2013 MERCEDES-BENZ G-CLASS SUV headlamp
[x] Cancel search: headlampPage 168 of 364
X
Engine oil level: check the engine oil level
and add oil if necessary.
Only then does the engine receive enough
oil when the vehicle is standing on a steep
incline.
X Tire-changing tool kit: check that the
jack
is working and make sure you have the lug
wrench, a robust tow cable and a folding
spade in the vehicle.
X Wheels and tires: check the tire tread
depth and tire pressure.
X Check for damage and remove any foreign
objects, e.g. small stones, from the
wheels/tires.
X Replace any missing valve caps.
X Replace dented or damaged wheels.
X Carry a sound spare wheel.
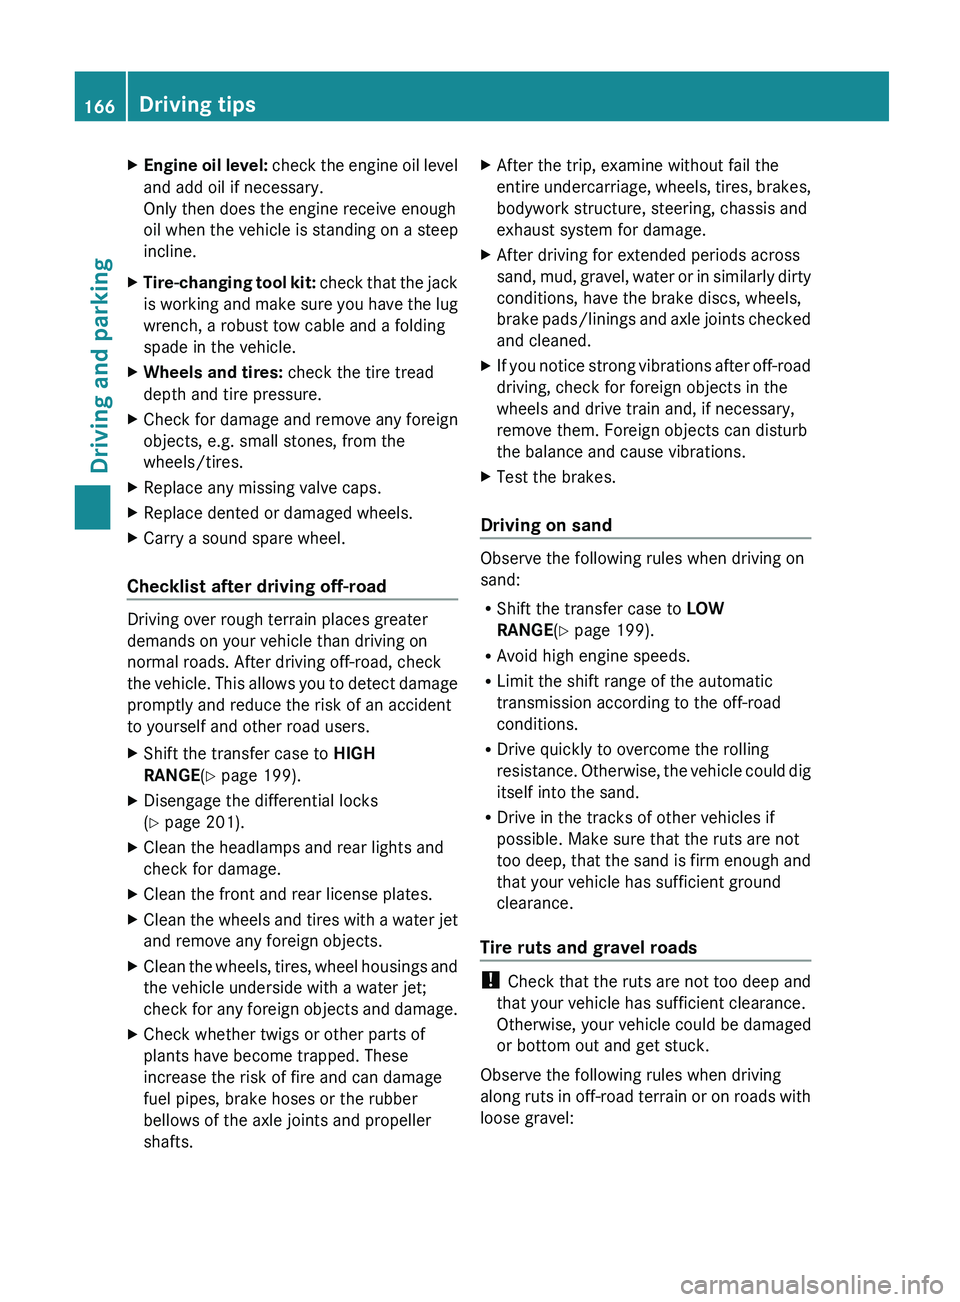
Checklist after driving off-road Driving over rough terrain places greater
demands on your vehicle than driving on
normal roads. After driving off-road, check
the vehicle. This
allows
you to detect damage
promptly and reduce the risk of an accident
to yourself and other road users.
X Shift the transfer case to HIGH
RANGE(Y page 199).
X Disengage the differential locks
(Y page 201).
X Clean the headlamps and rear lights and
check for damage.
X Clean the front and rear license plates.
X Clean the wheels and tires with a water jet
and remove any foreign objects.
X Clean the wheels, tires, wheel housings and
the vehicle underside with a water jet;
check for any foreign
objects and damage.
X Check whether twigs or other parts of
plants have become trapped. These
increase the risk of fire and can damage
fuel pipes, brake hoses or the rubber
bellows of the axle joints and propeller
shafts. X
After the trip, examine without fail the
entire undercarriage, wheels, tires,
brakes,
bodywork structure, steering, chassis and
exhaust system for damage.
X After driving for extended periods across
sand, mud, gravel, water
or in similarly dirty
conditions, have the brake discs, wheels,
brake pads/linings and axle joints checked
and cleaned.
X If you notice strong vibrations after off-road
driving, check for foreign objects in the
wheels and drive train and, if necessary,
remove them. Foreign objects can disturb
the balance and cause vibrations.
X Test the brakes.
Driving on sand Observe the following rules when driving on
sand:
R
Shift the transfer case to LOW
RANGE(Y page 199).
R Avoid high engine speeds.
R Limit the shift range of the automatic
transmission according to the off-road
conditions.
R Drive quickly to overcome the rolling
resistance. Otherwise, the vehicle
could dig
itself into the sand.
R Drive in the tracks of other vehicles if
possible. Make sure that the ruts are not
too deep, that the sand is firm enough and
that your vehicle has sufficient ground
clearance.
Tire ruts and gravel roads !
Check that the ruts are not too deep and
that your vehicle has sufficient clearance.
Otherwise, your vehicle could be damaged
or bottom out and get stuck.
Observe the following rules when driving
along ruts in off-road
terrain or on roads with
loose gravel: 166
Driving tips
Driving and parking
Page 222 of 364
X
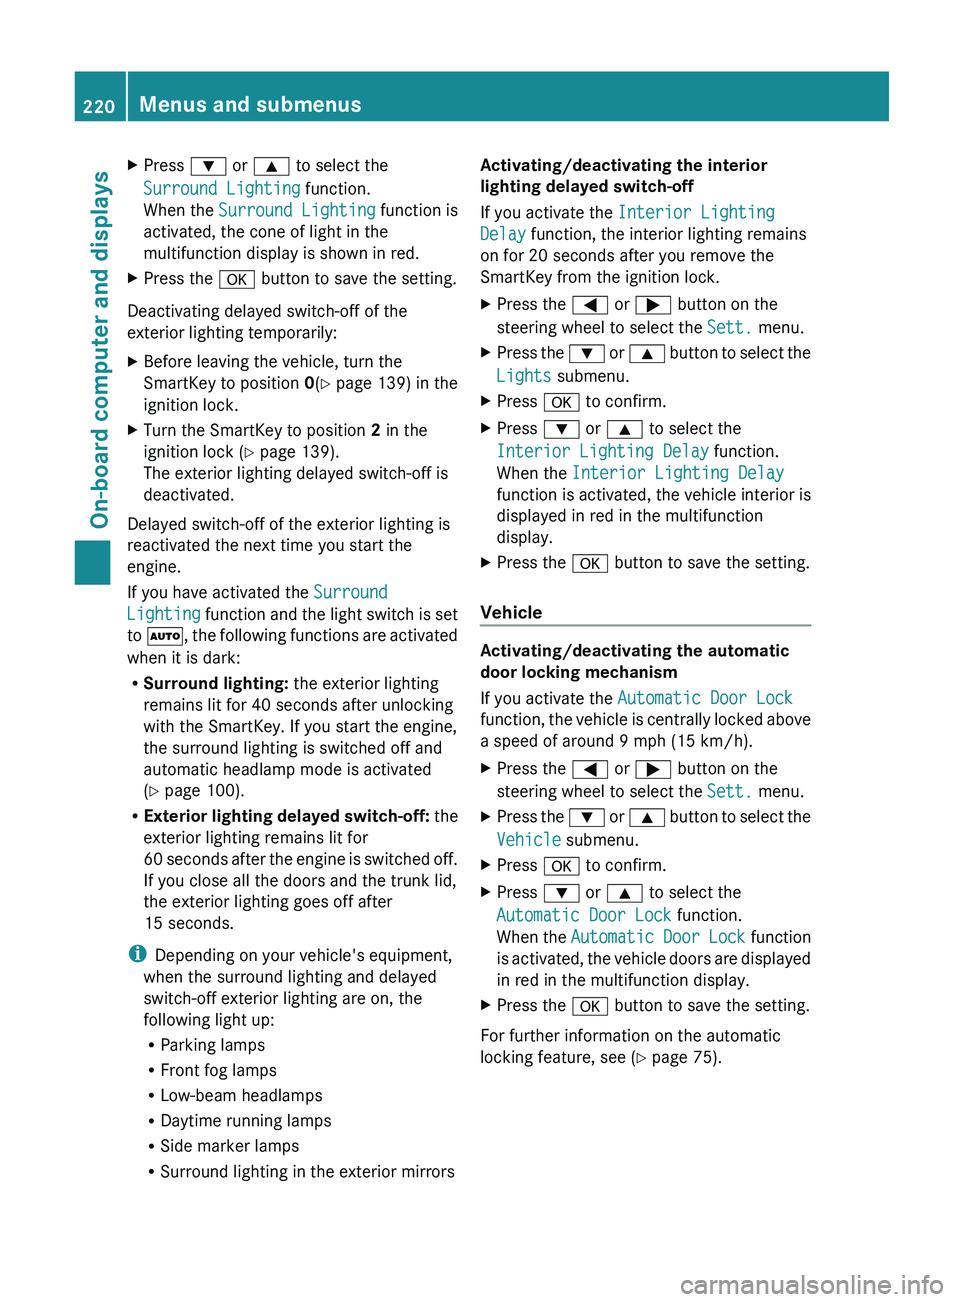
Press 0064 or 0063 to select the
Surround Lighting function.
When the Surround Lighting function is
activated, the cone of light in the
multifunction display is shown in red.
X Press the 0076 button to save the setting.
Deactivating delayed switch-off of the
exterior lighting temporarily:
X Before leaving the vehicle, turn the
SmartKey to position 0(Y page 139) in the
ignition lock.
X Turn the SmartKey to position 2 in the
ignition lock ( Y
page 139).
The exterior lighting delayed switch-off is
deactivated.
Delayed switch-off of the exterior lighting is
reactivated the next time you start the
engine.
If you have activated the Surround
Lighting function and
the
light switch is set
to 0058, the following functions are activated
when it is dark:
R Surround lighting: the exterior lighting
remains lit for 40 seconds after unlocking
with the SmartKey. If you start the engine,
the surround lighting is switched off and
automatic headlamp mode is activated
(Y page 100).
R Exterior lighting delayed switch-off: the
exterior lighting remains lit for
60 seconds after the engine is switched off.
If you close all the doors and the trunk lid,
the exterior lighting goes off after
15 seconds.
i Depending on your vehicle's equipment,
when the surround lighting and delayed
switch-off exterior lighting are on, the
following light up:
R Parking lamps
R Front fog lamps
R Low-beam headlamps
R Daytime running lamps
R Side marker lamps
R Surround lighting in the exterior mirrors Activating/deactivating the interior
lighting delayed switch-off
If you activate the Interior Lighting
Delay function, the interior lighting remains
on for 20 seconds
after you remove the
SmartKey from the ignition lock.
X Press the 0059 or
0065 button on the
steering wheel to select the Sett. menu.
X Press the 0064
or 0063
button
to select the
Lights submenu.
X Press 0076 to confirm.
X Press 0064 or 0063 to select the
Interior Lighting Delay function.
When the Interior Lighting Delay
function is activated,
the
vehicle interior is
displayed in red in the multifunction
display.
X Press the 0076 button to save the setting.
Vehicle Activating/deactivating the automatic
door locking mechanism
If you activate the Automatic Door Lock
function, the vehicle
is
centrally locked above
a speed of around 9 mph (15 km/h).
X Press the 0059 or 0065 button on the
steering wheel to select the Sett. menu.
X Press the 0064 or 0063 button
to select the
Vehicle submenu.
X Press 0076 to confirm.
X Press 0064 or 0063 to select the
Automatic Door Lock function.
When the Automatic Door
Lock function
is
activated, the vehicle doors are displayed
in red in the multifunction display.
X Press the 0076 button to save the setting.
For further information on the automatic
locking feature, see ( Y page 75).220
Menus and submenus
On-board computer and displays
Page 233 of 364
Display messages Possible causes/consequences and
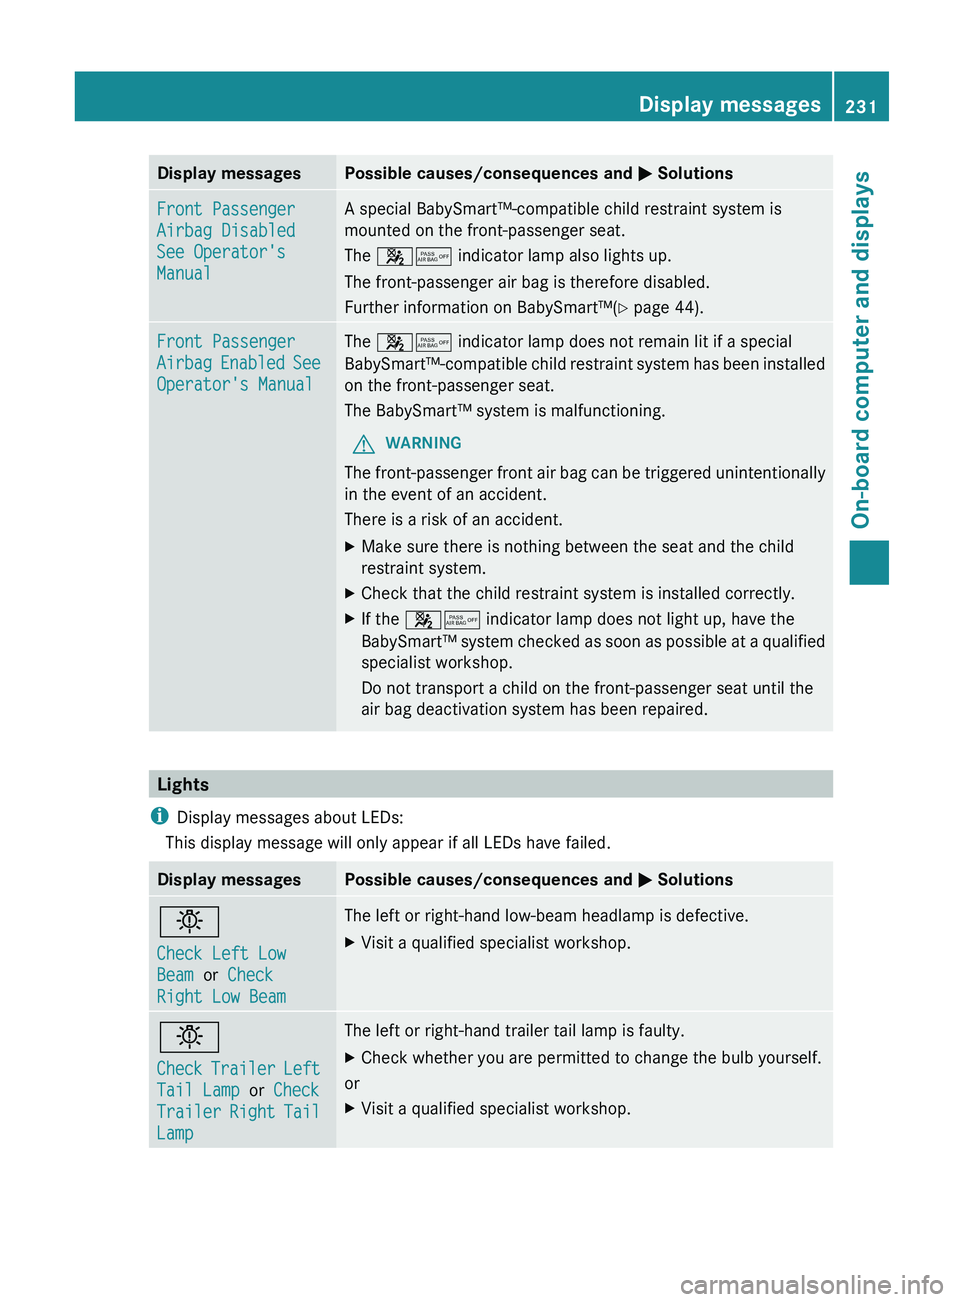
0050 SolutionsFront Passenger
Airbag Disabled
See Operator's
Manual A special BabySmart™-compatible child restraint system is
mounted on the front-passenger seat.
The 00730074 indicator lamp also lights up.
The front-passenger air bag is therefore disabled.
Further information on BabySmart™
(Y
page 44). Front Passenger
Airbag
Enabled
See
Operator's Manual The 00730074 indicator lamp does not remain lit if a special
BabySmart™-compatible child restraint
system
has been installed
on the front-passenger seat.
The BabySmart™ system is malfunctioning.
G WARNING
The front-passenger front air bag can be triggered unintentionally
in the event of an accident.
There is a risk of an accident.
X Make sure there is nothing between the seat and the child
restraint system.
X Check that the child restraint system is installed correctly.
X If the 00730074 indicator lamp does not light up, have the
BabySmart™ system checked as
soon as possible at a qualified
specialist workshop.
Do not transport a child on the front-passenger seat until the
air bag deactivation system has been repaired. Lights
i Display messages about LEDs:
This display message will only appear if all LEDs have failed. Display messages Possible causes/consequences and
0050 Solutions0049
Check Left Low
Beam or Check
Right Low Beam The left or right-hand low-beam headlamp is defective.
X
Visit a qualified specialist workshop. 0049
Check Trailer Left
Tail Lamp
or Check
Trailer
Right Tail
Lamp The left or right-hand trailer tail lamp is faulty.
X
Check whether you are permitted to change the bulb yourself.
or
X Visit a qualified specialist workshop. Display messages
231
On-board computer and displays Z
Page 249 of 364
SmartKey
Display messages Possible causes/consequences and
0050 Solutions00AF
Key Does Not
Belong to Vehicle You have put the wrong SmartKey in the ignition lock.
X
Use the correct SmartKey. 00AF
Take Your Key
from
Ignition The SmartKey is in the ignition lock.
X
Remove the SmartKey. 00AF
Obtain a New Key The SmartKey needs to be replaced.
X
Visit a qualified specialist workshop. Warning and indicator lamps in the
instrument cluster
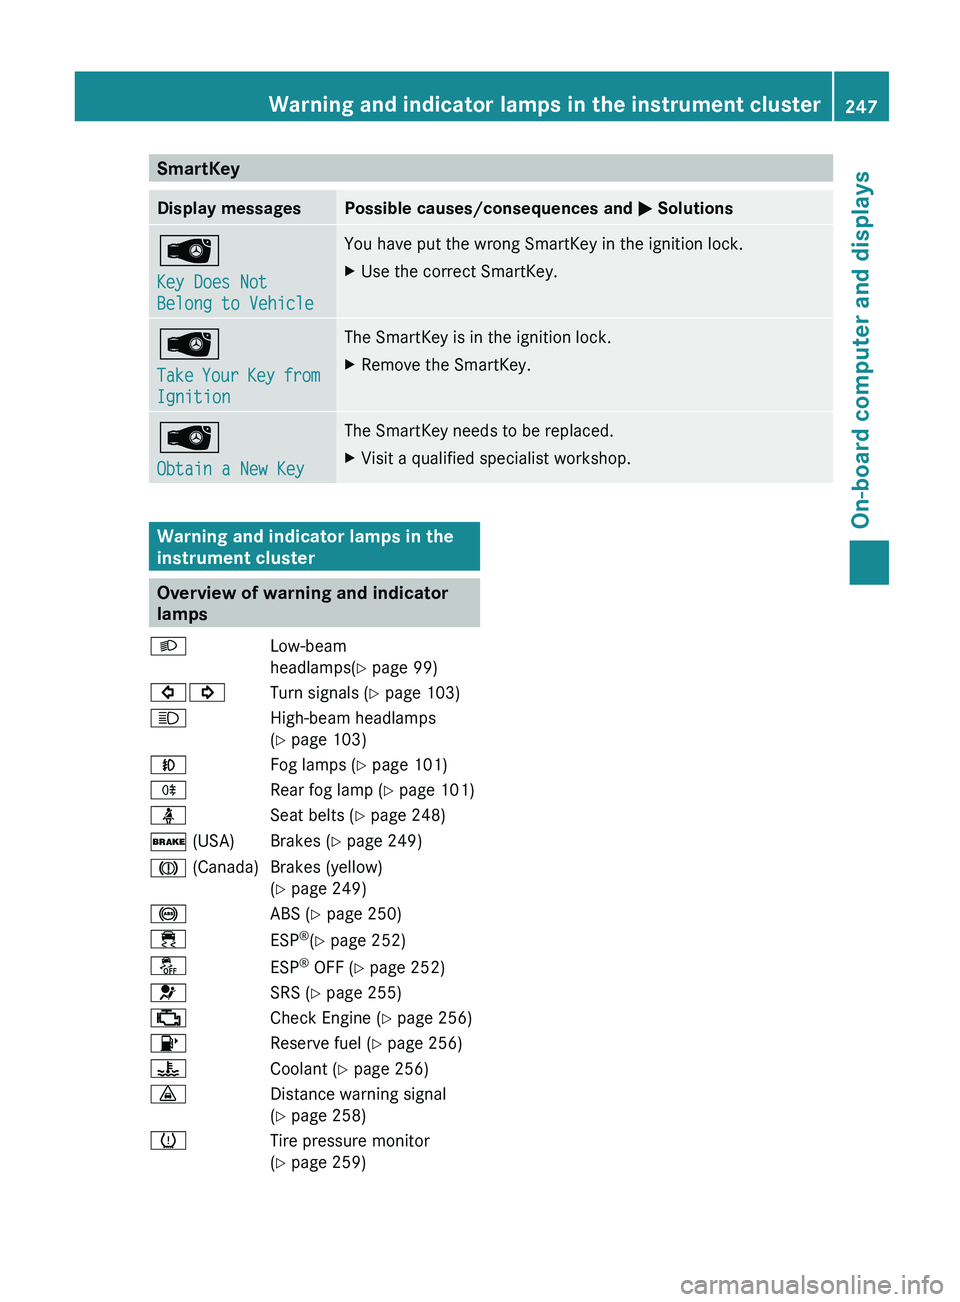
Overview of warning and indicator
lamps
0058 Low-beam
headlamps(Y page 99)
003E003D Turn signals (Y
page 103)
0057 High-beam headlamps
(
Y page 103)
005A Fog lamps (Y page 101)
005E Rear fog lamp (Y page 101)
00E9 Seat belts (Y page 248)
0027 (USA) Brakes (Y page 249)
004D (Canada) Brakes (yellow) (Y page 249)
0025 ABS (Y page 250)
00E5 ESP®
(Y page 252)
00BB ESP®
OFF (Y page 252)
0075 SRS (Y page 255)
00B9 Check Engine (Y page 256)
00B6 Reserve fuel (Y page 256)
00AC Coolant (Y page 256)
00BA Distance warning signal
(Y page 258)
0077 Tire pressure monitor
(Y page 259) Warning and indicator lamps in the instrument cluster
247
On-board computer and displays Z
Page 271 of 364
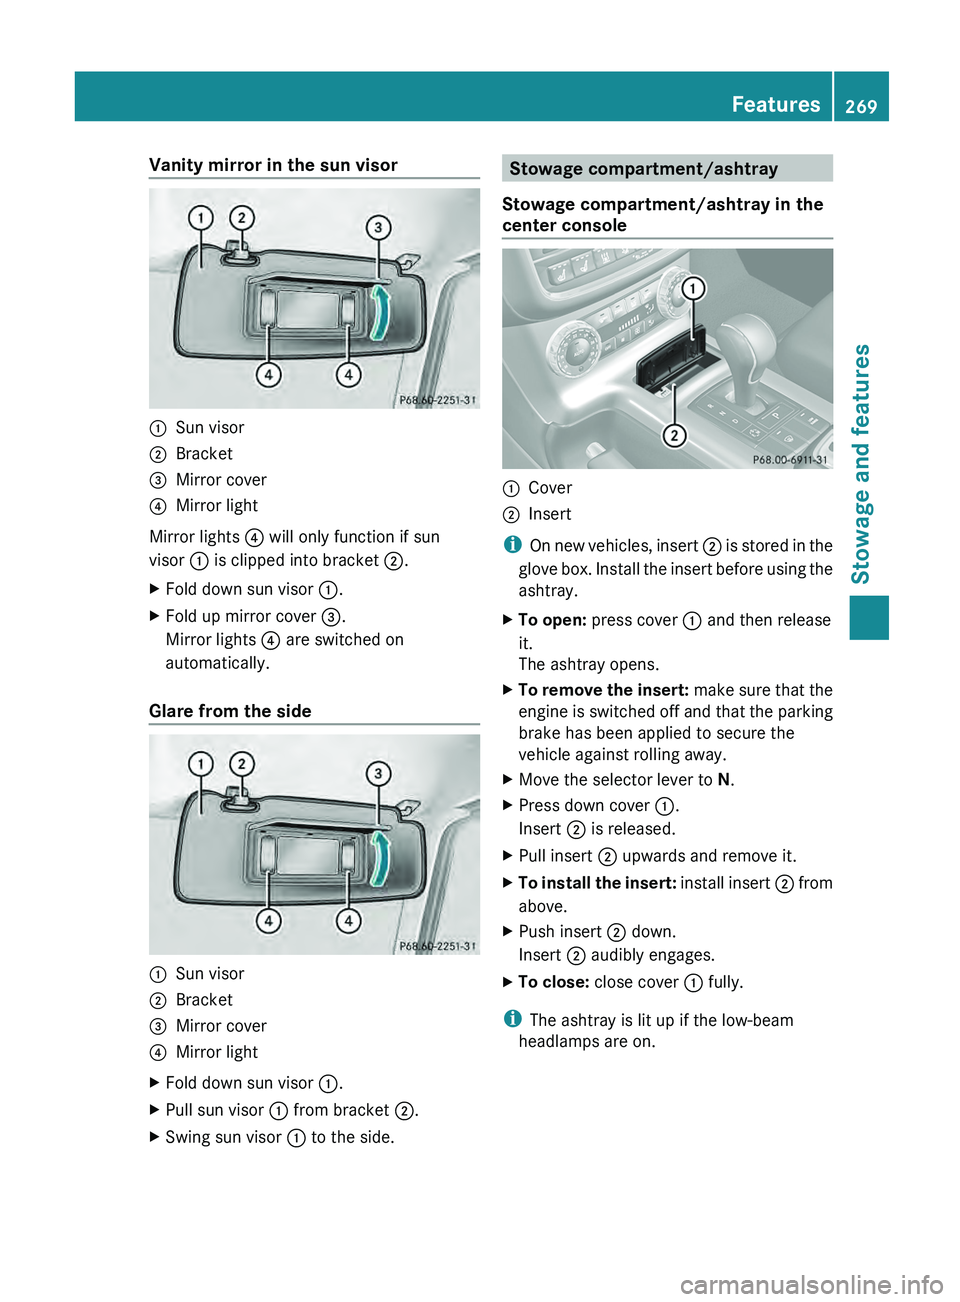
Vanity mirror in the sun visor
0043
Sun visor
0044 Bracket
0087 Mirror cover
0085 Mirror light
Mirror lights 0085 will only function if sun
visor 0043 is clipped into bracket 0044.
X Fold down sun visor 0043.
X Fold up mirror cover 0087.
Mirror lights 0085 are switched on
automatically.
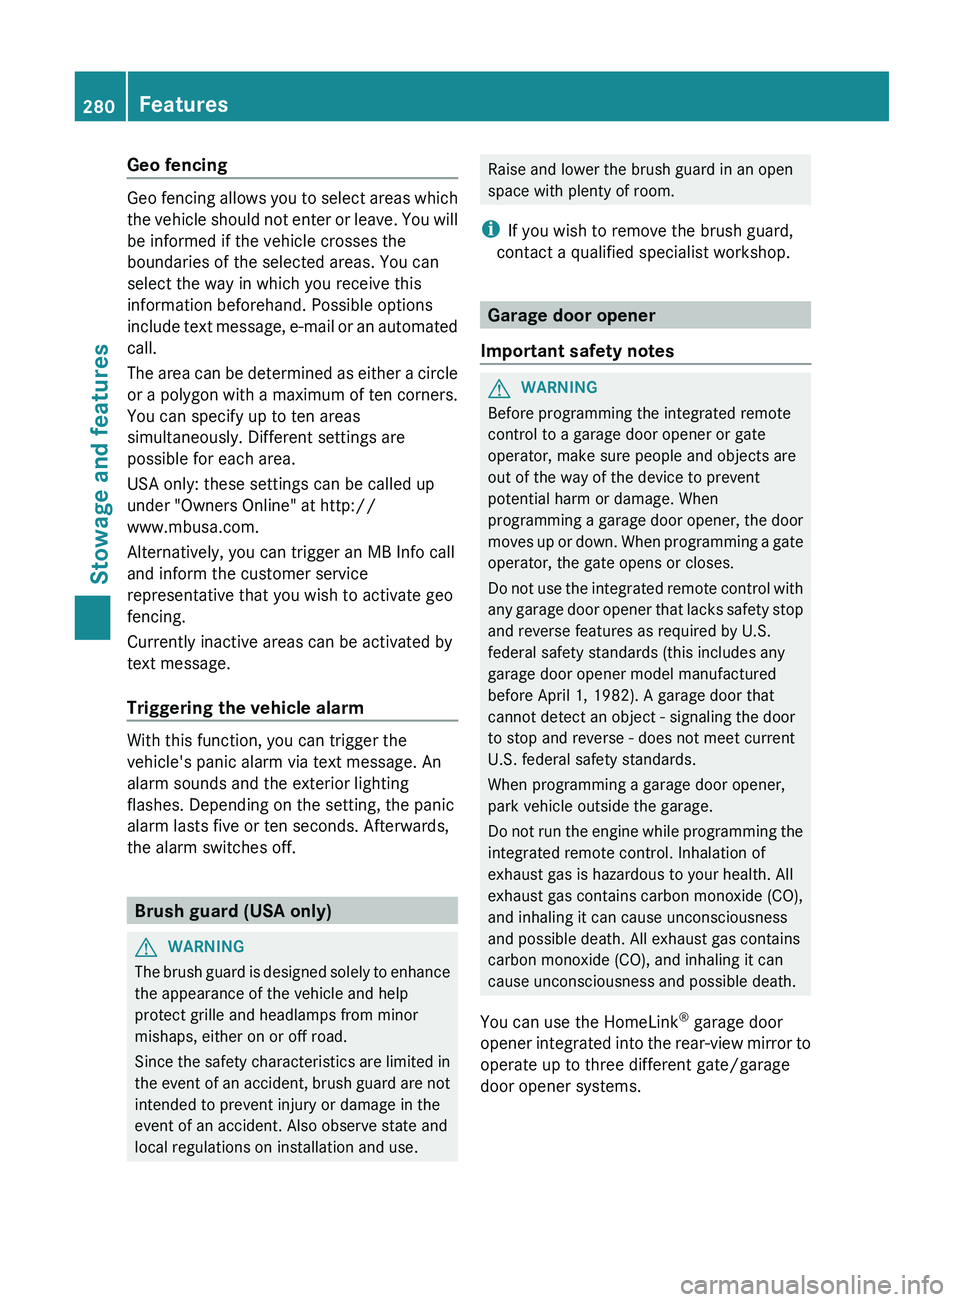
Glare from the side 0043
Sun visor
0044 Bracket
0087 Mirror cover
0085 Mirror light
X Fold down sun visor 0043.
X Pull sun visor 0043 from bracket 0044.
X Swing sun visor 0043 to the side. Stowage compartment/ashtray
Stowage compartment/ashtray in the
center console 0043
Cover
0044 Insert
i On new vehicles,
insert 0044
is stored in the
glove box. Install the insert before using the
ashtray.
X To open: press cover 0043 and then release
it.
The ashtray opens.
X To remove the insert: make
sure that
the
engine is switched off and that the parking
brake has been applied to secure the
vehicle against rolling away.
X Move the selector lever to N.
X Press down cover 0043.
Insert 0044 is released.
X Pull insert 0044 upwards and remove it.
X To install the insert: install insert 0044
from
above.
X Push insert 0044 down.
Insert 0044 audibly engages.
X To close: close cover 0043 fully.
i The ashtray is lit up if the low-beam
headlamps are on. Features
269
Stowage and features Z
Page 282 of 364
Geo fencing
Geo fencing allows you to select areas which
the vehicle should
not
enter or leave. You will
be informed if the vehicle crosses the
boundaries of the selected areas. You can
select the way in which you receive this
information beforehand. Possible options
include text message, e-mail or an automated
call.
The area can be determined as either a circle
or a polygon with a maximum of ten corners.
You can specify up to ten areas
simultaneously. Different settings are
possible for each area.
USA only: these settings can be called up
under "Owners Online" at http://
www.mbusa.com.
Alternatively, you can trigger an MB Info call
and inform the customer service
representative that you wish to activate geo
fencing.
Currently inactive areas can be activated by
text message.
Triggering the vehicle alarm With this function, you can trigger the
vehicle's panic alarm via text message. An
alarm sounds and the exterior lighting
flashes. Depending on the setting, the panic
alarm lasts five or ten seconds. Afterwards,
the alarm switches off.
Brush guard (USA only)
G
WARNING
The brush guard is designed solely to enhance
the appearance of the vehicle and help
protect grille and headlamps from minor
mishaps, either on or off road.
Since the safety characteristics
are limited in
the event of an accident, brush guard are not
intended to prevent injury or damage in the
event of an accident. Also observe state and
local regulations on installation and use. Raise and lower the brush guard in an open
space with plenty of room.
i If you wish to remove the brush guard,
contact a qualified specialist workshop. Garage door opener
Important safety notes G
WARNING
Before programming the integrated remote
control to a garage door opener or gate
operator, make sure people and objects are
out of the way of the device to prevent
potential harm or damage. When
programming a garage door
opener, the door
moves up or down. When programming a gate
operator, the gate opens or closes.
Do not use the integrated remote control with
any garage door opener that lacks safety stop
and reverse features as required by U.S.
federal safety standards (this includes any
garage door opener model manufactured
before April 1, 1982). A garage door that
cannot detect an object - signaling the door
to stop and reverse - does not meet current
U.S. federal safety standards.
When programming a garage door opener,
park vehicle outside the garage.
Do not run the engine while programming the
integrated remote control. Inhalation of
exhaust gas is hazardous to your health. All
exhaust gas contains carbon monoxide (CO),
and inhaling it can cause unconsciousness
and possible death. All exhaust gas contains
carbon monoxide (CO), and inhaling it can
cause unconsciousness and possible death.
You can use the HomeLink ®
garage door
opener integrated into the rear-view mirror to
operate up to three different gate/garage
door opener systems. 280
Features
Stowage and features
Page 294 of 364
X
Park the vehicle on a level surface.
Only check the coolant level when the
vehicle is on a
level surface and the engine
has cooled down.
X Turn the SmartKey to position
2 (Y page 139) in the ignition lock.
X Check the coolant temperature display in
the instrument cluster.
The coolant temperature must be below
158 ‡ (70 †).
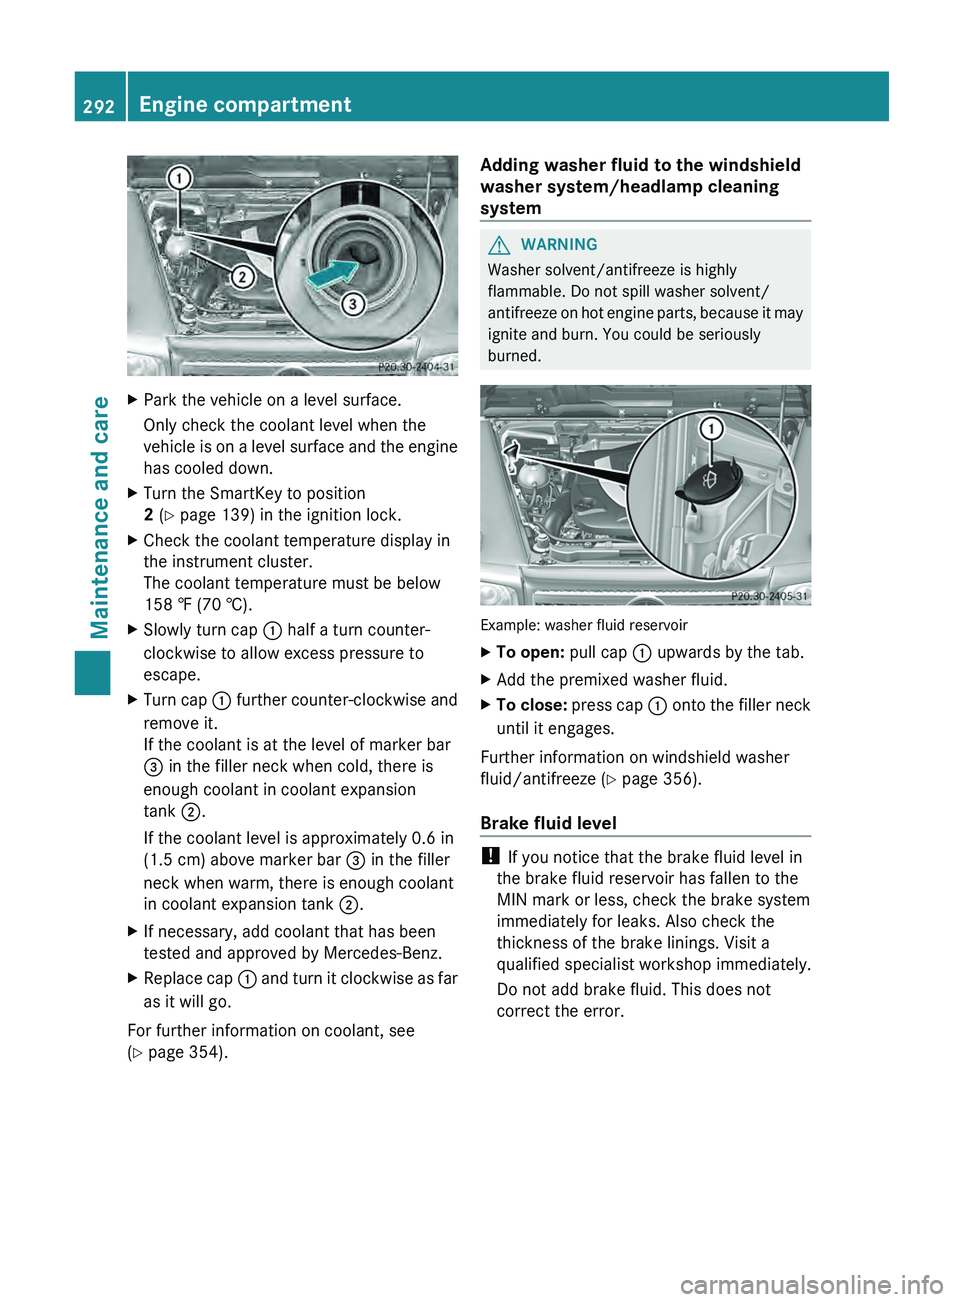
X Slowly turn cap 0043 half a turn counter-
clockwise to allow excess pressure to
escape.
X Turn cap 0043
further counter-clockwise and
remove it.
If the coolant is at the level of marker bar
0087
in the filler neck when cold, there is
enough coolant in coolant expansion
tank 0044.
If the coolant level is approximately 0.6 in
(1.5 cm) above marker bar 0087 in the filler
neck when warm, there is enough coolant
in coolant expansion tank 0044.
X If necessary, add coolant that has been
tested and approved by Mercedes-Benz.
X Replace cap 0043 and turn
it
clockwise as far
as it will go.
For further information on coolant, see
(Y page 354). Adding washer fluid to the windshield
washer system/headlamp cleaning
system G
WARNING
Washer solvent/antifreeze is highly
flammable. Do not spill washer solvent/
antifreeze on hot engine
parts, because it may
ignite and burn. You could be seriously
burned. Example: washer fluid reservoir
X
To open: pull cap 0043 upwards by the tab.
X Add the premixed washer fluid.
X To close: press cap
0043 onto
the filler neck
until it engages.
Further information on windshield washer
fluid/antifreeze ( Y page 356).
Brake fluid level !
If you notice that the brake fluid level in
the brake fluid reservoir has fallen to the
MIN mark or less, check the brake system
immediately for leaks. Also check the
thickness of the brake linings. Visit a
qualified specialist workshop immediately.
Do not add brake fluid. This does not
correct the error. 292
Engine compartment
Maintenance and care
Page 299 of 364

If your vehicle has a clear matte finish,
observe the following
instructions
in order to
avoid damage to the paintwork due to
incorrect care.
These notes also apply to light alloy wheels
with a clear matte finish.
i The vehicle should preferably be washed
by hand using a soft sponge, car shampoo
and plenty of water.
i Use only insect remover and car shampoo
from the range of recommended and
approved Mercedes-Benz care products.
Cleaning the windows G
WARNING
Switch off the windshield wipers and remove
the SmartKey from the ignition lock before
cleaning the windshield or the wiper blades.
The windshield wipers could otherwise move
and injure you.
! Do not use dry
cloths, abrasive products,
solvents or cleaning agents containing
solvents to clean the inside of the windows.
Do not touch the insides of the windows
with hard objects, e.g. an ice scraper or
ring. There is otherwise a risk of damaging
the windows.
! Clean the water drainage channels of the
windshield and the rear window at regular
intervals. Deposits such as leaves, petals
and pollen may under certain
circumstances prevent water from draining
away. This can lead to corrosion damage
and damage to electronic components.
X Clean the inside and outside of the
windows with a damp cloth and a cleaning
agent that is recommended and approved
by Mercedes-Benz. Cleaning the wiper blades G
WARNING
Switch off the windshield wipers and remove
the SmartKey from the ignition lock before
cleaning the windshield or the wiper blades.
The windshield wipers could otherwise move
and injure you.
! Do not pull the wiper blade. Otherwise,
the wiper blade could be damaged.
! Do not clean wiper blades too often and
do not rub them too hard. Otherwise, the
graphite coating could be damaged. This
could cause wiper noise.
! Hold the wiper arm
securely when folding
back. The windshield could be damaged if
the wiper arm smacks against it suddenly.
X Fold the windshield wiper arms away from
the windshield.
X Carefully clean the wiper blades with a
damp cloth.
X Fold the windshield wiper arms back again
before switching on the ignition.
Cleaning the headlamps !
Only use cleaning agents or cleaning
cloths which are suitable for plastic
headlamp lenses. Unsuitable cleaning
agents or cleaning cloths could scratch or
damage the plastic headlamp lenses.
X Clean the headlamp lenses with a damp
sponge and a mild cleaning agent, e.g.
Mercedes-Benz car shampoo or cleaning
cloths.
Cleaning the sensors !
If you clean the sensors with a power
washer, make sure that you keep a
distance of at least
11.8 in (30 cm) between
the vehicle and the power washer nozzle.
Information about the correct distance is
available from the equipment
manufacturer. Care
297
Maintenance and care Z