2013 MERCEDES-BENZ CLA lock
[x] Cancel search: lockPage 294 of 352
XMake sure that the vehicle is stationary and
that the key is in position 2 in the ignition
lock.XTo open the cover of the reversing cam-
era: with the audio system/COMAND
Online activated, press the W button.XSelect System by turning cVd the audio
system/COMAND controller and press W
to confirm.XSelect Rear view camera and press W to
confirm.XSelect Open camera cover and confirm
with W.
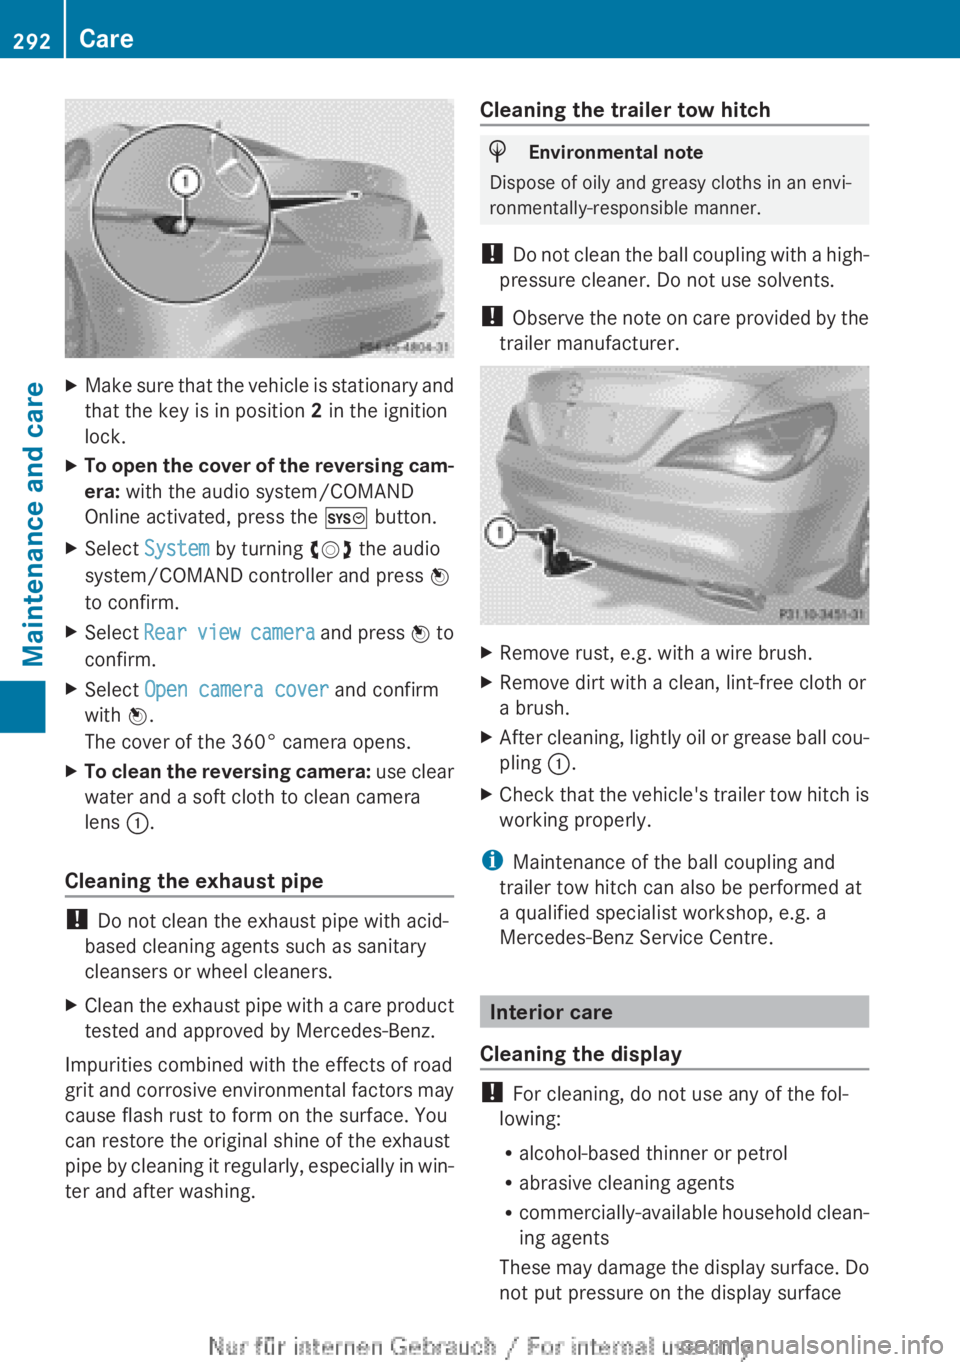
The cover of the 360° camera opens.XTo clean the reversing camera: use clear
water and a soft cloth to clean camera
lens :.
Cleaning the exhaust pipe
!
Do not clean the exhaust pipe with acid-
based cleaning agents such as sanitary
cleansers or wheel cleaners.
XClean the exhaust pipe with a care product
tested and approved by Mercedes-Benz.
Impurities combined with the effects of road
grit and corrosive environmental factors may
cause flash rust to form on the surface. You
can restore the original shine of the exhaust
pipe by cleaning it regularly, especially in win-
ter and after washing.
Cleaning the trailer tow hitchHEnvironmental note
Dispose of oily and greasy cloths in an envi-
ronmentally-responsible manner.
! Do not clean the ball coupling with a high-
pressure cleaner. Do not use solvents.
! Observe the note on care provided by the
trailer manufacturer.
XRemove rust, e.g. with a wire brush.XRemove dirt with a clean, lint-free cloth or
a brush.XAfter cleaning, lightly oil or grease ball cou-
pling :.XCheck that the vehicle's trailer tow hitch is
working properly.
i Maintenance of the ball coupling and
trailer tow hitch can also be performed at
a qualified specialist workshop, e.g. a
Mercedes-Benz Service Centre.
Interior care
Cleaning the display
! For cleaning, do not use any of the fol-
lowing:
R alcohol-based thinner or petrol
R abrasive cleaning agents
R commercially-available household clean-
ing agents
These may damage the display surface. Do
not put pressure on the display surface
292CareMaintenance and care
Page 298 of 352
Useful information
i This Owner's Manual describes all mod-
els, series and optional equipment for your
vehicle that were available at the time of
going to press. National variations are pos-
sible. Note that your vehicle may not be
equipped with all of the functions descri-
bed. This is also the case for systems and
functions relevant to safety.
i Read the information on qualified special-
ist workshops: ( Y page 24).
Where will I find...?
Warning triangle
Removing/replacing the warning trian-
gle
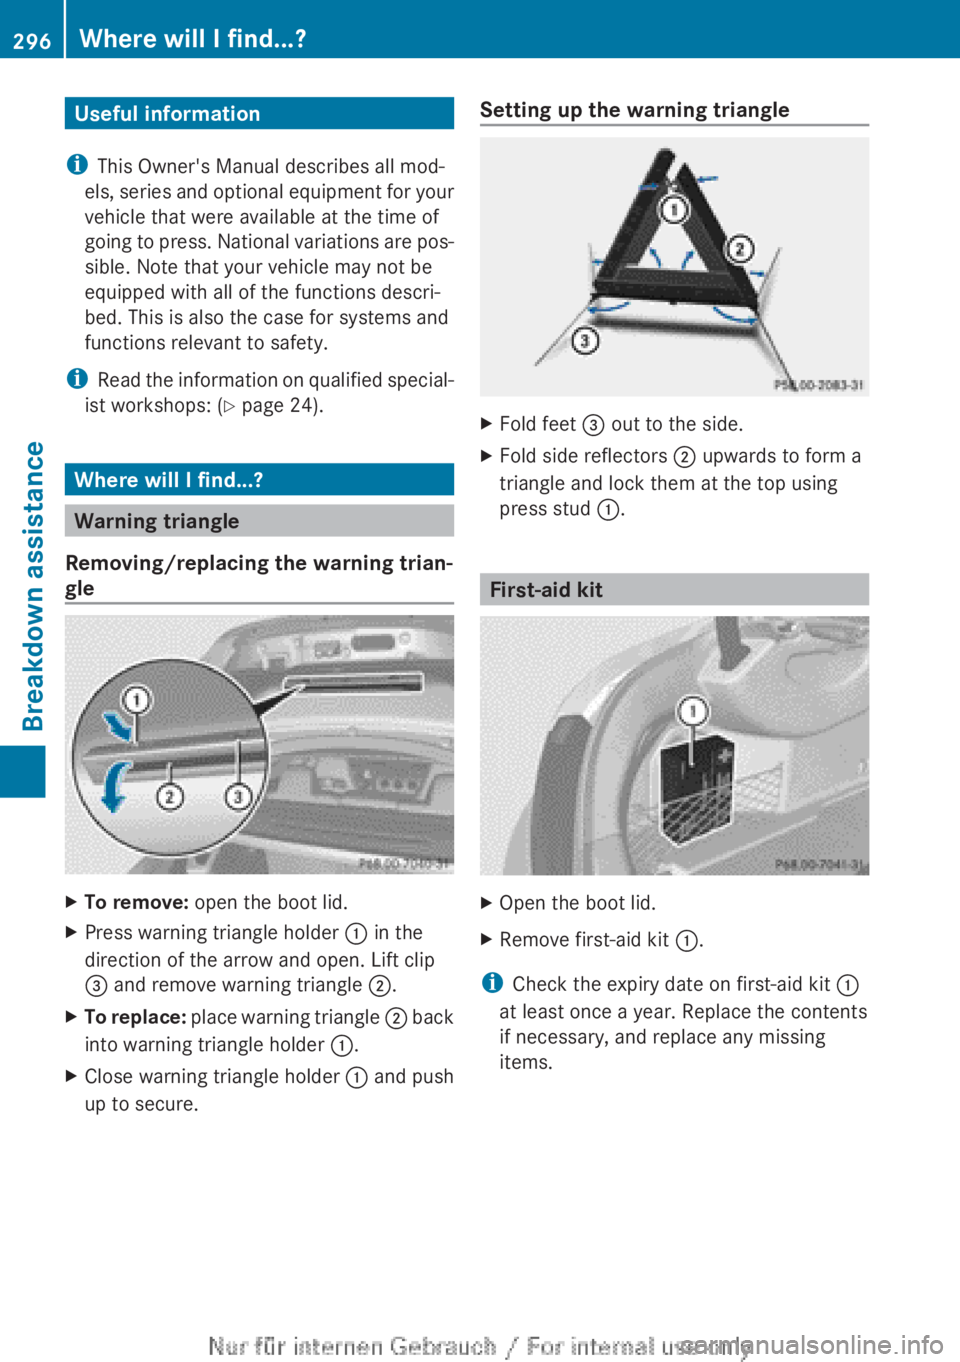
XTo remove: open the boot lid.XPress warning triangle holder : in the
direction of the arrow and open. Lift clip
= and remove warning triangle ;.XTo replace: place warning triangle ; back
into warning triangle holder :.XClose warning triangle holder : and push
up to secure.Setting up the warning triangleXFold feet = out to the side.XFold side reflectors ; upwards to form a
triangle and lock them at the top using
press stud :.
First-aid kit
XOpen the boot lid.XRemove first-aid kit :.
i
Check the expiry date on first-aid kit :
at least once a year. Replace the contents
if necessary, and replace any missing
items.
296Where will I find...?Breakdown assistance
Page 300 of 352
Flat tyre
Preparing the vehicle
Your vehicle may be equipped with:
R MOExtended tyres (tyres with run-flat char-
acteristics) ( Y page 298)
Vehicle preparation is not necessary on
vehicles with MOExtended tyres.
R a TIREFIT kit ( Y page 297)
R an emergency spare wheel (only for certain
countries)
Information on changing/fitting a wheel
( Y page 325).
XStop the vehicle as far away as possible
from traffic on solid, non-slippery and level
ground.XSwitch on the hazard warning lamps.XSecure the vehicle against rolling away
( Y page 162).XIf possible, bring the front wheels into the
straight-ahead position.XSwitch off the engine.XRemove the key from the ignition lock.XAll occupants must get out of the vehicle.
Make sure that they are not endangered as
they do so.XMake sure that no one is near the danger
area while a wheel is being changed. Any-
one who is not directly assisting in the
wheel change should, for example, stand
behind the barrier.XGet out of the vehicle. Pay attention to traf-
fic conditions when doing so.XClose the driver's door.XPlace the warning triangle a suitable dis-
tance away ( Y page 296). Observe legal
requirements.
i Vehicles with MOExtended tyres are not
equipped with a TIREFIT kit at the factory.
It is therefore recommended that you addi-
tionally equip your vehicle with a TIREFIT kit
if you fit tyres that do not feature run-flat
characteristics, e.g. winter tyres. A TIREFIT
kit can be obtained from a qualified spe-
cialist workshop.
MOExtended tyres (tyres with run-flat
characteristics)
General notes
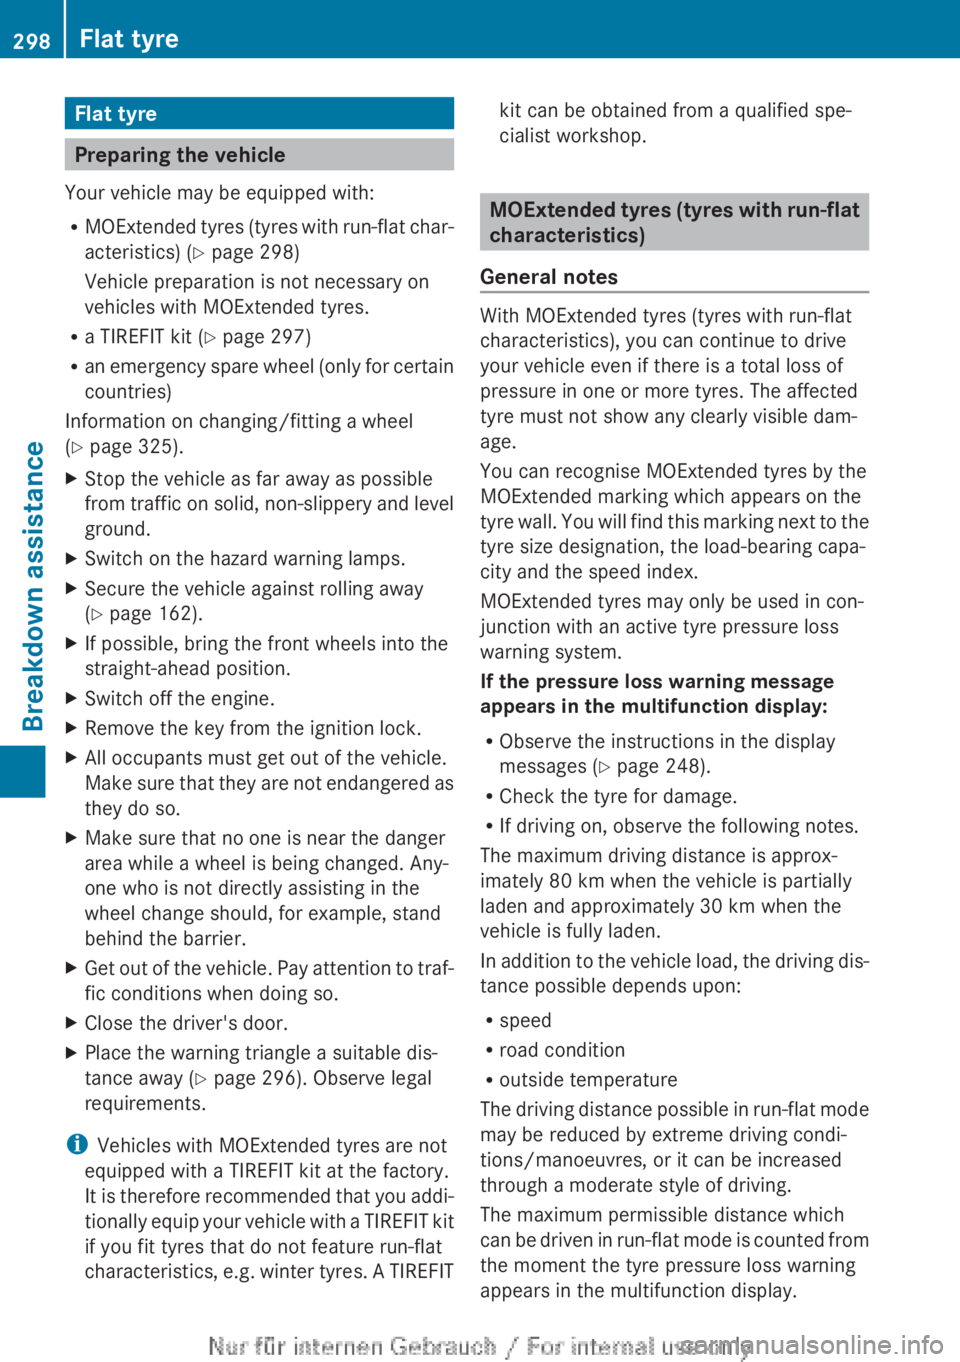
With MOExtended tyres (tyres with run-flat
characteristics), you can continue to drive
your vehicle even if there is a total loss of
pressure in one or more tyres. The affected
tyre must not show any clearly visible dam-
age.
You can recognise MOExtended tyres by the
MOExtended marking which appears on the
tyre wall. You will find this marking next to the
tyre size designation, the load-bearing capa-
city and the speed index.
MOExtended tyres may only be used in con-
junction with an active tyre pressure loss
warning system.
If the pressure loss warning message
appears in the multifunction display:
R Observe the instructions in the display
messages ( Y page 248).
R Check the tyre for damage.
R If driving on, observe the following notes.
The maximum driving distance is approx-
imately 80 km when the vehicle is partially
laden and approximately 30 km when the
vehicle is fully laden.
In addition to the vehicle load, the driving dis-
tance possible depends upon:
R speed
R road condition
R outside temperature
The driving distance possible in run-flat mode
may be reduced by extreme driving condi-
tions/manoeuvres, or it can be increased
through a moderate style of driving.
The maximum permissible distance which
can be driven in run-flat mode is counted from
the moment the tyre pressure loss warning
appears in the multifunction display.
298Flat tyreBreakdown assistance
Page 302 of 352
You can use TIREFIT at outside temperatures
down to Ò20 †.
TIREFIT sticker, 2-part
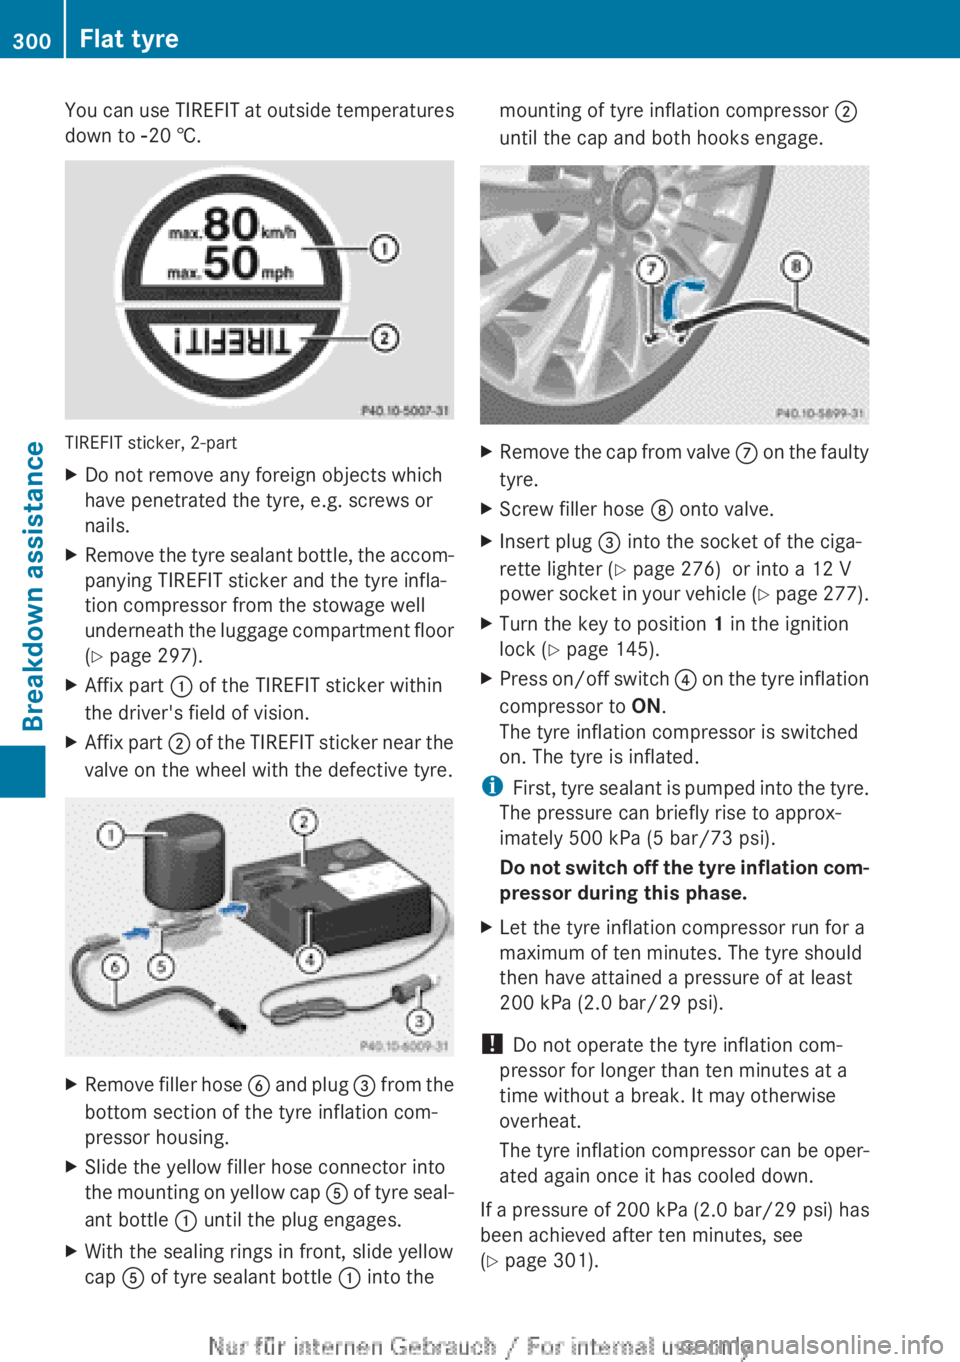
XDo not remove any foreign objects which
have penetrated the tyre, e.g. screws or
nails.XRemove the tyre sealant bottle, the accom-
panying TIREFIT sticker and the tyre infla-
tion compressor from the stowage well
underneath the luggage compartment floor
( Y page 297).XAffix part : of the TIREFIT sticker within
the driver's field of vision.XAffix part ; of the TIREFIT sticker near the
valve on the wheel with the defective tyre.XRemove filler hose B and plug = from the
bottom section of the tyre inflation com-
pressor housing.XSlide the yellow filler hose connector into
the mounting on yellow cap A of tyre seal-
ant bottle : until the plug engages.XWith the sealing rings in front, slide yellow
cap A of tyre sealant bottle : into themounting of tyre inflation compressor ;
until the cap and both hooks engage.XRemove the cap from valve C on the faulty
tyre.XScrew filler hose D onto valve.XInsert plug = into the socket of the ciga-
rette lighter ( Y page 276) or into a 12 V
power socket in your vehicle (Y page 277).XTurn the key to position 1 in the ignition
lock ( Y page 145).XPress on/off switch ? on the tyre inflation
compressor to ON.
The tyre inflation compressor is switched
on. The tyre is inflated.
i First, tyre sealant is pumped into the tyre.
The pressure can briefly rise to approx-
imately 500 kPa (5 bar/73 psi).
Do not switch off the tyre inflation com-
pressor during this phase.
XLet the tyre inflation compressor run for a
maximum of ten minutes. The tyre should
then have attained a pressure of at least
200 kPa (2.0 bar/29 psi).
! Do not operate the tyre inflation com-
pressor for longer than ten minutes at a
time without a break. It may otherwise
overheat.
The tyre inflation compressor can be oper-
ated again once it has cooled down.
If a pressure of 200 kPa (2.0 bar/29 psi) has
been achieved after ten minutes, see
( Y page 301).
300Flat tyreBreakdown assistance
Page 304 of 352
XCorrect the tyre pressure if it is still at least
130 kPa (1.3 bar /19 psi) (see the fuel filler
flap for values).XTo increase the tyre pressure: switch on
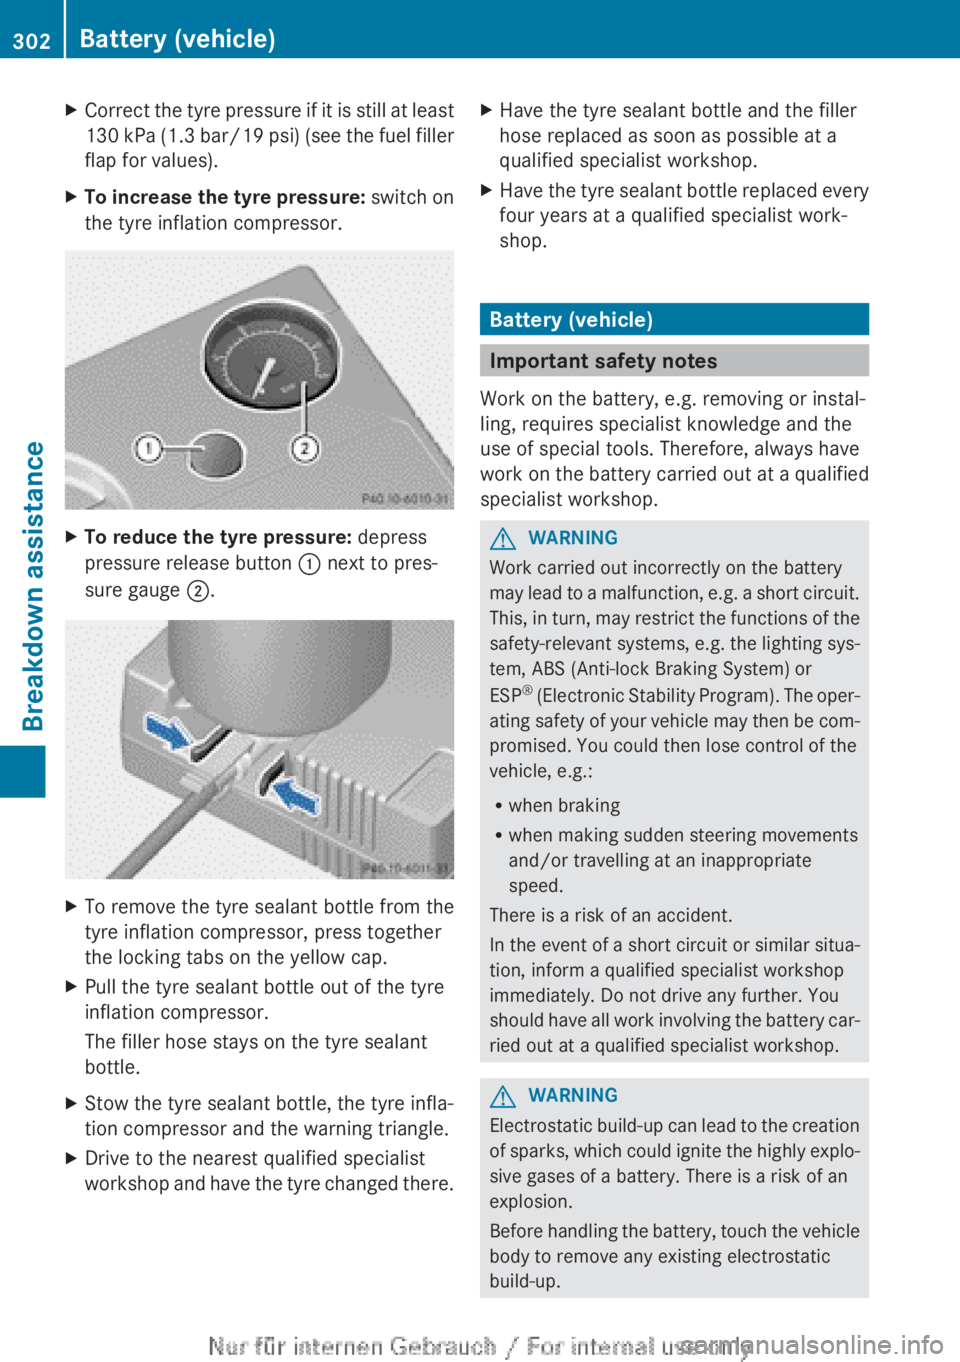
the tyre inflation compressor.XTo reduce the tyre pressure: depress
pressure release button : next to pres-
sure gauge ;.XTo remove the tyre sealant bottle from the
tyre inflation compressor, press together
the locking tabs on the yellow cap.XPull the tyre sealant bottle out of the tyre
inflation compressor.
The filler hose stays on the tyre sealant
bottle.XStow the tyre sealant bottle, the tyre infla-
tion compressor and the warning triangle.XDrive to the nearest qualified specialist
workshop and have the tyre changed there.XHave the tyre sealant bottle and the filler
hose replaced as soon as possible at a
qualified specialist workshop.XHave the tyre sealant bottle replaced every
four years at a qualified specialist work-
shop.
Battery (vehicle)
Important safety notes
Work on the battery, e.g. removing or instal-
ling, requires specialist knowledge and the
use of special tools. Therefore, always have
work on the battery carried out at a qualified
specialist workshop.
GWARNING
Work carried out incorrectly on the battery
may lead to a malfunction, e.g. a short circuit.
This, in turn, may restrict the functions of the
safety-relevant systems, e.g. the lighting sys-
tem, ABS (Anti-lock Braking System) or
ESP ®
(Electronic Stability Program). The oper-
ating safety of your vehicle may then be com-
promised. You could then lose control of the
vehicle, e.g.:
R when braking
R when making sudden steering movements
and/or travelling at an inappropriate
speed.
There is a risk of an accident.
In the event of a short circuit or similar situa-
tion, inform a qualified specialist workshop
immediately. Do not drive any further. You
should have all work involving the battery car-
ried out at a qualified specialist workshop.
GWARNING
Electrostatic build-up can lead to the creation
of sparks, which could ignite the highly explo-
sive gases of a battery. There is a risk of an
explosion.
Before handling the battery, touch the vehicle
body to remove any existing electrostatic
build-up.
302Battery (vehicle)Breakdown assistance
Page 305 of 352

The highly flammable gas mixture is created
while the battery is charging and when jump-
starting.
Always make sure that neither you nor the
battery is electrostatically charged. Electro-
static charge is created, for example:
R by wearing synthetic fibre clothing
R due to friction between clothing and the
seat
R when you pull or push the battery across
carpet or other synthetic materials
R when you rub the battery with a clothGWARNING
During the charging process, a battery produ-
ces hydrogen gas. If a short circuit occurs or
sparks are created, the hydrogen gas can
ignite. There is a risk of an explosion.
R Make sure that the positive terminal of a
connected battery does not come into con-
tact with vehicle parts.
R Never place metal objects or tools on a bat-
tery.
R It is important that you observe the descri-
bed order of the battery terminals when
connecting and disconnecting a battery.
R When jump-starting, make sure that the
battery poles with identical polarity are
connected.
R It is particularly important to observe the
described order when connecting and dis-
connecting the jump leads.
R Never connect or disconnect the battery
terminals while the engine is running.
GWARNING
Battery acid is caustic. There is a risk of injury.
Avoid contact with the skin, eyes or clothing.
Do not inhale any battery gases. Do not lean
over the battery. Keep children away from
batteries. Wash battery acid immediately with
water and seek medical attention.
HEnvironmental noteBatteries contain pollutants.
It is illegal to dispose of them
with the household rubbish.
They must be collected sep-
arately and disposed of in an
environmentally responsible
recycling system.Dispose of batteries in an
environmentally responsible
manner. Take discharged
batteries to a qualified spe-
cialist workshop or to a col-
lection point for used batter-
ies.
! Have the battery checked regularly at a
qualified specialist workshop.
Observe the service intervals in the Service
Booklet or contact a qualified specialist
workshop for more information.
! Always have work on the battery carried
out at a qualified specialist workshop.
Should it, in exceptional circumstances, be
absolutely necessary to disconnect the bat-
tery yourself, please observe the following:
R switch off the engine and remove the
key. Check that all the indicator lamps in
the instrument cluster are off. Otherwise,
you may damage electronic components
such as the alternator, for example.
R first, disconnect the negative terminal
clamp, followed by the positive terminal
clamp. Never swap the terminal clamps.
The vehicle electronics may otherwise be
damaged.
R on vehicles with automatic transmission,
the transmission is locked in position P
after disconnecting the battery. The vehi-
cle is secured against rolling away. You
can then no longer move the vehicle.
The battery and the cover of the positive
terminal clamp must be fitted securely dur-
ing operation.
Battery (vehicle)303Breakdown assistanceZ
Page 306 of 352
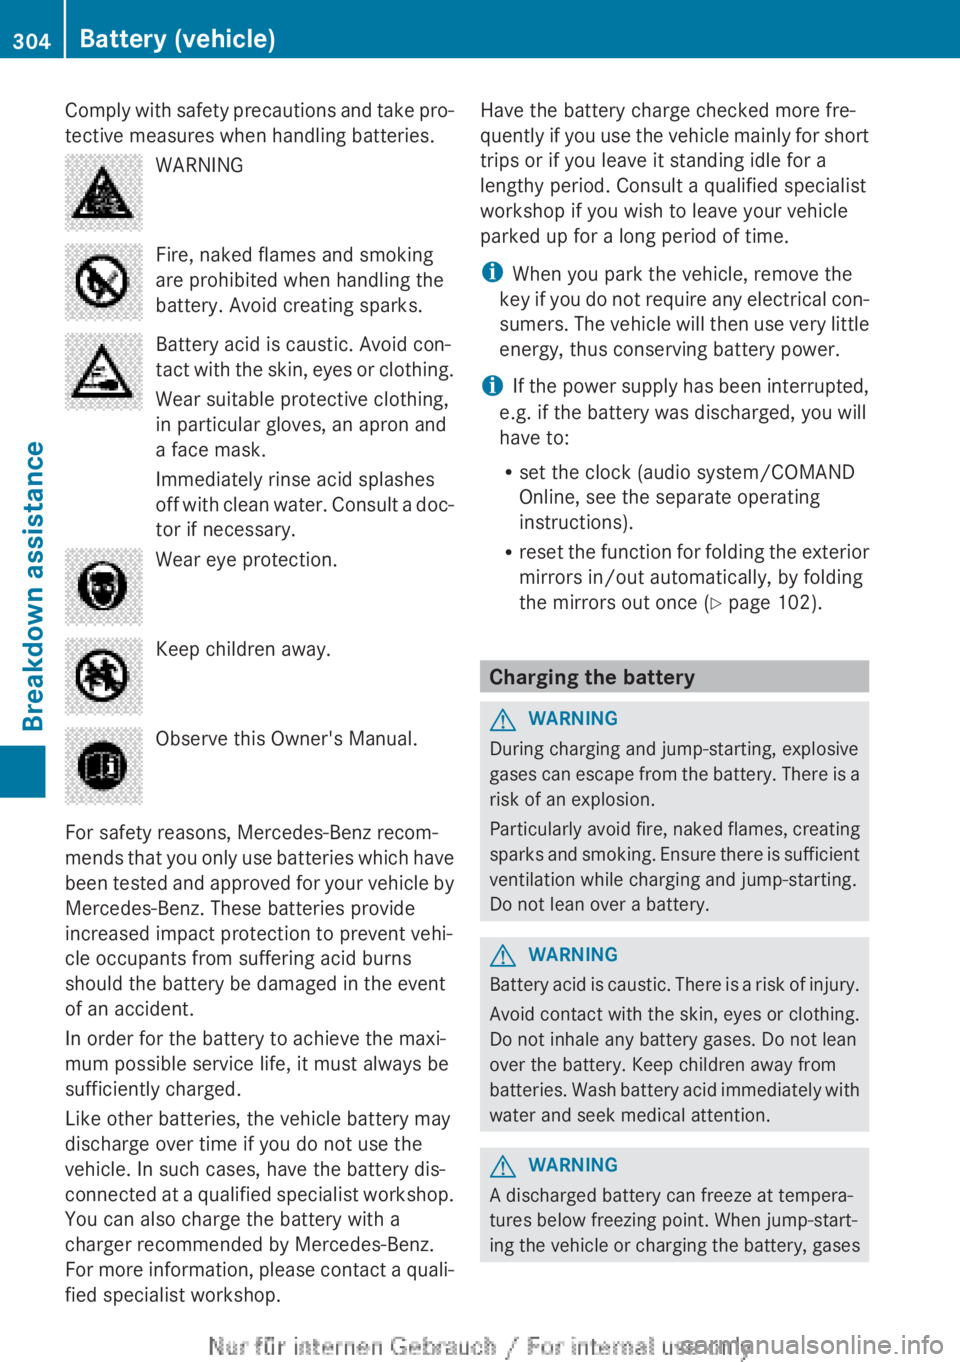
Comply with safety precautions and take pro-
tective measures when handling batteries.WARNINGFire, naked flames and smoking
are prohibited when handling the
battery. Avoid creating sparks.Battery acid is caustic. Avoid con-
tact with the skin, eyes or clothing.
Wear suitable protective clothing,
in particular gloves, an apron and
a face mask.
Immediately rinse acid splashes
off with clean water. Consult a doc-
tor if necessary.Wear eye protection.Keep children away.Observe this Owner's Manual.
For safety reasons, Mercedes-Benz recom-
mends that you only use batteries which have
been tested and approved for your vehicle by
Mercedes-Benz. These batteries provide
increased impact protection to prevent vehi-
cle occupants from suffering acid burns
should the battery be damaged in the event
of an accident.
In order for the battery to achieve the maxi-
mum possible service life, it must always be
sufficiently charged.
Like other batteries, the vehicle battery may
discharge over time if you do not use the
vehicle. In such cases, have the battery dis-
connected at a qualified specialist workshop.
You can also charge the battery with a
charger recommended by Mercedes-Benz.
For more information, please contact a quali-
fied specialist workshop.
Have the battery charge checked more fre-
quently if you use the vehicle mainly for short
trips or if you leave it standing idle for a
lengthy period. Consult a qualified specialist
workshop if you wish to leave your vehicle
parked up for a long period of time.
i When you park the vehicle, remove the
key if you do not require any electrical con-
sumers. The vehicle will then use very little
energy, thus conserving battery power.
i If the power supply has been interrupted,
e.g. if the battery was discharged, you will
have to:
R set the clock (audio system/COMAND
Online, see the separate operating
instructions).
R reset the function for folding the exterior
mirrors in/out automatically, by folding
the mirrors out once ( Y page 102).
Charging the battery
GWARNING
During charging and jump-starting, explosive
gases can escape from the battery. There is a
risk of an explosion.
Particularly avoid fire, naked flames, creating
sparks and smoking. Ensure there is sufficient
ventilation while charging and jump-starting.
Do not lean over a battery.
GWARNING
Battery acid is caustic. There is a risk of injury.
Avoid contact with the skin, eyes or clothing.
Do not inhale any battery gases. Do not lean
over the battery. Keep children away from
batteries. Wash battery acid immediately with
water and seek medical attention.
GWARNING
A discharged battery can freeze at tempera-
tures below freezing point. When jump-start-
ing the vehicle or charging the battery, gases
304Battery (vehicle)Breakdown assistance
Page 309 of 352
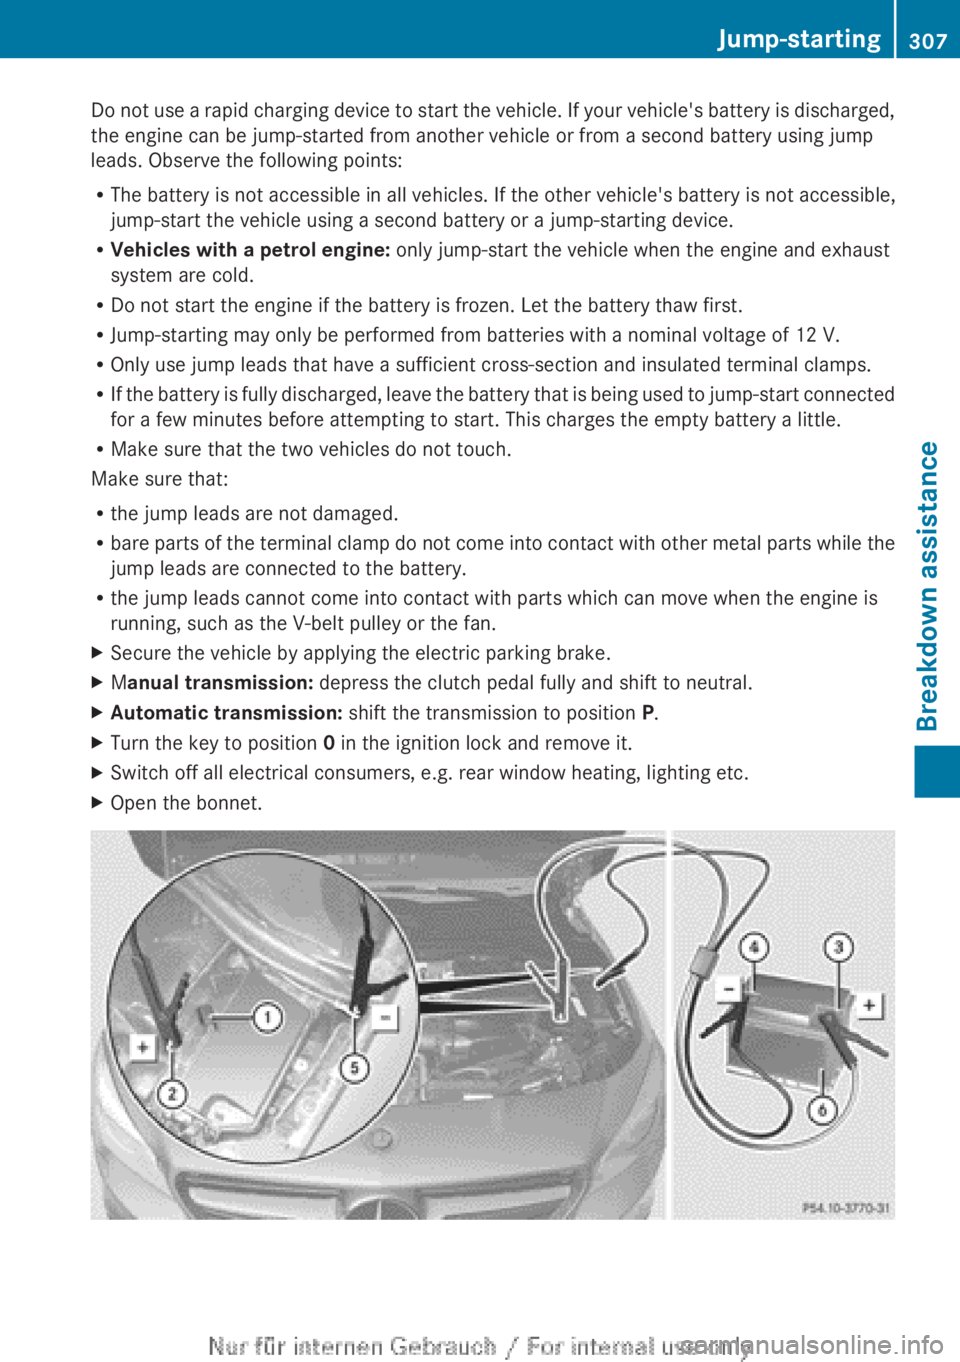
Do not use a rapid charging device to start the vehicle. If your vehicle's battery is discharged,
the engine can be jump-started from another vehicle or from a second battery using jump
leads. Observe the following points:
R The battery is not accessible in all vehicles. If the other vehicle's battery is not accessible,
jump-start the vehicle using a second battery or a jump-starting device.
R Vehicles with a petrol engine: only jump-start the vehicle when the engine and exhaust
system are cold.
R Do not start the engine if the battery is frozen. Let the battery thaw first.
R Jump-starting may only be performed from batteries with a nominal voltage of 12 V.
R Only use jump leads that have a sufficient cross-section and insulated terminal clamps.
R If the battery is fully discharged, leave the battery that is being used to jump-start connected
for a few minutes before attempting to start. This charges the empty battery a little.
R Make sure that the two vehicles do not touch.
Make sure that:
R the jump leads are not damaged.
R bare parts of the terminal clamp do not come into contact with other metal parts while the
jump leads are connected to the battery.
R the jump leads cannot come into contact with parts which can move when the engine is
running, such as the V-belt pulley or the fan.XSecure the vehicle by applying the electric parking brake.XM anual transmission: depress the clutch pedal fully and shift to neutral.XAutomatic transmission: shift the transmission to position P.XTurn the key to position 0 in the ignition lock and remove it.XSwitch off all electrical consumers, e.g. rear window heating, lighting etc.XOpen the bonnet.Jump-starting307Breakdown assistanceZ