2013 MERCEDES-BENZ CLA COUPE fuel consumption
[x] Cancel search: fuel consumptionPage 13 of 373
Emergency key
Unlocking the driver's door .............. 85
Emergency key element
Function/notes ................................ 79
Inserting .......................................... 79
Locking vehicle ................................ 86
Emergency release
Driver's door .................................... 85
Emergency spare wheel
General notes ................................ 349
Important safety notes .................. 349
Removing ...................................... .350
Technical data ............................... 350
Emergency unlocking
Boot ................................................. 88
Vehicle ............................................. 85
Engine
Display message ............................ 249
ECO start/stop function ................ 150
Engine number ............................... 354
Jump-starting ................................. 316
Running irregularl y......................... 153
Starting problems .......................... 153
Starting the engine with the key .... 148
Stopping ........................................ 167
Tow-starting (vehicle) ..................... 322
Warning lamp (engine diagnos-
tics) ............................................... 271
Engine electronics
Notes ............................................. 352
Problem (fault) ............................... 153
Engine jump starting
see Jump starting (engine)
Engine oil
Additives ........................................ 360
Checking the oil level ..................... 292
Checking the oil level using the
dipstick .......................................... 292
Display message ............................ 250
Filling capacity ............................... 359
Notes about oil grade s................... 359
Notes on oil level/consumption .... 292
Temperature (on-board com-
puter) ............................................. 231
Topping up ..................................... 293
Viscosity ........................................ 360
Environmental protection
Returning an end-of-life vehicle ....... 21 ESP® (Electronic Stability Pro-
gram)
4ETS ................................................ 68
AMG menu (on-board computer) ... 231
Characteristics ................................. 69
Deactivating/activating (AMG
vehicles) .......................................... 70
Deactivating/activating (except
AMG vehicles) ................................ 224
Deactivating/activating (notes;
except AMG vehicles) ...................... 69
Display message ............................ 235
ETS .................................................. 68
ETS/4ETS ........................................ 68
Function/note s................................ 68
General notes .................................. 68
Important safety guidelines ............. 68
Trailer stabilisation .......................... 71
Warning lamp ................................. 267
ETS (Electronic Traction System) ....... 68
ETS/4ETS (Electronic Traction Sys-
tem) ...................................................... 68
Exhaust pipe (cleaning instruc-
tions) .................................................. 301
Exterior lighting
Settings options ............................. 110
see Lights
Exterior mirrors
Adjusting ....................................... 105
Anti-dazzle mode (automatic) ........ 106
Folding in when locking (on-board computer) ...................................... 230
Folding in/out (automatically )....... 106
Folding in/out (electrically) ........... 105
Out of position (troubleshooting) ... 106
Parking position ............................. 106
Resetting ....................................... 106
Storing settings (memory func-
tion) ............................................... 107 F
Fault message see Display messages
Filler cap
see Fuel filler flap
Fire extinguisher ............................... 307
First-aid kit ......................................... 30610
Index
Page 14 of 373

Fitting a wheel
Fitting a wheel .............................. .339
Lowering the vehicle ..................... .339
Preparing the vehicle ..................... 336
Raising the vehicle ......................... 337
Removing a wheel .......................... 339
Securing the vehicle against roll-
ing away ........................................ 336
Flat tyre
MOExtended tyres ......................... 308
Preparing the vehicle ..................... 308
TIREFIT kit ...................................... 309
see Emergency spare wheel
Floormat ............................................. 287
Foglamps
Extended range .............................. 115
Switching on/off ........................... 111
Frequencies
Mobile phone ................................. 352
Two-way radio ................................ 352
Front foglamps
Display message ............................ 247
Fuel
Additives ........................................ 357
Consumption information .............. 358
Consumption statistics .................. 217
Displaying the current consump-
tion ................................................ 218
Displaying the range ..................... .218
E10 ................................................ 356
Fuel gauge ....................................... 30
Grade (petrol) ................................ 356
Important safety notes .................. 355
Low outside temperatures ............. 358
Notes for AMG vehicles ................. 357
Problem (malfunction) ................... 166
Quality (diesel )............................... 357
Refuelling ....................................... 163
Tank content/reserve fue l............. 355
Fuel filler flap
Opening ......................................... 164
Fuel filter (white display message) .. 251
Fuel level
Calling up the range (on-board
computer) ...................................... 218
Gaug e.............................................. 30
Fuel reserve
see Fuel Fuel tank
Capacity ........................................ 355
Problem (malfunction) ................... 166
Fuses
Allocation chart ............................. 323
Before changing ............................. 323
Fuse box in the engine compart-
ment .............................................. 323
Fuse box in the front-passenger
footwell .......................................... 323
Important safety notes .................. 322 G
Gear indicator (on-board com-
puter) .................................................. 231
Gear or selector lever (cleaning
instructions) ...................................... 302
Gearshift program
SETUP (on-board computer) .......... 231
Genuine Mercedes-Benz parts ........... 21
Glove compartment .......................... 277 H
Handbrake see Parking brake
Hazard warning lamps ...................... 113
Display message ............................ 262
Head restraints
Adjusting ....................................... 101
Adjusting (electrically) ................... 101
Adjusting (manually) ...................... 101
Adjusting (rear) .............................. 102
Fitting/removing (rear) .................. 102
Headlamp
Cleaning system (function) ............ 114
Cleaning system (notes) ................ 361
Headlamps
Misting up ...................................... 116
Topping up the cleaning system .... 295
see Automatic headlamp mode
Heating
see Climate control
High-pressure cleaners .................... 298
Hill start assist .................................. 149
HOLD function
Activating ....................................... 186 Index
11
Page 24 of 373
Protection of the environment
General notes
H
Environmental note
Daimler's declared policy is one of compre-
hensive environmental protection.
Our objectives are to use the natural resour-
ces which form the basis of our existence on
this planet sparingly and in a manner which
takes the requirements of both nature and
humanity into consideration.
You too can help to protect the environment
by operating your vehicle in an environmen-
tally-responsible manner.
Fuel consumption and the rate of engine,
transmission, brake and tyre wear depend on
the following factors:
R operating conditions of your vehicle
R your personal driving style
You can influence both factors. Therefore,
please bear the following in mind:
Operating conditions:
R avoid short trips, as these increase fuel
consumption.
R observe the correct tyre pressure.
R do not carry any unnecessary weight in the
vehicle.
R remove the roof rack once you no longer
need it.
R a regularly serviced vehicle will contribute
to environmental protection. You should
therefore adhere to the service intervals.
R all maintenance work should be carried out
at a qualified specialist workshop.
Personal driving style:
R do not depress the accelerator pedal when
starting the engine.
R do not warm up the engine when the vehicle
is stationary.
R drive carefully and maintain a safe distance
from the vehicle in front.
R avoid frequent, sudden acceleration and
braking. R
change gear in good time and use each gear
only up to Ôof its maximum engine speed.
R switch off the engine in stationary traffic.
R monitor the vehicle's fuel consumption. Returning an end-of-life vehicle
EU countries only:
Mercedes-Benz will take back your old vehicle to dispose of it in an environmentally-respon-sible manner in accordance with the Euro-
pean Union (EU) End of Life Vehicles Direc-
tive.
There is a network of return points and dis-
assembly plants available. You can return
your vehicle to these plants free of charge.
This makes a valuable contribution to the
recycling process and the conservation of
resources.
For further information on recycling old vehi- cles, recovery and the terms of the policy,
visit the Mercedes-Benz homepage. Genuine Mercedes-Benz parts
H
Environmental note
Daimler AG also supplies reconditioned
assemblies and parts which are of the same
quality as new parts. For these, the same war-
ranty applies as for new parts.
! Airbags and seat belt tensioners, as well
as control units and sensors for these
restraint systems, may be installed in the
following areas of your vehicle:
R doors
R door pillars
R door sills
R seats
R dashboard
R instrument cluster
R centre console Introduction
21 Z
Page 163 of 373
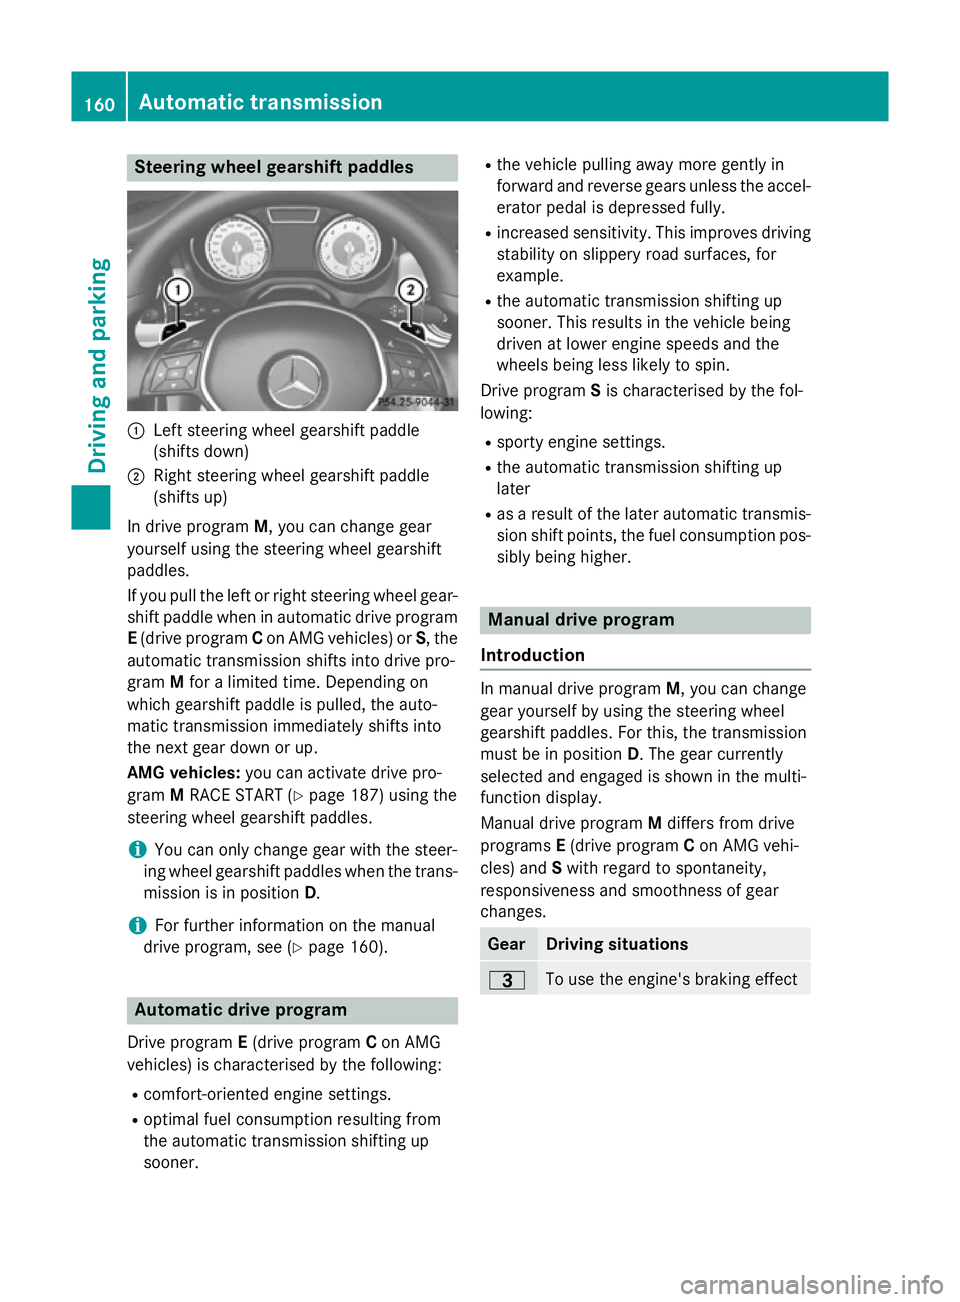
Steering wheel gearshift paddles
:
Left steering wheel gearshift paddle
(shifts down)
; Right steering wheel gearshift paddle
(shifts up)
In drive program M, you can change gear
yourself using the steering wheel gearshift
paddles.
If you pull the left or right steering wheel gear- shift paddle when in automatic drive program
E (drive program Con AMG vehicles) or S, the
automatic transmission shifts into drive pro-
gram Mfor a limited time. Depending on
which gearshift paddle is pulled, the auto-
matic transmission immediately shifts into
the next gear down or up.
AMG vehicles: you can activate drive pro-
gram MRACE START (Y page 187) using the
steering wheel gearshift paddles.
i You can only change gear with the steer-
ing wheel gearshift paddles when the trans-
mission is in position D.
i For further information on the manual
drive program, see (Y page 160).Automatic drive program
Drive program E(drive program Con AMG
vehicles) is characterised by the following:
R comfort-oriented engine settings.
R optimal fuel consumption resulting from
the automatic transmission shifting up
sooner. R
the vehicle pulling away more gently in
forward and reverse gears unless the accel-
erator pedal is depressed fully.
R increased sensitivity. This improves driving
stability on slippery road surfaces, for
example.
R the automatic transmission shifting up
sooner. This results in the vehicle being
driven at lower engine speeds and the
wheels being less likely to spin.
Drive program Sis characterised by the fol-
lowing:
R sporty engine settings.
R the automatic transmission shifting up
later
R as a result of the later automatic transmis-
sion shift points, the fuel consumption pos- sibly being higher. Manual drive program
Introduction In manual drive program
M, you can change
gear yourself by using the steering wheel
gearshift paddles. For this, the transmission
must be in position D. The gear currently
selected and engaged is shown in the multi-
function display.
Manual drive program Mdiffers from drive
programs E(drive program Con AMG vehi-
cles) and Swith regard to spontaneity,
responsiveness and smoothness of gear
changes. Gear Driving situations
=
To use the engine's braking effect160
Automatic transmissionDriving and parking
Page 173 of 373
If you leave the vehicle parked up for longer
than six weeks, the vehicle may suffer dam-
age as a result of lack of use.
X Visit a qualified specialist workshop and
seek advice.
i You can obtain information about trickle
chargers from a qualified specialist work-
shop. Driving tips
General notes
G
WARNING
If you switch off the ignition while driving,
safety-relevant functions are only available
with limitations, or not at all. This could affect, for example, the power steering and the brake
boosting effect. You will require considerably
more effort to steer and brake. There is a risk of an accident.
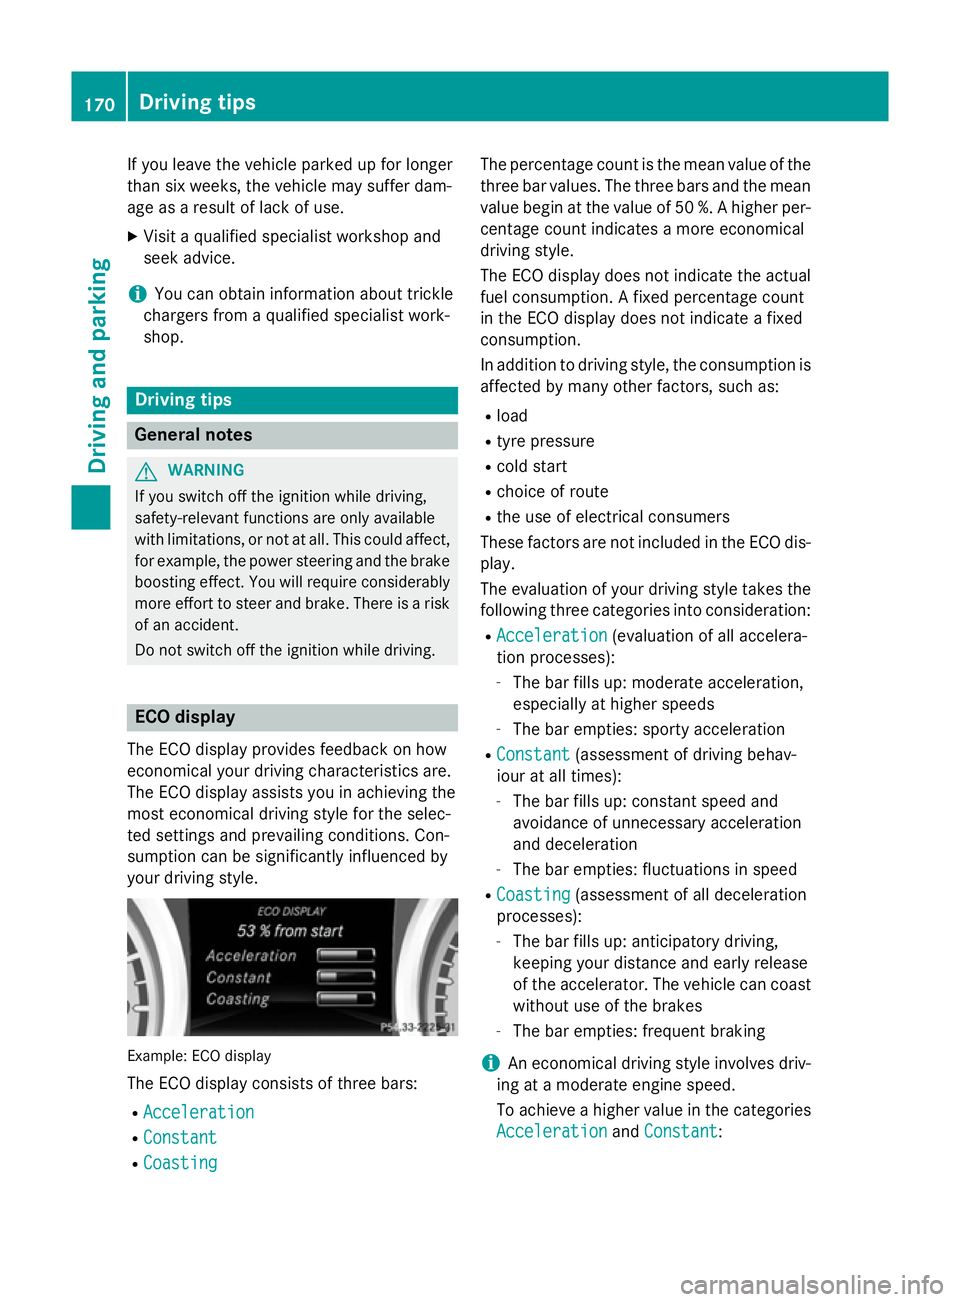
Do not switch off the ignition while driving. ECO display
The ECO display provides feedback on how
economical your driving characteristics are.
The ECO display assists you in achieving the
most economical driving style for the selec-
ted settings and prevailing conditions. Con-
sumption can be significantly influenced by
your driving style. Example: ECO display
The ECO display consists of three bars:
R Acceleration Acceleration
R Constant
Constant
R Coasting
Coasting The percentage count is the mean value of the
three bar values. The three bars and the mean
value begin at the value of 50 %. A higher per- centage count indicates a more economical
driving style.
The ECO display does not indicate the actual
fuel consumption. A fixed percentage count
in the ECO display does not indicate a fixed
consumption.
In addition to driving style, the consumption is
affected by many other factors, such as:
R load
R tyre pressure
R cold start
R choice of route
R the use of electrical consumers
These factors are not included in the ECO dis-
play.
The evaluation of your driving style takes the
following three categories into consideration:
R Acceleration Acceleration (evaluation of all accelera-
tion processes):
- The bar fills up: moderate acceleration,
especially at higher speeds
- The bar empties: sporty acceleration
R Constant Constant (assessment of driving behav-
iour at all times):
- The bar fills up: constant speed and
avoidance of unnecessary acceleration
and deceleration
- The bar empties: fluctuations in speed
R Coasting Coasting (assessment of all deceleration
processes):
- The bar fills up: anticipatory driving,
keeping your distance and early release
of the accelerator. The vehicle can coast
without use of the brakes
- The bar empties: frequent braking
i An economical driving style involves driv-
ing at a moderate engine speed.
To achieve a higher value in the categories
Acceleration
Acceleration andConstant Constant: 170
Driving tipsDriving and parking
Page 220 of 373
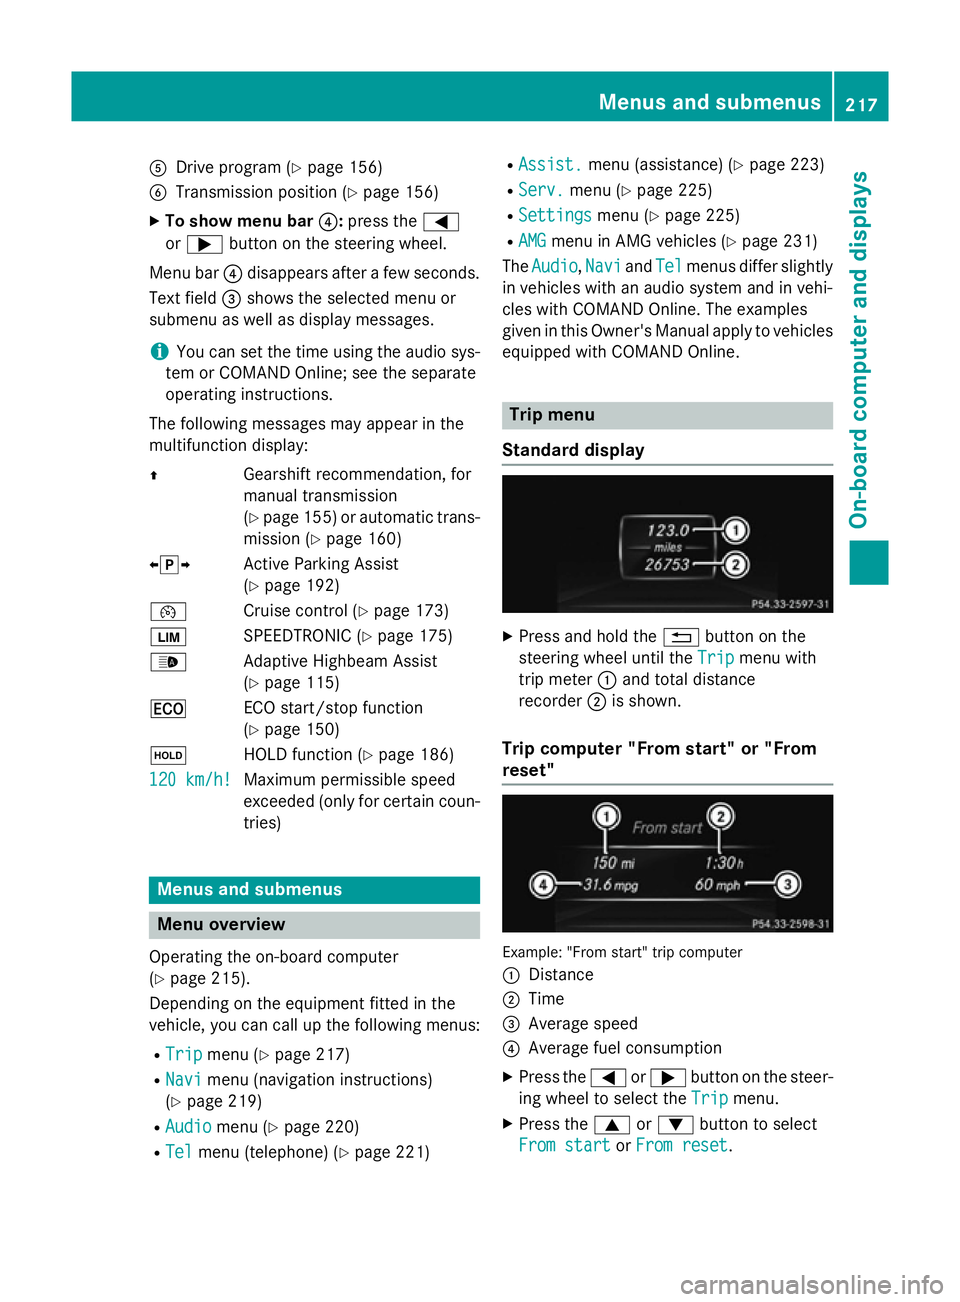
A
Drive program (Y page 156)
B Transmission position (Y page 156)
X To show menu bar ?:press the =
or ; button on the steering wheel.
Menu bar ?disappears after a few seconds.
Text field =shows the selected menu or
submenu as well as display messages.
i You can set the time using the audio sys-
tem or COMAND Online; see the separate
operating instructions.
The following messages may appear in the
multifunction display:
Z Gearshift recommendation, for
manual transmission
(Ypage 155 )or automatic trans-
mission (Y page 160)
XjY Active Parking Assist
(Ypage 192)
¯ Cruise control (Y page 173)
È SPEEDTRONIC (Y page 175)
_ Adaptive Highbeam Assist
(Ypage 115)
¤ ECO start/stop function
(Ypage 150)
ë HOLD function (Y page 186)
120 km/h!
120 km/h! Maximum permissible speed
exceeded (only for certain coun-
tries) Menus and submenus
Menu overview
Operating the on-board computer
(Y page 215).
Depending on the equipment fitted in the
vehicle, you can call up the following menus:
R Trip Trip menu (Y page 217)
R Navi
Navi menu (navigation instructions)
(Y page 219)
R Audio
Audio menu (Y page 220)
R Tel Tel menu (telephone) (Y page 221)R
Assist. Assist. menu (assistance) (Y page 223)
R Serv.
Serv. menu (Y page 225)
R Settings
Settings menu (Ypage 225)
R AMG
AMG menu in AMG vehicles (Y page 231)
The Audio
Audio, Navi
NaviandTel
Tel menus differ slightly
in vehicles with an audio system and in vehi-
cles with COMAND Online. The examples
given in this Owner's Manual apply to vehicles
equipped with COMAND Online. Trip menu
Standard display X
Press and hold the %button on the
steering wheel until the Trip Tripmenu with
trip meter :and total distance
recorder ;is shown.
Trip computer "From start" or "From
reset" Example: "From start" trip computer
:
Distance
; Time
= Average speed
? Average fuel consumption
X Press the =or; button on the steer-
ing wheel to select the Trip Tripmenu.
X Press the 9or: button to select
From start
From start orFrom reset
From reset. Menus and submenus
217On-board computer and displays Z
Page 221 of 373
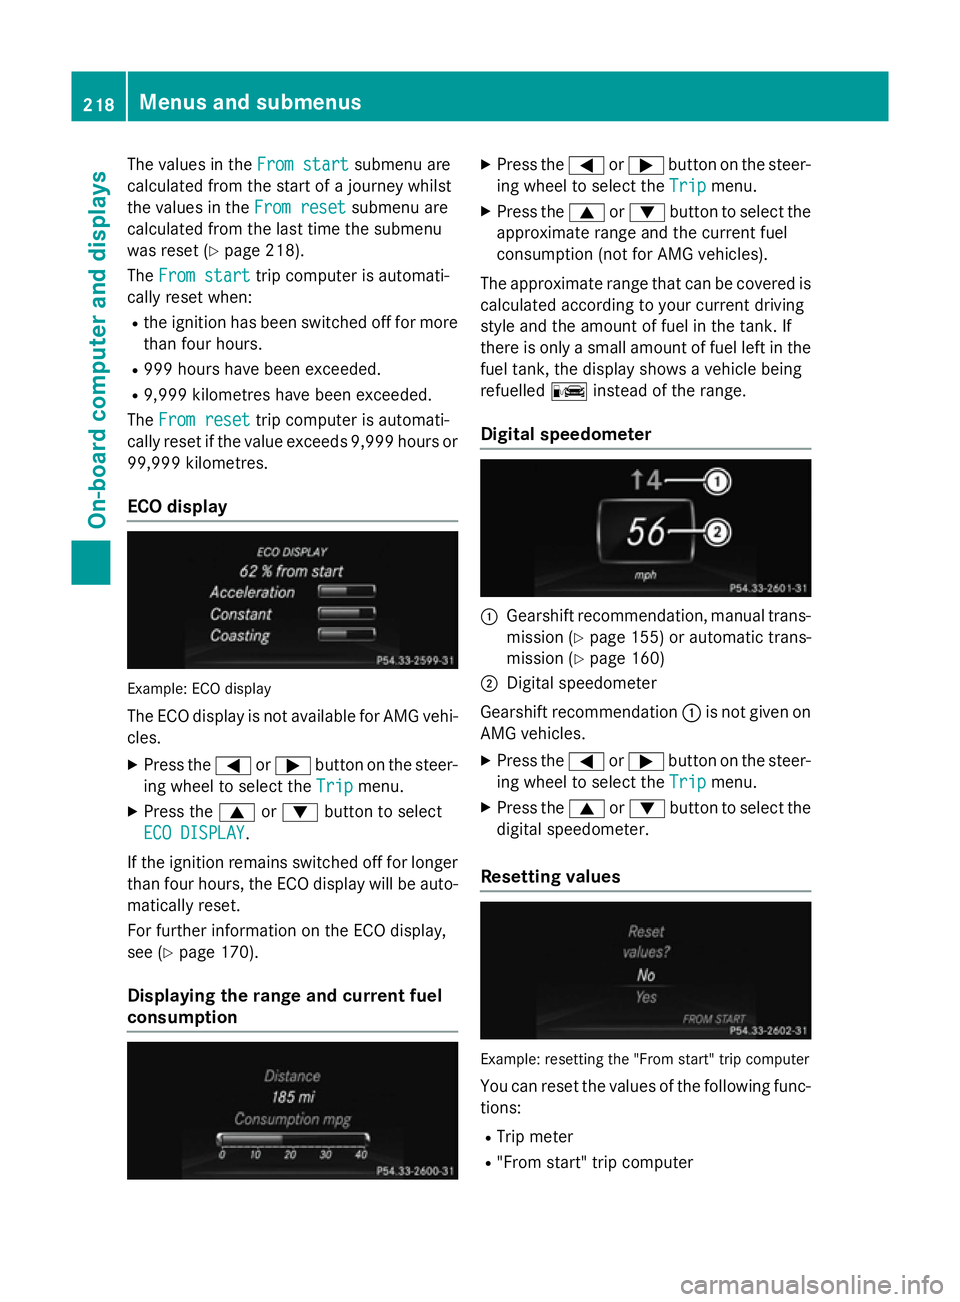
The values in the
From start
From startsubmenu are
calculated from the start of a journey whilst
the values in the From reset
From resetsubmenu are
calculated from the last time the submenu
was reset (Y page 218).
The From start
From start trip computer is automati-
cally reset when:
R the ignition has been switched off for more
than four hours.
R 999 hours have been exceeded.
R 9,999 kilometres have been exceeded.
The From reset
From reset trip computer is automati-
cally reset if the value exceeds 9,999 hours or 99,999 kilometres.
ECO display Example: ECO display
The ECO display is not available for AMG vehi-
cles.
X Press the =or; button on the steer-
ing wheel to select the Trip
Trip menu.
X Press the 9or: button to select
ECO DISPLAY
ECO DISPLAY.
If the ignition remains switched off for longer
than four hours, the ECO display will be auto- matically reset.
For further information on the ECO display,
see (Y page 170).
Displaying the range and current fuel
consumption X
Press the =or; button on the steer-
ing wheel to select the Trip Tripmenu.
X Press the 9or: button to select the
approximate range and the current fuel
consumption (not for AMG vehicles).
The approximate range that can be covered is
calculated according to your current driving
style and the amount of fuel in the tank. If
there is only a small amount of fuel left in the
fuel tank, the display shows a vehicle being
refuelled Cinstead of the range.
Digital speedometer :
Gearshift recommendation, manual trans-
mission (Y page 155) or automatic trans-
mission (Y page 160)
; Digital speedometer
Gearshift recommendation :is not given on
AMG vehicles.
X Press the =or; button on the steer-
ing wheel to select the Trip
Tripmenu.
X Press the 9or: button to select the
digital speedometer.
Resetting values Example: resetting the "From start" trip computer
You can reset the values of the following func-
tions:
R Trip meter
R "From start" trip computer 218
Menus and submenusOn-board computer and displays
Page 343 of 373
X
Place the ratchet ring spanner onto the
hexagon nut of the jack so that the letters
AB are visible.
X Turn the ratchet ring spanner until the vehi-
cle is once again standing firmly on the
ground.
X Place the jack to one side.
X Tighten the wheel bolts evenly in a cross-
wise pattern in the sequence indicated ( :
to A). The specified tightening torque is
130 Nm.
X Turn the jack back to its initial position.
X Stow the jack and the rest of the vehicle
tools in the vehicle again.
X AMG vehicles and vehicles with AMG
equipment: insert the cover into the outer
sill.
X Check the air pressure of the newly fitted
wheel and adjust accordingly.
Observe the recommended tyre pressure
(Y page 330).
i Vehicles with a tyre pressure control sys-
tem: all fitted wheels must be equipped
with functioning sensors. Wheel and tyre combinations
General notes
! For safety reasons, Mercedes-Benz rec-
ommends that you only use tyres and
wheels which have been approved by
Mercedes-Benz specifically for your vehi-
cle.
These are specially adapted to the control
systems, such as ABS or ESP ®
and are
marked as follows:
R MO = Mercedes-Benz Original
R MOE = Mercedes-Benz Original Extended
(tyres featuring run-flat characteristics)
R MO1 = Mercedes-Benz Original (only cer-
tain AMG tyres) Mercedes-Benz Original Extended tyres
may only be used on wheels that have been
specifically approved by Mercedes-Benz.
Only use tyres, wheels or accessories tes-
ted and approved by Mercedes-Benz. Cer-
tain characteristics, e.g. handling, vehicle
noise emissions or fuel consumption, may
otherwise be adversely affected. In addi-
tion, when driving with a load, tyre dimen-
sion variations could cause the tyres to
come into contact with the bodywork and
axle components. This could result in dam- age to the tyres or the vehicle.
Mercedes-Benz accepts no liability for
damage resulting from the use of tyres,
wheels or accessories other than those tes-
ted and approved.
Further information about wheels, tyres
and approved combinations can be
obtained from any qualified specialist
workshop.
! Retreaded tyres are neither tested nor
recommended by Mercedes-Benz, since
previous damage cannot always be detec-
ted on retreaded tyres. As a result,
Mercedes-Benz cannot guarantee vehicle
safety if retreaded tyres are fitted. Do not fit
used tyres if you have no information about their previous usage.
! Large wheels: the lower the section width
for a certain wheel size, the lower the ride
comfort is on poor road surfaces. Roll com-
fort and suspension comfort are reduced
and the risk of damage to the wheels and
tyres as a result of driving over obstacles
increases.
Overview of abbreviations used in the follow- ing tyre tables:
R BA: both axles
R FA: front axle
R RA: rear axle
You will find a table with recommended tyre
pressures for various operating conditions on
the inside of your vehicle's fuel filler flap. For
further information on tyre pressure, see 340
Wheel and tyre combinationsWheels and tyres