2013 MERCEDES-BENZ CLA COUPE door lock
[x] Cancel search: door lockPage 109 of 373

i
Make sure that the exterior mirrors are
always folded out fully while driving. They
could otherwise vibrate.
i If you are driving faster than 47 km/h, you
can no longer fold in the exterior mirrors.
Resetting the exterior mirrors If the battery has been disconnected or com-
pletely discharged, the exterior mirrors must
be reset. The exterior mirrors will otherwise
not fold in when you select the "Fold in mir-
rors when locking" function in the on-board
computer (Y page 230).
X Turn the key to position 1in the ignition
lock (Y page 147).
X Briefly press button :.
Folding the exterior mirrors in/out
automatically If the "Fold in mirrors when locking" function
is activated in the on-board computer
(Y page 230):
R the exterior mirrors fold in automatically as
soon as you lock the vehicle from the out-
side
R the exterior mirrors fold out again automat-
ically as soon as you unlock the vehicle and
then open the driver's or front-passenger
door.
i If the exterior mirrors have been folded in
manually, they do not fold out.
Exterior mirror pushed out of position If an exterior mirror has been pushed out of
position (forwards or backwards), proceed as
follows:
X Vehicles without electrically folding
exterior mirrors: move the exterior mirror
into the correct position manually.
X Vehicles with electrically folding exte-
rior mirrors: press and hold mirror-folding button (Y
page 105) until you hear a click
and then the mirror engage in position.
The mirror housing is engaged again and
you can adjust the exterior mirrors as usual
(Y page 105). Automatic anti-dazzle mirrors
The "Automatic anti-dazzle mirrors" function
is only available if the vehicle is equipped with
the "Mirror package".
The rear-view mirror and the exterior mirror
on the driver's side automatically go into anti- dazzle mode if:
R the ignition is switched on and
R incident light from headlamps strikes the
sensor in the rear-view mirror
The mirrors do not go into anti-dazzle mode if reverse gear is engaged or if the interior light-
ing is switched on. Parking position of the exterior mirror
on the front-passenger side
General notes The "Parking position for the exterior mirror
on the front-passenger side" function is only
available if the vehicle is equipped with the
"Memory package".
Setting and storing the parking position Using reverse gear
You can set the front-passenger side exterior
mirror so that you can see the rear wheel on
that side as soon as you engage reverse gear. You can store this position. 106
MirrorsSeats, steering wheel and mirrors
Page 114 of 373
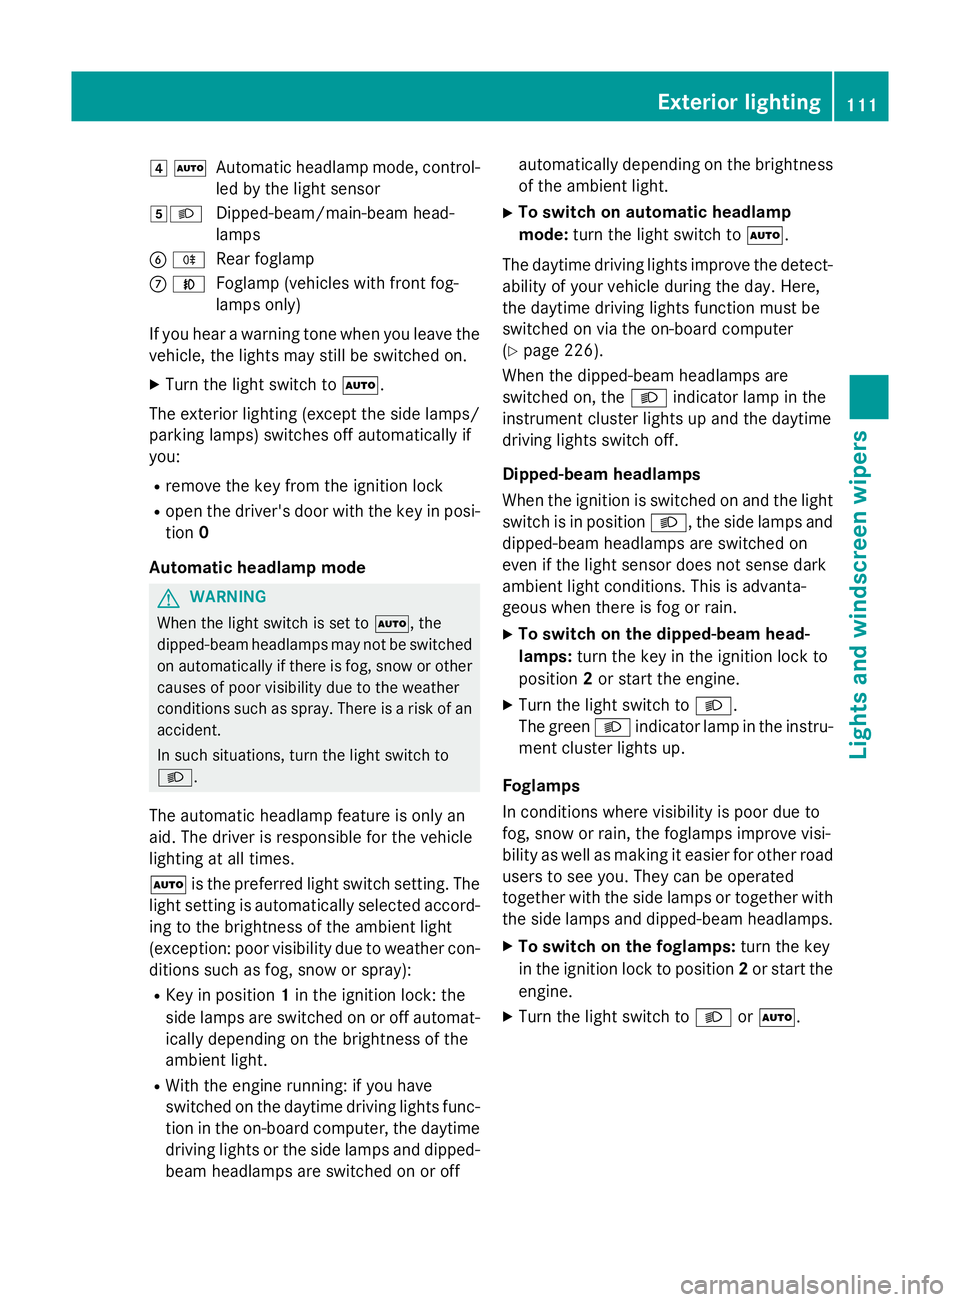
4
Ã
Automatic headlamp mode, control-
led by the light sensor
5L Dipped-beam/main-beam head-
lamps
B R
Rear foglamp
C N
Foglamp (vehicles with front fog-
lamps only)
If you hear a warning tone when you leave the
vehicle, the lights may still be switched on.
X Turn the light switch to Ã.
The exterior lighting (except the side lamps/
parking lamps) switches off automatically if
you:
R remove the key from the ignition lock
R open the driver's door with the key in posi-
tion 0
Automatic headlamp mode G
WARNING
When the light switch is set to Ã, the
dipped-beam headlamps may not be switched on automatically if there is fog, snow or othercauses of poor visibility due to the weather
conditions such as spray. There is a risk of an
accident.
In such situations, turn the light switch to
L.
The automatic headlamp feature is only an
aid. The driver is responsible for the vehicle
lighting at all times.
à is the preferred light switch setting. The
light setting is automatically selected accord- ing to the brightness of the ambient light
(exception: poor visibility due to weather con-
ditions such as fog, snow or spray):
R Key in position 1in the ignition lock: the
side lamps are switched on or off automat- ically depending on the brightness of the
ambient light.
R With the engine running: if you have
switched on the daytime driving lights func-
tion in the on-board computer, the daytime driving lights or the side lamps and dipped-
beam headlamps are switched on or off automatically depending on the brightness
of the ambient light.
X To switch on automatic headlamp
mode: turn the light switch to Ã.
The daytime driving lights improve the detect-
ability of your vehicle during the day. Here,
the daytime driving lights function must be
switched on via the on-board computer
(Y page 226).
When the dipped-beam headlamps are
switched on, the Lindicator lamp in the
instrument cluster lights up and the daytime
driving lights switch off.
Dipped-beam headlamps
When the ignition is switched on and the light
switch is in position L, the side lamps and
dipped-beam headlamps are switched on
even if the light sensor does not sense dark
ambient light conditions. This is advanta-
geous when there is fog or rain.
X To switch on the dipped-beam head-
lamps: turn the key in the ignition lock to
position 2or start the engine.
X Turn the light switch to L.
The green Lindicator lamp in the instru-
ment cluster lights up.
Foglamps
In conditions where visibility is poor due to
fog, snow or rain, the foglamps improve visi-
bility as well as making it easier for other road
users to see you. They can be operated
together with the side lamps or together with the side lamps and dipped-beam headlamps.
X To switch on the foglamps: turn the key
in the ignition lock to position 2or start the
engine.
X Turn the light switch to LorÃ. Exterior lighting
111Lights andwindscreen wipers Z
Page 120 of 373
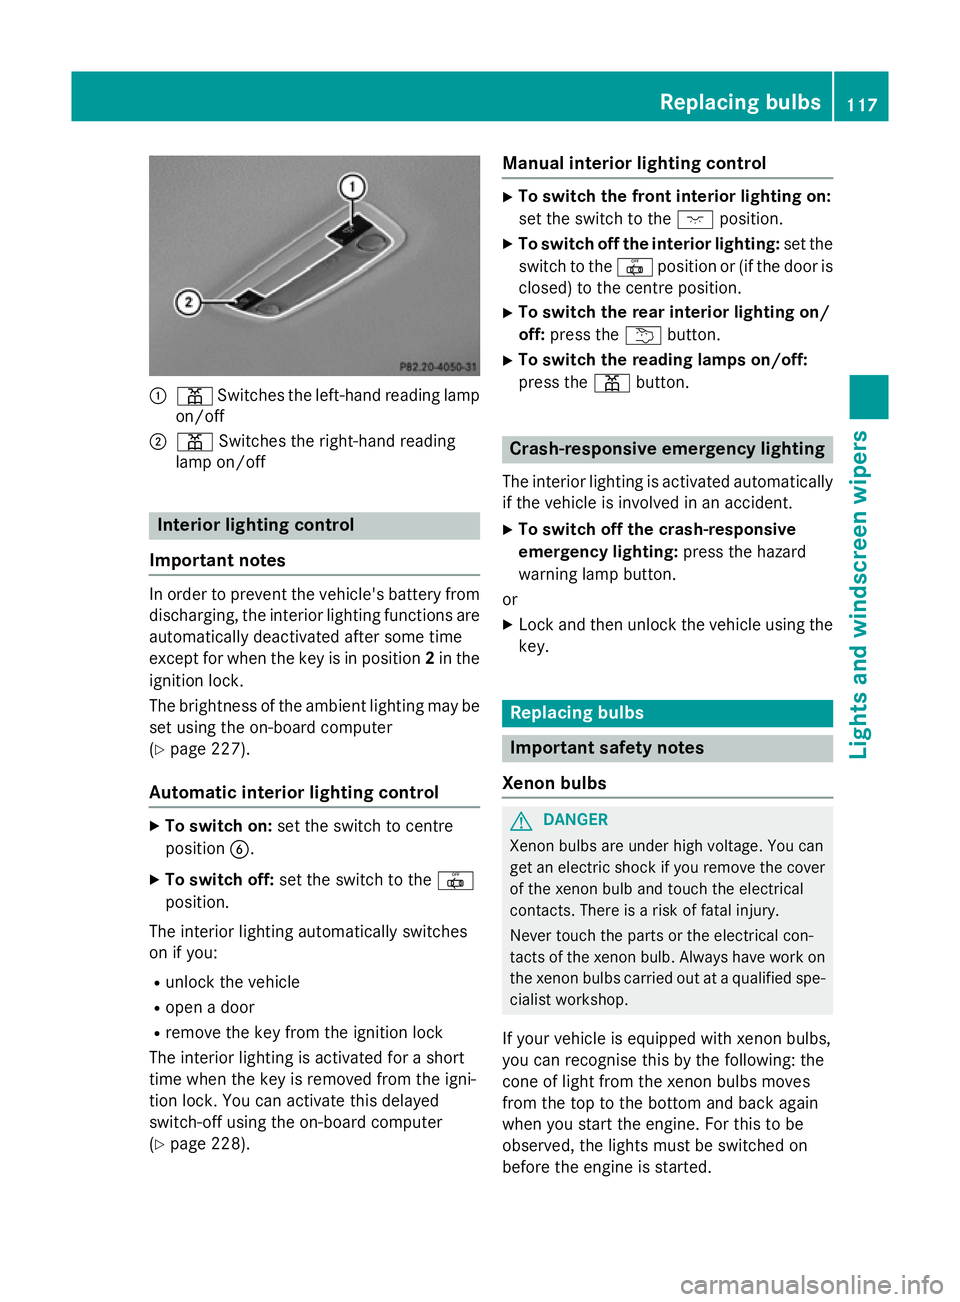
:
p Switches the left-hand reading lamp
on/off
; p Switches the right-hand reading
lamp on/off Interior lighting control
Important notes In order to prevent the vehicle's battery from
discharging, the interior lighting functions are automatically deactivated after some time
except for when the key is in position 2in the
ignition lock.
The brightness of the ambient lighting may be set using the on-board computer
(Y page 227).
Automatic interior lighting control X
To switch on: set the switch to centre
position B.
X To switch off: set the switch to the |
position.
The interior lighting automatically switches
on if you:
R unlock the vehicle
R open a door
R remove the key from the ignition lock
The interior lighting is activated for a short
time when the key is removed from the igni-
tion lock. You can activate this delayed
switch-off using the on-board computer
(Y page 228). Manual interior lighting control X
To switch the front interior lighting on:
set the switch to the cposition.
X To switch off the interior lighting: set the
switch to the |position or (if the door is
closed) to the centre position.
X To switch the rear interior lighting on/
off: press the ubutton.
X To switch the reading lamps on/off:
press the pbutton. Crash-responsive emergency lighting
The interior lighting is activated automatically
if the vehicle is involved in an accident.
X To switch off the crash-responsive
emergency lighting: press the hazard
warning lamp button.
or X Lock and then unlock the vehicle using the
key. Replacing bulbs
Important safety notes
Xenon bulbs G
DANGER
Xenon bulbs are under high voltage. You can
get an electric shock if you remove the cover
of the xenon bulb and touch the electrical
contacts. There is a risk of fatal injury.
Never touch the parts or the electrical con-
tacts of the xenon bulb. Always have work on the xenon bulbs carried out at a qualified spe- cialist workshop.
If your vehicle is equipped with xenon bulbs,
you can recognise this by the following: the
cone of light from the xenon bulbs moves
from the top to the bottom and back again
when you start the engine. For this to be
observed, the lights must be switched on
before the engine is started. Replacing bulbs
117Lights and windscreen wipers Z
Page 140 of 373
in the door. The side window stops. To con-
tinue closing the side window, pull on the
W switch.
X Convenience closing feature: press and
hold the ebutton until the side win-
dows and the panorama sliding sunroof are closed.
The indicator lamp in the ebutton lights
up. Air-recirculation mode is activated.
If parts of the body are in the closing area
during convenience closing, proceed as fol-
lows:
X To open/close the side window, press the
W button.
The side window stops.
X To then open the side window, press the
W button again.
or X Press and hold the ebutton again for at
least two seconds.
The side windows move in the opposite
direction.
X Press the 3button for opening/closing
the panorama sliding sunroof.
The panorama sliding sunroof stops.
X To then open the panorama sliding sunroof,
pull back on the 3switch.
i Notes on the automatic reversing func-
tion for:
R the side window (Y page 89)
R the panorama sliding sunroof
(Y page 92)
X Convenience opening feature: press and
hold the ebutton until the side win-
dows and the panorama sliding sunroof
have opened. The side windows and the
panorama sliding sunroof move back to
their original position.
The indicator lamp in the ebutton goes
out. Air-recirculation mode is deactivated.
i If you open the side windows or the pan-
orama sliding sunroof manually after clos-
ing with the convenience closing feature, they will remain in this position when
opened using the convenience opening fea-
ture. Activating/deactivating the residual
heat function
General notes The residual heat function is only available
with THERMOTRONIC automatic climate con-
trol.
It is possible to make use of the residual heat of the engine to continue heating the vehicle
for approximately 30 minutes after the engine
has been switched off. The heating time
depends on the set interior temperature.
i The blower will run at a low speed regard-
less of the airflow setting.
i If you activate the residual heat function
at high temperatures, only the ventilation
will be activated. The blower runs at
medium speed.
i You cannot use the ventilation to cool the
vehicle interior to a temperature lower than the outside temperature.
Activating/deactivating X
Turn the key to position 0in the ignition
lock or remove it (Y page 147).
X To activate: press theÌbutton.
The indicator lamp in the Ìbutton lights
up.
X To deactivate: press theÌbutton.
The indicator lamp in the Ìbutton goes
out.
i Residual heat is deactivated automati-
cally:
R after approximately 30 minutes
R when the ignition is switched on
R if the battery voltage drops
R when the auxiliary heating is switched on Operating the climate control system
137Climate control Z
Page 151 of 373
Carry out regular checks to make sure that
there are no flammable foreign materials in
the engine compartment or in the exhaust
system.
! Do not depress the accelerator when
starting the engine.
i Vehicles with a petrol engine:
the
engine runs at a higher engine speed during the cold start procedure so that the cata-
lytic converter can reach operating tem-
perature more quickly. The sound of the
engine may change as a result.
Manual transmission X
Depress the brake pedal and keep it
depressed.
X Depress the clutch pedal fully.
X Shift to neutral N.
i You can only start the engine when the
clutch pedal is fully depressed.
Automatic transmission X
Shift the transmission to position P.
Transmission position display Pis shown in
the multifunction display.
i When the transmission is in position
N,
you can also start the engine with the brake pedal depressed.
Starting procedure X
To start a petrol engine: turn the key to
position 3in the ignition lock (Y page 147)
and release it as soon as the engine is run-
ning.
X To start a diesel engine: turn the key to
position 2(Y page 147) in the ignition lock.
The % preglow indicator lamp in the
instrument cluster lights up.
X When the %preglow indicator lamp
goes out, turn the key to position
3 (Y page 147) and release it as soon as the
engine is running. i
You can start the engine without preglow
if the engine is warm. Pulling away
Manual transmission !
Change gear in good time and avoid spin-
ning the wheels. Otherwise, you could dam- age the vehicle.
X Depress the brake pedal and keep it
depressed.
X Depress the clutch pedal fully.
X Shift to either first gear or reverse gear R.
X Release the electric parking brake
(Y page 168).
X Release the brake pedal.
X Slowly release the clutch pedal and gently
depress the accelerator pedal.
i Follow the shift recommendations in the
multifunction display for an economical
driving style (Y page 155).
i The vehicle locks centrally once you have
pulled away. The locking knobs in the doors
drop down.
You can open the doors from the inside at
any time.
You can also deactivate the automatic lock- ing feature (Y page 229).
Automatic transmission i
It is only possible to shift the transmission
from position Pto the desired position if
you depress the brake pedal. Only then can
the parking lock be deactivated. If you do
not depress the brake pedal, the DIRECT
SELECT lever can still be moved but the
parking lock remains engaged.
i At transmission fluid temperatures below
Ò20 †, you can only shift out of position P
into another transmission position when
the engine is running. 148
DrivingDriving and parking
Page 152 of 373
X
Depress the brake pedal and keep it
depressed.
X Shift the transmission to position Dor R.
X Release the brake pedal.
X Carefully depress the accelerator pedal.
The electric parking brake is automatically
released (Y page 168).
The red !indicator lamp in the instru-
ment cluster goes out.
i The vehicle locks centrally once you have
pulled away. The locking knobs in the doors
drop down.
You can open the doors from the inside at
any time.
You can also deactivate the automatic lock- ing feature (Y page 229).
i Upshifts take place at higher engine
speeds after a cold start. This helps the
catalytic converter to reach its operating
temperature more quickly.
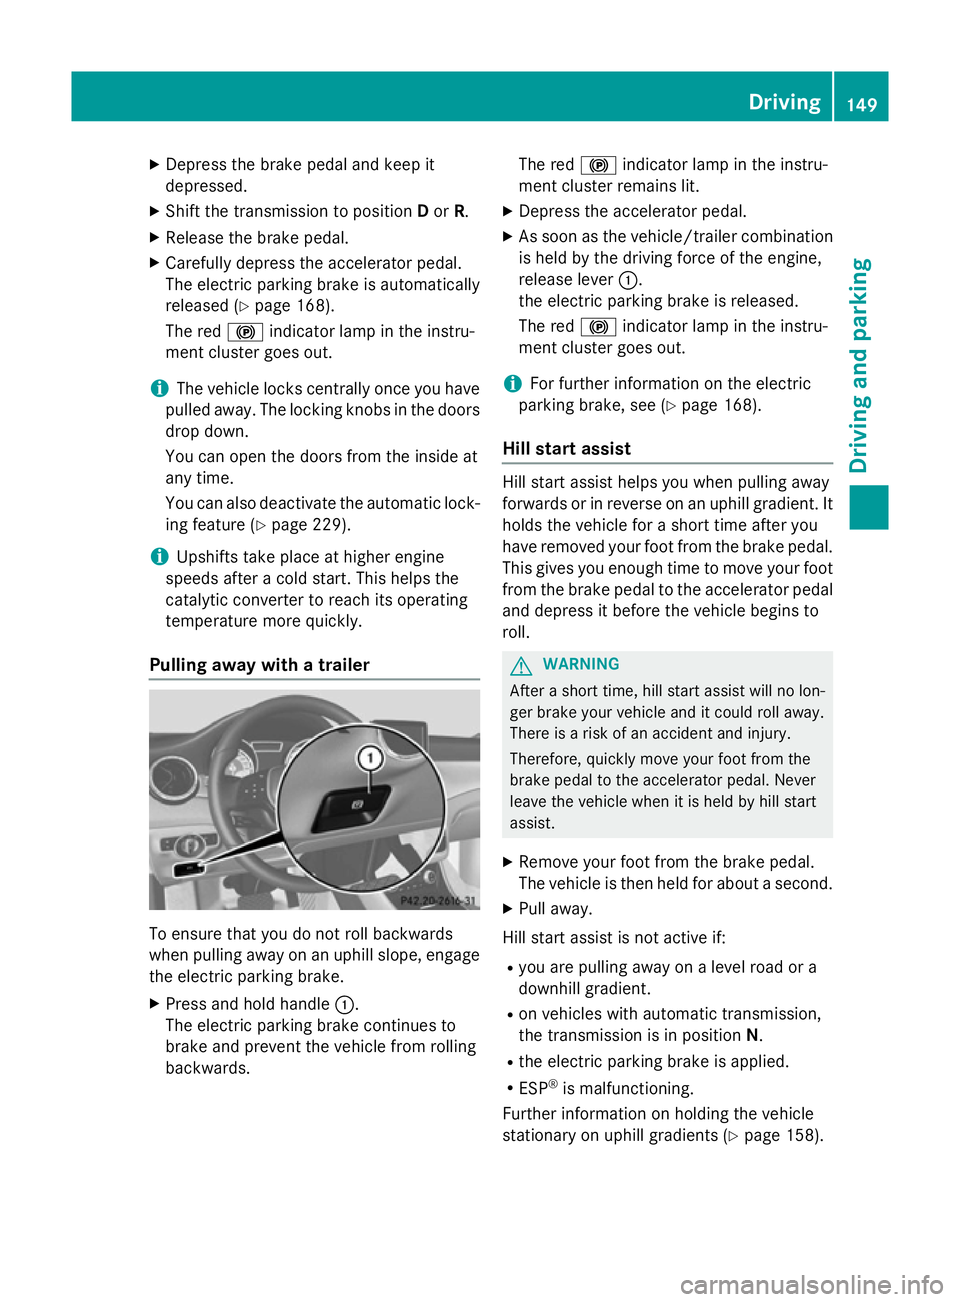
Pulling away with a trailer To ensure that you do not roll backwards
when pulling away on an uphill slope, engage
the electric parking brake.
X Press and hold handle :.
The electric parking brake continues to
brake and prevent the vehicle from rolling
backwards. The red
!indicator lamp in the instru-
ment cluster remains lit.
X Depress the accelerator pedal.
X As soon as the vehicle/trailer combination
is held by the driving force of the engine,
release lever :.
the electric parking brake is released.
The red !indicator lamp in the instru-
ment cluster goes out.
i For further information on the electric
parking brake, see (Y page 168).
Hill start assist Hill start assist helps you when pulling away
forwards or in reverse on an uphill gradient. It
holds the vehicle for a short time after you
have removed your foot from the brake pedal.
This gives you enough time to move your foot from the brake pedal to the accelerator pedal and depress it before the vehicle begins to
roll. G
WARNING
After a short time, hill start assist will no lon-
ger brake your vehicle and it could roll away.
There is a risk of an accident and injury.
Therefore, quickly move your foot from the
brake pedal to the accelerator pedal. Never
leave the vehicle when it is held by hill start
assist.
X Remove your foot from the brake pedal.
The vehicle is then held for about a second.
X Pull away.
Hill start assist is not active if: R you are pulling away on a level road or a
downhill gradient.
R on vehicles with automatic transmission,
the transmission is in position N.
R the electric parking brake is applied.
R ESP ®
is malfunctioning.
Further information on holding the vehicle
stationary on uphill gradients (Y page 158). Driving
149Driving an d parking Z
Page 159 of 373
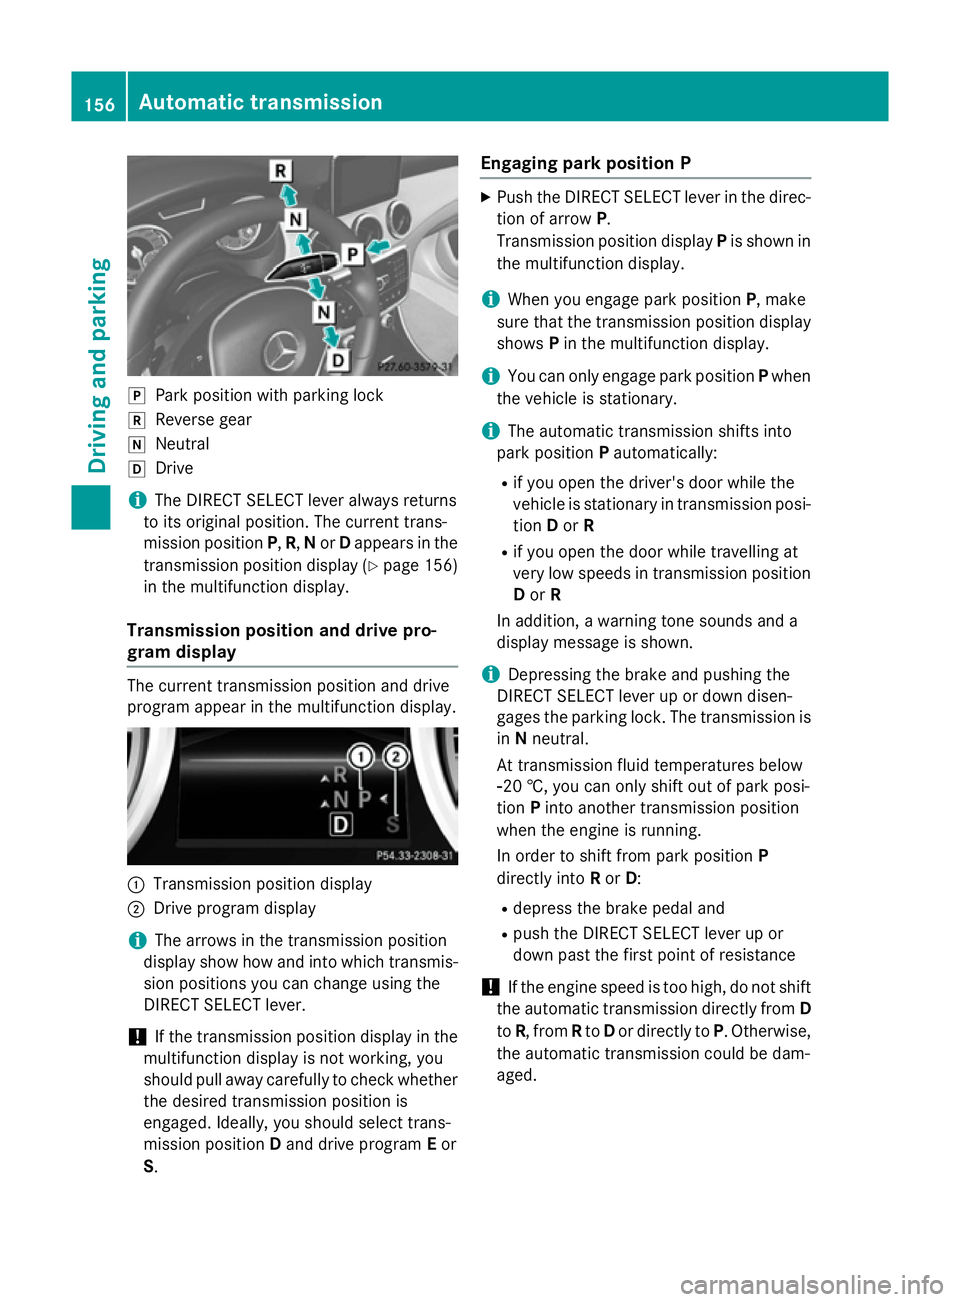
j
Park position with parking lock
k Reverse gear
i Neutral
h Drive
i The DIRECT SELECT lever always returns
to its original position. The current trans-
mission position P,R, Nor Dappears in the
transmission position display (Y page 156)
in the multifunction display.
Transmission position and drive pro-
gram display The current transmission position and drive
program appear in the multifunction display.
:
Transmission position display
; Drive program display
i The arrows in the transmission position
display show how and into which transmis-
sion positions you can change using the
DIRECT SELECT lever.
! If the transmission position display in the
multifunction display is not working, you
should pull away carefully to check whether the desired transmission position is
engaged. Ideally, you should select trans-
mission position Dand drive program Eor
S. Engaging park position P X
Push the DIRECT SELECT lever in the direc-
tion of arrow P.
Transmission position display Pis shown in
the multifunction display.
i When you engage park position
P, make
sure that the transmission position display shows Pin the multifunction display.
i You can only engage park position
Pwhen
the vehicle is stationary.
i The automatic transmission shifts into
park position Pautomatically:
R if you open the driver's door while the
vehicle is stationary in transmission posi-
tion Dor R
R if you open the door while travelling at
very low speeds in transmission position
D or R
In addition, a warning tone sounds and a
display message is shown.
i Depressing the brake and pushing the
DIRECT SELECT lever up or down disen-
gages the parking lock. The transmission is
in Nneutral.
At transmission fluid temperatures below
Ò20 †, you can only shift out of park posi-
tion Pinto another transmission position
when the engine is running.
In order to shift from park position P
directly into Ror D:
R depress the brake pedal and
R push the DIRECT SELECT lever up or
down past the first point of resistance
! If the engine speed is too high, do not shift
the automatic transmission directly from D
to R, from Rto Dor directly to P. Otherwise,
the automatic transmission could be dam-
aged. 156
Automatic transmissionDriving and parking
Page 171 of 373
AMG vehicles:
X Apply the electric parking brake.
X Press button :.
X Turn the key to position 0in the ignition
lock and remove it.
The immobiliser is activated.
i If you switch the engine off with the trans-
mission in position Ror D, the automatic
transmission shifts to Nautomatically.
If you then open one of the front doors or
remove the key from the ignition, the auto-
matic transmission shifts to P.
If you shift the automatic transmission to N
before switching off the engine, the auto-
matic transmission remains in Neven if a
door is opened. Electric parking brake
General notes G
WARNING
If you leave children unattended in the vehi-
cle, they may be able to set the vehicle in
motion if, for example, they:
R release the parking brake
R shift the automatic transmission out of park
position Por shift manual transmission into
neutral
R start the engine
In addition, they may operate vehicle equip-
ment and become trapped. There is a risk of
an accident and injury.
When leaving the vehicle, always take the key with you and lock the vehicle. Never leave
children unattended in the vehicle. The function of the electric parking brake is
dependent on the on-board voltage. If the on-
board voltage is low or if there is a malfunc-
tion in the system, it may not be possible to
apply the released parking brake.
X If this is the case, only park the vehicle on
level ground and secure it to prevent it from
rolling away.
X Vehicles with automatic transmission:
shift the automatic transmission to posi-
tion P.
X Vehicles with manual transmission:
engage first gear.
It may not be possible to release an applied
parking brake if the on-board voltage is low or if there is a malfunction in the system. Con-
tact a qualified specialist workshop.
i The electric parking brake carries out a
function check at regular intervals when
the engine is switched off. Noises that
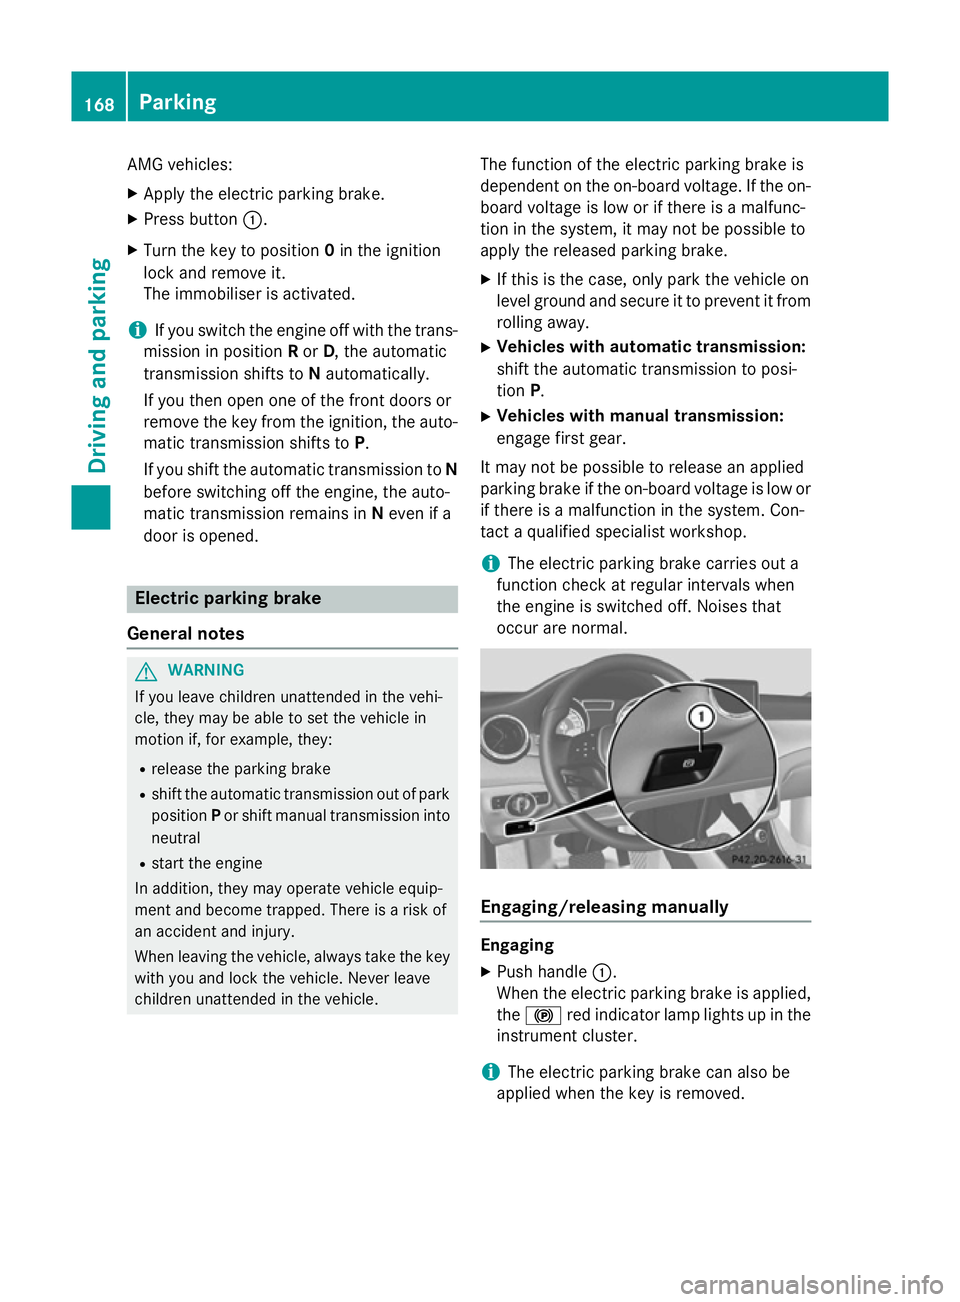
occur are normal. Engaging/releasing manually
Engaging
X Push handle :.
When the electric parking brake is applied, the ! red indicator lamp lights up in the
instrument cluster.
i The electric parking brake can also be
applied when the key is removed. 168
ParkingDriving an
d parking