2013 MERCEDES-BENZ CLA COUPE brake light
[x] Cancel search: brake lightPage 73 of 373
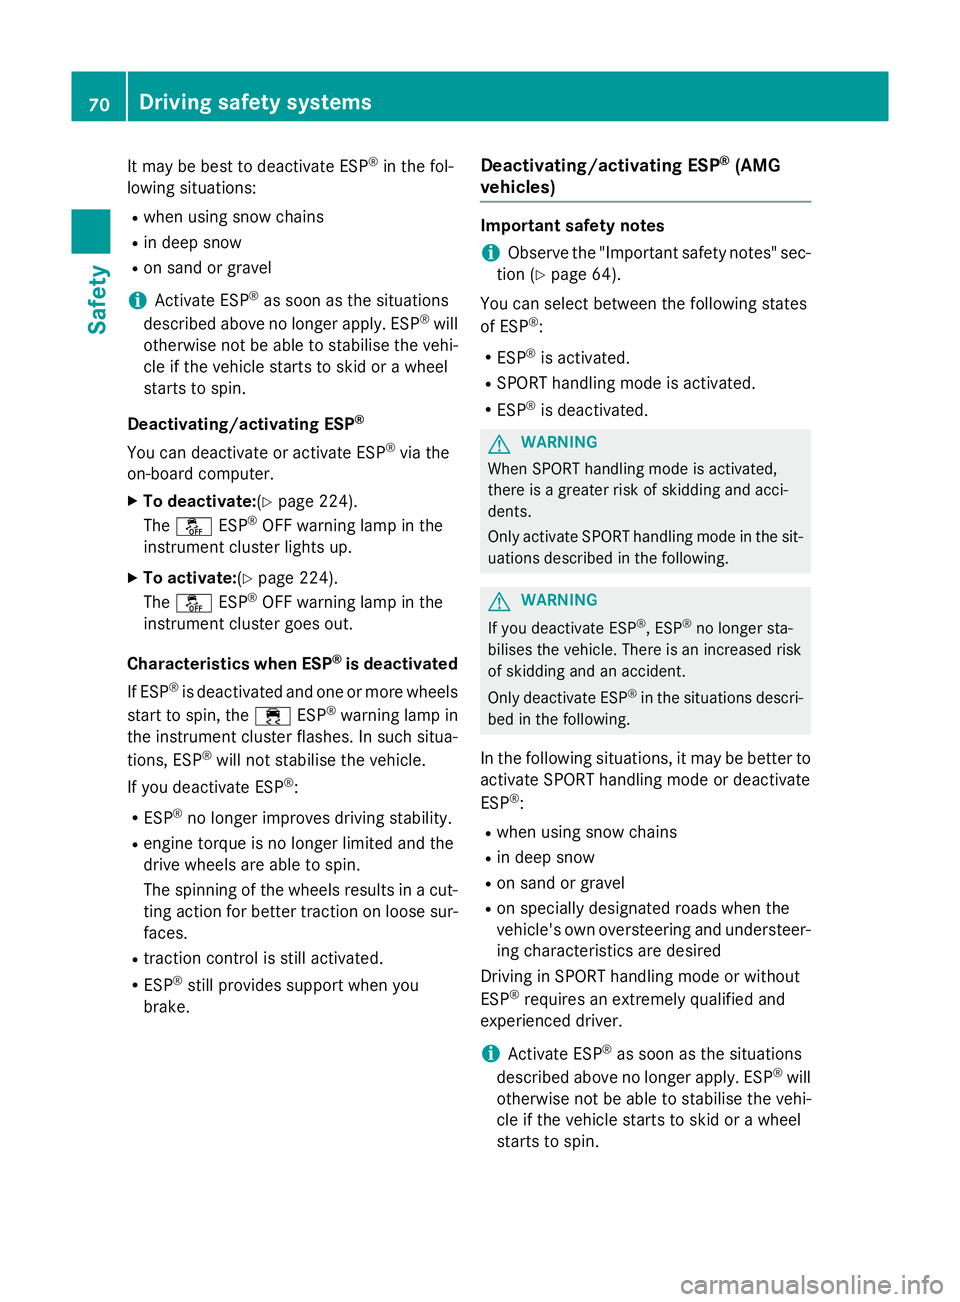
It may be best to deactivate ESP
®
in the fol-
lowing situations:
R when using snow chains
R in deep snow
R on sand or gravel
i Activate ESP ®
as soon as the situations
described above no longer apply. ESP ®
will
otherwise not be able to stabilise the vehi-
cle if the vehicle starts to skid or a wheel
starts to spin.
Deactivating/activating ESP ®
You can deactivate or activate ESP ®
via the
on-board computer.
X To deactivate: (Ypage 224).
The å ESP®
OFF warning lamp in the
instrument cluster lights up.
X To activate: (Ypage 224).
The å ESP®
OFF warning lamp in the
instrument cluster goes out.
Characteristics when ESP ®
is deactivated
If ESP ®
is deactivated and one or more wheels
start to spin, the ÷ESP®
warning lamp in
the instrument cluster flashes. In such situa-
tions, ESP ®
will not stabilise the vehicle.
If you deactivate ESP ®
:
R ESP ®
no longer improves driving stability.
R engine torque is no longer limited and the
drive wheels are able to spin.
The spinning of the wheels results in a cut-
ting action for better traction on loose sur-faces.
R traction control is still activated.
R ESP ®
still provides support when you
brake. Deactivating/activating ESP
®
(AMG
vehicles) Important safety notes
i Observe the "Important safety notes" sec-
tion (Y page 64).
You can select between the following states
of ESP ®
:
R ESP ®
is activated.
R SPORT handling mode is activated.
R ESP ®
is deactivated. G
WARNING
When SPORT handling mode is activated,
there is a greater risk of skidding and acci-
dents.
Only activate SPORT handling mode in the sit- uations described in the following. G
WARNING
If you deactivate ESP ®
, ESP ®
no longer sta-
bilises the vehicle. There is an increased risk
of skidding and an accident.
Only deactivate ESP ®
in the situations descri-
bed in the following.
In the following situations, it may be better to activate SPORT handling mode or deactivate
ESP ®
:
R when using snow chains
R in deep snow
R on sand or gravel
R on specially designated roads when the
vehicle's own oversteering and understeer-
ing characteristics are desired
Driving in SPORT handling mode or without
ESP ®
requires an extremely qualified and
experienced driver.
i Activate ESP ®
as soon as the situations
described above no longer apply. ESP ®
will
otherwise not be able to stabilise the vehi-
cle if the vehicle starts to skid or a wheel
starts to spin. 70
Driving safety systemsSafety
Page 74 of 373
Deactivating/activating ESP
®X
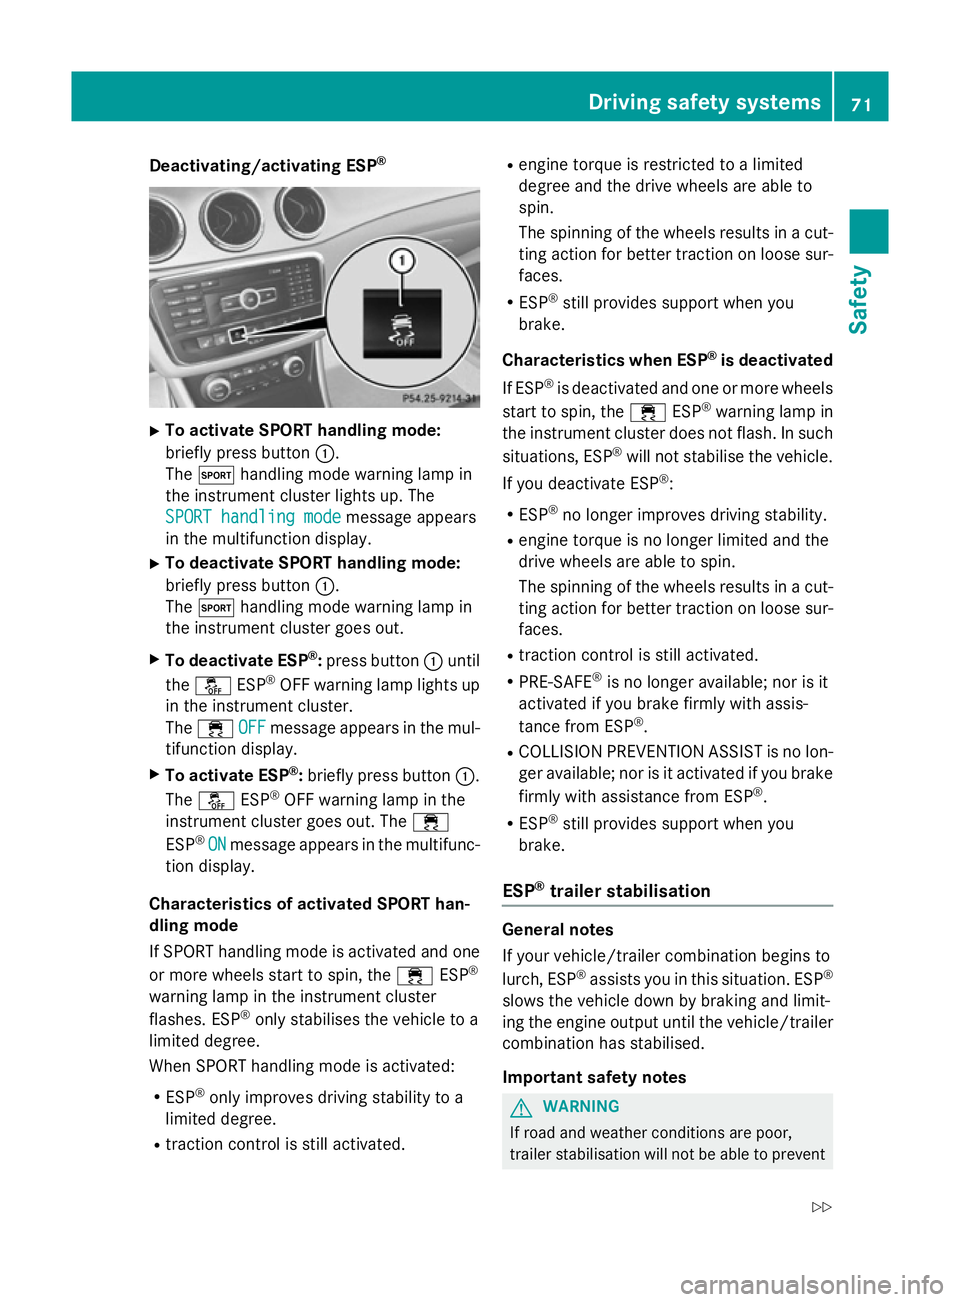
To activate SPORT handling mode:
briefly press button :.
The M handling mode warning lamp in
the instrument cluster lights up. The
SPORT handling mode
SPORT handling mode message appears
in the multifunction display.
X To deactivate SPORT handling mode:
briefly press button :.
The M handling mode warning lamp in
the instrument cluster goes out.
X To deactivate ESP ®
:press button :until
the å ESP®
OFF warning lamp lights up
in the instrument cluster.
The ÷ OFF
OFF message appears in the mul-
tifunction display.
X To activate ESP ®
:briefly press button :.
The å ESP®
OFF warning lamp in the
instrument cluster goes out. The ÷
ESP ®
ON
ON message appears in the multifunc-
tion display.
Characteristics of activated SPORT han-
dling mode
If SPORT handling mode is activated and one or more wheels start to spin, the ÷ESP®
warning lamp in the instrument cluster
flashes. ESP ®
only stabilises the vehicle to a
limited degree.
When SPORT handling mode is activated:
R ESP ®
only improves driving stability to a
limited degree.
R traction control is still activated. R
engine torque is restricted to a limited
degree and the drive wheels are able to
spin.
The spinning of the wheels results in a cut-
ting action for better traction on loose sur- faces.
R ESP ®
still provides support when you
brake.
Characteristics when ESP ®
is deactivated
If ESP ®
is deactivated and one or more wheels
start to spin, the ÷ESP®
warning lamp in
the instrument cluster does not flash. In such
situations, ESP ®
will not stabilise the vehicle.
If you deactivate ESP ®
:
R ESP ®
no longer improves driving stability.
R engine torque is no longer limited and the
drive wheels are able to spin.
The spinning of the wheels results in a cut-
ting action for better traction on loose sur- faces.
R traction control is still activated.
R PRE-SAFE ®
is no longer available; nor is it
activated if you brake firmly with assis-
tance from ESP ®
.
R COLLISION PREVENTION ASSIST is no lon-
ger available; nor is it activated if you brake
firmly with assistance from ESP ®
.
R ESP ®
still provides support when you
brake.
ESP ®
trailer stabilisation General notes
If your vehicle/trailer combination begins to
lurch, ESP
®
assists you in this situation. ESP ®
slows the vehicle down by braking and limit-
ing the engine output until the vehicle/trailer
combination has stabilised.
Important safety notes G
WARNING
If road and weather conditions are poor,
trailer stabilisation will not be able to prevent Driving safety syste
ms
71Safety
Z
Page 86 of 373
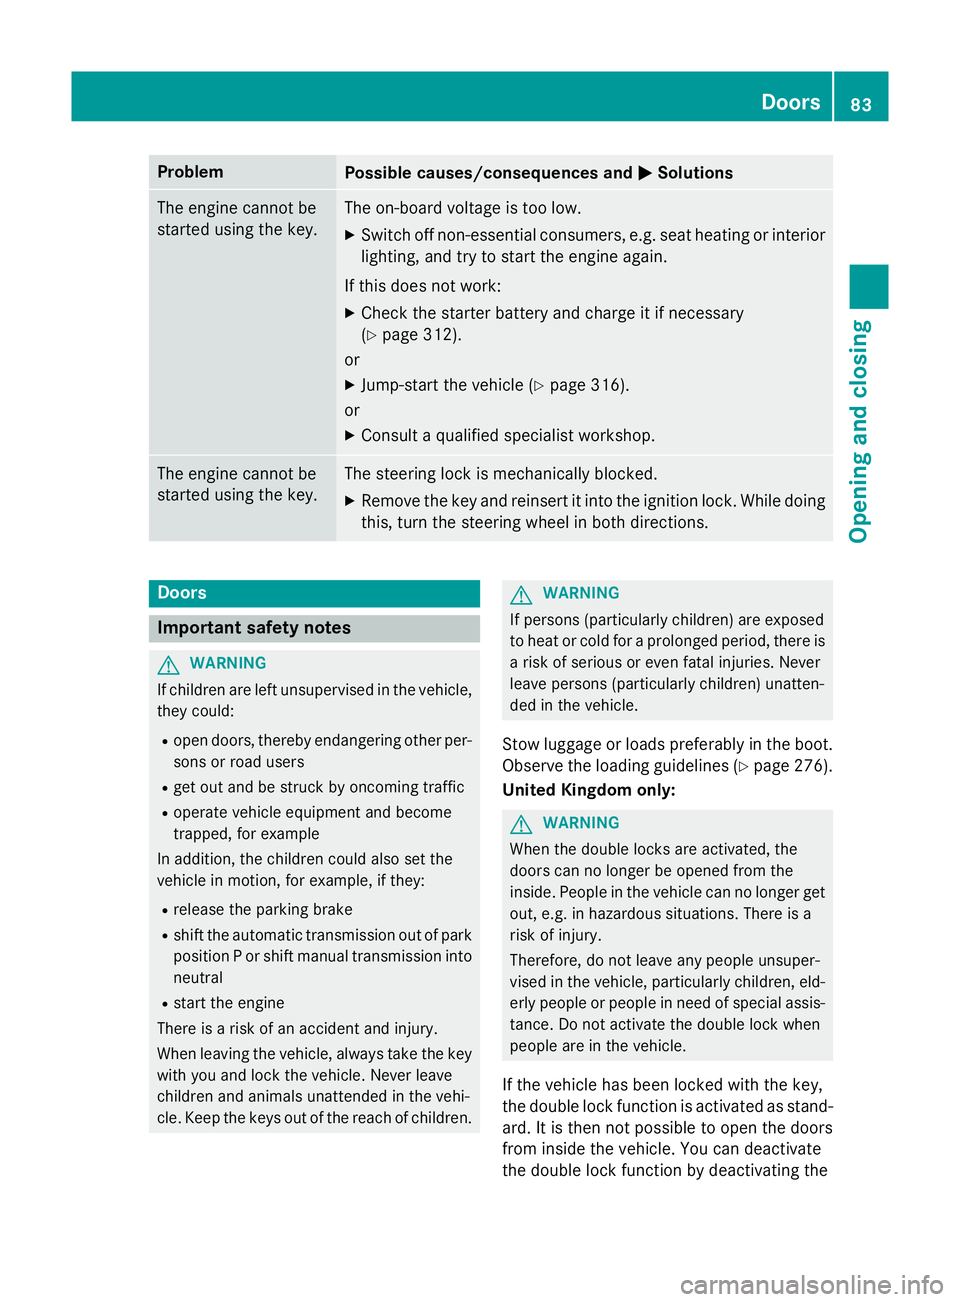
Problem
Possible causes/consequences and
M
MSolutions The engine cannot be
started using the key. The on-board voltage is too low.
X Switch off non-essential consumers, e.g. seat heating or interior
lighting, and try to start the engine again.
If this does not work:
X Check the starter battery and charge it if necessary
(Y page 312).
or
X Jump-start the vehicle (Y page 316).
or
X Consult a qualified specialist workshop. The engine cannot be
started using the key. The steering lock is mechanically blocked.
X Remove the key and reinsert it into the ignition lock. While doing
this, turn the steering wheel in both directions. Doors
Important safety notes
G
WARNING
If children are left unsupervised in the vehicle, they could:
R open doors, thereby endangering other per-
sons or road users
R get out and be struck by oncoming traffic
R operate vehicle equipment and become
trapped, for example
In addition, the children could also set the
vehicle in motion, for example, if they:
R release the parking brake
R shift the automatic transmission out of park
position P or shift manual transmission into
neutral
R start the engine
There is a risk of an accident and injury.
When leaving the vehicle, always take the key with you and lock the vehicle. Never leave
children and animals unattended in the vehi-
cle. Keep the keys out of the reach of children. G
WARNING
If persons (particularly children) are exposed
to heat or cold for a prolonged period, there is a risk of serious or even fatal injuries. Never
leave persons (particularly children) unatten-
ded in the vehicle.
Stow luggage or loads preferably in the boot. Observe the loading guidelines (Y page 276).
United Kingdom only: G
WARNING
When the double locks are activated, the
doors can no longer be opened from the
inside. People in the vehicle can no longer get out, e.g. in hazardous situations. There is a
risk of injury.
Therefore, do not leave any people unsuper-
vised in the vehicle, particularly children, eld-
erly people or people in need of special assis-
tance. Do not activate the double lock when
people are in the vehicle.
If the vehicle has been locked with the key,
the double lock function is activated as stand-
ard. It is then not possible to open the doors
from inside the vehicle. You can deactivate
the double lock function by deactivating the Doors
83Opening and closing Z
Page 115 of 373
X
Press the Nbutton.
The green Nindicator lamp in the instru-
ment cluster lights up.
X To switch off the front foglamps: press
the N button.
The green Nindicator lamp in the instru-
ment cluster goes out.
Only vehicles with front foglamps are equip-
ped with the "Foglamp" function; for how to
operate the foglamps on vehicles with the
Intelligent Light System (Y page 115).
Rear foglamp
The rear foglamp improves the visibility of
your vehicle in heavy fog for the following
traffic. Please observe the country-specific
laws on the use of rear foglamps.
X To switch on the rear foglamp: turn the
key in the ignition lock to position 2or start
the engine.
X Turn the light switch to LorÃ.
X Press the Rbutton.
The yellow Rindicator lamp in the
instrument cluster lights up.
X To switch off the rear foglamp: press the
R button.
The yellow Rindicator lamp in the
instrument cluster goes out.
i When the rear foglamp is switched on, the
centre brake lamp in the tail lamp switches off due to a legal requirement.
Side lamps ! If the battery has been excessively dis-
charged, the side lamps or parking lamps
are automatically switched off to enable
the next engine start. Always park your
vehicle safely and sufficiently lit according
to legal standards. Avoid the continuous
use of the Tside lamps for several
hours. If possible, switch on the Xright
or the Wleft parking lamp.
X To switch on: turn the light switch to T.
The green Tindicator lamp in the instru-
ment cluster lights up. Parking lamps
Switching on the parking lamps ensures that
the corresponding side of the vehicle is illu-
minated.
X To switch on the parking lamps: the key
is not in the ignition lock or it is in posi-
tion 0.
X Turn the light switch to W(left-hand side
of the vehicle) or X(right-hand side of
the vehicle).
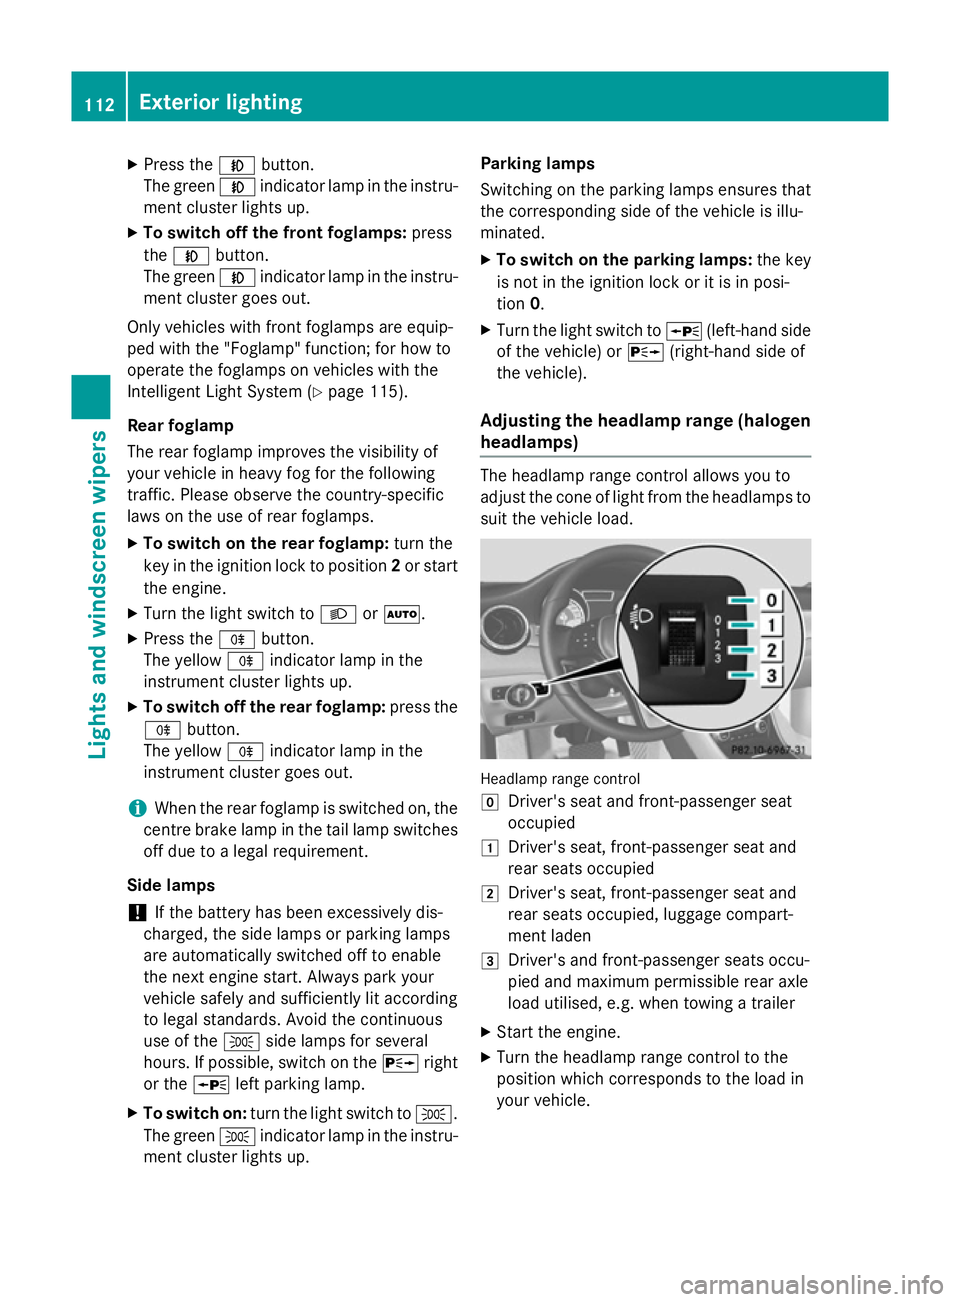
Adjusting the headlamp range (halogen headlamps) The headlamp range control allows you to
adjust the cone of light from the headlamps to
suit the vehicle load. Headlamp range control
g
Driver's seat and front-passenger seat
occupied
1 Driver's seat, front-passenger seat and
rear seats occupied
2 Driver's seat, front-passenger seat and
rear seats occupied, luggage compart-
ment laden
3 Driver's and front-passenger seats occu-
pied and maximum permissible rear axle
load utilised, e.g. when towing a trailer
X Start the engine.
X Turn the headlamp range control to the
position which corresponds to the load in
your vehicle. 112
Exterior lightingLights and windscreen wipers
Page 116 of 373
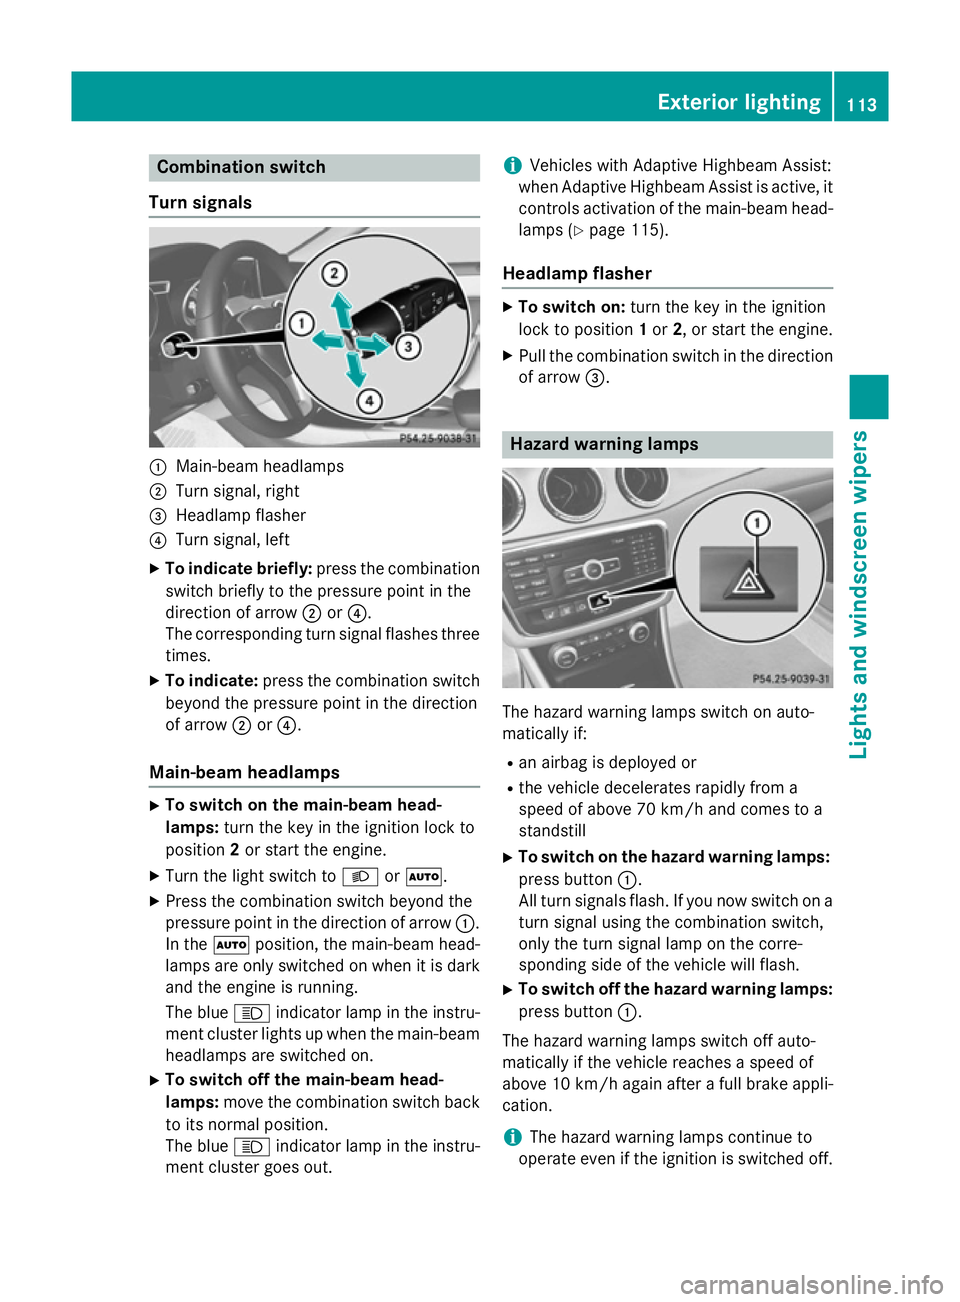
Combination switch
Turn signals :
Main-beam headlamps
; Turn signal, right
= Headlamp flasher
? Turn signal, left
X To indicate briefly: press the combination
switch briefly to the pressure point in the
direction of arrow ;or?.
The corresponding turn signal flashes three
times.
X To indicate: press the combination switch
beyond the pressure point in the direction
of arrow ;or?.
Main-beam headlamps X
To switch on the main-beam head-
lamps: turn the key in the ignition lock to
position 2or start the engine.
X Turn the light switch to LorÃ.
X Press the combination switch beyond the
pressure point in the direction of arrow :.
In the Ãposition, the main-beam head-
lamps are only switched on when it is dark
and the engine is running.
The blue Kindicator lamp in the instru-
ment cluster lights up when the main-beam headlamps are switched on.
X To switch off the main-beam head-
lamps: move the combination switch back
to its normal position.
The blue Kindicator lamp in the instru-
ment cluster goes out. i
Vehicles with Adaptive Highbeam Assist:
when Adaptive Highbeam Assist is active, it controls activation of the main-beam head-lamps (Y page 115).
Headlamp flasher X
To switch on: turn the key in the ignition
lock to position 1or 2, or start the engine.
X Pull the combination switch in the direction
of arrow =. Hazard warning lamps
The hazard warning lamps switch on auto-
matically if:
R
an airbag is deployed or
R the vehicle decelerates rapidly from a
speed of above 70 km/h and comes to a
standstill
X To switch on the hazard warning lamps:
press button :.
All turn signals flash. If you now switch on a turn signal using the combination switch,
only the turn signal lamp on the corre-
sponding side of the vehicle will flash.
X To switch off the hazard warning lamps:
press button :.
The hazard warning lamps switch off auto-
matically if the vehicle reaches a speed of
above 10 km/h again after a full brake appli- cation.
i The hazard warning lamps continue to
operate even if the ignition is switched off. Exterior lighting
113Lights and windscreen wipers Z
Page 122 of 373
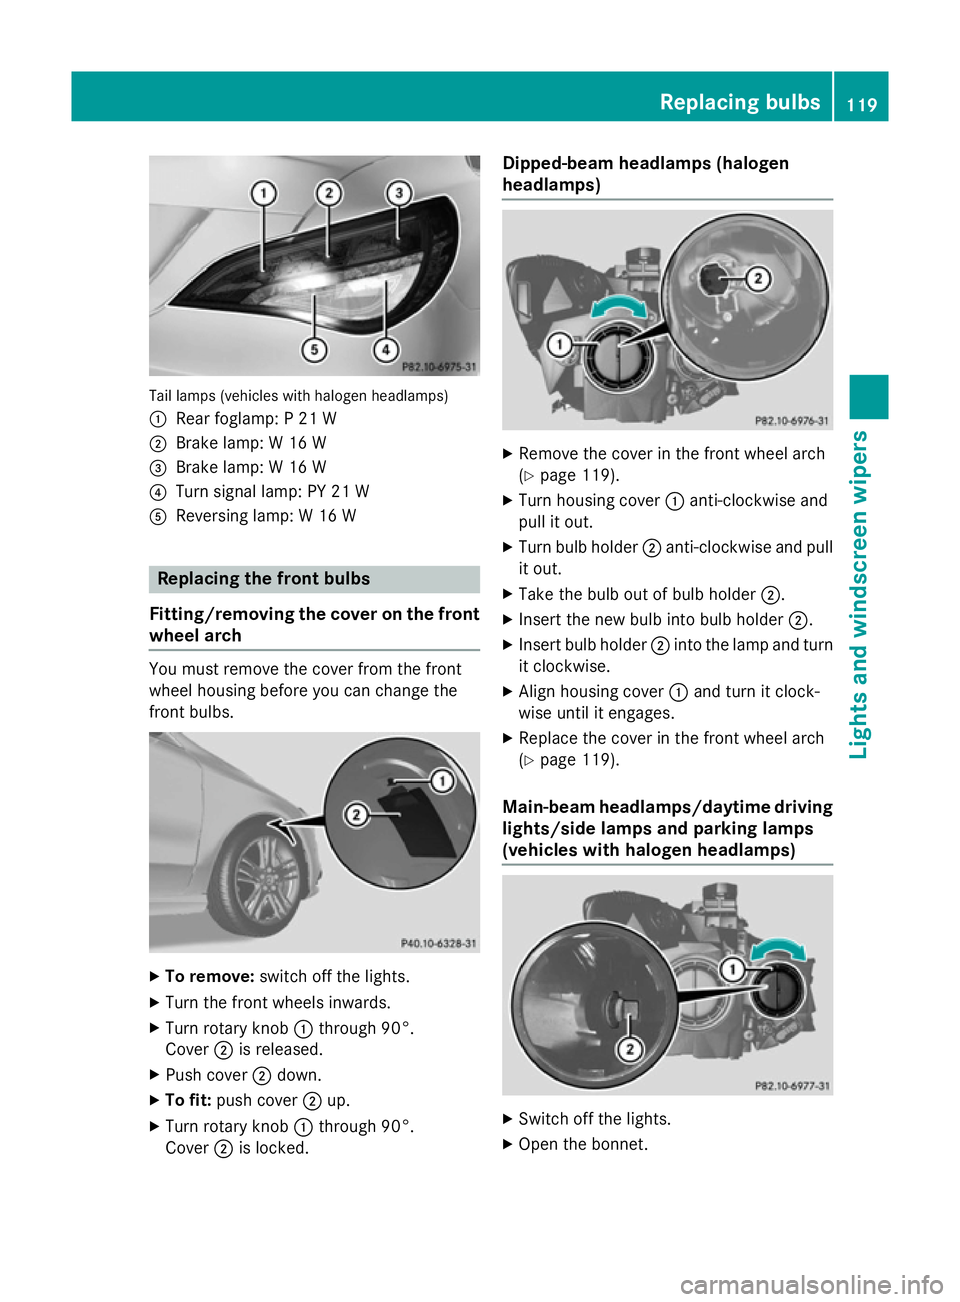
Tail lamps (vehicles with halogen headlamps)
: Rear foglamp: P 21 W
; Brake lamp: W 16 W
= Brake lamp: W 16 W
? Turn signal lamp: PY 21 W
A Reversing lamp: W 16 W Replacing the front bulbs
Fitting/removing the cover on the front wheel arch You must remove the cover from the front
wheel housing before you can change the
front bulbs. X
To remove: switch off the lights.
X Turn the front wheels inwards.
X Turn rotary knob :through 90°.
Cover ;is released.
X Push cover ;down.
X To fit: push cover ;up.
X Turn rotary knob :through 90°.
Cover ;is locked. Dipped-beam headlamps (halogen
headlamps) X
Remove the cover in the front wheel arch
(Y page 119).
X Turn housing cover :anti-clockwise and
pull it out.
X Turn bulb holder ;anti-clockwise and pull
it out.
X Take the bulb out of bulb holder ;.
X Insert the new bulb into bulb holder ;.
X Insert bulb holder ;into the lamp and turn
it clockwise.
X Align housing cover :and turn it clock-
wise until it engages.
X Replace the cover in the front wheel arch
(Y page 119).
Main-beam headlamps/daytime driving lights/side lamps and parking lamps
(vehicles with halogen headlamps) X
Switch off the lights.
X Open the bonnet. Replacing bulbs
119Lights and windscreen wipers Z
Page 124 of 373
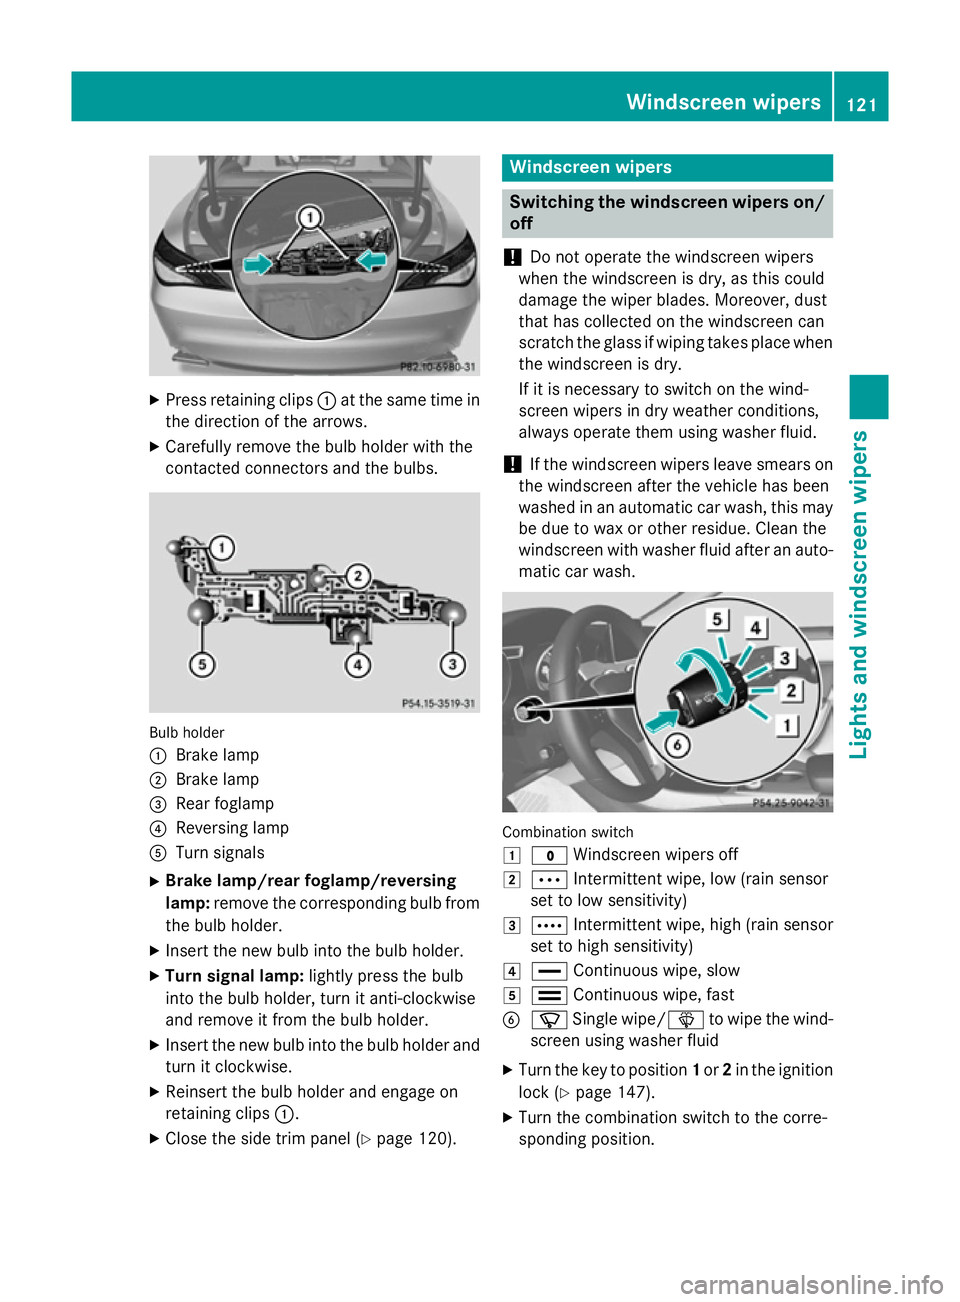
X
Press retaining clips :at the same time in
the direction of the arrows.
X Carefully remove the bulb holder with the
contacted connectors and the bulbs. Bulb holder
:
Brake lamp
; Brake lamp
= Rear foglamp
? Reversing lamp
A Turn signals
X Brake lamp/rear foglamp/reversing
lamp: remove the corresponding bulb from
the bulb holder.
X Insert the new bulb into the bulb holder.
X Turn signal lamp: lightly press the bulb
into the bulb holder, turn it anti-clockwise
and remove it from the bulb holder.
X Insert the new bulb into the bulb holder and
turn it clockwise.
X Reinsert the bulb holder and engage on
retaining clips :.
X Close the side trim panel (Y page 120). Windscreen wipers
Switching the windscreen wipers on/
off
! Do not operate the windscreen wipers
when the windscreen is dry, as this could
damage the wiper blades. Moreover, dust
that has collected on the windscreen can
scratch the glass if wiping takes place when the windscreen is dry.
If it is necessary to switch on the wind-
screen wipers in dry weather conditions,
always operate them using washer fluid.
! If the windscreen wipers leave smears on
the windscreen after the vehicle has been
washed in an automatic car wash, this may
be due to wax or other residue. Clean the
windscreen with washer fluid after an auto- matic car wash. Combination switch
1
$ Windscreen wipers off
2 Ä Intermittent wipe, low (rain sensor
set to low sensitivity)
3 Å Intermittent wipe, high (rain sensor
set to high sensitivity)
4 ° Continuous wipe, slow
5 ¯ Continuous wipe, fast
B í Single wipe/ îto wipe the wind-
screen using washer fluid
X Turn the key to position 1or 2in the ignition
lock (Y page 147).
X Turn the combination switch to the corre-
sponding position. Windscreen wipers
121Lights and windscreen wipers Z
Page 151 of 373
Carry out regular checks to make sure that
there are no flammable foreign materials in
the engine compartment or in the exhaust
system.
! Do not depress the accelerator when
starting the engine.
i Vehicles with a petrol engine:
the
engine runs at a higher engine speed during the cold start procedure so that the cata-
lytic converter can reach operating tem-
perature more quickly. The sound of the
engine may change as a result.
Manual transmission X
Depress the brake pedal and keep it
depressed.
X Depress the clutch pedal fully.
X Shift to neutral N.
i You can only start the engine when the
clutch pedal is fully depressed.
Automatic transmission X
Shift the transmission to position P.
Transmission position display Pis shown in
the multifunction display.
i When the transmission is in position
N,
you can also start the engine with the brake pedal depressed.
Starting procedure X
To start a petrol engine: turn the key to
position 3in the ignition lock (Y page 147)
and release it as soon as the engine is run-
ning.
X To start a diesel engine: turn the key to
position 2(Y page 147) in the ignition lock.
The % preglow indicator lamp in the
instrument cluster lights up.
X When the %preglow indicator lamp
goes out, turn the key to position
3 (Y page 147) and release it as soon as the
engine is running. i
You can start the engine without preglow
if the engine is warm. Pulling away
Manual transmission !
Change gear in good time and avoid spin-
ning the wheels. Otherwise, you could dam- age the vehicle.
X Depress the brake pedal and keep it
depressed.
X Depress the clutch pedal fully.
X Shift to either first gear or reverse gear R.
X Release the electric parking brake
(Y page 168).
X Release the brake pedal.
X Slowly release the clutch pedal and gently
depress the accelerator pedal.
i Follow the shift recommendations in the
multifunction display for an economical
driving style (Y page 155).
i The vehicle locks centrally once you have
pulled away. The locking knobs in the doors
drop down.
You can open the doors from the inside at
any time.
You can also deactivate the automatic lock- ing feature (Y page 229).
Automatic transmission i
It is only possible to shift the transmission
from position Pto the desired position if
you depress the brake pedal. Only then can
the parking lock be deactivated. If you do
not depress the brake pedal, the DIRECT
SELECT lever can still be moved but the
parking lock remains engaged.
i At transmission fluid temperatures below
Ò20 †, you can only shift out of position P
into another transmission position when
the engine is running. 148
DrivingDriving and parking