Page 327 of 628
314
IS300h_EE(OM53B95E)
5-1. Basic Operations
Lexus Display Audio
System ............................ 316
Steering wheel audio
switches .......................... 322
USB/AUX ports................ 323
5-2. Setup
Setup menu ....................... 324
General settings ................ 325
Voice settings .................... 328
Display settings................. 329
5-3. Using the audio system
Selecting the audio
source.............................. 330
Optimal use of the
audio system ................... 331
Audio settings ................... 332
Audio menu screen
operation ......................... 336
5-4. Using the radio
Radio operation................. 339
Page 330 of 628
3175-1. Basic Operations
5
Lexus Display Audio system
IS300h_EE(OM53B95E)
“MENU” screen
To display the “MENU” screen, press the button on the controller
unit.
ButtonFunction
“Audio”Display the audio top screen
(P. 339, 341, 348, 351, 356, 365)
“Climate”Automatic air conditioning system (P. 398)
“Telephone”Display the phone top screen(P. 379)
“Car” Consumption information (P. 122)
“Info”Display the “Information” screen (P. 390)
“Setup”Setup menu (P. 324)
“Display”Display settings (P. 329)
Page 331 of 628
3185-1. Basic Operations
IS300h_EE(OM53B95E)
By using the Lexus Display Audio controller, you can control the audio
system, hands-free system, etc.
Display the “Source” screen or
audio top screen (P. 330)
Display the “MENU” screen
(P. 317)
Display the previous screen
Turn or move the controller to
select a function and number.
Move the controller to display
the left or right side of screen.
Push the controller to enter the selected function and number.
Using the Lexus Display Audio controller
Select: Turn or move the con-
troller.
Enter: Push the controller.
Lexus Display Audio controller
1
2
3
4
1
2
Page 337 of 628
324
IS300h_EE(OM53B95E)5-2. Setup
Go to “Setup”: “Setup”
Change the settings for operation
sounds, screen animation, etc.
(P. 325)
Adjust the settings for voice
guidance volume. (P. 328)
Change the settings for register-
ing, removing, connecting and
disconnecting Bluetooth
®
devices.
(P. 358)
Change the settings for FM radio, iPod, etc. (P. 332)
Change the settings for vehicle customization. (P. 575)
Change the settings for phone sound, phonebook, etc. (P. 379)
Setup menu
The Display Audio system can be adjusted to the desired settings.
Display “Setup” screen
1
2
3
4
5
6
Page 342 of 628

3295-2. Setup
5
Lexus Display Audio system
IS300h_EE(OM53B95E)
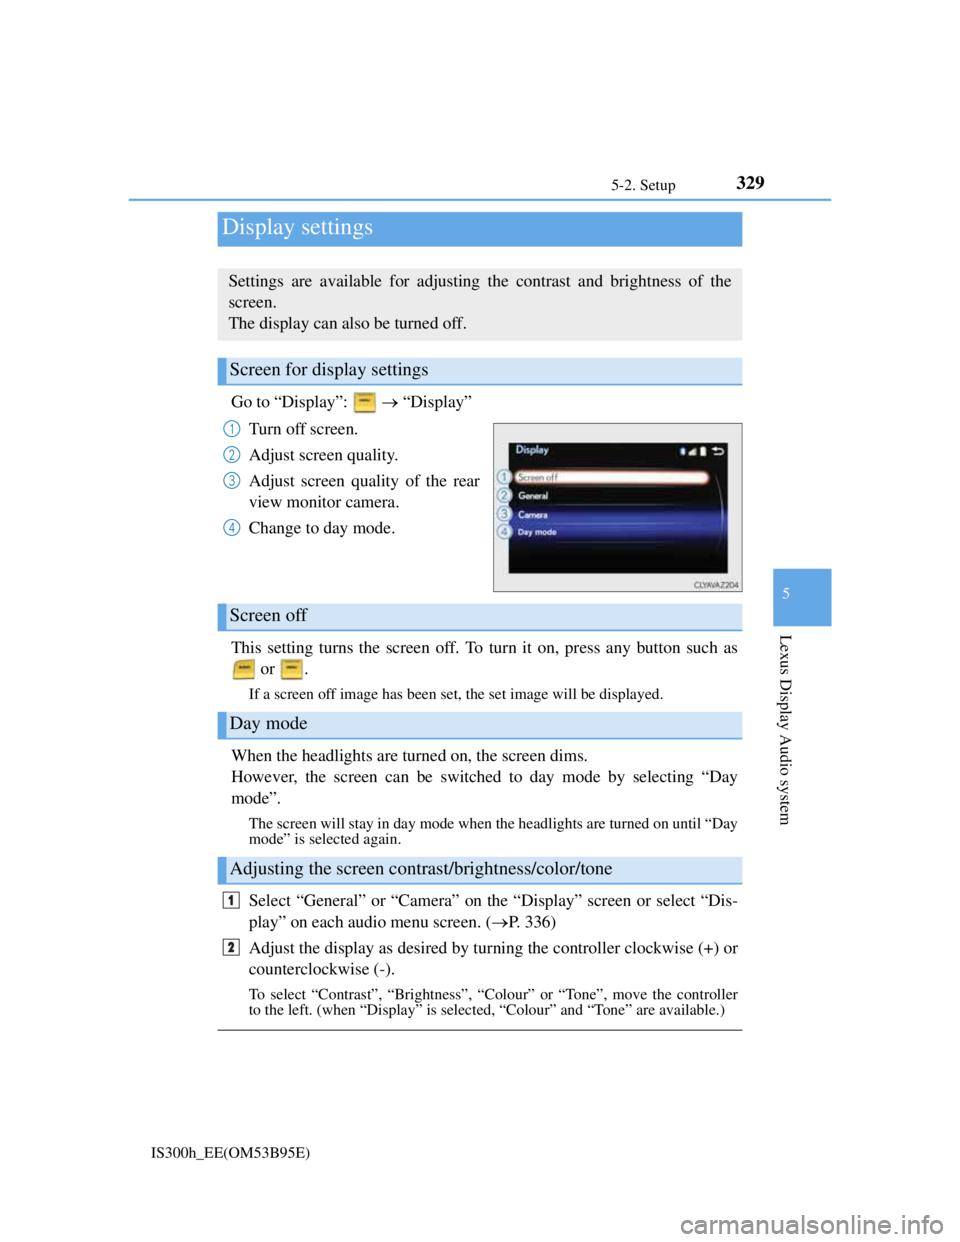
Go to “Display”: “Display”
Turn off screen.
Adjust screen quality.
Adjust screen quality of the rear
view monitor camera.
Change to day mode.
This setting turns the screen off. To turn it on, press any button such as
or .
If a screen off image has been set, the set image will be displayed.
When the headlights are turned on, the screen dims.
However, the screen can be switched to day mode by selecting “Day
mode”.
The screen will stay in day mode when the headlights are turned on until “Day
mode” is selected again.
Select “General” or “Camera” on the “Display” screen or select “Dis-
play” on each audio menu screen. (P. 336)
Adjust the display as desired by turning the controller clockwise (+) or
counterclockwise (-).
To select “Contrast”, “Brightness”, “Colour” or “Tone”, move the controller
to the left. (when “Display” is selected, “Colour” and “Tone” are available.)
Display settings
Settings are available for adjusting the contrast and brightness of the
screen.
The display can also be turned off.
Screen for display settings
1
2
3
4
Screen off
Day mode
Adjusting the screen contrast/brightness/color/tone
1
2
Page 350 of 628
3365-3. Using the audio system
IS300h_EE(OM53B95E)
To display the audio menu screen, move the controller to the left while on
an audio top screen.
FM or AM radio
Seek a station of the nearest
frequency (stops when a sta-
tion is found) (manual mode)
Change FM radio settings
(P. 333)
Change DAB settings (P.
333)
DAB
Adjust the playback offset
time on time shift mode
Cancel time shift operation
Select an ensemble (manual
mode)
Select a service (manual
mode)
Change FM radio settings
(P. 333)
Change DAB settings (P.
333)
Audio menu screen operation
You can change the settings and control functions for each audio source.
Audio menu screen
1
2
3
1
2
3
4
5
6
Page 353 of 628

339
5
Lexus Display Audio system
IS300h_EE(OM53B95E)5-4. Using the radio
Pressing the “RADIO” button displays the radio top screen from any
screen of the selected source.
Menu screen
P. 3 3 6
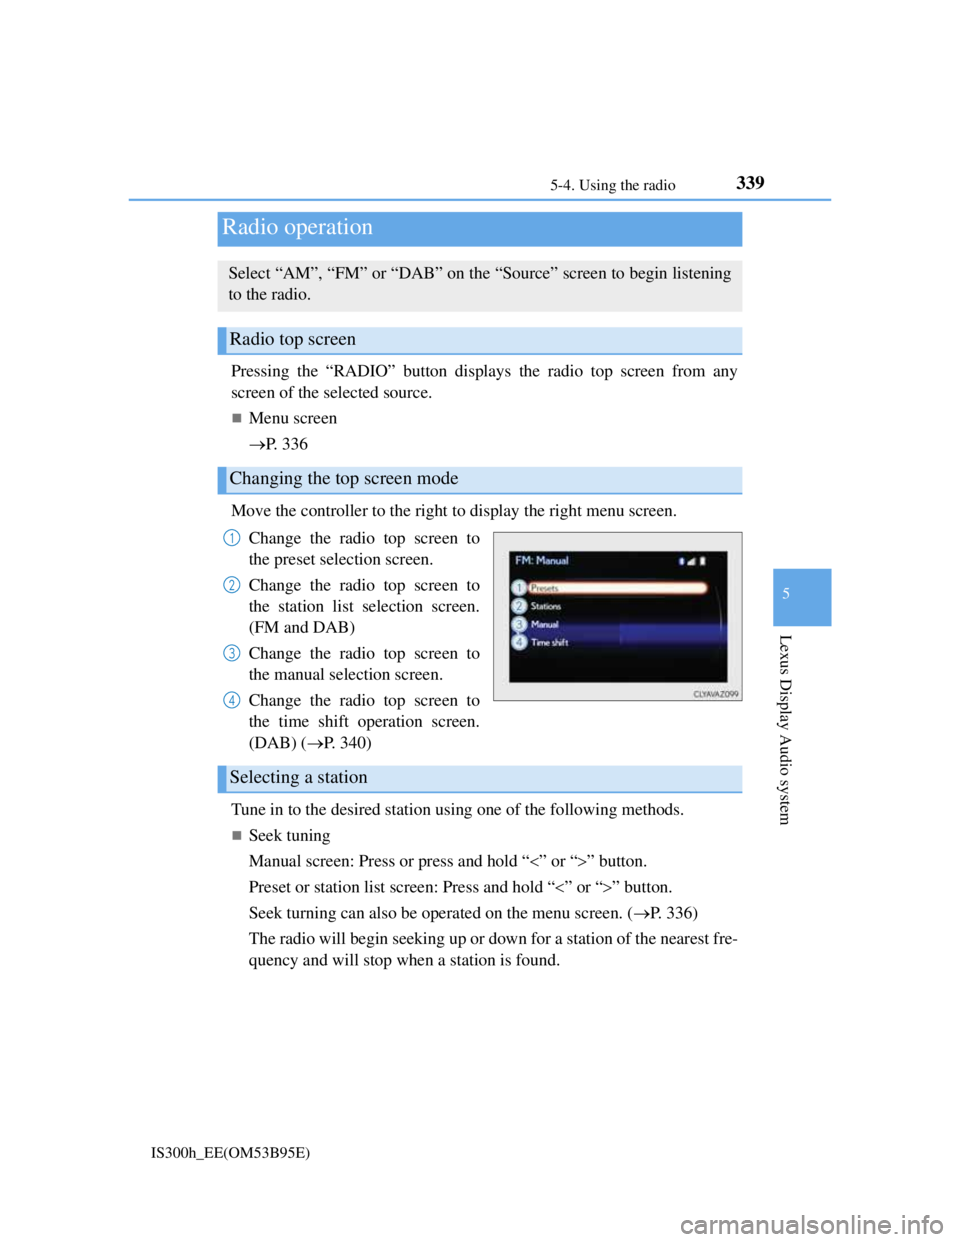
Move the controller to the right to display the right menu screen.
Change the radio top screen to
the preset selection screen.
Change the radio top screen to
the station list selection screen.
(FM and DAB)
Change the radio top screen to
the manual selection screen.
Change the radio top screen to
the time shift operation screen.
(DAB) (P. 340)
Tune in to the desired station using one of the following methods.
Seek tuning
Manual screen: Press or press and hold “” or “” button.
Preset or station list screen: Press and hold “” or “” button.
Seek turning can also be operated on the menu screen. (P. 336)
The radio will begin seeking up or down for a station of the nearest fre-
quency and will stop when a station is found.
Radio operation
Select “AM”, “FM” or “DAB” on the “Source” screen to begin listening
to the radio.
Radio top screen
Changing the top screen mode
1
2
3
4
Selecting a station
Page 354 of 628

3405-4. Using the radio
IS300h_EE(OM53B95E)
Manual tuning (manual screen)
Turn the right side knob (left-hand drive vehicle) or left side knob
(right-hand drive vehicle) on the audio panel or turn the controller.
Station list (preset or station list screen)
Select the desired station by pressing “<” or “>”, turn the right side
knob (left-hand drive vehicle) or left side knob (right-hand drive vehi-
cle) on the audio panel or controller.
Radio stations can be preset.
Search for desired stations.
Turn the controller to select one of the preset stations and then press
the controller until you hear a beep while on the preset selection
screen.
The broadcast you are currently listening to can be re-listened to at any
time.
Move the controller to the right and then select “Time shift”.
Turn the right side knob (left-hand drive vehicle) or left side knob
(right-hand drive vehicle) on the audio panel to set the desired offset.
An offset playback time can also be set on the menu screen. (P. 3 3 6 )
To cancel the time shift operation while in time shift mode, move the control-
ler to the left and select “Time shift off”. If the time shift display is left show-
ing “-0' 00”” for 6 seconds without any operation, the time shift operation will
be canceled.
Reception sensitivity
Maintaining perfect radio reception at all times is difficult due to the continu-
ally changing position of the antenna, differences in signal strength and sur-
rounding objects, such as trains, transmitters, etc.
The radio antenna is mounted inside the rear window. To maintain clear radio
reception, do not attach metallic window tinting or other metallic objects to the
antenna wire mounted inside the rear window.
Traffic announcement operation
When traffic announcement is set to on, “TP” will appear on the screen and the
radio will begin seeking a TP station. If the radio seeks out a TP station, the pro-
gram name will appear on the screen. If a traffic announcement station is
received, the radio will be switched to the traffic information program automati-
cally. When the program ends, the initial operation will resume.
Setting station presets (preset screen)
Time shift operation (DAB)
1
2
1
2