Page 154 of 256
154
4. SETUP
GS450h_300h_350_250_NAVI_OM30D64E_(EE)
13.10.23 11:07
2. VEHICLE SETTINGS
1Press the “MENU” button on the
Remote Touch.
2Select “Setup”.
3Select “Vehicle”.
4Select “Maintenance”.
5Select the desired screen button.
Setting maintenance information (See
page 155.)
Setting dealer (See page 156.)
MAINTENANCE
When the navigation system is
turned on, the “Information” screen
displays when it is time to replace a
part or certain components. (See
page 37.)
Page 157 of 256
157
4. SETUP
GS450h_300h_350_250_NAVI_OM30D64E_(EE)
13.10.23 11:07
3
NAVIGATION SYSTEM
4Select “Set dealer”.
5If the dealer has not been registered,
enter the location of the dealer in the
same way as for a destination search.
(See “DESTINATION SEARCH”
on page 81.)
When “Set dealer” registration is fin-
ished, the “Set dealer” screen will be
displayed.
6Select the screen button to be edited.
No
.Function
Select to enter the name of a deal-
er. (See page 158.)
Select to enter the name of a dealer
member. (See page 158.)
Select to set the location. (See
page 158.)
Select to set the telephone num-
ber. (See page 158.)
Select to delete the dealer infor-
mation displayed on the screen.
Select to set the displayed dealer
as a destination. (See “START-
ING ROUTE GUIDANCE” on
page 102.)
Page 158 of 256
158
4. SETUP
GS450h_300h_350_250_NAVI_OM30D64E_(EE)
13.10.23 11:07
TO EDIT “Dealer” OR “Contact”
1Select “Dealer” or “Contact”.
2Enter the name using the alphanu-
meric keys.
Up to 70 characters can be entered for
“Dealer” and 24 characters for “Con-
tact”.
3Select “OK”.
The previous screen will be displayed.
TO EDIT “Location”
1Select “Location”.
2Select one of the 8 directional screen
buttons to move the cursor to the
desired point on the map.
3Select “OK”.
The previous screen will be displayed.
TO EDIT “Tel. no.” (TELEPHONE
NUMBER)
1Select “Tel. no.”.
2Enter the number using number
keys.
3Select “OK”.
The previous screen will be displayed.
Page 159 of 256

159
4. SETUP
GS450h_300h_350_250_NAVI_OM30D64E_(EE)
13.10.23 11:07
3
NAVIGATION SYSTEM
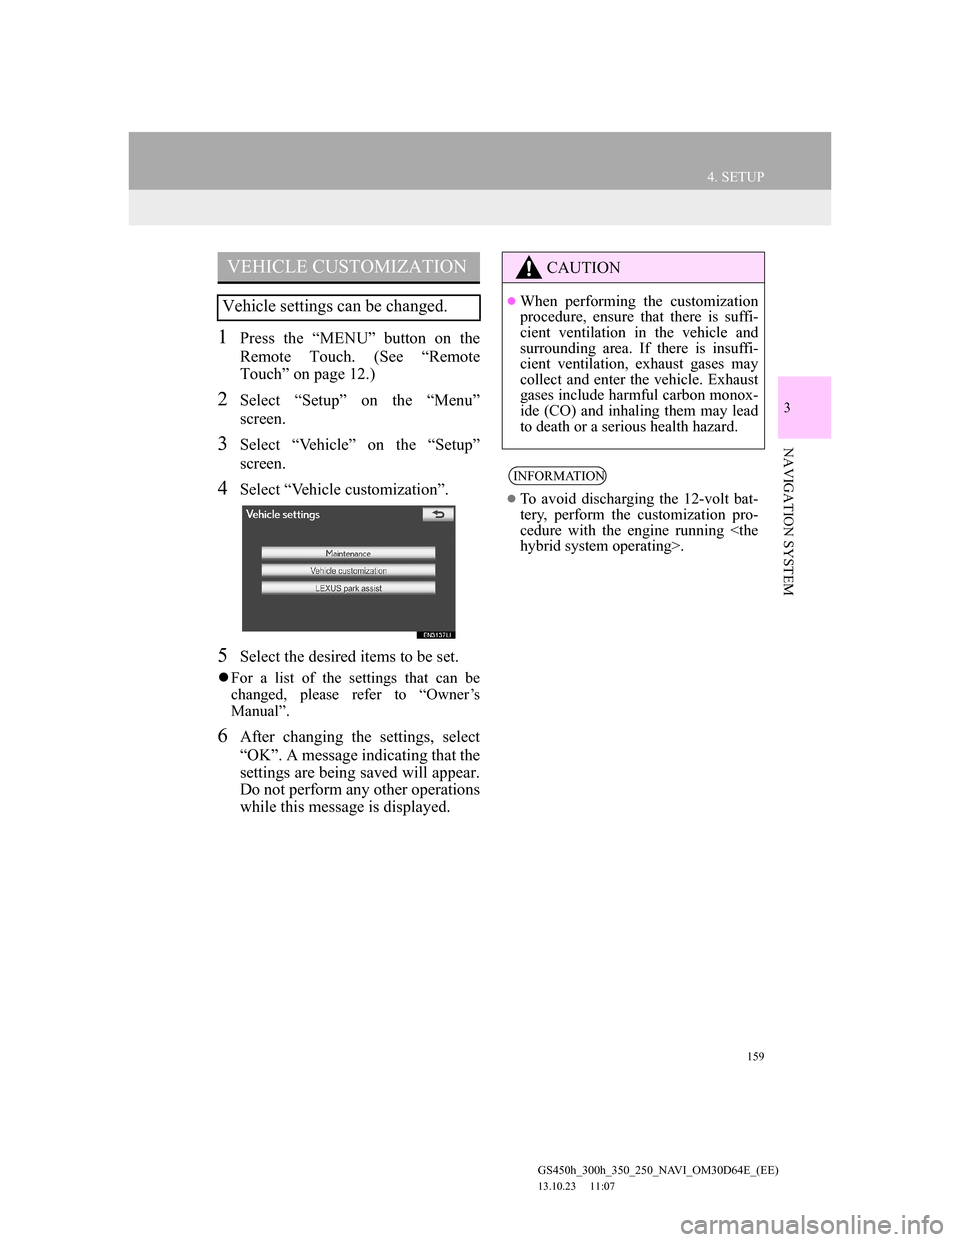
1Press the “MENU” button on the
Remote Touch. (See “Remote
Touch” on page 12.)
2Select “Setup” on the “Menu”
screen.
3Select “Vehicle” on the “Setup”
screen.
4Select “Vehicle customization”.
5Select the desired items to be set.
For a list of the settings that can be
changed, please refer to “Owner’s
Manual”.
6After changing the settings, select
“OK”. A message indicating that the
settings are being saved will appear.
Do not perform any other operations
while this message is displayed.
VEHICLE CUSTOMIZATION
Vehicle settings can be changed.
CAUTION
When performing the customization
procedure, ensure that there is suffi-
cient ventilation in the vehicle and
surrounding area. If there is insuffi-
cient ventilation, exhaust gases may
collect and enter the vehicle. Exhaust
gases include harmful carbon monox-
ide (CO) and inhaling them may lead
to death or a serious health hazard.
INFORMATION
To avoid discharging the 12-volt bat-
tery, perform the customization pro-
cedure with the engine running
hybrid system operating>.
Page 161 of 256

161
5. GPS (GLOBAL POSITIONING SYSTEM)
GS450h_300h_350_250_NAVI_OM30D64E_(EE)
13.10.23 11:07
3
NAVIGATION SYSTEM
Accurate current position may not be
shown in the following cases:
• When driving on a small angled Y-
shaped road.
• When driving on a winding road.
• When driving on a slippery road such
as in sand, gravel, snow, etc.
• When driving on a long straight road.
• When motorway and surface streets
run in parallel.
• After moving by ferry or vehicle car-
rier.
• When a long route is searched during
high speed driving.
• When driving without setting the cur-
rent position calibration correctly.
• After repeating a change of direction
by going forward and backward, or
turning on a turntable in a parking lot.
• When leaving a covered parking lot or
parking garage.
• When a roof carrier is installed.
• When driving with tyre chains
installed.
• When the tyres are worn.
• After replacing a tyre or tyres.
• When using tyres that are smaller or
larger than the factory specifications.
• When the tyre pressure in any of the 4
tyres is not correct.Inappropriate route guidance may
occur in the following cases:
• When turning at an intersection off
the designated route guidance.
• If you set more than 1 destination but
skip any of them, auto reroute will
display a route returning to the desti-
nation on the previous route.
• When turning at an intersection for
which there is no route guidance.
• When passing through an intersection
for which there is no route guidance.
• During auto reroute, the route guid-
ance may not be available for the next
turn to the right or left.
• During high speed driving, it may
take a long time for auto reroute to
operate. In auto reroute, a detour route
may be shown.
• After auto reroute, the route may not
be changed.
• If an unnecessary U-turn is shown or
announced.
• If a location has multiple names and
the system announces 1 or more of
them.
• When a route cannot be searched.
• If the route to your destination
includes gravel, unpaved roads or
alleys, the route guidance may not be
shown.
• Your destination point might be
shown on the opposite side of the
street.
• When a portion of the route has regu-
lations prohibiting the entry of the
vehicle that vary by time or season or
other reasons.
• The road and map data stored in the
navigation system may not be com-
plete or may not be the latest version.
If the vehicle cannot receive GPS sig-
nals, the current position can be
adjusted manually. For information
on setting the current position cali-
bration, see page 152.
Page 163 of 256
163
5. GPS (GLOBAL POSITIONING SYSTEM)
GS450h_300h_350_250_NAVI_OM30D64E_(EE)
13.10.23 11:07
3
NAVIGATION SYSTEM
2. MAP DATABASE VERSION AND COVERED AREA
1Select “Menu”.
2Select “Map data”.
3The “Map data” screen will be dis-
played.
MAP INFORMATION
Coverage areas and legal informa-
tion can be displayed and map data
can be updated.
INFORMATION
Map data updates are available for a
fee. Contact your Lexus dealer for
further information.
The “Map data” screen displays
“Map version” and “Map update
ID”. This data is needed to perform a
map data update.
Page 164 of 256
164
5. GPS (GLOBAL POSITIONING SYSTEM)
GS450h_300h_350_250_NAVI_OM30D64E_(EE)
13.10.23 11:07
1Select “Menu”.
2Select “Map data” on the navigation
menu screen.
3Select “Legal info”.
The “Legal information” screen will be
displayed.
1Select “Menu”.
2Select “Map data” on the navigation
menu screen.
3Select “Covered area”.
The “Map data coverage” screen will
be displayed.
LEGAL INFORMATION
Legal information related to the map
data can be displayed.COVERED AREA
Map data coverage areas can be dis-
played.
Page 166 of 256

166
GS450h_300h_350_250_NAVI_OM30D64E_(EE)
13.10.23 11:07
1. SPEECH COMMAND SYSTEM OPERATION
1. SPEECH COMMAND SYSTEM
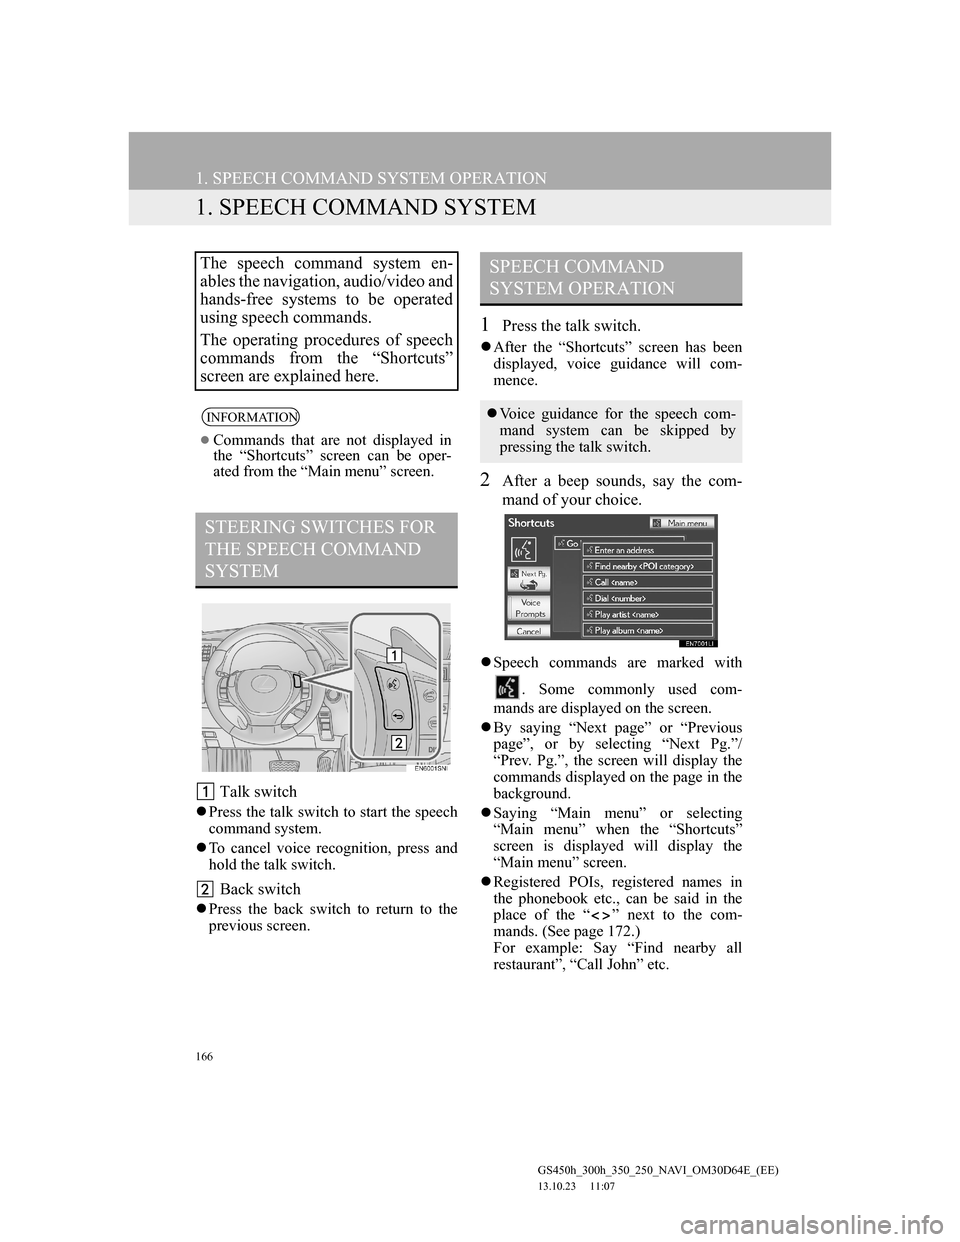
Talk switch
Press the talk switch to start the speech
command system.
To cancel voice recognition, press and
hold the talk switch.
Back switch
Press the back switch to return to the
previous screen.
1Press the talk switch.
After the “Shortcuts” screen has been
displayed, voice guidance will com-
mence.
2After a beep sounds, say the com-
mand of your choice.
Speech commands are marked with
. Some commonly used com-
mands are displayed on the screen.
By saying “Next page” or “Previous
page”, or by selecting “Next Pg.”/
“Prev. Pg.”, the screen will display the
commands displayed on the page in the
background.
Saying “Main menu” or selecting
“Main menu” when the “Shortcuts”
screen is displayed will display the
“Main menu” screen.
Registered POIs, registered names in
the phonebook etc., can be said in the
place of the “ ” next to the com-
mands. (See page 172.)
For example: Say “Find nearby all
restaurant”, “Call John” etc.
The speech command system en-
ables the navigation, audio/video and
hands-free systems to be operated
using speech commands.
The operating procedures of speech
commands from the “Shortcuts”
screen are explained here.
INFORMATION
Commands that are not displayed in
the “Shortcuts” screen can be oper-
ated from the “Main menu” screen.
STEERING SWITCHES FOR
THE SPEECH COMMAND
SYSTEM
SPEECH COMMAND
SYSTEM OPERATION
Voice guidance for the speech com-
mand system can be skipped by
pressing the talk switch.