2013 Lancia Thema instrument panel
[x] Cancel search: instrument panelPage 154 of 336

REAR SEAT CUPHOLDERS
The rear seat cupholders are located
in the center armrest between the rear
seats. The cupholders are positioned
forward in the armrest and side-by-
side to provide convenient access to
beverage cans or bottles while main-
taining a resting place for the rear
occupant's elbows.
Lighted Cupholders
On some vehicles the rear cupholders
are equipped with a light ring that
illuminates the cupholders for the
rear passengers. The light ring is con-
trolled by the Dimmer Control. Refer
to “Lights” in “Understanding The
Features Of Your Vehicle” for further
information.STORAGE
GLOVEBOX STORAGE
The glovebox storage compartment is
located on the passenger side of the
instrument panel.
CONSOLE FEATURES
There is a cubby bin located forward of
the shift lever. The cubby bin is covered
with a push-push actuated door. Push
inward on the door to open it, push the
door a second time to close it.Two separate storage compartments
are also located underneath the center
console armrest.
Rear Seat Cupholders
Light Ring In Rear CupholderGlovebox Storage Compartment
Opened Glovebox Storage
Compartment
Center Console
148
Page 159 of 336

4
UNDERSTANDING YOUR INSTRUMENT
PANEL
INSTRUMENT PANEL FEATURES . . . . . . . . . . . .156
INSTRUMENT CLUSTER . . . . . . . . . . . . . . . . . .157
INSTRUMENT CLUSTER DESCRIPTIONS . . . . .158
ELECTRONIC VEHICLE INFORMATION CENTER (EVIC) . . . . . . . . . . . . . . . . . . . . . . . . . .163
ELECTRONIC VEHICLE INFORMATION CENTER (EVIC) DISPLAYS . . . . . . . . . . . . . . .164
EVIC WHITE TELLTALES . . . . . . . . . . . . . . . .165
EVIC AMBER TELLTALES . . . . . . . . . . . . . . . .166
EVIC RED TELLTALES . . . . . . . . . . . . . . . . . .167
OIL CHANGE DUE . . . . . . . . . . . . . . . . . . . . . .168
DIESEL PARTICULATE FILTER (DPF) MESSAGES. . . . . . . . . . . . . . . . . . . . . . . . . . . .169
FUEL ECONOMY . . . . . . . . . . . . . . . . . . . . . . .169
CRUISE CONTROL . . . . . . . . . . . . . . . . . . . . . .170
VEHICLE SPEED . . . . . . . . . . . . . . . . . . . . . . .170
TRIP INFO . . . . . . . . . . . . . . . . . . . . . . . . . . . .171
TIRE BAR . . . . . . . . . . . . . . . . . . . . . . . . . . . . .171
153
Page 162 of 336

INSTRUMENT PANEL FEATURES1 — Air Outlet7 — ESC Off Switch 13 — Engine Start/Stop Button
2 — Instrument Cluster 8 —
Uconnect Touch™ System Hard Controls
14 — Trunk Release Button
3 — Hazard Switch 9 — SD Memory Card Slot 15 — Dimmer Controls
4 — Uconnect Touch™ System 10 — Power Outlet 16 — Hood Release
5 —
Climate Control Hard Controls
11 — CD/DVD Slot 17 — Headlight Switch
6 — Glove Compartment 12 — Storage Compartment 18 — Analog Clock
156
Page 178 of 336
Trans Temperature
Displays the actual transmissiontemperature.
Engine Hours
Displays the number of hours of engine operation.
MESSAGES #
Select from Main Menu using the UP
or DOWN buttons. This feature shows
the number of stored warning mes-
sages (in the # place holder). Pressing
the SELECT button will allow you to
see what the stored messages are.
Pressing the BACK button takes you
back to the Main Menu.
TURN MENU OFF
Select from Main Menu using the
DOWN button. Pressing the SELECT
button blanks the menu display.
Pressing any one of the four steering
wheel buttons brings the menu back. Uconnect Touch™
SETTINGS
The Uconnect Touch™ system uses a
combination of soft and hard keys
located on the center of the instru-
ment panel that allows you to access
and change the customer program-
mable features.
HARD-KEYS
Hard-Keys are located below the
Uconnect Touch™ system in the cen-
ter of the instrument panel. In addi-
tion, there is a Scroll/Enter control
knob located on the right side of the
Climate Controls in the center of the
instrument panel. Turn the control
knob to scroll through menus and
change settings (i.e., 30, 60, 90),
press the center of the control knob
one or more times to select or change a
setting (i.e., ON, OFF).
SOFT-KEYS
Soft-Keys are accessible on the
Uconnect Touch™ display.CUSTOMER
PROGRAMMABLE
FEATURES — Uconnect
Touch™ SYSTEM 8.4
SETTINGS
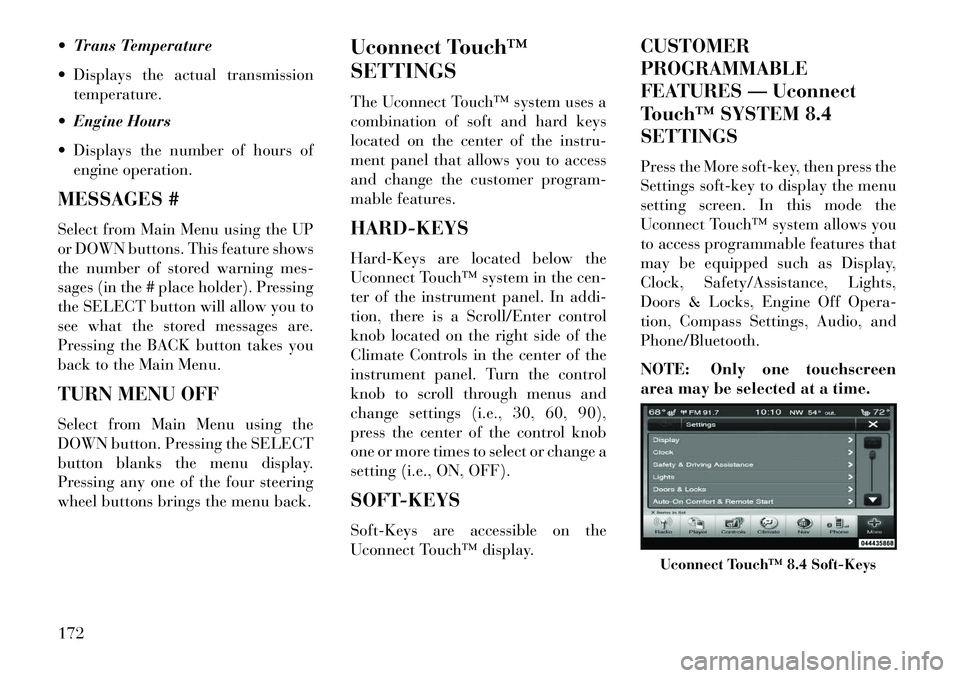
Press the More soft-key, then press the
Settings soft-key to display the menu
setting screen. In this mode the
Uconnect Touch™ system allows you
to access programmable features that
may be equipped such as Display,
Clock, Safety/Assistance, Lights,
Doors & Locks, Engine Off Opera-
tion, Compass Settings, Audio, and
Phone/Bluetooth.
NOTE: Only one touchscreen
area may be selected at a time.
Uconnect Touch™ 8.4 Soft-Keys
172
Page 187 of 336
Equalizer
When in this display you may adjust
the Bass, Mid and Treble settings.
Adjust the settings with the + and –
setting soft-keys or by selecting any
point on the scale between the + and –
soft-keys. Then touch the arrow back
soft-key.
NOTE: Bass/Mid/Treble allow
you to simply slide your finger up
or down to change the setting as
well as touch directly on the de-
sired setting.
Speed Adjusted VolumeThis feature increases or decreases
volume relative to vehicle speed. To
change the Speed Adjusted Volume
touch the Off, 1, 2 or 3 soft-key. Then
touch the arrow back soft-key. Music Info Cleanup (for versions/
markets, where provided)
This feature helps organize music files
for optimized music navigation. To
make your selection, touch the Music
Info Cleanup soft-key, select On or Off
followed by pressing the arrow back
soft-key. Surround Sound (for versions/
markets, where provided)
This feature provides simulated sur-
round sound mode. To make your se-
lection, touch the Surround Sound
soft-key, select On or Off followed by
pressing the arrow back soft-key.
Phone/Bluetooth
After pressing the Phone/Bluetooth
soft-key the following settings will be
available.
Paired Devices
This feature shows which phones are
paired to the Phone/Bluetooth system.
For further information, refer to the
Uconnect Touch™ Supplement.SOUND SYSTEMS
Refer to your Sound Systems Booklet.
NAVIGATION SYSTEM
(for versions/markets,
where provided)
Refer to your Uconnect Touch™ User
Manual.
SETTING THE ANALOG
CLOCK
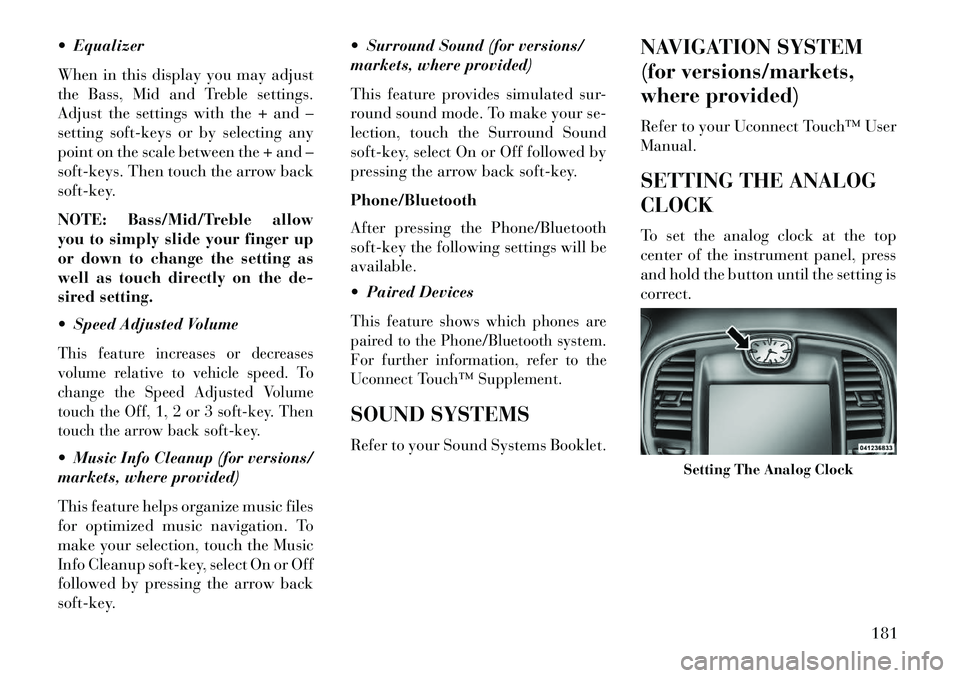
To set the analog clock at the top
center of the instrument panel, press
and hold the button until the setting is
correct.
Setting The Analog Clock
181
Page 188 of 336
iPod®/USB/MP3
CONTROL (for vehicles/
markets, where provided)
This feature allows an iPod® or exter-
nal USB device to be plugged into the
USB port.
iPod® control supports Mini, 4G,
Photo, Nano, 5G iPod® and iPhone®
devices. Some iPod® software ver-
sions may not fully support the iPod®
control features. Please visit Apple’s
website for software updates.
For further information, refer to the
Uconnect Touch™ User’s Manual.HARMAN KARDON®
Logic7® HIGH
PERFORMANCE
MULTICHANNEL
SURROUND SOUND
SYSTEM WITH
DRIVER-SELECTABLE
SURROUND (DSS)
(for versions/markets,
where required)
Your vehicle is equipped with a Har-
man Kardon® audio system with
GreenEdge™ technology that offers
superior sound quality, higher Sound
Pressure Levels (SPL) and reduced
energy consumption. The new system
utilizes proprietary amplifier and
speaker technologies delivering sub-
stantial increases in component and
system efficiency levels.
The 12 Channel Class D GreenEdge
high efficiency amplifier is governed
by a high voltage tracking power sup-
ply and drives a 7.5-channel play-
back architecture. The Harman Kar-
don® audio system offers the abilityto choose Logic 7 surround sound for
any audio source. The GreenEdge
high-efficiency speaker designs en-
sure the system has higher SPL and a
dramatic increase in dynamic sound
quality. The speakers are tuned for
maximum efficiency and perfectly
matched to the amplifier output stage
ensuring state of the art multi-seat
surround sound processing.
Logic7® multichannel surround-
sound technology delivers an immer-
sive, accurate sound-stage to every
seating position This surround effect is
available for audio from any source -
AM/FM/CD/ Satellite Radio or dash-
board AUX input; and is activated
through the Uconnect Touch™ Sys-
tem. Refer to “Surround Sound” under
“Uconnect Touch™ Settings” in “Un-
derstanding Your Instrument Panel”.Selecting “Audio Surround” through
the DSS modes activates the Harman
Kardon® Logic7® multichannel
surround-sound technology in your
vehicle. The “Video Surround” mode
is described under Driver-Selectable
Surround (DSS). The Video Surround
182
Page 190 of 336
CD/DVD DISC
MAINTENANCE
To keep a CD/DVD in good condition,
take the following precautions:
1. Handle the disc by its edge; avoid
touching the surface.
2. If the disc is stained, clean the
surface with a soft cloth, wiping from
center to edge.
3. Do not apply paper or tape to the
disc; avoid scratching the disc.
4. Do not use solvents such as ben-
zene, thinner, cleaners, or anti-static
sprays.
5. Store the disc in its case after play-
ing.
6. Do not expose the disc to direct
sunlight.
7. Do not store the disc where tem-
peratures may become too high.
NOTE: If you experience diffi-
culty in playing a particular disc, it
may be damaged (i.e., scratched,
reflective coating removed, a hair,moisture or dew on the disc) over-
sized, or have protection encoding.
Try a known good disc before con-
sidering disc player service.
RADIO OPERATION AND
MOBILE PHONES
Under certain conditions, the mobile
phone being on in your vehicle can
cause erratic or noisy performance
from your radio. This condition may
be lessened or eliminated by relocat-
ing the mobile phone antenna. This
condition is not harmful to the radio.
If your radio performance does not
satisfactorily “clear” by the reposi-
tioning of the antenna, it is recom-
mended that the radio volume be
turned down or off during mobile
phone operation.
CLIMATE CONTROLS
The air conditioning and heating sys-
tem is designed to make you comfort-
able in all types of weather. This sys-
tem can be operated through either
the Automatic Climate Controls on
the instrument panel or through the
Uconnect Touch™ system display.When the Uconnect Touch™ system
is in different modes (Radio, Player,
Settings, More, etc.) the driver and
passenger temperature settings will be
indicated at the top of the display.
GENERAL OVERVIEW
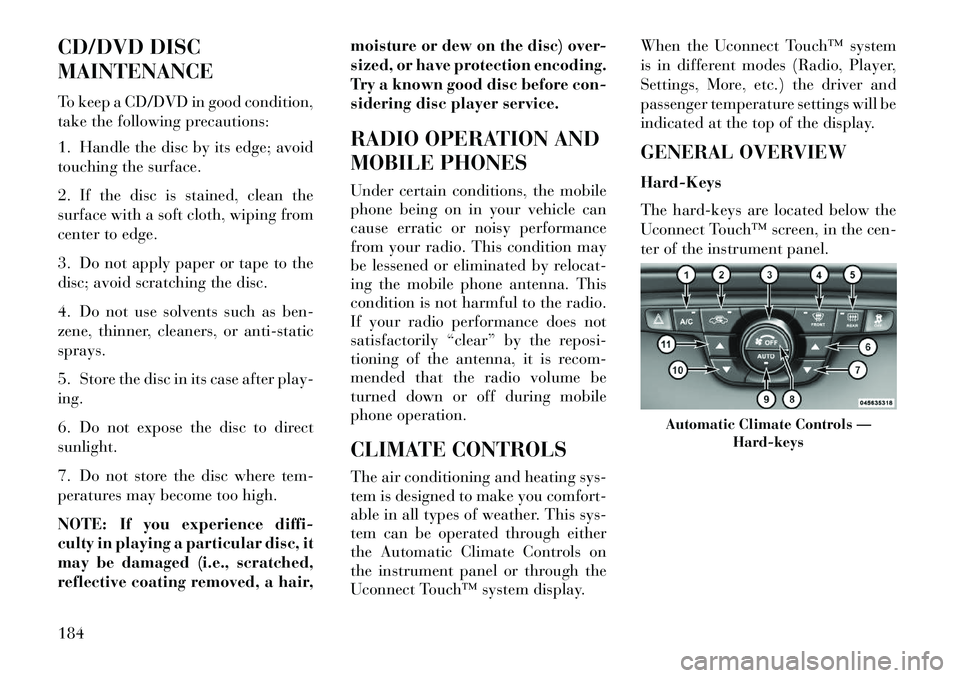
Hard-Keys
The hard-keys are located below the
Uconnect Touch™ screen, in the cen-
ter of the instrument panel.
Automatic Climate Controls —
Hard-keys
184
Page 192 of 336
CAUTION!
Failure to follow these cautions can
cause damage to the heating ele-
ments:
Use care when washing the insideof the rear window. Do not use
abrasive window cleaners on the
interior surface of the window.
Use a soft cloth and a mild wash-
ing solution, wiping parallel to
the heating elements. Labels can
be peeled off after soaking with
warm water.
Do not use scrapers, sharp instru- ments, or abrasive window clean-
ers on the interior surface of the
window.
Keep all objects a safe distance
from the window.
Passenger Temperature Control
Up Button
6. Provides the passenger with inde-
pendent temperature control. Push
the button for warmer temperature
settings.
NOTE:
Pressing this button while
in Sync mode will automatically
exit Sync.
Passenger Temperature Control
Down Button
7.
Provides the passenger with inde-
pendent temperature control. Push the
button for cooler temperature settings.
NOTE:
Pressing this button while
in Sync mode will automatically
exit Sync.
Climate Control OFF Button
8. Press and release this button to
turn the Climate Control ON/OFF.
AUTO Operation Button
9.
Automatically controls the interior
cabin temperature by adjusting airflow
distribution and amount. Performing
this function will cause the ATC to
switch between manual mode and au-
tomatic modes. Refer to “Automatic
Operation” for more information.
Driver Temperature Control Down
Button
10.
Provides the driver with indepen-
dent temperature control. Push the
button for cooler temperature settings.
NOTE: In Sync mode, this but-
ton will also automatically adjust
the passenger temperature setting
at the same time.
Driver Temperature Control
Up Button
11.
Provides the driver with indepen-
dent temperature control. Push the but-
ton for warmer temperature settings.
NOTE: In Sync mode, this but-
ton will also automatically adjust
the passenger temperature setting
at the same time.
Modes
12.
The airflow distribution mode can
be adjusted so air comes from the in-
strument panel outlets, floor outlets,
demist outlets and defrost outlets. The
Mode settings are as follows:
Panel Mode Air comes from the outlets in
the instrument panel. Each of
these outlets can be individu-
ally adjusted to direct the flow of air.
The air vanes of the center outlets and
outboard outlets can be moved up and
186