2013 Lancia Thema ignition
[x] Cancel search: ignitionPage 48 of 336

It also includes diagnostics that will
illuminate the instrument cluster Air
Bag Warning Light if a malfunction is
noted that could affect the air bag
system. The diagnostics also record
the nature of the malfunction.WARNING!
Ignoring the Air Bag Warning Light
in your instrument panel could
mean you won't have the air bags to
protect you in a collision. If the light
does not come on as a bulb check
when the ignition is first turned on,
stays on after you start the vehicle,
or if it comes on as you drive, have
an authorized dealer service the air
bag system immediately.
Driver And Passenger Advanced
Front Air Bag Inflator Units
The Driver and Passenger Advanced
Front Air Bag Inflator Units are lo-
cated in the center of the steering
wheel and on the right side of the
instrument panel. When the ORC
detects a collision requiring the
Advanced Front Air Bags, it signals
the inflator units. A large quantity of non-toxic gas is generated to inflate
the Advanced Front Air Bags. Differ-
ent air bag inflation rates are possible,
based on several factors, including the
collision type and severity. The steer-
ing wheel hub trim cover and the
upper right side of the instrument
panel separate and fold out of the way
as the air bags inflate to their full size.
The air bags fully inflate in about
50 to 70 milliseconds. This is about
half of the time it takes to blink your
eyes. The air bags then quickly deflate
while helping to restrain the driver
and front passenger.
The Advanced Front Air Bag gas is
vented through the vent holes in the
sides of the air bag. In this way, the air
bags do not interfere with your con-
trol of the vehicle.
Supplemental Driver Side Knee
Air Bag Inflator Unit
The Supplemental Driver Side Knee
Air Bag unit is located in the instru-
ment panel trim beneath the steering
column. When the ORC detects a col-
lision requiring the Advanced Front
Air Bags, it signals the inflator units.A large quantity of non-toxic gas is
generated to inflate the Supplemental
Driver Side Knee Air Bag. The trim
cover separates and folds out of the
way allowing the air bag to inflate to
the full size. The air bag fully inflates
in about 15 to 20 milliseconds. The
Supplemental Driver Side Knee Air
Bag gas is vented through small vent
holes in the side of the air bag.
Supplemental Seat-Mounted Side
Air Bag (SAB) Inflator Units
The Supplemental Seat-Mounted Side
Air Bags (SAB) are designed to acti-
vate only in certain side collisions.The ORC determines if a side collision
requires the side air bags to inflate,
based on the severity and type of col-
lision.
Based on the severity and type of col-
lision, the side air bag inflator on the
crash side of the vehicle may be trig-
gered, releasing a quantity of non-
toxic gas. The inflating SAB exits
through the seat seam into the space
between the occupant and the door.
42
Page 49 of 336

The SAB fully inflate in about 10 milli-
seconds. The side air bag moves at a
very high speed and with such a high
force that it could injure you if you are
not seated properly, or if items are
positioned in the area where the side
air bag inflates. This especially ap-
plies to children.
Supplemental Side Air Bag
Inflatable Curtain (SABIC)
Inflator Units
During collisions where the impact is
confined to a particular area of the
side of the vehicle, the ORC may de-
ploy the SABIC air bags, depending
on the severity and type of collision.
In these events, the ORC will deploy
the SABIC only on the impact side of
the vehicle.
A quantity of non-toxic gas is gener-
ated to inflate the side curtain air bag.
The inflating side curtain air bag
pushes the outside edge of the head-
liner out of the way and covers the
window. The air bag inflates in about
30 milliseconds (about one-quarter of
the time that it takes to blink your
eyes) with enough force to injure youif you are not belted and seated prop-
erly, or if items are positioned in the
area where the side curtain air bag
inflates. This especially applies to
children. The side curtain air bag is
only about 9 cm thick when it is in-
flated.
Because air bag sensors estimate de-
celeration over time, vehicle speed
and damage are not good indicators of
whether or not an air bag should have
deployed.
NOTE: In a rollover the preten-
sioners and/or SAB and SABIC air
bags may deploy on both sides of
the vehicle.
Front And Side Impact Sensors
In front and side impacts, impact sen-
sors can aid the ORC in determining
appropriate response to impact events.Enhanced Accident Response
System
In the event of an impact causing air
bag deployment, if the communica-
tion network remains intact, and the
power remains intact, depending on
the nature of the event the ORC willdetermine whether to have the En-
hanced Accident Response System
perform the following functions:
Cut off fuel to the engine.
Flash hazard lights as long as the
battery has power or until the igni-
tion is cycled off.
Turn on the interior lights, which
remain on as long as the battery has
power or until the ignition key is
removed. Unlock the doors automatically.
In order to reset the Enhanced Acci-
dent Response System functions after
an event, the ignition switch must be
changed from IGN ON to IGN OFF.
If A Deployment Occurs
The Advanced Front Air Bags are
designed to deflate immediately after
deployment.
NOTE:
Front and/or side air bags
will not deploy in all collisions.
This does not mean something is
wrong with the air bag system.
43
Page 51 of 336

WARNING!(Continued)
Do not attempt to modify any part
of your air bag system. The air bag
may inflate accidentally or may
not function properly if modifica-
tions are made. Take your vehicle
to an authorized dealer for any
air bag system service. If your seat,
including your trim cover and
cushion, needs to be serviced in
any way (including removal or
loosening/tightening of seat at-
tachment bolts), take the vehicle
to your authorized dealer. Only
manufacturer approved seat ac-
cessories may be used. If it is nec-
essary to modify the air bag system
for persons with disabilities, con-
tact your authorized dealer.
Air Bag Warning Light
You will want to have the
air bags ready to inflate for
your protection in a colli-
sion. The Air Bag Warning
Light monitors the internal circuits
and interconnecting wiring associated with air bag system electrical compo-
nents. While the air bag system is
designed to be maintenance free. If
any of the following occurs, have an
authorized dealer service the air bag
system immediately.
The Air Bag Warning Light does
not come on during the four to eight
seconds when the ignition is first
cycled to the ON/RUN.
The Air Bag Warning Light remains on after the four to eight-second
interval.
The Air Bag Warning Light comes on intermittently or remains on
while driving.
NOTE:
If the speedometer, ta-
chometer, or any engine related
gauges are not working, the Occu-
pant Restraint Controller (ORC)
may also be disabled. The air bags
may not be ready to inflate for your
protection. Promptly check the fuse
block for blown fuses. Refer to the
label located on the inside of the
fuse block cover for the proper air
bag fuses. See your authorized
dealer if the fuse is good.
Event Data Recorder (EDR)This vehicle is equipped with an event
data recorder (EDR). The main pur-
pose of an EDR is to record, in certain
crash or near crash-like situations,
such as an air bag deployment or hit-
ting a road obstacle, data that will
assist in understanding how a vehicle’s
systems performed. The EDR is de-
signed to record data related to vehicle
dynamics and safety systems for a
short period of time, typically 30 sec-
onds or less. The EDR in this vehicle is
designed to record such data as: How various systems in your ve-
hicle were operating;
Whether or not the driver and pas- senger safety belts were
buckled/fastened;
How far (if at all) the driver was depressing the accelerator and/or
brake pedal; and,
How fast the vehicle was traveling.
These data can help provide a better
understanding of the circumstances in
which crashes and injuries occur.
45
Page 63 of 336

Safety Checks You Should
Make Inside The Vehicle
Seat BeltsInspect the belt system periodically,
checking for cuts, frays, and loose
parts. Damaged parts must be replaced
immediately. Do not disassemble or
modify the system.
Front seat belt assemblies must be re-
placed after a collision. Rear seat belt
assemblies must be replaced after a
collision if they have been damaged
(i.e., bent retractor, torn webbing,
etc.). If there is any question regarding
belt or retractor condition, replace the
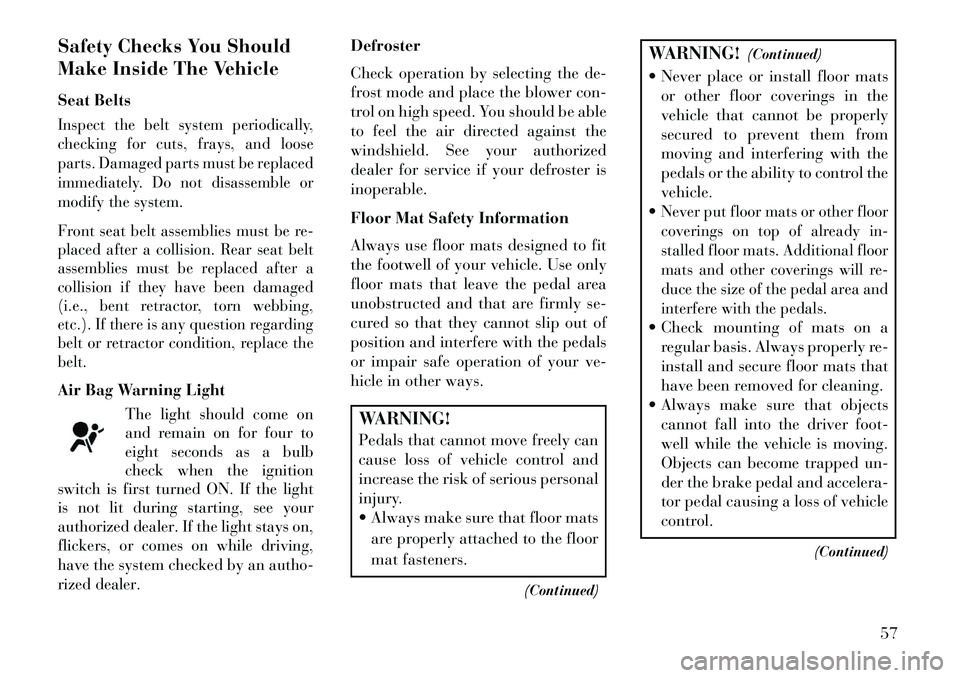
belt.Air Bag Warning Light
The light should come on
and remain on for four to
eight seconds as a bulb
check when the ignition
switch is first turned ON. If the light
is not lit during starting, see your
authorized dealer. If the light stays on,
flickers, or comes on while driving,
have the system checked by an autho-
rized dealer.
Defroster
Check operation by selecting the de-
frost mode and place the blower con-
trol on high speed. You should be able
to feel the air directed against the
windshield. See your authorized
dealer for service if your defroster is
inoperable.
Floor Mat Safety Information
Always use floor mats designed to fit
the footwell of your vehicle. Use only
floor mats that leave the pedal area
unobstructed and that are firmly se-
cured so that they cannot slip out of
position and interfere with the pedals
or impair safe operation of your ve-
hicle in other ways.WARNING!
Pedals that cannot move freely can
cause loss of vehicle control and
increase the risk of serious personal
injury.
Always make sure that floor mats
are properly attached to the floor
mat fasteners.
(Continued)
WARNING!(Continued)
Never place or install floor mats or other floor coverings in the
vehicle that cannot be properly
secured to prevent them from
moving and interfering with the
pedals or the ability to control the
vehicle.
Never put floor mats or other floor
coverings on top of already in-
stalled floor mats. Additional floor
mats and other coverings will re-
duce the size of the pedal area and
interfere with the pedals. Check mounting of mats on a regular basis. Always properly re-
install and secure floor mats that
have been removed for cleaning.
Always make sure that objects cannot fall into the driver foot-
well while the vehicle is moving.
Objects can become trapped un-
der the brake pedal and accelera-
tor pedal causing a loss of vehicle
control.
(Continued)
57
Page 70 of 336

ENABLING AND DISABLING PARKSENSE® . . .136SERVICE THE PARKSENSE® PARK ASSIST
SYSTEM . . . . . . . . . . . . . . . . . . . . . . . . . . . . . .136 CLEANING THE PARKSENSE® SYSTEM . . . . .137
PARKSENSE® SYSTEM USAGEPRECAUTIONS. . . . . . . . . . . . . . . . . . . . . . . . .137
PARKVIEW® REAR BACK UP CAMERA (for versions/markets, where provided) . . . . . . . .138
TURNING PARKVIEW® ON OR OFF — WITH TOUCH SCREEN . . . . . . . . . . . . . . . . . .140
OVERHEAD CONSOLE . . . . . . . . . . . . . . . . . . . .140
SUNGLASS BIN DOOR . . . . . . . . . . . . . . . . . .140
POWER SUNROOF (for versions/markets, where provided) . . . . . . . .140
OPENING SUNROOF — EXPRESS . . . . . . . . . .143
OPENING SUNROOF — MANUAL MODE . . . . .143
CLOSING SUNROOF — EXPRESS . . . . . . . . . .143
CLOSING SUNROOF — MANUAL MODE . . . . .143
PINCH PROTECT FEATURE. . . . . . . . . . . . . . .144
VENTING SUNROOF — EXPRESS . . . . . . . . . .141
SUNSHADE OPERATION . . . . . . . . . . . . . . . . .142
WIND BUFFETING . . . . . . . . . . . . . . . . . . . . .142
SUNROOF MAINTENANCE . . . . . . . . . . . . . . .142
IGNITION OFF OPERATION . . . . . . . . . . . . . . .144
64
Page 71 of 336

COMMANDVIEW® SUNROOF WITHPOWER SHADE — (for versions/markets,
where provided) . . . . . . . . . . . . . . . . . . . . . . . . .142
OPENING SUNROOF — EXPRESS . . . . . . . . . .143
OPENING SUNROOF — MANUAL MODE . . . . .143
CLOSING SUNROOF — EXPRESS . . . . . . . . . .143
CLOSING SUNROOF — MANUAL MODE . . . . .143
OPENING POWER SHADE — EXPRESS . . . . .143
OPENING POWER SHADE — MANUAL MODE . . . . . . . . . . . . . . . . . . . . . . . .144
CLOSING POWER SHADE — EXPRESS. . . . . .144
CLOSING POWER SHADE — MANUAL MODE . . . . . . . . . . . . . . . . . . . . . . . .144
PINCH PROTECT FEATURE. . . . . . . . . . . . . . .144
WIND BUFFETING . . . . . . . . . . . . . . . . . . . . .144
SUNROOF MAINTENANCE . . . . . . . . . . . . . . . .144
IGNITION OFF OPERATION . . . . . . . . . . . . . . .144
SUNROOF FULLY CLOSED . . . . . . . . . . . . . . .145
ELECTRICAL POWER OUTLETS . . . . . . . . . . . .145
CUPHOLDERS . . . . . . . . . . . . . . . . . . . . . . . . . .147
FRONT SEAT CUPHOLDERS . . . . . . . . . . . . . .147
REAR SEAT CUPHOLDERS . . . . . . . . . . . . . . .148
STORAGE . . . . . . . . . . . . . . . . . . . . . . . . . . . . . . .148
GLOVEBOX STORAGE . . . . . . . . . . . . . . . . . . .148
CONSOLE FEATURES . . . . . . . . . . . . . . . . . . .148
65
Page 90 of 336

the far end, a call on hold may not
become active automatically. This is
cell phone-dependent.
Redial
Press the “Redial” soft-key,
or press the
and after the “Lis-
tening” prompt and the following
beep, say “Redial”,
After the “Listening” prompt and the following beep, say “Redial”,
The Uconnect™ Phone will call the last number that was dialed from
your mobile phone.
Call Continuation
Call continuation is the progression of
a phone call on the Uconnect™ Phone
after the vehicle ignition key has been
switched to OFF.
NOTE: The call will remain
within the vehicle audio system
until the phone becomes out of
range for the Bluetooth® connec-
tion. It is recommended to press
the “transfer” soft-key when leav-
ing the vehicle. UCONNECT™ PHONE
FEATURES
Emergency Assistance
If you are in an emergency and the
mobile phone is reachable:
Pick up the phone and manually
dial the emergency number for
your area.
If the phone is not reachable and the
Uconnect™ Phone is operational, you
may reach the emergency number as
follows:
Press the
button to begin.
After the “Listening” prompt and the following beep, say “Call Emer-
gency or Dial Emergency” and the
Uconnect™ Phone will instruct the
paired mobile phone to call the
emergency number. This feature is
supported in the U.S., Canada, and
Mexico.
NOTE:
The Emergency call may also be initiated by using the touch-
screen. The emergency number dialed is
based on the country where the
vehicle is purchased. The num-
ber dialed may not be appli-
cable with the available mobile
service and area.
The Uconnect™ Phone does slightly lower your chances of
successfully making a phone
call as to that for the mobile
phone directly.
WARNING!
Your phone must be turned on and
connected to the Uconnect™ Phone
to allow use of this vehicle feature
in emergency situations, when the
mobile phone has network coverage
and stays connected to the
Uconnect™ Phone.
Towing Assistance
If you need towing assistance:
Press the
button to begin.
After the “Listening” prompt and the following beep, say “Towing
Assistance”.
84
Page 95 of 336

If multiple numbers are availablefor the contact select which number
you would like to have the message
sent,
Press “Send” or “Cancel”.
Send Messages Using Voice
Commands:
Press the
button,
After the “Listening” prompt and
the following beep, say “Send mes-
sage to John Smith mobile”,After the system prompts you for
what message you want to send, say
the message you wish to send or say
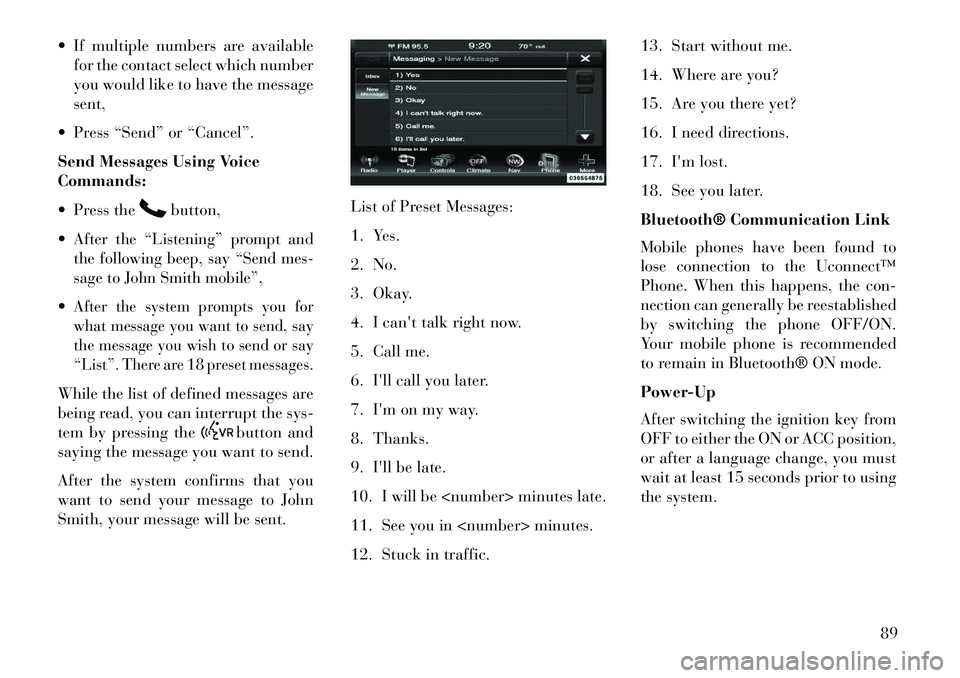
“List”. There are 18 preset messages.While the list of defined messages are
being read, you can interrupt the sys-
tem by pressing the
button and
saying the message you want to send.
After the system confirms that you
want to send your message to John
Smith, your message will be sent. List of Preset Messages:
1. Yes.
2. No.
3. Okay.
4. I can't talk right now.
5. Call me.
6. I'll call you later.
7. I'm on my way.
8. Thanks.
9. I'll be late.
10. I will be
11. See you in
12. Stuck in traffic.13. Start without me.
14. Where are you?
15. Are you there yet?
16. I need directions.
17. I'm lost.
18. See you later.
Bluetooth® Communication Link
Mobile phones have been found to
lose connection to the Uconnect™
Phone. When this happens, the con-
nection can generally be reestablished
by switching the phone OFF/ON.
Your mobile phone is recommended
to remain in Bluetooth® ON mode.
Power-Up
After switching the ignition key from
OFF to either the ON or ACC position,
or after a language change, you must
wait at least 15 seconds prior to using
the system.
89