2013 KIA VENGA ECU
[x] Cancel search: ECUPage 438 of 751
333
Safety features of your vehicle
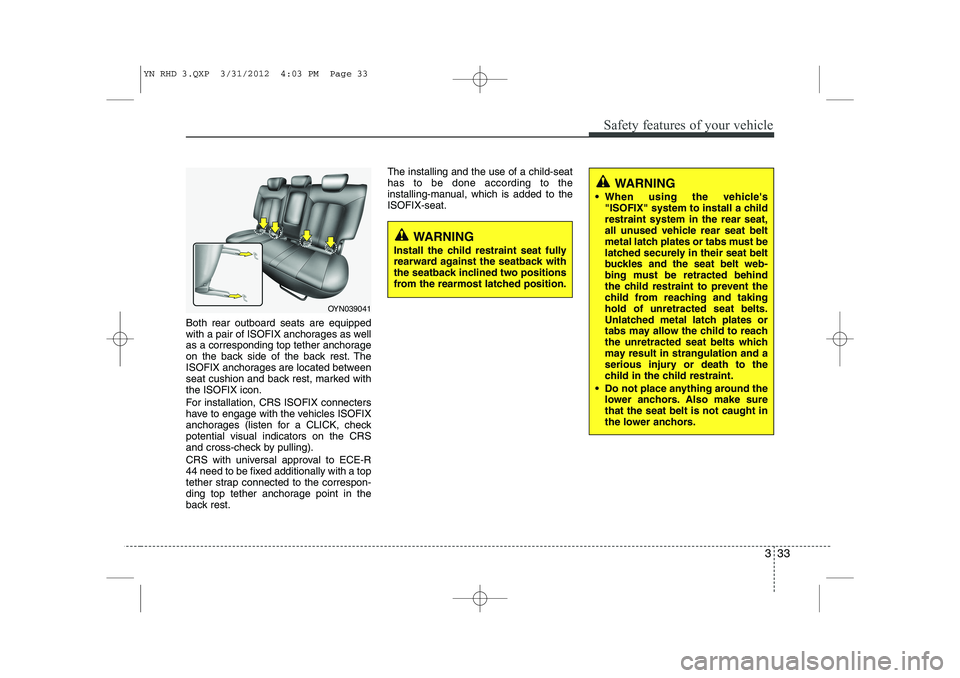
Both rear outboard seats are equipped
with a pair of ISOFIX anchorages as well
as a corresponding top tether anchorage
on the back side of the back rest. The
ISOFIX anchorages are located between
seat cushion and back rest, marked withthe ISOFIX icon.
For installation, CRS ISOFIX connecters
have to engage with the vehicles ISOFIX
anchorages (listen for a CLICK, checkpotential visual indicators on the CRS
and cross-check by pulling).
CRS with universal approval to ECE-R
44 need to be fixed additionally with a top
tether strap connected to the correspon-
ding top tether anchorage point in the
back rest.The installing and the use of a child-seathas to be done according to the
installing-manual, which is added to theISOFIX-seat.
OYN039041
WARNING
Install the child restraint seat fully
rearward against the seatback with
the seatback inclined two positions
from the rearmost latched position.
WARNING
When using the vehicle's "ISOFIX" system to install a child restraint system in the rear seat,
all unused vehicle rear seat belt
metal latch plates or tabs must be
latched securely in their seat belt
buckles and the seat belt web-
bing must be retracted behind
the child restraint to prevent the
child from reaching and takinghold of unretracted seat belts.
Unlatched metal latch plates or
tabs may allow the child to reach
the unretracted seat belts which
may result in strangulation and a
serious injury or death to the
child in the child restraint.
Do not place anything around the lower anchors. Also make surethat the seat belt is not caught in
the lower anchors.
YN RHD 3.QXP 3/31/2012 4:03 PM Page 33
Page 439 of 751
Safety features of your vehicle
34
3
To secure the child restraint seat:
1. To engage the child restraint seat to
the ISOFIX lower anchor, insert the
child restraint seat latch into the
ISOFIX anchor. Listen for the audible
“click” sound.
2. Connect the tether strap hook to the child restraint hook holder and tighten
to secure the seat. (Refer to the previ-
ous page.)
WARNING
Do not install a child restraint seat at the centre of the rear seat
using the vehicle's ISOFIX
anchors. The ISOFIX anchors are
only provided for the left and right
outboard rear seating positions.
Do not misuse the ISOFIX anchors
by attempting to attach a child
restraint seat in the middle of the
rear seat to the ISOFIX anchors.
In a crash, the child restraint seat
ISOFIX attachments may not be
strong enough to secure the child
restraint seat properly in the cen-
tre of the rear seat and may
break, causing serious injury ordeath.
Do not mount more than one child restraint to a child restraint
lower anchorage point. The
improper increased load may
cause the anchorage points or
tether anchor to break, causing
serious injury or death.
(Continued)(Continued)
Attach the ISOFIX or ISOFIX-com-patible child restraint seat only to
the appropriate locations shownin the illustration.
Always follow the installation and use instructions provided by the
manufacturer of the child restraint.
CAUTION
Do not allow the rear seat belt web-
bing to get scratched or pinched by
the ISOFIX-seat latch and ISOFIXanchor during the installation.
YN RHD 3.QXP 3/31/2012 4:03 PM Page 34
Page 445 of 751
Safety features of your vehicle
40
3
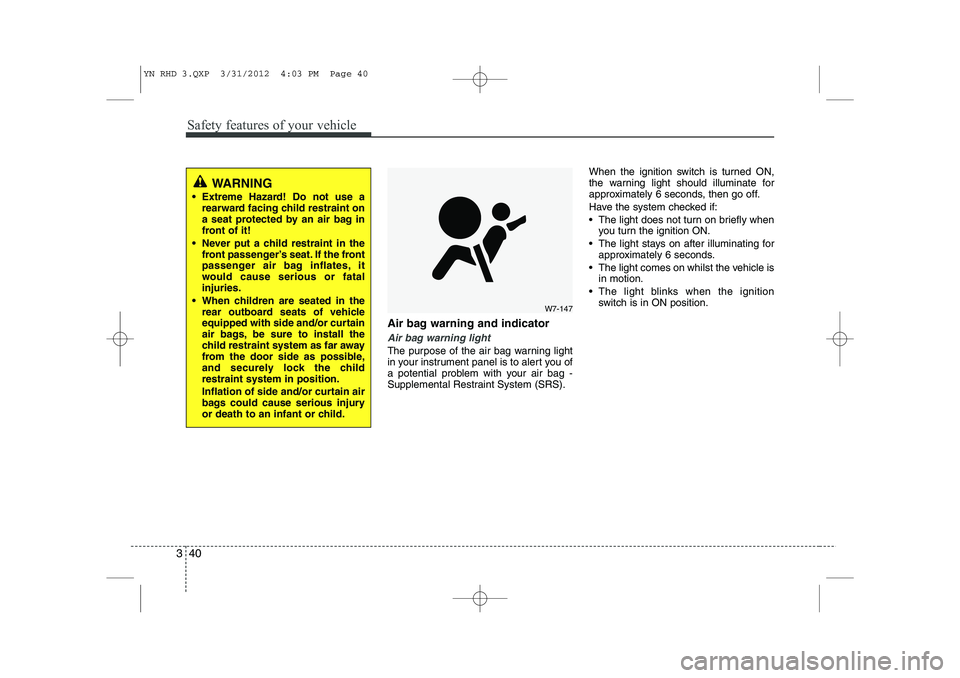
Air bag warning and indicator
Air bag warning light
The purpose of the air bag warning light
in your instrument panel is to alert you of
a potential problem with your air bag -
Supplemental Restraint System (SRS). When the ignition switch is turned ON,
the warning light should illuminate for
approximately 6 seconds, then go off.
Have the system checked if:
The light does not turn on briefly when
you turn the ignition ON.
The light stays on after illuminating for approximately 6 seconds.
The light comes on whilst the vehicle is in motion.
The light blinks when the ignition switch is in ON position.
WARNING
Extreme Hazard! Do not use a rearward facing child restraint on
a seat protected by an air bag in
front of it!
Never put a child restraint in the front passenger’s seat. If the front
passenger air bag inflates, it
would cause serious or fatalinjuries.
When children are seated in the rear outboard seats of vehicle
equipped with side and/or curtain
air bags, be sure to install the
child restraint system as far away
from the door side as possible,
and securely lock the childrestraint system in position.
Inflation of side and/or curtain air
bags could cause serious injury
or death to an infant or child.
W7-147
YN RHD 3.QXP 3/31/2012 4:03 PM Page 40
Page 456 of 751
351
Safety features of your vehicle
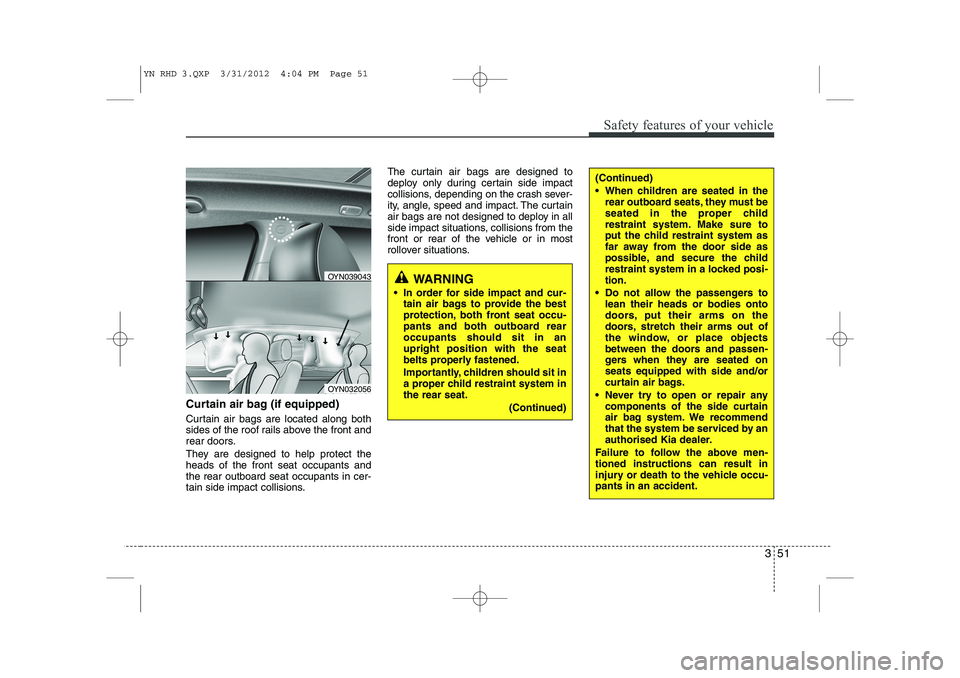
Curtain air bag (if equipped)
Curtain air bags are located along both
sides of the roof rails above the front and
rear doors.
They are designed to help protect the heads of the front seat occupants andthe rear outboard seat occupants in cer-
tain side impact collisions.The curtain air bags are designed to
deploy only during certain side impact
collisions, depending on the crash sever-
ity, angle, speed and impact. The curtain
air bags are not designed to deploy in all
side impact situations, collisions from the
front or rear of the vehicle or in most
rollover situations.
WARNING
In order for side impact and cur- tain air bags to provide the best
protection, both front seat occu-
pants and both outboard rearoccupants should sit in anupright position with the seat
belts properly fastened.
Importantly, children should sit in
a proper child restraint system inthe rear seat.
(Continued)
(Continued)
When children are seated in therear outboard seats, they must be
seated in the proper child
restraint system. Make sure to
put the child restraint system as
far away from the door side as
possible, and secure the child
restraint system in a locked posi-tion.
Do not allow the passengers to lean their heads or bodies onto
doors, put their arms on the
doors, stretch their arms out of
the window, or place objects
between the doors and passen-
gers when they are seated onseats equipped with side and/or
curtain air bags.
Never try to open or repair any components of the side curtain
air bag system. We recommend
that the system be serviced by an
authorised Kia dealer.
Failure to follow the above men-tioned instructions can result in
injury or death to the vehicle occu-pants in an accident.
OYN032056
OYN039043
YN RHD 3.QXP 3/31/2012 4:04 PM Page 51
Page 475 of 751
411
Features of your vehicle
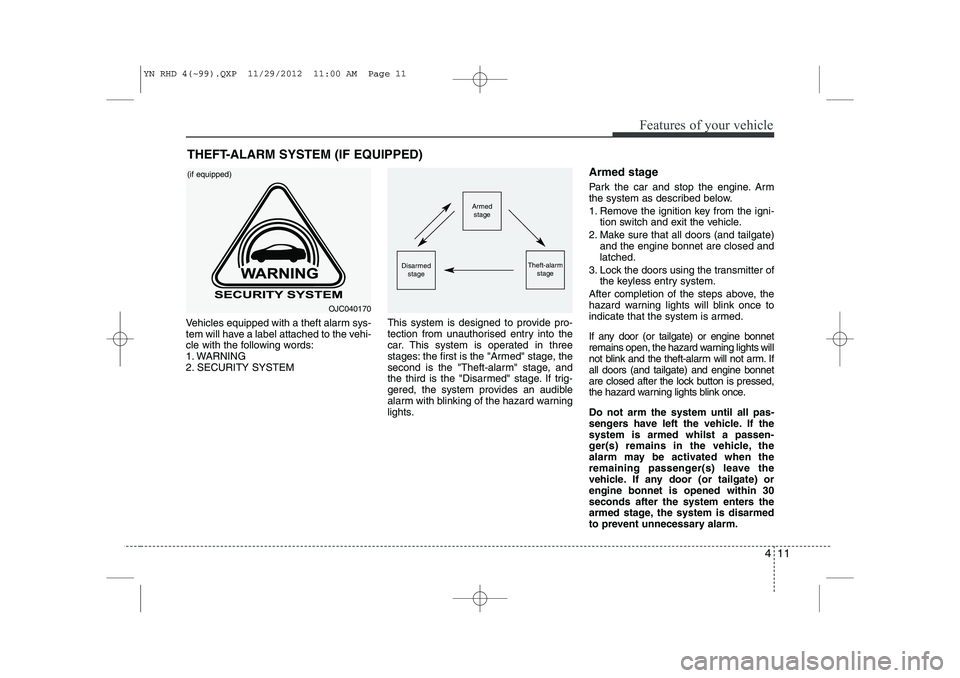
Vehicles equipped with a theft alarm sys-
tem will have a label attached to the vehi-
cle with the following words:
1. WARNING
2. SECURITY SYSTEMThis system is designed to provide pro-
tection from unauthorised entry into the
car. This system is operated in three
stages: the first is the "Armed" stage, the
second is the "Theft-alarm" stage, and
the third is the "Disarmed" stage. If trig-
gered, the system provides an audible
alarm with blinking of the hazard warning
lights.Armed stage
Park the car and stop the engine. Arm
the system as described below.
1. Remove the ignition key from the igni-
tion switch and exit the vehicle.
2. Make sure that all doors (and tailgate) and the engine bonnet are closed and latched.
3. Lock the doors using the transmitter of the keyless entry system.
After completion of the steps above, the
hazard warning lights will blink once to
indicate that the system is armed.
If any door (or tailgate) or engine bonnet
remains open, the hazard warning lights will
not blink and the theft-alarm will not arm. Ifall doors (and tailgate) and engine bonnet
are closed after the lock button is pressed,
the hazard warning lights blink once. Do not arm the system until all pas-
sengers have left the vehicle. If thesystem is armed whilst a passen-
ger(s) remains in the vehicle, the
alarm may be activated when the
remaining passenger(s) leave the
vehicle. If any door (or tailgate) orengine bonnet is opened within 30
seconds after the system enters the
armed stage, the system is disarmed
to prevent unnecessary alarm.
THEFT-ALARM SYSTEM (IF EQUIPPED)
Armed
stage
Theft-alarm stageDisarmedstage
OJC040170
(if equipped)
YN RHD 4(~99).QXP 11/29/2012 11:00 AM Page 11
Page 477 of 751
413
Features of your vehicle
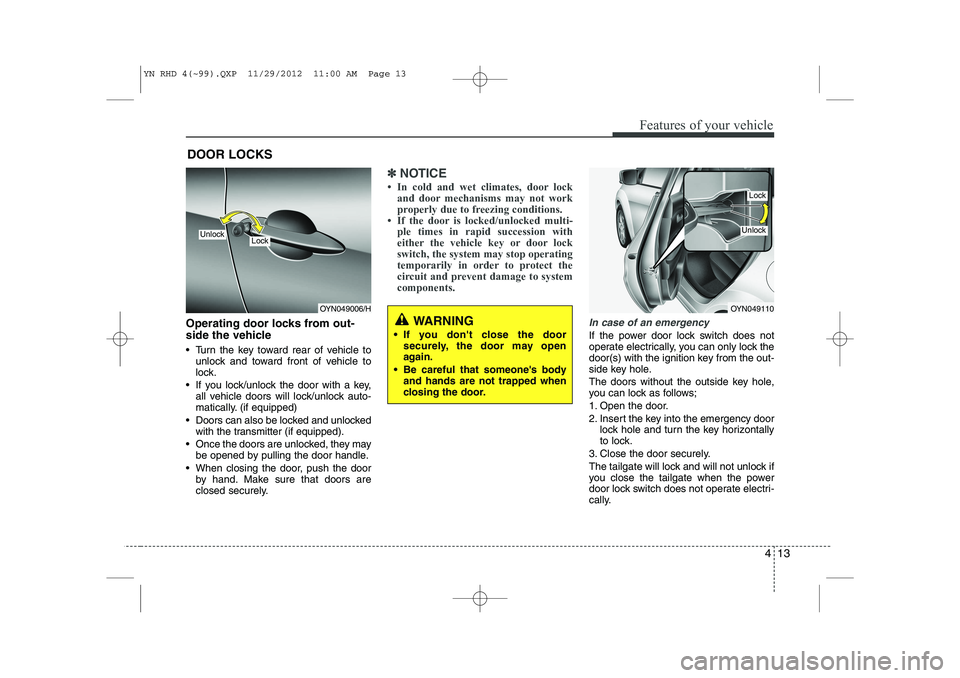
Operating door locks from out-
side the vehicle
Turn the key toward rear of vehicle tounlock and toward front of vehicle to
lock.
If you lock/unlock the door with a key, all vehicle doors will lock/unlock auto-
matically. (if equipped)
Doors can also be locked and unlocked with the transmitter (if equipped).
Once the doors are unlocked, they may be opened by pulling the door handle.
When closing the door, push the door by hand. Make sure that doors are
closed securely.
✽✽ NOTICE
Page 480 of 751
Features of your vehicle
16
4
Deadlock system (if equipped)
Some vehicles are equipped with a
deadlocking system. Deadlocks preventopening a door from either inside or out-
side the vehicle once the deadlocks have
been activated providing an additional
measure of vehicle security.
To lock the vehicle using the deadlock
function, the doors must be locked using
the (smart) key or the Remote Keyless
Entry transmitter. To unlock the vehicle,
the (smart) key or the transmitter must beused again.
To lock a vehicle without using the dead-
lock function, the doors should be locked
by pressing the door lock button and
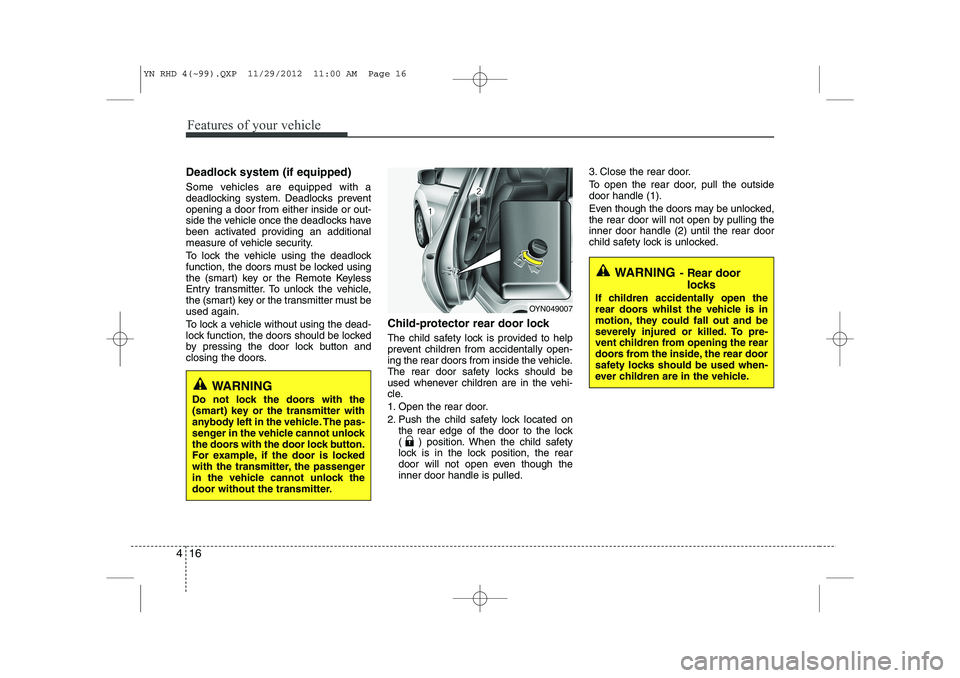
closing the doors. Child-protector rear door lock
The child safety lock is provided to help
prevent children from accidentally open-
ing the rear doors from inside the vehicle.
The rear door safety locks should be
used whenever children are in the vehi-
cle.
1. Open the rear door.
2. Push the child safety lock located on
the rear edge of the door to the lock
( ) position. When the child safety
lock is in the lock position, the rear
door will not open even though theinner door handle is pulled. 3. Close the rear door.
To open the rear door, pull the outside door handle (1).
Even though the doors may be unlocked,
the rear door will not open by pulling theinner door handle (2) until the rear door
child safety lock is unlocked.
WARNING
- Rear door
locks
If children accidentally open the
rear doors whilst the vehicle is in
motion, they could fall out and be
severely injured or killed. To pre-
vent children from opening the rear
doors from the inside, the rear door
safety locks should be used when-
ever children are in the vehicle.
OYN049007
WARNING
Do not lock the doors with the
(smart) key or the transmitter with
anybody left in the vehicle. The pas-
senger in the vehicle cannot unlock
the doors with the door lock button.
For example, if the door is locked
with the transmitter, the passenger
in the vehicle cannot unlock the
door without the transmitter.
YN RHD 4(~99).QXP 11/29/2012 11:00 AM Page 16
Page 482 of 751
Features of your vehicle
18
4
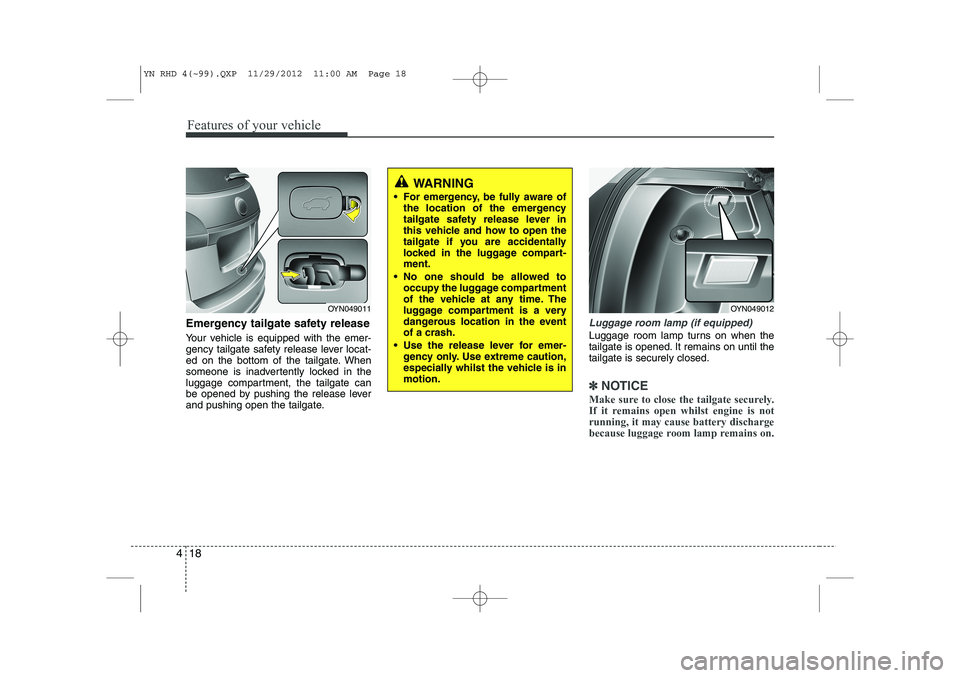
Emergency tailgate safety release
Your vehicle is equipped with the emer-
gency tailgate safety release lever locat-
ed on the bottom of the tailgate. When
someone is inadvertently locked in the
luggage compartment, the tailgate can
be opened by pushing the release lever
and pushing open the tailgate.Luggage room lamp (if equipped)
Luggage room lamp turns on when the
tailgate is opened. It remains on until thetailgate is securely closed.
✽✽
NOTICE
Make sure to close the tailgate securely.
If it remains open whilst engine is notrunning, it may cause battery discharge
because luggage room lamp remains on.
WARNING
For emergency, be fully aware of the location of the emergency
tailgate safety release lever in
this vehicle and how to open the
tailgate if you are accidentally
locked in the luggage compart-ment.
No one should be allowed to occupy the luggage compartment
of the vehicle at any time. The
luggage compartment is a very
dangerous location in the eventof a crash.
Use the release lever for emer- gency only. Use extreme caution,
especially whilst the vehicle is inmotion.
OYN049012OYN049011
YN RHD 4(~99).QXP 11/29/2012 11:00 AM Page 18