2013 KIA CEED inflation pressure
[x] Cancel search: inflation pressurePage 991 of 1168

Driving your vehicle
66
5
Driving in flooded areas
Avoid driving through flooded areas
unless you are sure the water is no high-
er than the bottom of the wheel hub.
Drive through any water slowly. Allowadequate stopping distance because
brake performance may be affected.
After driving through water, dry the
brakes by gently applying them several
times whilst the vehicle is moving slowly.
Driving off-road
Drive carefully off-road because your
vehicle may be damaged by rocks or
roots of trees. Become familiar with the
off-road conditions where you are going
to drive before you begin driving. Highway driving
Tyres
Adjust the tyre inflation pressures to
specification. Low tyre inflation pressures
will result in overheating and possible
failure of the tyres.
Avoid using worn or damaged tyres
which may result in reduced traction or
tyre failure.
✽✽
NOTICE
Never exceed the maximum tyre infla-
tion pressure shown on the tyres.
Fuel, engine coolant and engine oil
High speed travel consumes more fuel
than urban motoring. Do not forget to
check both engine coolant and engineoil.
Drive belt
A loose or damaged drive belt may result
in overheating of the engine.
WARNING
Underinflated or overinflated tyres can cause poor handling,
loss of vehicle control, and sud-den tyre failure leading to acci-
dents, injuries, and even death.
Always check the tyres for proper
inflation before driving. For prop-
er tyre pressures, refer to section
8, “Tyres and wheels”.
(Continued)
(Continued)
Driving on tyres with no or insuf-ficient tread is dangerous. Worn- out tyres can result in loss of
vehicle control, collisions, injury,
and even death. Worn-out tyresshould be replaced as soon as
possible and should never be
used for driving. Always check
the tyre tread before driving your
vehicle. For further information
and tread limits, refer to section
7, “Tyres and wheels”.
JD RHD 5.QXP 7/21/2012 1:16 PM Page 66
Page 1019 of 1168
What to do in an emergency
14
6
Wheel nut tightening torque:
Steel wheel & aluminium alloy wheel:
9~11 kg.m (65~79 lb.ft)
If you have a tyre gauge, remove the
valve cap and check the air pressure.
If the pressure is lower than recom-
mended, drive slowly to the nearest
service station and inflate to the cor-
rect pressure. If it is too high, adjust
it until it is correct. Always reinstall
the valve cap after checking or
adjusting tyre pressure. If the cap is
not replaced, air may leak from the
tyre. If you lose a valve cap, buyanother and install it as soon as pos-
sible.
After you have changed wheels,
always secure the flat tyre in its place
and return the jack and tools to their
proper storage locations. To prevent the jack, jack handle,
wheel lug nut wrench and spare tyre
from rattling whilst the vehicle is in
motion, store them properly.CAUTION
Your vehicle has metric threads
on the wheel studs and nuts.Make certain during wheel removal that the same nuts thatwere removed are reinstalled -or, if replaced, that nuts with metric threads and the samechamfer configuration are used.Installation of a non-metric thread nut on a metric stud orvice-versa will not secure thewheel to the hub properly andwill damage the stud so that it must be replaced.
Note that most lug nuts do nothave metric threads. Be sure touse extreme care in checking for thread style before installingaftermarket lug nuts or wheels.If in doubt, we recommend thatyou consult an authorised Kia dealer.
WARNING - Wheel studs
If the studs are damaged, they
may lose their ability to retain
the wheel. This could lead to theloss of the wheel and a collisionresulting in serious injuries.
WARNING - Inadequate
spare tyre pressure
Check the inflation pressures as
soon as possible after installing
the spare tyre. Adjust it to the
specified pressure, if necessary.
Refer to “Tyres and wheels” insection 8.
JD RHD 6.QXP 7/21/2012 12:56 PM Page 14
Page 1020 of 1168
615
What to do in an emergency
Important - use of compact sparetyre (if equipped)
Your vehicle is equipped with a com-
pact spare tyre. This compact spare
tyre takes up less space than a reg-
ular-size tyre. This tyre is smaller
than a conventional tyre and is
designed for temporary use only.
The compact spare should be inflat-
ed to 420 kPa (60 psi).
✽✽NOTICE
Check the inflation pressure after
installing the spare tyre. Adjust it to
the specified pressure, as necessary.
When using a compact spare tyre,
observe the following precautions:
Under no circumstances should you exceed 80 km/h (50 mph); a higher speed could damage the
tyre.
Ensure that you drive slowly enough to avoid all hazards. Anyroad hazard, such as a pothole or
debris, could seriously damage the
compact spare.
Any continuous road use of this tyre could result in tyre failure, loss
of vehicle control, and possible
personal injury.
Do not exceed the vehicle’s maxi- mum load rating or the load-carry-
ing capacity shown on the sidewall
of the compact spare tyre.
Avoid driving over obstacles. The compact spare tyre diameter issmaller than the diameter of a con-
ventional tyre and reduces the
ground clearance approximately25 mm (1 inch), which could result
in damage to the vehicle.
CAUTION
You should drive carefully
when the compact spare is inuse. The compact spareshould be replaced by theproper conventional tyre and rim at the first opportunity.
The operation of this vehicle is not recommended withmore than one compact spare tyre in use at the same time.
WARNING
The compact spare tyre is for
emergency use only. Do not
operate your vehicle on thiscompact spare at the speed
over 80 km/h (50 mph). Theoriginal tyre should be repaired
or replaced as soon as possible
to avoid failure of the spare
possibly leading to personal
injury or death.
JD RHD 6.QXP 7/21/2012 12:56 PM Page 15
Page 1024 of 1168
619
What to do in an emergency
7. Pressure gauge for displaying thetyre inflation pressure
8. Button for reducing tyre inflation pressure
9. Hose to connect compressor and sealant bottle or compressor and wheel
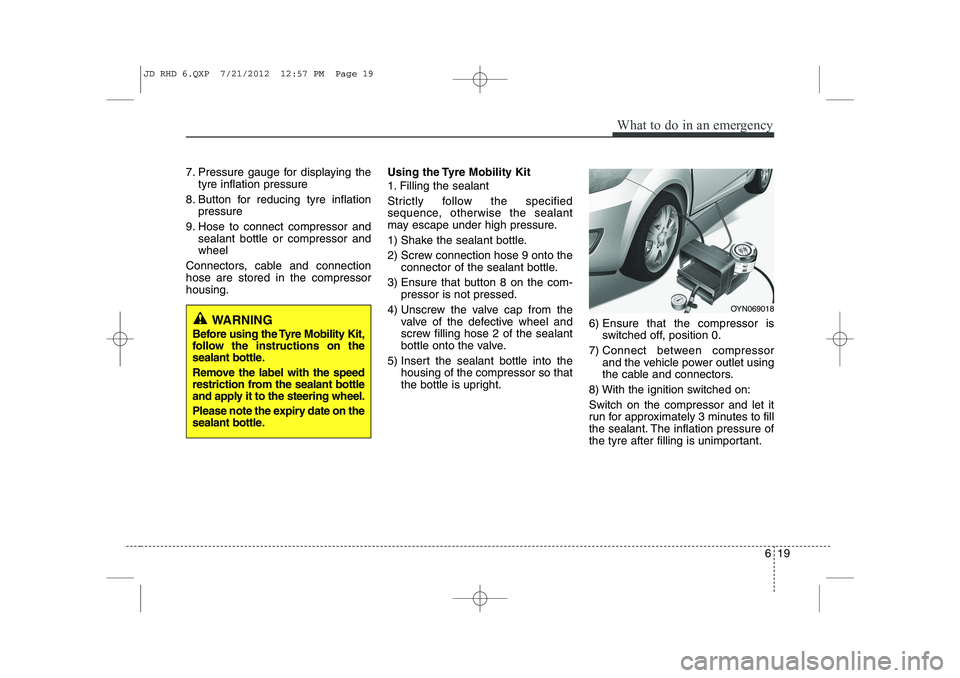
Connectors, cable and connectionhose are stored in the compressorhousing. Using the Tyre Mobility Kit
1. Filling the sealant
Strictly follow the specified
sequence, otherwise the sealant
may escape under high pressure.
1) Shake the sealant bottle.
2) Screw connection hose 9 onto the
connector of the sealant bottle.
3) Ensure that button 8 on the com- pressor is not pressed.
4) Unscrew the valve cap from the valve of the defective wheel and
screw filling hose 2 of the sealant
bottle onto the valve.
5) Insert the sealant bottle into the housing of the compressor so that
the bottle is upright. 6) Ensure that the compressor is
switched off, position 0.
7) Connect between compressor and the vehicle power outlet using
the cable and connectors.
8) With the ignition switched on: Switch on the compressor and let it
run for approximately 3 minutes to fill
the sealant. The inflation pressure of
the tyre after filling is unimportant.
OYN069018
WARNING
Before using the Tyre Mobility Kit,
follow the instructions on the
sealant bottle.
Remove the label with the speed
restriction from the sealant bottle
and apply it to the steering wheel.
Please note the expiry date on the
sealant bottle.
JD RHD 6.QXP 7/21/2012 12:57 PM Page 19
Page 1025 of 1168
What to do in an emergency
20
6
9) Switch off the compressor. 10) Detach the hoses from the sealant bottle connector and
from the tyre valve.
Return the Tyre Mobility Kit to its
storage location in the vehicle. Distributing the sealant
Immediately drive approximately 3
km (2 miles) to evenly distribute the
sealant in the tyre.
Producing the tyre inflation pres- sure
1) After driving approximately 3 km
(2 miles), stop at a suitable loca- tion.
2) Connect connection hose 9 of the compressor directly to the tyre
valve.
3) Connect between compressor and the vehicle power outlet using
the cable and connectors.
4) Adjust the tyre inflation pressure to 220 kPa (32 psi). With the igni-
tion switched on, proceed as fol-
lows.
- To increase the inflation pres- sure: Switch on the compressor,
position I. To check the current
inflation pressure setting, briefly
switch off the compressor.
WARNING
Carbon monoxide poisoning
and suffocation is possible if the
engine is left running in a poorly
ventilated or unventilated loca-
tion (such as inside a building).
WARNING
Do not let the compressor run for
more than 10 minutes, otherwise
the device will overheat and may
be damaged.
CAUTION
Do not exceed a speed of 80 km/h (50 mph). If possible, donot fall below a speed of 20 km/h (12 mph).
Whilst driving, if you experienceany unusual vibration, ride dis-turbance or noise, reduce yourspeed and drive with caution until you can safely pull off ofthe side of the road.
Call for road side service or tow-ing.
JD RHD 6.QXP 7/21/2012 12:57 PM Page 20
Page 1026 of 1168
621
What to do in an emergency
- To reduce the inflation pres-sure: Press the button 8 on the
compressor. Notes on the safe use of the Tyre Mobility Kit
Park your car at the side of the
road so that you can work with the
Tyre Mobility Kit away from moving
traffic. Place your warning triangle
in a prominent place to make pass-
ing vehicles aware of your location.
To be sure your vehicle won't move, even when you're on fairly
level ground, always set your park-
ing brake.
Only use the Tyre Mobility Kit for sealing/inflation passenger car
tyres. Do not use on motorcycles,
bicycles or any other type of tyres.
Do not remove any foreign objects- such as nails or screws -that have
penetrated the tyre.
Before using the Tyre Mobility Kit, read the precautionary advice
printed on the sealant bottle!
Provided the car is outdoors, leave the engine running. Otherwise
operating the compressor may
eventually drain the car battery. Never leave the Tyre Mobility Kit
unattended whilst it is being used.
Do not leave the compressor run- ning for more than 10 min. at a time
or it may overheat.
Do not use the Tyre Mobility Kit if the ambient temperature is below -30°C (-22°F).
Do not use the sealing compound after its expiration date which can
be found on the label of the bottle.
Keep away from children.
WARNING
The tyre inflation pressure must
be at least 220 kPa (32 psi). If it
is not, do not continue driving.
Call for road side service or
towing.
CAUTION
If the inflation pressure is not maintained, drive the vehicle asecond time, refer to Distributing the sealant. Thenrepeat steps 1 to 4.
Use of the Tyre Mobility Kit maybe ineffectual for tyre damagelarger than approximately 4 mm (0.16 in). We recommend thatyou contact an authorised Kiadealer if the tyre cannot be made roadworthy with the TyreMobility Kit.
WARNING
Have your tyre repaired as soon
as possible. The tyre may loose
air pressure at any time after
inflating with the TMK.
CAUTION
The Tyre Mobility Kit is a tempo- rary fix to the tyre and we rec-ommend that the tyre beinspected by an authorised Kia dealer as soon as possible.
JD RHD 6.QXP 7/21/2012 12:57 PM Page 21
Page 1028 of 1168
623
What to do in an emergency
TYRE PRESSURE MONITORING SYSTEM (TPMS) (IF EQUIPPED)
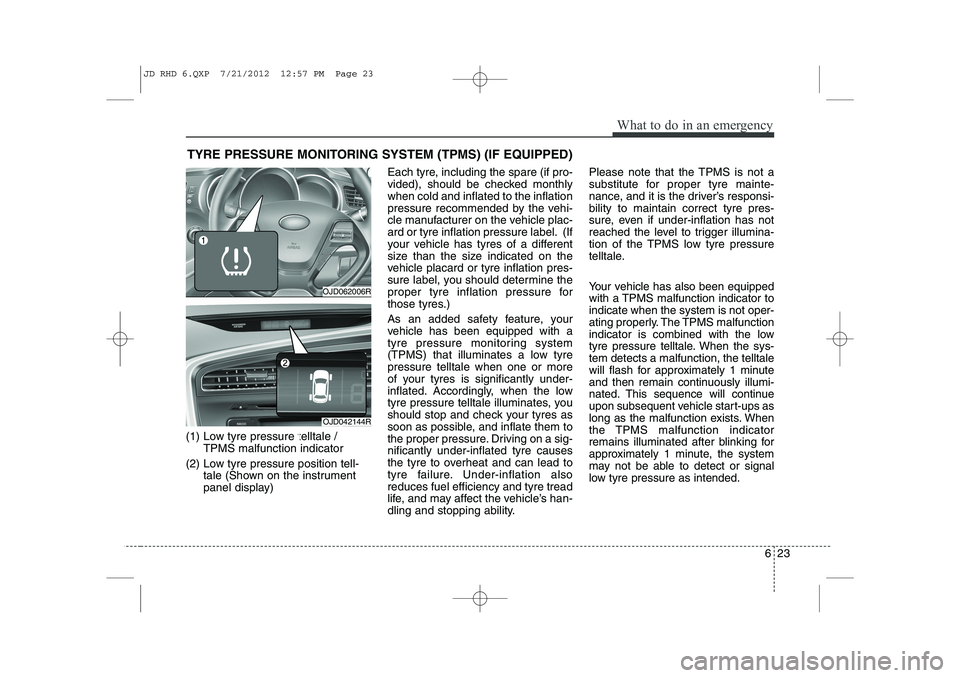
(1) Low tyre pressure telltale / TPMS malfunction indicator
(2) Low tyre pressure position tell- tale (Shown on the instrument
panel display) Each tyre, including the spare (if pro-
vided), should be checked monthlywhen cold and inflated to the inflation
pressure recommended by the vehi-
cle manufacturer on the vehicle plac-
ard or tyre inflation pressure label. (If
your vehicle has tyres of a different
size than the size indicated on the
vehicle placard or tyre inflation pres-
sure label, you should determine the
proper tyre inflation pressure for
those tyres.)
As an added safety feature, your
vehicle has been equipped with a
tyre pressure monitoring system
(TPMS) that illuminates a low tyrepressure telltale when one or more
of your tyres is significantly under-
inflated. Accordingly, when the low
tyre pressure telltale illuminates, you
should stop and check your tyres as
soon as possible, and inflate them to
the proper pressure. Driving on a sig-nificantly under-inflated tyre causes
the tyre to overheat and can lead to
tyre failure. Under-inflation alsoreduces fuel efficiency and tyre tread
life, and may affect the vehicle’s han-
dling and stopping ability. Please note that the TPMS is not a
substitute for proper tyre mainte-
nance, and it is the driver’s responsi-bility to maintain correct tyre pres-
sure, even if under-inflation has not
reached the level to trigger illumina-
tion of the TPMS low tyre pressure
telltale.
Your vehicle has also been equipped
with a TPMS malfunction indicator toindicate when the system is not oper-
ating properly. The TPMS malfunction
indicator is combined with the low
tyre pressure telltale. When the sys-tem detects a malfunction, the telltale
will flash for approximately 1 minute
and then remain continuously illumi-
nated. This sequence will continue
upon subsequent vehicle start-ups as
long as the malfunction exists. When
the TPMS malfunction indicator
remains illuminated after blinking for
approximately 1 minute, the system
may not be able to detect or signal
low tyre pressure as intended.
OJD062006R
OJD042144R
JD RHD 6.QXP 7/21/2012 12:57 PM Page 23
Page 1029 of 1168
What to do in an emergency
24
6
TPMS malfunctions may occur for a
variety of reasons, including theinstallation of replacement or alter-
nate tyres or wheels on the vehicle
that prevent the TPMS from function-
ing properly. Always check theTPMS malfunction telltale afterreplacing one or more tyres or
wheels on your vehicle to ensure that
the replacement or alternate tyres
and wheels allow the TPMS to con-
tinue to function properly.
✽✽
NOTICE
If any of the below happens, we rec- ommend that the system be checked
by an authorised Kia dealer.
1.The low tyre pressure telltale/ TPMS malfunction indicator do
not illuminate for 3 seconds whenthe ignition switch is turned to theON position.
2. The TPMS malfunction indicator remains illuminated after blinking
for approximately 1 minute.
3. The Low tyre pressure position telltale remains illuminated.
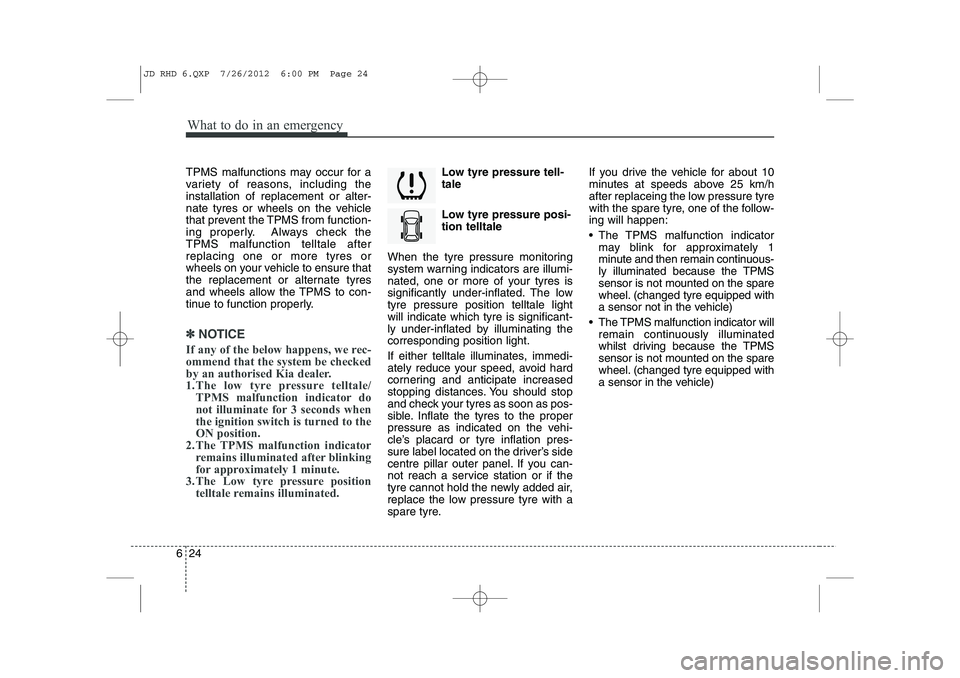
Low tyre pressure tell- tale
Low tyre pressure posi- tion telltale
When the tyre pressure monitoring
system warning indicators are illumi-
nated, one or more of your tyres is
significantly under-inflated. The lowtyre pressure position telltale lightwill indicate which tyre is significant-
ly under-inflated by illuminating thecorresponding position light.
If either telltale illuminates, immedi-
ately reduce your speed, avoid hard
cornering and anticipate increased
stopping distances. You should stop
and check your tyres as soon as pos-
sible. Inflate the tyres to the proper
pressure as indicated on the vehi-
cle’s placard or tyre inflation pres-
sure label located on the driver’s side
centre pillar outer panel. If you can-
not reach a service station or if the
tyre cannot hold the newly added air,
replace the low pressure tyre with a
spare tyre. If you drive the vehicle for about 10
minutes at speeds above 25 km/h
after replaceing the low pressure tyre
with the spare tyre, one of the follow-ing will happen:
The TPMS malfunction indicator
may blink for approximately 1
minute and then remain continuous-
ly illuminated because the TPMSsensor is not mounted on the spare
wheel. (changed tyre equipped with
a sensor not in the vehicle)
The TPMS malfunction indicator will remain continuously illuminated
whilst driving because the TPMSsensor is not mounted on the spare
wheel. (changed tyre equipped with
a sensor in the vehicle)
JD RHD 6.QXP 7/26/2012 6:00 PM Page 24