Page 44 of 655

Four-Door Models
The lower left switch controls the left rear passenger
window, and the lower right switch controls the right
rear passenger window.
Auto-Down
Both the driver and front passenger window switches
have an “Auto-Down” feature. Press the window switch
past the first detent, release, and the window will go
down automatically. To cancel the Auto-Down move-
ment, operate the switch in either the up or down
direction and release the switch.
To stop the window from going all the way down during
the Auto-Down operation, pull up on the switch briefly.
To partially open the window, press halfway to the first
detent and release it when you want the window to stop. Window Lockout Switch — Four-Door Models
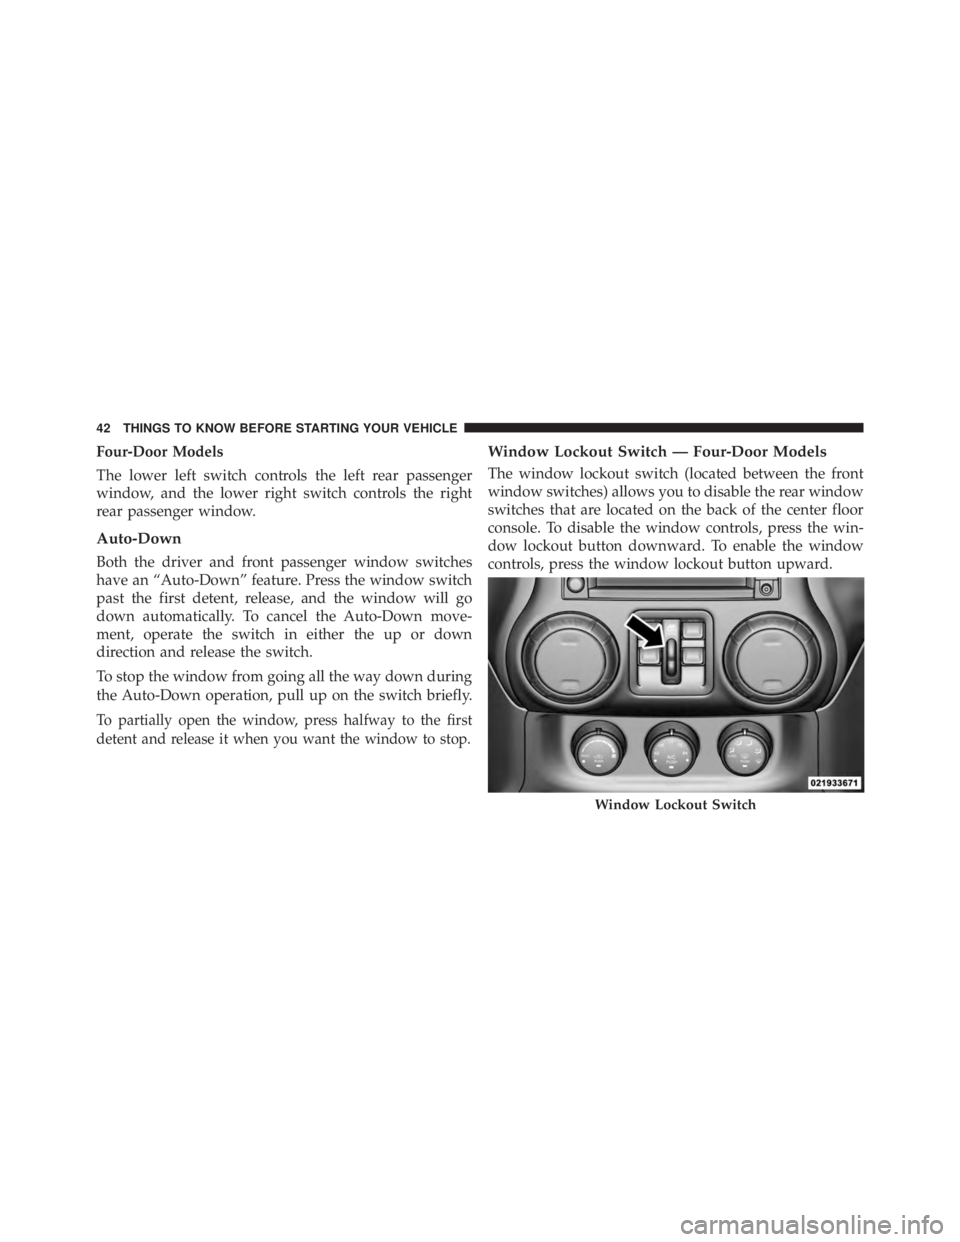
The window lockout switch (located between the front
window switches) allows you to disable the rear window
switches that are located on the back of the center floor
console. To disable the window controls, press the win-
dow lockout button downward. To enable the window
controls, press the window lockout button upward.
Window Lockout Switch42 THINGS TO KNOW BEFORE STARTING YOUR VEHICLE
Page 45 of 655
Rear Power Windows — Four-Door Models
The rear passenger window switches are located on the
back of the center floor console. Press the switch down-
ward to open the window and upward to close the
window. Wind Buffeting
Wind buffeting can be described as the perception of
pressure on the ears or a helicopter-type sound in the
ears. Your vehicle may exhibit wind buffeting with the
windows down in certain open or partially open posi-
tions. This is a normal occurrence and can be minimized
by adjusting the window opening.
Rear Power Window Switches (Four-Door Models) 2 THINGS TO KNOW BEFORE STARTING YOUR VEHICLE 43
Page 185 of 655
A second power outlet is located inside the center console
and is powered directly from the vehicle battery.
CAUTION!• Do not exceed the maximum power of 160 Watts
(13 Amps) at 12 Volts. If the 160 Watt (13 Amp)
power rating is exceeded the fuse protecting the
system will need to be replaced.
• Power outlets are designed for accessory plugs
only. Do not insert any other object in the power
outlets as this will damage the outlet and blow the
fuse. Improper use of the power outlet can cause
damage not covered by your New Vehicle Limited
Warranty. On vehicles equipped with a rear subwoofer, there is a
third power outlet located in the right rear cargo area.
Rear Power Outlet — If Equipped
3 UNDERSTANDING THE FEATURES OF YOUR VEHICLE 183
Page 188 of 655
POWER INVERTER — IF EQUIPPED
There is a 115 Volt, 150 Watt inverter outlet located on the
front of the center console to convert DC current to AC
current. This outlet can power cellular phones, electron-
ics and other low power devices requiring power up to
150 Watts. Certain high-end video games, such as Play-
station3 and XBox360 will exceed this power limit, as will
most power tools.
The power inverter is designed with built-in overload
protection. If the power rating of 150 Watts is exceeded,
the power inverter will automatically shut down. Once
the electrical device has been removed from the outlet the Power Inverter186 UNDERSTANDING THE FEATURES OF YOUR VEHICLE
Page 190 of 655
CUPHOLDERS
Front Cupholders
The front cupholders are located in the center console. Rear Cupholders
The rear cupholders are located on the back of the center
console.
Front Cupholders Rear Cupholders188 UNDERSTANDING THE FEATURES OF YOUR VEHICLE
Page 191 of 655
STORAGE
Glovebox Storage
The lockable glovebox storage compartment is located on
the passenger side of the lower instrument panel. Pull
outward on the handle/latch to open the compartment.
Console Storage Compartment
To lock or unlock the storage compartment, insert the
ignition key and turn. To open the storage compartment,
press the latch and lift the cover. Center Console
3 UNDERSTANDING THE FEATURES OF YOUR VEHICLE 189
Page 292 of 655
WARNING!You or others could be injured if you carry the side
bars loose in your vehicle. Remove the side bars from
the vehicle or securely store them as described or
they may cause personal injury if an accident occurs.
See your authorized dealer for the cinch straps.
10. Remove the windshield wiper arms by first pulling
the wiper away from the windshield and out to the
“lock” position. Unsnap the wiper arm nut caps, and
remove the retaining nuts. Lift the wiper arms off and
store them in the center console or securely behind
the rear seat.
NOTE: It may be necessary to use a battery terminal
puller tool in order to separate the wiper arms from the
shaft after the nuts have been removed. 11. Remove the lower windshield plates by removing the
six black round-headed Torx � head screws (using a
#40 Torx � head driver) on each side of the base of the
windshield.290 UNDERSTANDING THE FEATURES OF YOUR VEHICLE
Page 384 of 655

iPod � /USB/MP3 CONTROL — IF EQUIPPED
NOTE: This section is for sales code RES and REQ/
REL/RET radios only with Uconnect™. For sales code
RBZ/RHB, RHR, RHP, RHW or RB2 touch-screen radio
iPod � /USB/MP3 control feature, refer to the separate
RBZ/RHB, RHR, RHP, RHW or RB2 User’s Manual.
iPod � /USB/MP3 control is available only if equipped as
an option with these radios.
This feature allows an iPod � or external USB device to be
plugged into the USB port, located in the center console.
iPod � control supports Mini, 4G, Photo, Nano, 5G iPod �
and iPhone � devices. Some iPod � software versions may
not fully support the iPod � control features. Please visit
Apple’s website for software updates. NOTE:
• If the radio has a USB port, refer to the appropriate
Uconnect™ Multimedia radio User ’s Manual for
iPod � or external USB device support capability.
• Connecting an iPod � or consumer electronic audio
device to the AUX port located in the radio faceplate,
plays media, but does not use the iPod � /MP3 control
feature to control the connected device.
Connecting The iPod � Or External USB Device
Use the connection cable to connect an iPod � or external
USB device to the vehicle’s USB/AUX connector port
which is located in the center console.382 UNDERSTANDING YOUR INSTRUMENT PANEL