Page 265 of 655
NOTE: Clean side and rear windows before removal to
assist in preventing scratching during removal of the soft
top. If zippers are difficult to operate due to road dust,
etc., clean them with a mild soap solution and a small
brush. Cleaning products are available through your
authorized dealer.
1. If your vehicle has half-doors, remove each half-door
window by opening the door and lifting the half-door
window out.
NOTE: Stow half-door windows carefully outside of the
vehicle, never inside, to avoid scratches.
2. Unclip and move the sun visors to the side. 3. Release the header latches and hooks from the loops
on the windshield frame.
3 UNDERSTANDING THE FEATURES OF YOUR VEHICLE 263
Page 267 of 655
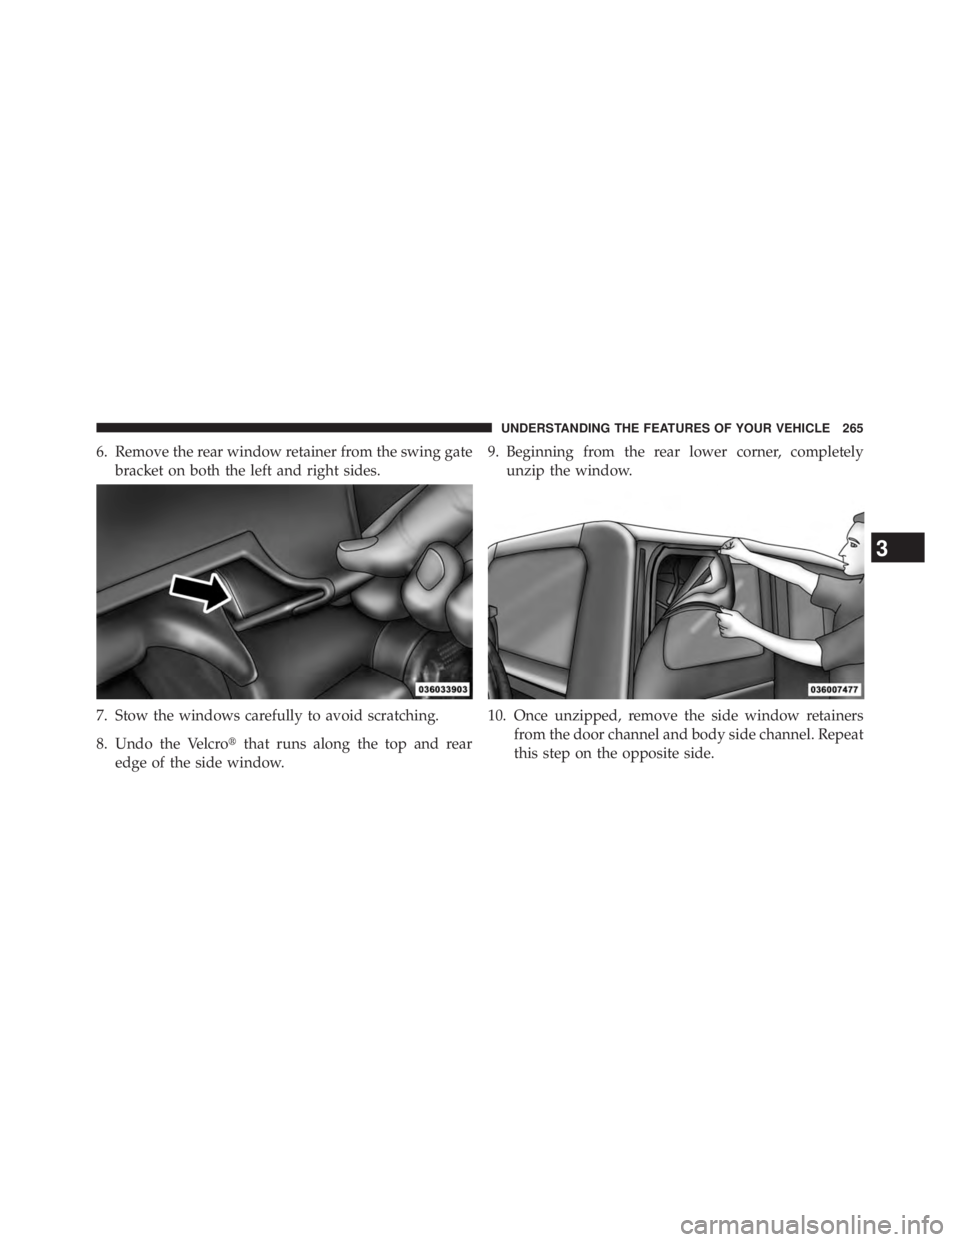
6. Remove the rear window retainer from the swing gate
bracket on both the left and right sides.
7. Stow the windows carefully to avoid scratching.
8. Undo the Velcro � that runs along the top and rear
edge of the side window. 9. Beginning from the rear lower corner, completely
unzip the window.
10. Once unzipped, remove the side window retainers
from the door channel and body side channel. Repeat
this step on the opposite side. 3 UNDERSTANDING THE FEATURES OF YOUR VEHICLE 265
Page 269 of 655
13. The swing gate brackets do not need to be removed
unless the hard top is being installed. To remove the
swing gate brackets, pull the front of the bracket
forward while rolling the entire bracket back in
toward the vehicle to disengage. 14. Grasp the front side bow behind the header, and lift
the top.
3 UNDERSTANDING THE FEATURES OF YOUR VEHICLE 267
Page 277 of 655
Partially install the sail panel retainers into the body side
channel, leaving the last 3 in (7.6 cm) toward the rear
window loose (on both sides). Pulling down on the rear
roof bow (4–bow) will aid in reaching the channel with
the retainers. 12. To install the side windows, affix the window tem-
porarily by attaching it to the Velcro � in the upper
rear corner. Start the zipper but close only about 1 in
(2.5 cm).
3 UNDERSTANDING THE FEATURES OF YOUR VEHICLE 275
Page 303 of 655

7. Seat Belt Reminder Light
When the ignition switch is first turned to ON/
RUN, this light will turn on for four to eight
seconds as a bulb check. During the bulb check, if
the driver’s seat belt is unbuckled, a chime will sound.
After the bulb check or when driving, if the driver seat
belt remains unbuckled, the Seat Belt Reminder Light
will flash or remain on continuously. Refer to “Occupant
Restraints” in “Things To Know Before Starting Your
Vehicle” for further information.
8. Turn Signal Indicators
The left or right arrow will flash with the corre-
sponding exterior turn signal lights when the turn
signal lever is operated. A chime will sound if the vehicle is
driven more than 1 mile (1.6 km) with either turn signal on.
NOTE: If either indicator flashes at a rapid rate, check
for a defective outside light bulb. 9. Oil Pressure Warning Light
This light indicates low engine oil pressure. The
light should turn on momentarily when the engine
is started; if the bulb does not come on, have the system
checked by an authorized dealer. If the light turns on while
driving, stop the vehicle and shut off the engine as soon as
possible. A chime will sound when this light turns on.
Do not operate the vehicle until the cause is corrected.
This light does not indicate how much oil is in the engine.
The engine oil level must be checked under the hood.
10. High Beam Indicator
This indicator shows that the high beam head-
lights are on. Push the multifunction control lever
away from you to switch the headlights to high beam.
Pull the lever toward you to switch the headlights back to
low beam. If the driver’s door is open, and the headlights
or park lights are left on, the high beam indicator light
will remain illuminated and a chime will sound. 4 UNDERSTANDING YOUR INSTRUMENT PANEL 301
Page 307 of 655

gauge to pass � H. � In this case, a continuous chime will
sound, until the engine is allowed to cool or the 4 minutes
duration is expired, whichever come first.
17. Vehicle Security Light — If Equipped
This light will flash at a fast rate for approxi-
mately 15 seconds, when the vehicle security
alarm is arming, and then will flash slowly
until the vehicle is disarmed.
18. Temperature Gauge
The temperature gauge shows engine coolant tempera-
ture. Any reading within the normal range indicates that
the engine cooling system is operating satisfactorily.
The gauge pointer will likely indicate a higher tempera-
ture when driving in hot weather, up mountain grades,
or when towing a trailer. It should not be allowed to
exceed the upper limits of the normal operating range. CAUTION!Driving with a hot engine cooling system could
damage your vehicle. If the temperature gauge reads
“H” pull over and stop the vehicle. Idle the vehicle
with the air conditioner turned off until the pointer
drops back into the normal range. If the pointer
remains on the “H” and you hear continuous chimes,
turn the engine off immediately and call an autho-
rized dealer for service.
WARNING!A hot engine cooling system is dangerous. You or
others could be badly burned by steam or boiling
coolant. You may want to call an authorized dealer
for service if your vehicle overheats. If you decide to (Continued)
4 UNDERSTANDING YOUR INSTRUMENT PANEL 305
Page 311 of 655

Vehicle Odometer Messages
When the appropriate conditions exist, the following
odometer messages will display:
ECO ..................... Fuel Saver Indicator
door ............................ Door Ajar
gATE ....................... Swing Gate Ajar
LoW tirE ...................LowTirePr essure
HOTOIL ...........T ransmission Oil Temperature
Above Normal Limits
gASCAP ...................... Fuel Cap Fault
noFUSE ......................... Fuse Fault
CHAngE OIL ..............Oil Change Required ECO (Fuel Saver Indicator) — If Equipped
The ECO indicator will illuminate when you are driving
in a fuel efficient manner and can be used to modify
driving habits in order to increase fuel economy.
LoW tirE
When the appropriate condition exists, the odometer
display will toggle between LoW and tirE for three
cycles.
“ HOTOIL” Transmission Temperature Warning
Message
The “HOTOIL” cluster message will appear in the odom-
eter accompanied with a chime to indicate that there is
excessive transmission fluid temperature that might oc-
cur with severe usage such as trailer towing. It may also
occur when operating the vehicle in a high torque
converter slip condition, such as 4-wheel drive operation
4 UNDERSTANDING YOUR INSTRUMENT PANEL 309
Page 314 of 655

Certain conditions, such as a loose or missing gas cap,
poor quality fuel, etc., may illuminate the light after
engine start. The vehicle should be serviced if the light
stays on through several typical driving styles. In most
situations, the vehicle will drive normally and will not
require towing.
When the engine is running, the MIL may flash to alert
serious conditions that could lead to immediate loss of
power or severe catalytic converter damage. The vehicle
should be serviced as soon as possible if this occurs.
CAUTION!Prolonged driving with the MIL on could cause damage
to the engine control system. It also could affect fuel
economy and drivability. If the MIL is flashing, severe
catalytic converter damage and power loss will soon
occur. Immediate service is required. WARNING!A malfunctioning catalytic converter, as referenced
above, can reach higher temperatures than in normal
operating conditions. This can cause a fire if you
drive slowly or park over flammable substances such
as dry plants, wood, cardboard, etc. This could result
in death or serious injury to the driver, occupants or
others.
26. Electronic Stability Control (ESC) Activation/
Malfunction Indicator Light — If Equipped
The “ESC Activation/Malfunction Indicator
Light” in the instrument cluster will come on
when the ignition switch is turned to the
ON/RUN position. It should go out with the312 UNDERSTANDING YOUR INSTRUMENT PANEL


 toward the rear
window loose (on both sides). Pulling down on the rear
roof bow (4–bow) will aid")