2013 Hyundai Sonata Hybrid Lighting
[x] Cancel search: LightingPage 81 of 425

4
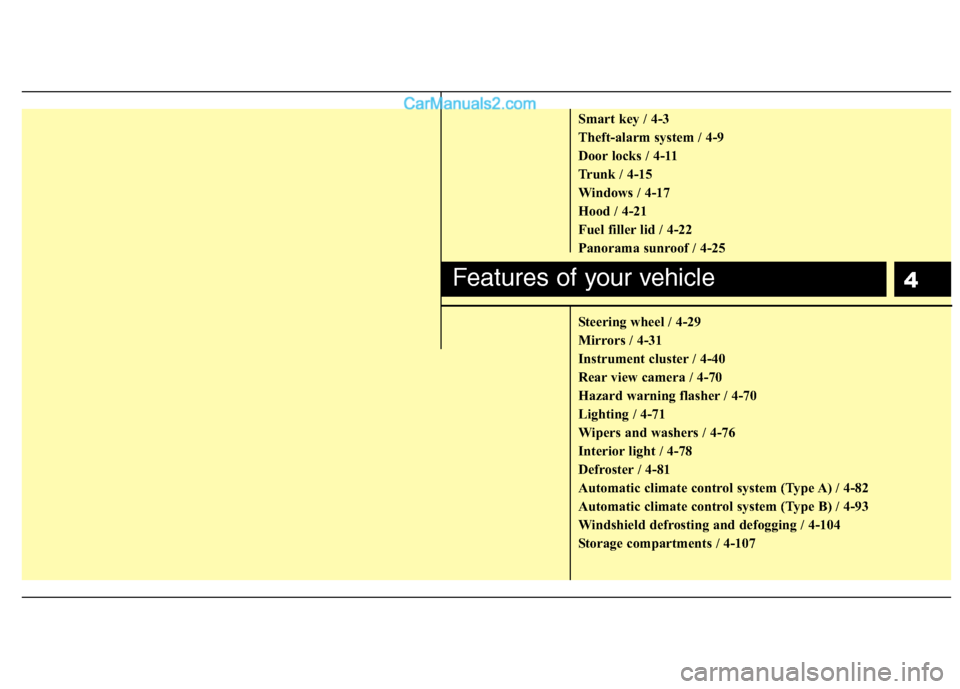
Smart key / 4-3
Theft-alarm system / 4-9
Door locks / 4-11
Trunk / 4-15
Windows / 4-17
Hood / 4-21
Fuel filler lid / 4-22
Panorama sunroof / 4-25
Steering wheel / 4-29
Mirrors / 4-31
Instrument cluster / 4-40
Rear view camera / 4-70
Hazard warning flasher / 4-70
Lighting / 4-71
Wipers and washers / 4-76
Interior light / 4-78
Defroster / 4-81
Automatic climate control system (Type A) / 4-82
Automatic climate control system (Type B) / 4-93
Windshield defrosting and defogging / 4-104
Storage compartments / 4-107
Features of your vehicle
Page 114 of 425

Features of your vehicle
34 4
To adjust the Zone setting:
1. Determine the desired Zone Number
based upon your current location on
the Zone Map.
2. Press and hold the button for 6 sec-
onds, the current Zone Number will
appear on the display.
3. Pressing and holding the button
again will cause the numbers to incre-
ment (Note: they will repeat …13, 14,
15, 1, 2, …). Releasing the button
when the desired Zone Number
appears on the display will set the new
Zone.
4. Within about 5 seconds the compass
will start displaying a compass head-
ing again.
There are some conditions that can
cause changes to the vehicle magnets,
such as installing a ski rack or a CB
antenna. Body repair work on the vehicle
can also cause changes to the vehicle's
magnetic field. In these situations, the
compass will need to be re-calibrated to
quickly correct for these changes. To re-
calibrate the compass:1. Press and hold the button for more
than 9 seconds. When the compass
memory is cleared a "C" will appear in
the display.
2. To calibrate the compass, drive the
vehicle in 2 complete circles at less
than 5 mph (8 km/h).
Integrated HomeLink
®Wireless Control
System
The HomeLink
®Wireless Control System
provides a convenient way to replace up
to three hand-held radio-frequency (RF)
transmitters with a single built-in device.
This innovative feature will learn the
radio frequency codes of most current
transmitters to operate devices such as
gate operators, garage door openers,
entry door locks, security systems, even
home lighting. Both standard and rolling
code-equipped transmitters can be pro-
grammed by following the outlined proce-
dures. Additional HomeLink
®information
can be found at: www.homelink.com or
by calling 1-800-355-3515.Retain the original transmitter of the RF
device you are programming for use in
other vehicles as well as for future
HomeLink
®programming. It is also sug-
gested that upon the sale of the vehicle,
the programmed HomeLink
®buttons be
erased for security purposes.
WARNING
Before programming HomeLink®to
a garage door opener or gate oper-
ator, make sure that people and
objects are out of the way of the
device to prevent potential harm or
damage. Do not use HomeLink
®
with any garage door opener that
lacks the safety stop and reverse
features required by U.S. federal
safety standards (this includes any
garage door opener model manu-
factured before April 1, 1982). A
garage door that cannot detect an
object - signaling the door to stop
and reverse - does not meet current
U.S. federal safety standards. Using
a garage door opener without these
features increases the risk of seri-
ous injury or death.
Page 117 of 425

437
Features of your vehicle
Gate operator & Canadian program-
ming
During programming, your handheld
transmitter may automatically stop trans-
mitting. Continue to press the Integrated
HomeLink
®Wireless Control System but-
ton (note steps 2 through 3 in the
Programming portion of this document)
while you press and re-press ("cycle")
your handheld transmitter every two sec-
onds until the frequency signal has been
learned. The indicator light will flash
slowly and then rapidly after several sec-
onds upon successful training.
Operating HomeLink
®
To operate, simply press and release the
programmed HomeLink®button.
Activation will now occur for the trained
device (i.e. garage door opener, gate
operator, security system, entry door
lock, home/office lighting, etc.). For con-
venience, the hand-held transmitter of
the device may also be used at any time.Reprogramming a single HomeLink
®
button
To program a device to HomeLink®using
a HomeLink®button previously trained,
follow these steps:
1. Press and hold the desired HomeLink
®
button. DO NOT release the button.
2. The indicator light will begin to flash
after 20 seconds. Without releasing the
HomeLink
®button, proceed with
"Programming" step 2.
For questions or comments, contact
HomeLink
®at www.homelink.comor 1-
800-355-3515.
Erasing HomeLink
®buttons
Individual buttons cannot be erased.
However, to erase all three programmed
buttons:
1. Press and hold the two outer
HomeLink
®buttons until the indicator
light begins to flash after 10 seconds.
2. Release both buttons. Do not hold for
longer than 20 seconds.
The Integrated HomeLink
®Wireless
Control System is now in the training
(learn) mode and can be programmed at
any time following the appropriate steps
in the Programming sections above.FCC ID: NZLTLMHL4
IC: 4112A-TLMHL4
This device complies with Part 15 of
the FCC Rules.
Operation is subject to the following two
conditions:
1. This device may not cause harmful
interference, and
2. This device must accept any interfer-
ence received, including interference
that may cause undesired operation.
NVS
®is a registered trademark and Z-
Nav™ is a trademark of the Gentex
Corporation, Zeeland, Michigan.
HomeLink
®is a registered trademark
owned by Johnson Controls,
Incorporated, Milwaukee, Wisconsin.
CAUTION
The transceiver has been tested and
complies with FCC and Industry
Canada rules. Changes or modifica-
tions not expressly approved by the
party responsible for compliance
could void the user's authority to
operate the device.
Page 132 of 425

Features of your vehicle
52 4
Auto door lock
Off- The auto door lock operation will be
canceled.
Speed- All doors will be automatically
locked when the vehicle speed
exceeds 9.3mph (15km/h).
Shift Lever
All doors will be automatically locked if
the shift lever is shifted from the P(Park)
position to the R(Reverse), N(Neutral) or
D(Drive) position.
Auto door unlock
Off- The auto door unlock operation will
be canceled.
Key Out- All doors will be automatically
unlocked when smart key is
removed from the smart key
holder.
Door- All doors will be automatically
unlocked if the driver's door is
unlocked inside.
Shift Lever
All doors will be automatically unlocked if
the shift lever is shifted to the P(Park)
position.
Two-press unlock
Driver Door 1st Press- The driver's door
will unlock when pressing the unlock but-
ton on the transmitter or smart key, press-
ing the button of the driver's outside door
handle with the smart key, or inserting the
key into the key hole of the driver's out-
side door and turning the key toward the
rear of the vehicle. All doors will unlock
when pressing the unlock button on the
smart key, pressing the button of the dri-
ver's outside door handle with the smart
key, or inserting the key into the key hole
of the driver's outside door and turning
the key toward the rear of the vehicle
within 4 seconds.
All Doors 1st Press- All doors will
unlock when pressing the unlock button
on the smart key, pressing the button of
the driver's outside door handle with the
smart key, or inserting the key into the
key hole of the driver's outside door and
turning the key toward the rear of the
vehicle.
Headlamp delay
On- If you turn the engine start/stop but-
ton to the ACC or OFF position with
the headlamp ON, the headlamps
remain on for about 20 minutes.
Also, the headlamp welcome opera-
tion will be activated. Refer to the
[LIGHTING] section in this chapter.
Off- The headlamp delay and headlamp
welcome operation will be can-
celed.
Page 151 of 425

471
Features of your vehicle
Battery saver function
The purpose of this feature is to pre-
vent the battery from being dis-
charged. The system automatically
turns off the parking lights when the
driver turns off the hybrid system and
opens the driver-side door.
With this feature, the parking lights will
be turned off automatically if the driver
parks on the side of the road at night.
If necessary, to keep the lights on
when the vehicle is off, perform the fol-
lowing:
1) Open the driver-side door.
2) Turn the parking lights OFF and ON
again using the light switch on the
steering column.
Headlamp delay (if equipped)
If you press the engine start/stop button
to the ACC or OFF position with the
headlights ON, the headlights (and/or tail
lights) remain on for about 20 minutes.
However, if the driver’s door is opened
and closed, the headlights are turned off
after 30 seconds.
The headlights can be turned off by
pressing the lock button on the smart key
twice or turning the light switch to the
OFF or Auto position.
However, if you turn the light switch to the
Auto position when it is dark outside, the
headlights will not be turned off.
Headlamp welcome function
When the headlight switch is in the ON or
AUTO position and all doors (and trunk)
are closed and locked, if you press the
door unlock button on the smart key, the
headlights will come on for about 15 sec-
onds. At this time, if you press the door
lock button on the smart key, the head-
lights will turn off immediately.
Daytime running light
(if equipped)
Daytime Running Lights (DRL) can make
it easier for others to see the front of your
vehicle during the day. DRL can be help-
ful in many different driving conditions,
and it is especially helpful after dawn and
before sunset.
The DRL system will turn OFF when:
1. The headlight is ON.
2. Engine stops.
3. If the multifuntion switch is on “DRL
OFF” position.
4. Parking brake ON.
LIGHTING
CAUTION
If the driver gets out of the vehicle
through doors other than the (dri-
ver's door), the battery saver func-
tion does not operate and the head
lamp delay does not turn off auto-
matically. Therefore, the battery may
become discharged. In this case,
make sure to turn off the lamps
before getting out of the vehicle.
Page 152 of 425

Features of your vehicle
72 4
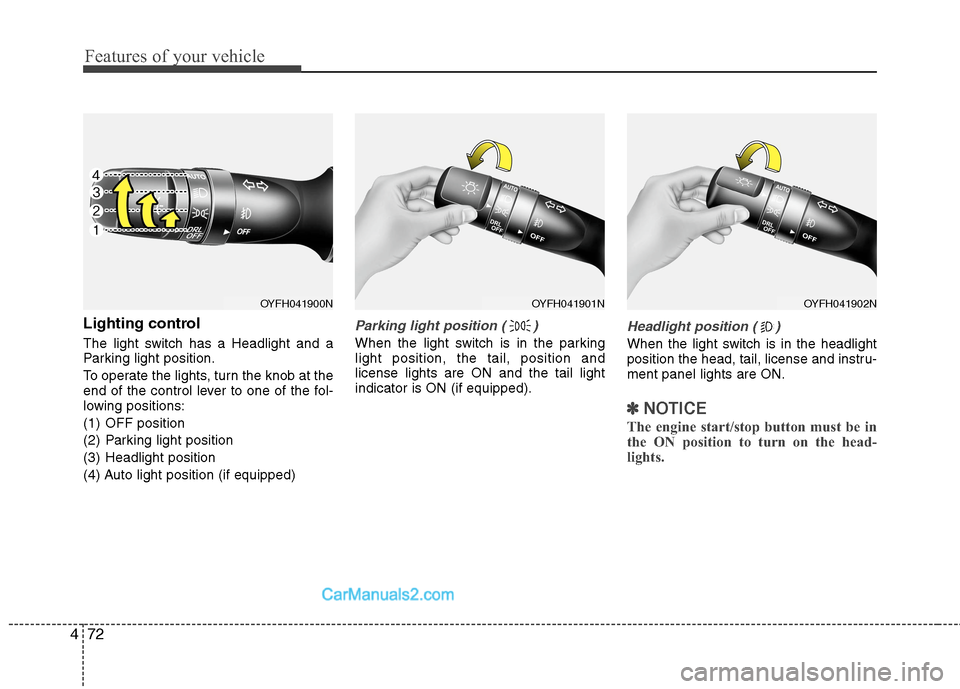
Lighting control
The light switch has a Headlight and a
Parking light position.
To operate the lights, turn the knob at the
end of the control lever to one of the fol-
lowing positions:
(1) OFF position
(2) Parking light position
(3) Headlight position
(4) Auto light position (if equipped)
Parking light position ( )
When the light switch is in the parking
light position, the tail, position and
license lights are ON and the tail light
indicator is ON (if equipped).
Headlight position ( )
When the light switch is in the headlight
position the head, tail, license and instru-
ment panel lights are ON.
✽ ✽
NOTICE
The engine start/stop button must be in
the ON position to turn on the head-
lights.
OYFH041900NOYFH041901NOYFH041902N
Page 422 of 425

Index
6I
Aux, USB and iPod port ·········································4-112
Clothes hanger ·························································4-111
Cup holder ·······························································4-108
Digital clock ····························································4-110
Floor mat anchor(s) ·················································4-111
Power outlet·····························································4-110
Sunvisor···································································4-109
Interior light ···································································4-78
Interior overview ·····························································2-2
Inverter coolant ······························································7-24
Jack and tools (with spare tire) ······································6-14
Jump starting····································································6-6
Label
Air bag warning label················································3-62
Tire sidewall labeling ················································7-43
Tire specification and pressure label···························8-8
Vehicle certification label············································8-7
Latch system, see lower anchor system ························3-33
Light bulbs ·····································································7-60
Lighting··········································································4-71
Battery saver function ···············································4-71
Lower anchor system ·····················································3-33
Lubricants and capacities·················································8-5Maintenance
Explanation of scheduled maintenance items ···········7-19
Maintenance services ··················································7-3
Maintenance under severe usage conditions ·············7-18
Normal maintenance schedule ····································7-8
Owner maintenance·····················································7-5
Scheduled maintenance service ··································7-7
Tire maintenance ·······················································7-42
Maintenance schedule······················································7-7
Maintenance under severe usage conditions ·············7-18
Normal maintenance schedule ····································7-8
Maintenance services ·······················································7-3
Memory fuse ··································································7-51
Mirrors ···········································································4-31
Day/night rearview mirror ········································4-31
Electric chromic mirror (ECM) with Homelink system ··4-31
Inside rearview mirror···············································4-31
Outside rearview mirror ············································4-38
Multi box ·····································································4-108
Multi fuse ·······································································7-53
Neck restraints, see headrest ··································3-7, 3-11
J
L
M
N