Page 113 of 425

433
Features of your vehicle
Z-Nav™ Compass Display
The NVS™ Mirror in your vehicle is also
equipped with a Z-Nav™ Compass that
shows the vehicle Compass heading in
the Display Window using the 8 basic
cardinal headings (N, NE, E, SE, etc.).
Compass function
The Compass can be turned ON and
OFF and will remember the last state
when the ignition is cycled. To turn the
display feature ON/OFF:
1. Press and release the button within
1 second to turn the display feature
OFF.
2. Press and release the button again
within 1 second to turn the display
back ON.
Additional options can be set with press
and hold sequences of the button and
are detailed below.
There is a difference between magnetic
north and true north. The compass in the
mirror can compensate for this difference
when it knows the Magnetic Zone in which
it is operating. This is set either by the
dealer or by the user. The operating Zone
Numbers for North America are shown in
the figure on the following section.
B520C05NF
Page 192 of 425

Aux, USB and iPod®port
If your vehicle has an aux and/or
USB(universal serial bus) port or iPod
port, you can use an aux port to connect
audio devices, a USB port to plug in a
USB, and an iPod port to plug in an iPod.
✽ ✽
NOTICE
When using a portable audio device
connected to the power outlet, noise may
occur during playback. If this happens,
use the power source of the portable
audio device.
❈iPod®is a trademark of Apple Inc.
Navigation system (if equipped)
The navigation system ascertains the
present position of your vehicle by using
information from satellites and guides
you to the place you assign as the desti-
nation.
Detailed information for the navigation
system is described in a separate sup-
plied manual.
Bluetooth hands-free
You can use the mobile phone wirelessly
by using the Bluetooth system.
Detailed information for the Bluetooth
hands-free is described in the “Audio
system” section in this chapter or in the
manual supplied separately.
WARNING
The following must be observed
when installing ANY floor mat to
the vehicle.
Ensure that the floor mats are
securely attached to the vehicle's
floor mat anchor(s) before driving
the vehicle.
Do not use ANY floor mat that
cannot be firmly attached to the
vehicle's floor mat anchors.
Do not stack floor mats on top of
one another (e.g. all-weather rub-
ber mat on top of a carpeted floor
mat). Only a single floor mat
should be installed in each posi-
tion.
IMPORTANT - Your vehicle was
manufactured with driver's side
floor mat anchors that are designed
to securely hold the floor mat in
place. To avoid any interference
with pedal operation, HYUNDAI rec-
ommends that only the HYUNDAI
floor mat designed for use in your
vehicle be installed.
OYF049147N
4112
Features of your vehicle
Page 211 of 425

4131
Features of your vehicle
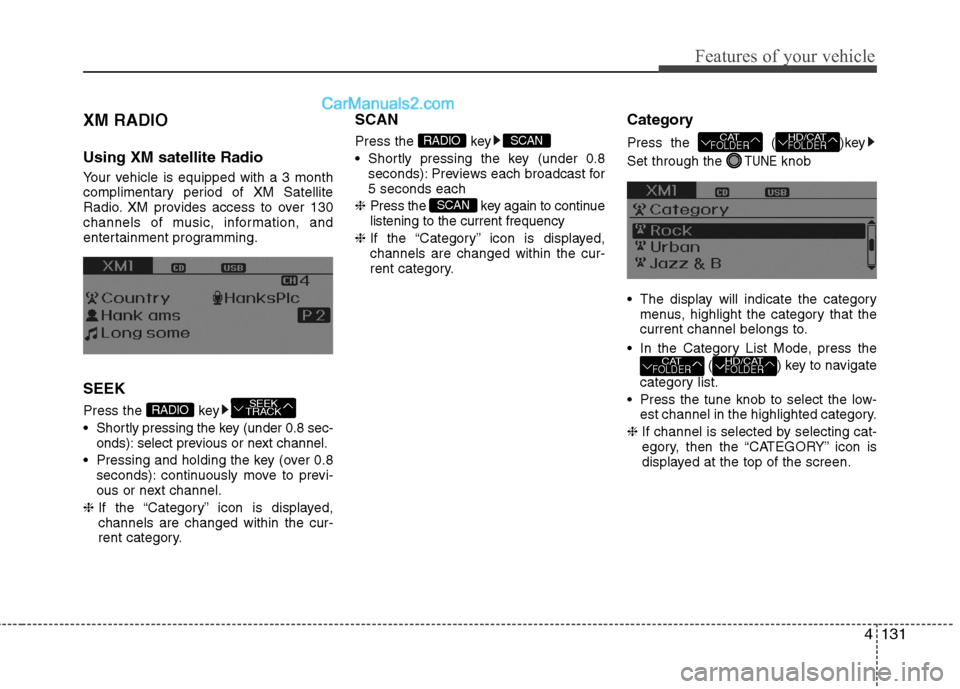
XM RADIO
Using XM satellite Radio
Your vehicle is equipped with a 3 month
complimentary period of XM Satellite
Radio. XM provides access to over 130
channels of music, information, and
entertainment programming.
SEEK
Press the key
Shortly pressing the key (under 0.8 sec-
onds): select previous or next channel.
Pressing and holding the key (over 0.8
seconds): continuously move to previ-
ous or next channel.
❈If the “Category” icon is displayed,
channels are changed within the cur-
rent category.
SCAN
Press the key
Shortly pressing the key (under 0.8
seconds): Previews each broadcast for
5 seconds each
❈Press the key again to continue
listening to the current frequency
❈If the “Category” icon is displayed,
channels are changed within the cur-
rent category.
Category
Press the ( )key
Set through the
TUNEknob
The display will indicate the category
menus, highlight the category that the
current channel belongs to.
In the Category List Mode, press the
( ) key to navigate
category list.
Press the tune knob to select the low-
est channel in the highlighted category.
❈If channel is selected by selecting cat-
egory, then the “CATEGORY” icon is
displayed at the top of the screen.
HD/CATFOLDERCATFOLDER
HD/CATFOLDERCATFOLDER
SCAN
SCANRADIO
SEEK
TRACKRADIO