Page 201 of 422

�Û�ÝTo remove the disc that is currently
playing, press the eject button. You
will see ‘‘EJECT’’ in the display.
When you remove the disc f rom the
slot, the system begins the load
sequence so you can load another
disc in that position. If you do not
load another CD within 10 seconds,
the system selects the previous
mode (AM, FM1, FM2, or
To remove the disc f rom the
changer,firstselectitbypressing
the appropriate preset bar or
corresponding number on the screen.
When that disc begins playing, press
the eject button.
To take the system out of CD mode,
press the AM/FM button or XM
button. Each time you press the
AM/FM button, the system changes
to the next mode (AM, FM1, or FM
2). When you return to CD mode by
pressing the CD/AUX button, play
will continue where it lef t of f .
If you turn the system of f while a CD
is playing, either with the PWR
button or the ignition switch, play
will continue at the same point when
youturnitbackon.
If the disc was not recorded with text
data, only the track number is shown.
To scroll through the display, touch
the or icononthesideof
thedisplay.Togobacktothe
previous display, touch the Return
icon on the display.
Select the desired track/f ile by
touching the icon on the display. The
selected icon will be highlighted in
blue. The system begins to play the
selected track/f ile. With a disc in
MP3 or WMA, touch the f older icon
on the upper lef t of the screen to
move to the parent folder. The
current f older is highlighted in blue. Removing CDs f rom the In-dash
CD Changer
To Stop Playing a Disc
CD Changer (Models with navigation system)
196
12/08/09 16:25:06 31SJC670_203
Features
XM Radio).
Page 202 of 422
When you press the eject button
while listening to the radio, or with
the audio system turned of f , the disc
that was last selected is ejected.
Af ter that disc is ejected, pressing
the eject button again will eject the
next disc in numerical order. By
doing this six times, you can remove
all the discs f rom the changer.
To eject one disc, press and release
the eject button. You can also eject discs when the
ignition switch is on or of f :
To eject all discs, press and hold the
eject button until the LOAD
indicator begins to blink.For inf ormation on how to handle
and protect discs, see page .
198
CD Changer (Models with navigation system)
Protecting Discs
197
12/08/09 16:25:12 31SJC670_204
Features
Page 208 of 422

�´
�µ
�´�µ
�Û�Ý
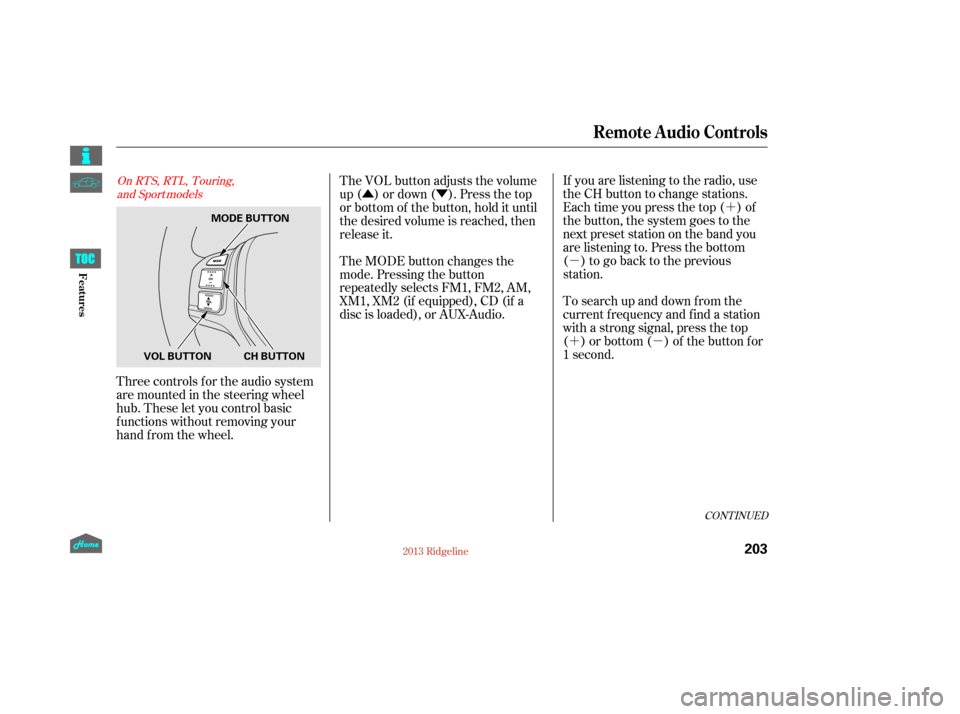
Three controls f or the audio system
are mounted in the steering wheel
hub. These let you control basic
f unctions without removing your
hand f rom the wheel. If you are listening to the radio, use
the CH button to change stations.
Each time you press the top ( ) of
the button, the system goes to the
next preset station on the band you
are listening to. Press the bottom
( ) to go back to the previous
station.
To search up and down from the
current f requency and f ind a station
with a strong signal, press the top
( ) or bottom ( ) of the button for
1 second.
The VOL button adjusts the volume
up ( ) or down ( ). Press the top
or bottom of the button, hold it until
the desired volume is reached, then
release it.
The MODE button changes the
mode. Pressing the button
repeatedly selects FM1, FM2, AM,
XM1, XM2 (if equipped), CD (if a
disc is loaded), or AUX-Audio.
CONT INUED
On RTS, RTL, Touring,
and Sport models
Remote Audio Controls
203
MODE BUTTON
CH BUTTON
VOL BUTTON
12/08/09 16:25:59 31SJC670_210
Features
Page 209 of 422

�´�µ �´
�µ
�´
�µ �´
�µ
�´ �µ
If you are playing a disc, the system
skips to the beginning of the next
track each time you press the top
( ) of the CH button. Press the
bottom ( ) to return to the
beginning of the current track. Press
it again to return to the previous
track. You will see the disc and track
numbers in the upper display.
To go to the next disc, press the top
( ) of the button for 1 second.
Press the bottom ( ) f or 1 second
to go back to the previous disc.
When you play an MP3/WMA disc,
press the top ( ) of the button for 1
second to go to the next folder. Press
the bottom ( ) for 1 second to go
back to the previous folder.If you are listening to XM Radio, use
the CH button to change channels.
Each time you press the top ( ) of
the button, the system goes to the
next preset channel. Press the
bottom( )togobacktothe
previous preset channel.
To go to the next channel of the
category you are listening to, press
the top ( ) of the button for 1
second. Press the bottom ( ) for
1 second to go back to the
previous channel.
On models without navigation system
Remote Audio Controls
204
12/08/09 16:26:05 31SJC670_211
Features
Page 223 of 422
�Ì�Ì�Ì�Ì
Try to reduce all background
noise. If the microphone picks up
voices other than yours,
commands may be misinterpreted. Many commands can be spoken
together. For example, you can
say ‘‘Call 123-456- ’’ or
‘‘Dial Peter.’’
Press and release the HFL Talk
button each time you want to
make a command. Af ter the beep,
speak in a clear, natural tone.
When HFL is in use, navigation
voice commands cannot
be recognized.
To change the volume level of
HFL, use the audio system
volume knob or the steering
wheel volume controls.
Airorwindnoisefromthe
dashboard and side vents and all
windows may interfere with the
microphone. Adjust or close them
as necessary.
BluetoothHandsFreeL ink
Voice Cont rol T ips
218
MICROPHONE
12/08/09 16:27:42 31SJC670_225
Features
Page 228 of 422

�Î
�Î
CONT INUED
BluetoothHandsFreeL ink
223
‘‘Change Language’’‘‘Hands Free Help’’
‘‘System
Set up’’
‘‘Tutorial’’ ‘‘Clear’’
‘‘Auto Transfer’’ ‘‘Call Notification’’ ‘‘Security’’
‘‘Change Passcode’’
Press HFL
Talk button
Press and release the HFL Talk button each time you give a command.
: Canadian models Set how you would like to be notified of an incoming call
Hear a list of available commands and additional information describing each command Apply a security passcode to the system that must be input at each key
cycle to access the system
(See page237)
Change your security passcode (See page238)
(See page 238)
Clear the system of all paired phones, phonebook entries and security
passcode (See page 239)
Change language from English to French (See page240)
Hear a tutorial for general rules on using the system (See page219)
(See page 219)Set calls to automatically transfer from your phone to HFL when you
enter the vehicle
(See page238)
12/08/09 16:28:16 31SJC670_230
Features
Page 231 of 422

Press and release the HFL Talk
button bef ore a command.Say ‘‘ .’’
Say‘‘ ’’aftertheprompts.
HFL will tell you which phone is
linked to the system. Press and release the HFL Talk
button bef ore a command.
Say ‘‘ .’’ Say ‘‘
.’’
Press and release the HFL Talk
button bef ore a command.
Say ‘‘ ’’ af ter the
prompts.
HFL disconnects the linked phone
and searches for another
paired phone.
Once another phone is f ound, it is
linked to the system. HFL will
inform you which phone
is now linked.
If no other phones are f ound or
paired, HFL will inf orm you that the
original phone is linked again. Say ‘‘
’’ af ter the
prompts.
If you want HFL to create a
random code each time you pair a
phone, say ‘‘ .’’ If you want
to choose your own 4-digit code to
be used each time, say ‘‘ ’’
and f ollow the HFL prompts.
1.
2.
3.
1.
2.
3.1.
2.
3.
4.
BluetoothHandsFreeL ink
T o hear which paired phone is current ly linked: To change f rom the currently linked
phone t o anot her paired phone: T o change t he pairing code set t ing:
Phone setup
StatusPhone setup
Phone setup
Next phone Set pairing code
Random Fixed
226
12/08/09 16:28:49 31SJC670_233
Features
Page 242 of 422
This command group allows you
to change or customize HFL
basic settings.Press and release the HFL Talk
button bef ore a command.
Say ‘‘ .’’ Once a passcode is set, you
will need to enter it to use HFL each
time you start the vehicle. If you
forget the code, your dealer will have
to reset it for you, or you will have to
clear the entire system (see
page ).
Follow the HFL prompts to
conf irm the number. Follow the HFL prompts and say the 4-digit passcode
you want to set.
Say‘‘ ’’aftertheprompts.
1.
2.
3.
4. 239
CONT INUED
System Setup
System setup
Security
BluetoothHandsFreeL ink
T o set a 4-digit passcode t o lock t heHFL system f or security purposes:
237
NOTE:
12/08/09 16:30:40 31SJC670_244
Features