Page 3 of 433
2Quick Reference Guide
Quick Reference GuideVisual Index
❙
(Vehicle Stability Assist (VSA®) System OFF) Button
(P300)
❙
(Blind Spot Information (BSI) System) OFF Button
* (P306)
❙Power Sliding Door Switch
* (P127)
❙Power Tailgate Switch
* (P121)
❙Parking Sensor System Switch
* (P313)
❙System Indicators
(P72)
❙Gauges
(P86)
❙Information Display
* (P87)
❙Multi-Information Display
* (P98)
❙Rear Window Defogger
(P147)
❙Heated Mirror Button
* (P147)
❙Hazard Warning Button❙Heating and Cooling System
* (P182)
❙Climate Control System
* (P186)
❙Seat Heater Switches
* (P180)
❙Audio System
(P194)
❙Rear Entertainment System
* (P236)
❙Navigation System
*
() See Navigation System Manual❙Accessory Power Sockets
(P175)
❙Cool Box Switch
* (P172)
❙Center Pocket
(P172)
❙Driving Position Memory System
Buttons
* (P148)
❙Auxiliary Input Jack
(P195)
Page 6 of 433
5Quick Reference Guide
❙Sun Visors❙Vanity Mirrors❙Moonroof Switch
* (P139)
❙Map Lights
(P169)
❙HomeLink® Button
* (P252)
❙Sunglasses Holder
(P179)
❙Seat Belts
(P30)
❙Grab Handle❙Coat Hooks
(P177)
❙Seat Belt to Secure a Child Seat
(P64)
❙Seat Belt (Installing a Child Seat)
(P62)
❙Accessory Power Socket
(P175)
❙Side Curtain Airbags
(P49)
❙Coat Hooks
(P177)
❙AC Power Outlet
* (P176)
❙Auxiliary Input Jacks
* (P236)
❙Side Airbags
(P46)
❙Second Row Seat
(P154, 161)
❙Front Seat
(P153)
❙Removable Center Console
* (P170)
❙Flip-up Trash Bag Ring
* (P171)
❙Third Row Seat
(P154, 161)
❙Folding the One-Motion Third Row Magic Seat
(P165)
❙Second Row Multi-Functional Center Seat
* (P154, 164)
❙Integrated Sunshades
* (P181)
* Not available on all models
Page 15 of 433
14Quick Reference Guide
Features
(P193)
Audio system
(P194)
Models without rear entertainment system
(XM®)
Button*
AM/FM Button
VOL/ (Power/
Volume) Knob
(CD Eject)
Button
TITLE Button
Selector KnobPreset Buttons USB/AUX Button CD/CDL ButtonCD Slot
SCAN Button
SKIP Bar
RETURN ButtonCATEGORY
(FOLDER) Bar
SETUP Button
(XM®)
Button*
AM/FM Button
VOL/ (Power/
Volume) Knob
(CD Eject)
Button
TITLE Button
Selector KnobPreset ButtonsDVD Button USB/AUX ButtonCD/CDL Button
SCAN Button SKIP Bar
REAR POWER
ButtonCATEGORY
(FOLDER) Bar
SETUP Button
Models with rear entertainment system
Button
RETURN ButtonPHONE Button
CD Slot
DISPLAY Button
REAR SOURCE
Button
(DVD Eject) Button
DVD Slot
DISPLAY Button
PHONE Button
Page 16 of 433
15Quick Reference Guide
●Audio Remote Controls (P198)
●VOL (Volume) Button
Press / to adjust the volume up/
down.
●MODE Button
Press and release to change the audio
mode: FM1/FM2/AM/XM1
*/XM2
*/CD/CD-L/
AUX.
●CH (Channel) Button
Radio: Press and release to change the
preset station.
Press and hold to select the next or
previous strong station.
CD/CD Library/USB device:
Press and release to skip to the
beginning of the next song or
return to the beginning of the
current song.
CD/CD Library:
Press and hold to change a folder/
album.
MODE Button
CH Button
VOL Button
3
4
* Not available on all models
Page 194 of 433

193
Features
This chapter describes how to operate technology features.
Audio System
About Your Audio System ................ 194
USB Adapter Cable .......................... 195
Auxiliary Input Jack .......................... 195
Audio System Theft Protection ......... 196
Audio System Basic Operation........ 197
Audio Remote Controls .................... 198
Adjusting the Sound ........................ 199
Playing the AM/FM Radio ................. 200
Playing the XM® Radio
*................... 204
Playing a CD .................................... 207
Playing CD Library ............................ 211
Playing an iPod®............................... 217Playing a USB Flash Drive ................. 221
Playing Bluetooth® Audio................. 225
Audio Error Messages
CD Player ......................................... 230
iPod®/USB Flash Drive....................... 231
General Information on the Audio
System
XM® Radio Service
*......................... 232
Recommended CDs ......................... 233
Compatible iPod
® and USB Flash Drives ... 235
Rear Entertainment System
*........... 236
HomeLink® Universal Transceiver
*.. 252Bluetooth® HandsFreeLink®
Using HFL ........................................ 254
HFL Menus ...................................... 256
Compass
*.......................................... 277
* Not available on all models
Page 196 of 433

195
uuAudio SystemuUSB Adapter Cable
Features
USB Adapter Cable
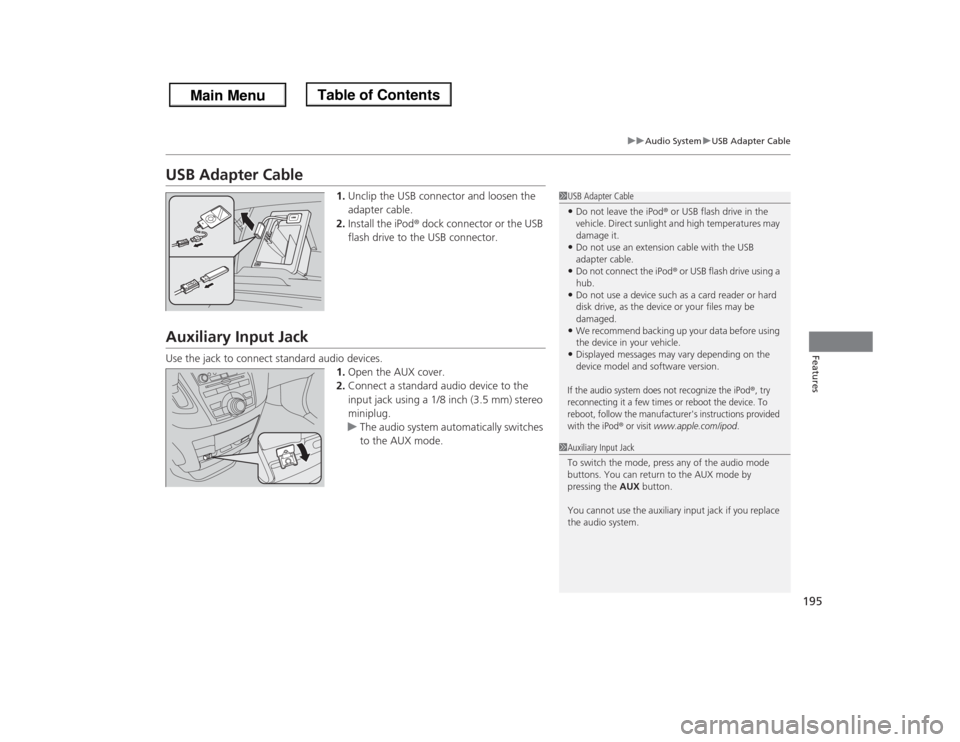
1.Unclip the USB connector and loosen the
adapter cable.
2.Install the iPod® dock connector or the USB
flash drive to the USB connector.
Auxiliary Input JackUse the jack to connect standard audio devices.
1.Open the AUX cover.
2.Connect a standard audio device to the
input jack using a 1/8 inch (3.5 mm) stereo
miniplug.
uThe audio system automatically switches
to the AUX mode.
1USB Adapter Cable•Do not leave the iPod® or USB flash drive in the
vehicle. Direct sunlight and high temperatures may
damage it.•Do not use an extension cable with the USB
adapter cable.•Do not connect the iPod® or USB flash drive using a
hub.•Do not use a device such as a card reader or hard
disk drive, as the device or your files may be
damaged.•We recommend backing up your data before using
the device in your vehicle.•Displayed messages may vary depending on the
device model and software version.If the audio system does not recognize the iPod
®, try
reconnecting it a few times or reboot the device. To
reboot, follow the manufacturer's instructions provided
with the iPod
® or visit
www.apple.com/ipod
.
1Auxiliary Input Jack
To switch the mode, press any of the audio mode
buttons. You can return to the AUX mode by
pressing the AUX button.
You cannot use the auxiliary input jack if you replace
the audio system.
Page 199 of 433

198
uuAudio System Basic OperationuAudio Remote Controls
Features
Audio Remote ControlsAllows you to operate the audio system while driving.
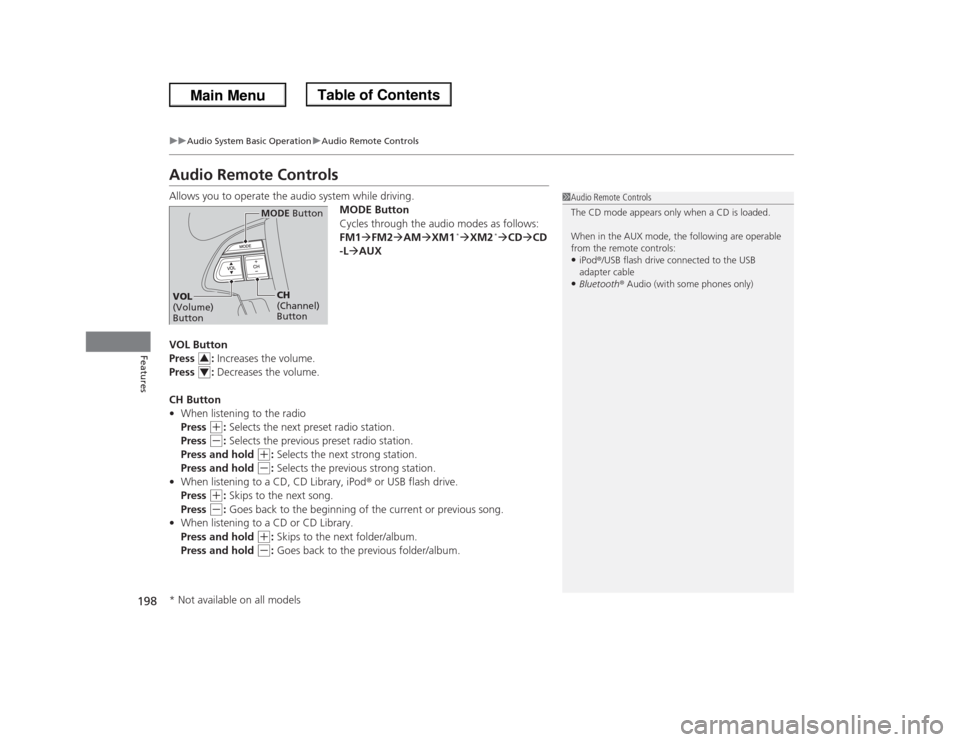
MODE Button
Cycles through the audio modes as follows:
FM1�FM2�AM�XM1
*�XM2
*�CD�CD
-L�AUX
VOL Button
Press : Increases the volume.
Press : Decreases the volume.
CH Button
•When listening to the radio
Press
(+
: Selects the next preset radio station.
Press
(-
: Selects the previous preset radio station.
Press and hold
(+
: Selects the next strong station.
Press and hold
(-
: Selects the previous strong station.
•When listening to a CD, CD Library, iPod® or USB flash drive.
Press
(+
: Skips to the next song.
Press
(-
: Goes back to the beginning of the current or previous song.
•When listening to a CD or CD Library.
Press and hold
(+
: Skips to the next folder/album.
Press and hold
(-
: Goes back to the previous folder/album.
1Audio Remote Controls
The CD mode appears only when a CD is loaded.
When in the AUX mode, the following are operable
from the remote controls:•iPod®/USB flash drive connected to the USB
adapter cable•Bluetooth® Audio (with some phones only)
MODE Button
CH
(Channel)
Button
VOL
(Volume)
Button
34
* Not available on all models
Page 218 of 433
217
uuAudio System Basic OperationuPlaying an iPod®
Continued
Features
Playing an iPod®Connect the iPod® using your dock connector to the USB adapter cable, then press
the USB/AUX button.2USB Adapter Cable P. 195
VOL/ (Power/volume) Knob
Press to turn the audio system ON
and OFF.
Turn to adjust the volume.
RETURN Button
Press to go back to the previous display.Selector Knob
Turn to select a song, file, menu item,
or play mode. Press to set your
selection.
SETUP Button
Press to display menu items. USB/AUX Button
Press to select iPod® (if connected).
SKIP Bar
Press or to change songs.
Press and hold to move rapidly
within a song.
Models without rear entertainment system