Page 132 of 433

131
uuOpening and Closing the Sliding DoorsuOpening/Closing the Power Sliding Doors
*
Controls
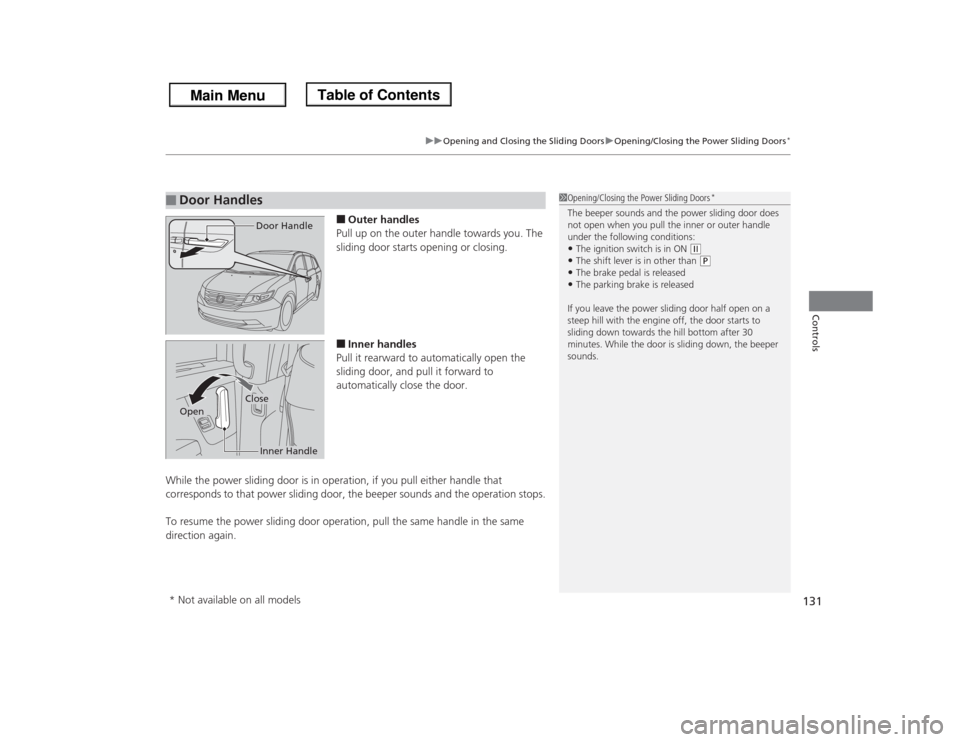
■Outer handles
Pull up on the outer handle towards you. The
sliding door starts opening or closing.■Inner handles
Pull it rearward to automatically open the
sliding door, and pull it forward to
automatically close the door.
While the power sliding door is in operation, if you pull either handle that
corresponds to that power sliding door, the beeper sounds and the operation stops.
To resume the power sliding door operation, pull the same handle in the same
direction again.
■
Door Handles
1Opening/Closing the Power Sliding Doors
*
The beeper sounds and the power sliding door does
not open when you pull the inner or outer handle
under the following conditions:•The ignition switch is in ON
(w
•The shift lever is in other than
(P
•The brake pedal is released•The parking brake is released
If you leave the power sliding door half open on a
steep hill with the engine off, the door starts to
sliding down towards the hill bottom after 30
minutes. While the door is sliding down, the beeper
sounds.
Door HandleInner Handle
Close
Open* Not available on all models
Page 142 of 433

141
uuOperating the Switches Around the Steering WheeluTurn SignalsContinued
Controls
Turn Signals
The turn signals can be used when the ignition
switch is in ON
(w
.
Light Switches
Rotating the light switch turns the lights on
and off, regardless of the position of the
ignition switch.■High beams
Push the lever forward until you hear a click.■Low beams
When in high beams, pull the lever back to
return to low beams.■Flashing the high beams
Pull the lever back, and release it.
Right Turn
Left Turn
■
Manual Operation
1Light Switches
If you remove the key from the ignition switch while
the lights are on, a chime sounds when the driver’s
door is opened.
When the lights are on, the lights on indicator in the
instrument panel will be on.
2Lights On Indicator P. 79
Repeatedly turning the headlights on and off reduces
the life of the HID headlight bulbs. If you sense that
the level of the headlights is abnormal, have the
vehicle inspected by a dealer.
Do not leave the lights on when the engine is off
because it will cause the battery to discharge.Models with high voltage discharge tube bulb
High Beams
Flashing the high beamsLow Beams
Turns on side marker, tail, and
rear license plate lights
Turns on headlights, parking, side
marker, tail, and rear license plate
lights
Page 146 of 433

145
uuOperating the Switches Around the Steering WheeluWipers and Washers
Controls
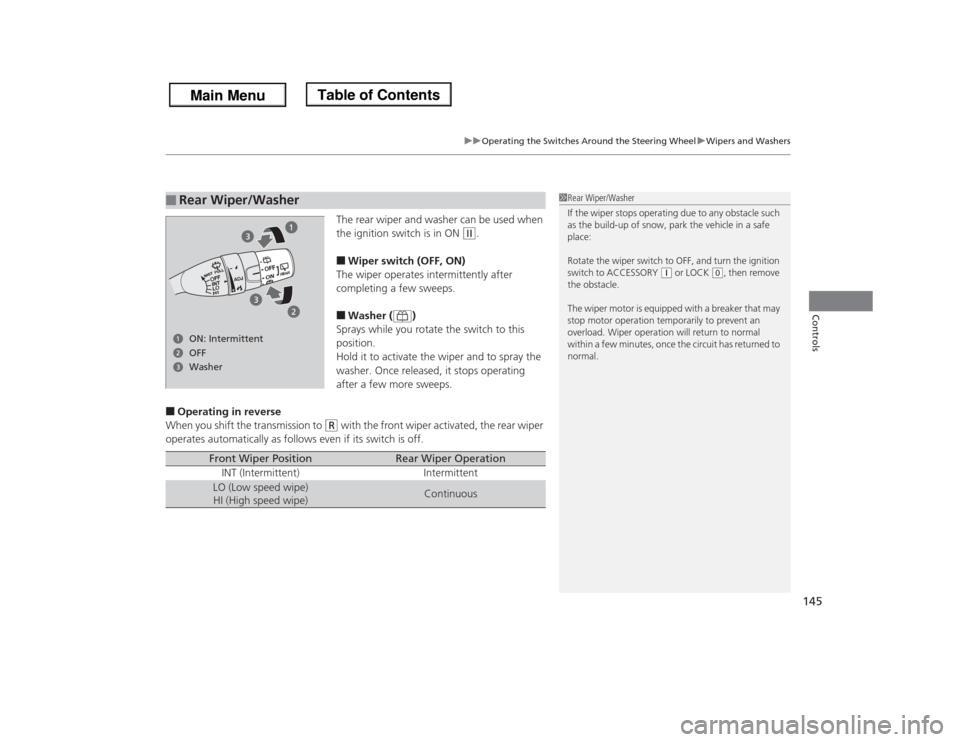
The rear wiper and washer can be used when
the ignition switch is in ON
(w
.
■Wiper switch (OFF, ON)
The wiper operates intermittently after
completing a few sweeps.■Washer ( )
Sprays while you rotate the switch to this
position.
Hold it to activate the wiper and to spray the
washer. Once released, it stops operating
after a few more sweeps.
■Operating in reverse
When you shift the transmission to
(R
with the front wiper activated, the rear wiper
operates automatically as follows even if its switch is off.
■
Rear Wiper/Washer
1Rear Wiper/Washer
If the wiper stops operating due to any obstacle such
as the build-up of snow, park the vehicle in a safe
place:
Rotate the wiper switch to OFF, and turn the ignition
switch to ACCESSORY
(q or LOCK
(0, then remove
the obstacle.
The wiper motor is equipped with a breaker that may
stop motor operation temporarily to prevent an
overload. Wiper operation will return to normal
within a few minutes, once the circuit has returned to
normal.
ON: Intermittent
Washer OFF
Front Wiper Position
Rear Wiper Operation
INT (Intermittent) Intermittent
LO (Low speed wipe)
HI (High speed wipe)
Continuous
Page 148 of 433

147
uuOperating the Switches Around the Steering WheeluRear Defogger/Heated Door Mirror
* Button
Controls
Rear Defogger/Heated Door Mirror
* Button
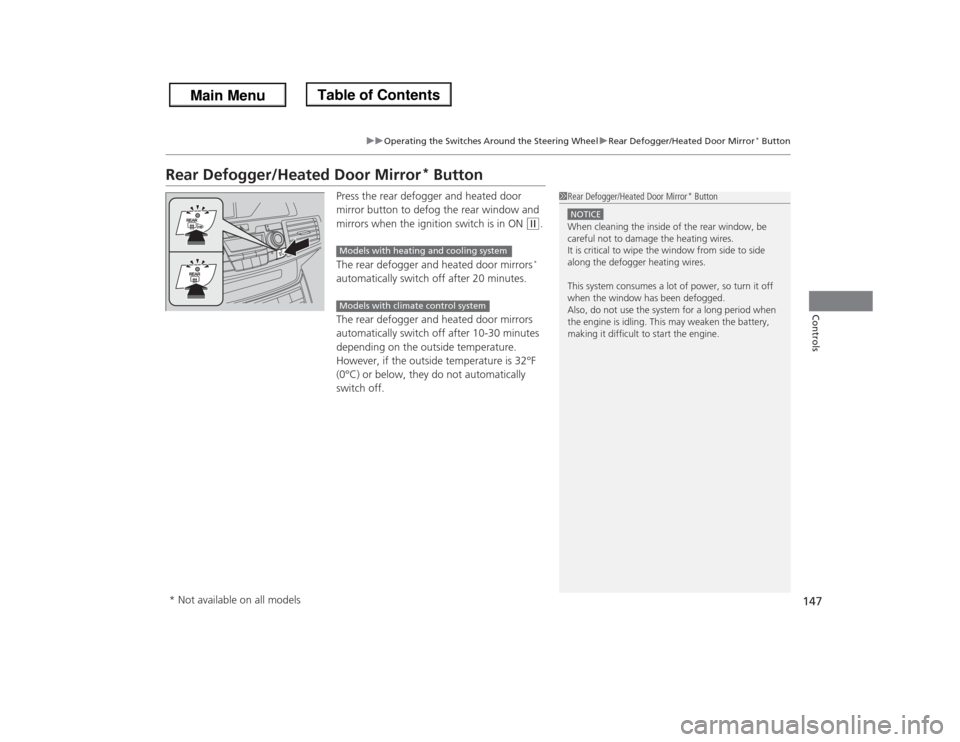
Press the rear defogger and heated door
mirror button to defog the rear window and
mirrors when the ignition switch is in ON
(w
.
The rear defogger and heated door mirrors*
automatically switch off after 20 minutes.
The rear defogger and heated door mirrors
automatically switch off after 10-30 minutes
depending on the outside temperature.
However, if the outside temperature is 32°F
(0°C) or below, they do not automatically
switch off.
1Rear Defogger/Heated Door Mirror
* Button
NOTICEWhen cleaning the inside of the rear window, be
careful not to damage the heating wires.
It is critical to wipe the window from side to side
along the defogger heating wires.
This system consumes a lot of power, so turn it off
when the window has been defogged.
Also, do not use the system for a long period when
the engine is idling. This may weaken the battery,
making it difficult to start the engine.
Models with heating and cooling systemModels with climate control system
* Not available on all models
Page 152 of 433
151Controls
Adjusting the MirrorsInterior Rearview MirrorAdjust the angle of the rearview mirror when you are sitting in the correct driving
position.
Flip the tab to switch the position.
The night position will help to reduce the glare
from headlights behind you when driving
after dark.
When driving after dark, the automatic
dimming rearview mirror always reduces the
glare from headlights behind you, based in
inputs from the mirror sensor. This feature is
always active.■
Rearview Mirror with Day and Night Positions
*
1Adjusting the Mirrors
Keep the inside and outside mirrors clean and
adjusted for best visibility.
Adjust the mirrors before you start driving.
2Adjusting the Seat Positions P. 153
Tab
Daytime
Position
Night PositionUp
Down■
Automatic Dimming Rearview Mirror
*
1Automatic Dimming Rearview Mirror
*
The auto dimming function cancels when the shift
position is in
(R.
Sensor
* Not available on all models
Page 157 of 433
uuAdjusting the SeatsuAdjusting the Seat Positions
156Controls
Your vehicle is equipped with head restraints
in all seating positions.
Head restraints are most effective for
protection against whiplash and other rear-
impact crash injuries when the center of the
back of the occupant's head rests against the
center of the restraint. The tops of the
occupant's ears should be level with the
center height of the restraint.
■
Adjusting the Head Restraints
1Adjusting the Head Restraints
3
WARNING
Improperly positioning head restraints
reduces their effectiveness and increases
the likelihood of serious injury in a crash.
Make sure head restraints are in place and
positioned properly before driving.
Position head in the center
of the head restraint.
Page 161 of 433
uuAdjusting the SeatsuAdjusting the Seat Positions
160Controls
The driver’s and front passenger’s seats have active head restraints. In a rear impact,
an occupant properly secured by a seat belt will be pushed against the seat-back and
the head restraint will move forward. This reduces the distance between the
restraint and the occupant’s head, which helps reduce the likelihood of whiplash
and injuries to the neck and upper spine.■
Active Head Restraints
1Active Head Restraints
In order for the active head restraints to operate
properly:•Do not hang any items on the head restraints, or
from the restraint legs.•Do not place any objects between an occupant and
the seat-back.•Install each restraint in its proper location.
After a collision, the activated restraint should return
to its normal position. If the restraint does not return
to its normal position, or in the event of a severe
collision, have the vehicle inspected by a dealer.
Page 162 of 433
161
uuAdjusting the SeatsuRear Seats
Continued
Controls
Rear Seats
Pull up on the seat-back angle adjustment
lever, or pulling the release strap tilts the
second row outer seat’s seat-back forward.
Slide the whole seat forward.
■
Third Row Seat Access
1Third Row Seat Access
When you enter the third row seat, be careful not to
trip over the second row seat belt. If necessary, move
the seat forward after tilting the seat-back forward.
Lever Strap