Page 35 of 433

uuSeat BeltsuFastening a Seat Belt
34Safe Driving
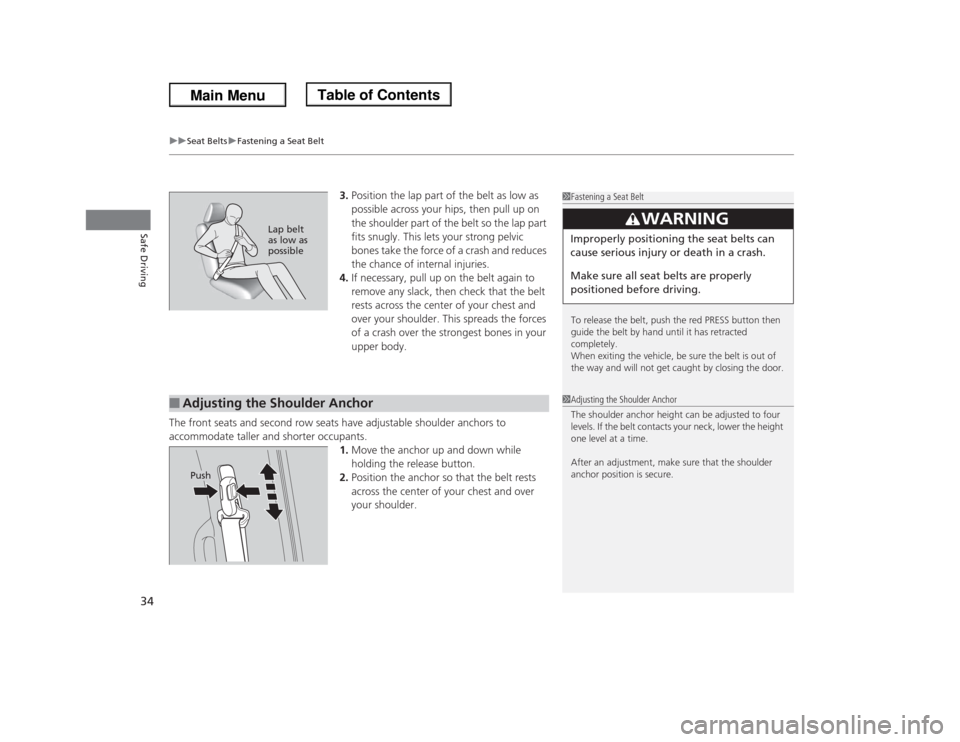
3.Position the lap part of the belt as low as
possible across your hips, then pull up on
the shoulder part of the belt so the lap part
fits snugly. This lets your strong pelvic
bones take the force of a crash and reduces
the chance of internal injuries.
4.If necessary, pull up on the belt again to
remove any slack, then check that the belt
rests across the center of your chest and
over your shoulder. This spreads the forces
of a crash over the strongest bones in your
upper body.
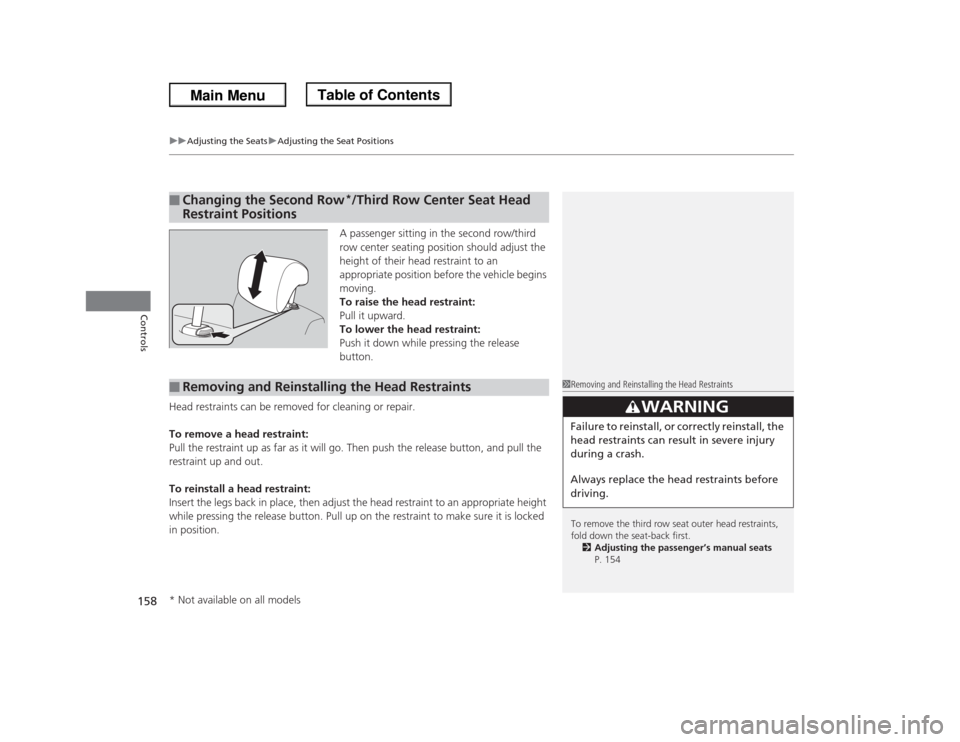
The front seats and second row seats have adjustable shoulder anchors to
accommodate taller and shorter occupants.
1.Move the anchor up and down while
holding the release button.
2.Position the anchor so that the belt rests
across the center of your chest and over
your shoulder.
1Fastening a Seat Belt
To release the belt, push the red PRESS button then
guide the belt by hand until it has retracted
completely.
When exiting the vehicle, be sure the belt is out of
the way and will not get caught by closing the door.
3
WARNING
Improperly positioning the seat belts can
cause serious injury or death in a crash.
Make sure all seat belts are properly
positioned before driving.
Lap belt
as low as
possible
■
Adjusting the Shoulder Anchor
1Adjusting the Shoulder Anchor
The shoulder anchor height can be adjusted to four
levels. If the belt contacts your neck, lower the height
one level at a time.
After an adjustment, make sure that the shoulder
anchor position is secure.
Push
Page 159 of 433

uuAdjusting the SeatsuAdjusting the Seat Positions
158Controls
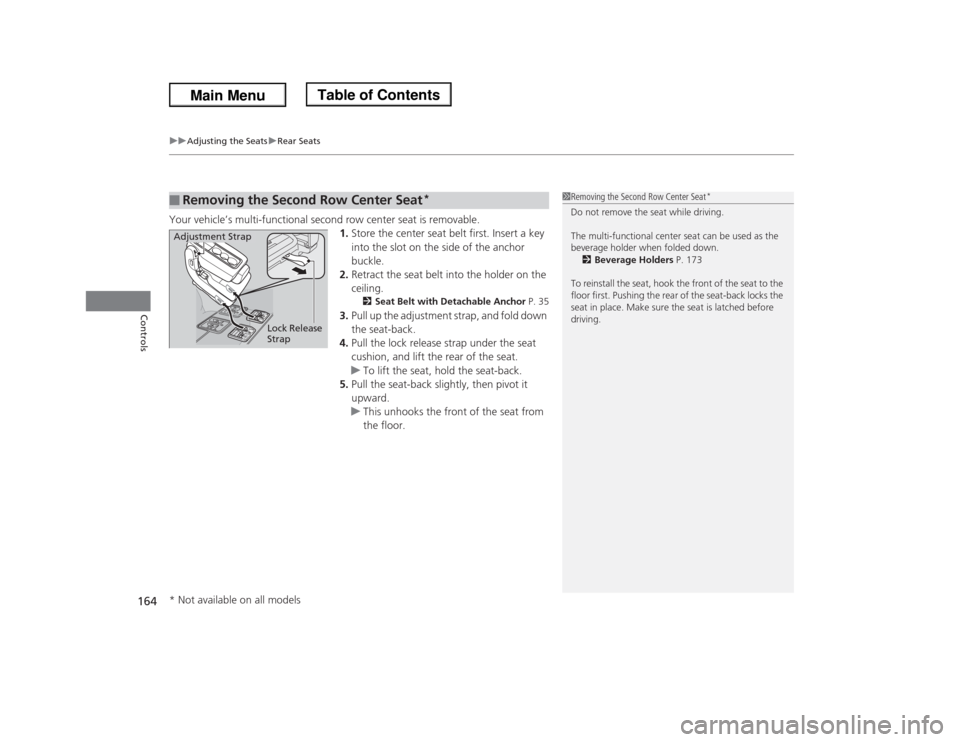
A passenger sitting in the second row/third
row center seating position should adjust the
height of their head restraint to an
appropriate position before the vehicle begins
moving.
To raise the head restraint:
Pull it upward.
To lower the head restraint:
Push it down while pressing the release
button.
Head restraints can be removed for cleaning or repair.
To remove a head restraint:
Pull the restraint up as far as it will go. Then push the release button, and pull the
restraint up and out.
To reinstall a head restraint:
Insert the legs back in place, then adjust the head restraint to an appropriate height
while pressing the release button. Pull up on the restraint to make sure it is locked
in position.
■
Changing the Second Row
*/Third Row Center Seat Head
Restraint Positions
■
Removing and Reinstalling the Head Restraints
1Removing and Reinstalling the Head Restraints
To remove the third row seat outer head restraints,
fold down the seat-back first.
2Adjusting the passenger’s manual seats
P. 154
3
WARNING
Failure to reinstall, or correctly reinstall, the
head restraints can result in severe injury
during a crash.
Always replace the head restraints before
driving.
* Not available on all models
Page 163 of 433
uuAdjusting the SeatsuRear Seats
162Controls
1.Lower the head restraint to its lowest
position.
2.Move the seat to its rearmost position.
3.Fold the seat-back down.
4.Pull the lock release lever, and lift the rear
of the seat.
uTo lift the seat, grab the handle under
the rear side of the seat cushion.
5.Pull the seat-back slightly, then pivot it
upward.
uThis unhooks the front of the seat from
the floor.
■
Removing a Second Row Outer Seat
1Removing a Second Row Outer Seat
Do not remove the seat while driving.
To reinstall the seat, hook the front of the seat to the
floor first. Pushing the rear of the seat-back locks the
seat in place. Make sure the seat is latched before
driving.
Handle
Seat-back Angle
adjustment LeverLock Release Lever
Page 165 of 433

uuAdjusting the SeatsuRear Seats
164Controls
Your vehicle’s multi-functional second row center seat is removable.
1.Store the center seat belt first. Insert a key
into the slot on the side of the anchor
buckle.
2.Retract the seat belt into the holder on the
ceiling.
2Seat Belt with Detachable Anchor P. 35
3.Pull up the adjustment strap, and fold down
the seat-back.
4.Pull the lock release strap under the seat
cushion, and lift the rear of the seat.
uTo lift the seat, hold the seat-back.
5.Pull the seat-back slightly, then pivot it
upward.
uThis unhooks the front of the seat from
the floor.
■
Removing the Second Row Center Seat
*
1Removing the Second Row Center Seat
*
Do not remove the seat while driving.
The multi-functional center seat can be used as the
beverage holder when folded down.
2Beverage Holders P. 173
To reinstall the seat, hook the front of the seat to the
floor first. Pushing the rear of the seat-back locks the
seat in place. Make sure the seat is latched before
driving.
Adjustment Strap
Lock Release
Strap* Not available on all models
Page 166 of 433
Continued
165
uuAdjusting the SeatsuRear Seats
Controls
1.Store the center seat belt first. Insert a key
into the slot on the side of the anchor
buckle.
2.Retract the seat belt into the holder on the
ceiling.
2Seat Belt with Detachable Anchor P. 35
3.Lower the head restraints to their lowest
position.
4.The right and left halves can be tucked
away separately. Pull either strap to release
the front leg lock of the third row seat.
5.Continue pulling the strap to tuck the seat
and strap away into the cargo area.
■
Tucking away the One-Motion Third row magic Seat®
1Tucking away the One-Motion Third row magic Seat®
Remove any items from the cargo area before you
tuck away the third row seat.
The instruction label is attached at the back of the
third row seat-back.
When you tuck away one side of the third row seats
and use the non-recessed part of the cargo area,
make sure to secure the cargo. Loose items can fly
forward and cause injury if you have to brake hard.
Straps