Page 29 of 433

28
uuFor Safe DrivinguYour Vehicle's Safety Features
Safe Driving
Your Vehicle's Safety FeaturesThe following checklist will help you take an active role in protecting yourself and
your passengers.
1Your Vehicle's Safety Features
Your vehicle is equipped with many features that
work together to help protect you and your
passengers during a crash.
Some features do not require any action on your part.
These include a strong steel framework that forms a
safety cage around the passenger compartment,
front and rear crush zones, a collapsible steering
column, and tensioners that tighten the front seat
belts in a sufficient crash.
However, you and your passengers cannot take full
advantage of these features unless you remain seated
in the correct position and always wear your seat
belts. In fact, some safety features can contribute to
injuries if they are not used properly.
67891011
Safety Cage
Crush Zones
Seats and Seat-Backs
Head Restraints
Collapsible Steering Column
Seat Belts
Front Airbags
Side Curtain Airbags
Seat Belt Tensioners
Occupant Position Detection
System (OPDS) Sensor Side Airbags
Door Locks
12
67
8
9
10
11
12
9
810
7
Page 30 of 433

29
uuFor Safe DrivinguYour Vehicle's Safety Features
Safe Driving
For the safety of you and your passengers, make a habit of checking these items
each time before you drive.
•After everyone has entered the vehicle, be sure all doors and the tailgate are
closed and locked. Locking the doors helps prevent an occupant from being
ejected and an outsider from unexpectedly opening a door.
2Locking/Unlocking the Doors from the Inside P. 113
•Adjust your seat to a position suitable for driving. Be sure the front seats are
adjusted as far to the rear as possible while allowing the driver to control the
vehicle. Sitting too close to a front airbag can result in serious or fatal injury in a
crash.
2Adjusting the Seats P. 153
•Adjust head restraints to the proper position. Head restraints are most effective
when the center of the head restraint aligns with the center of your head. Taller
persons should adjust their head restraint to the highest position.
2Adjusting the Head Restraints P. 156
•Always wear your seat belt, and make sure you wear it properly. Confirm that any
passengers are properly belted as well.
2Fastening a Seat Belt P. 33
•Protect children by using seat belts or child seats according to a child's age, height
and weight.
2Child Safety P. 54
■
Safety CheckList
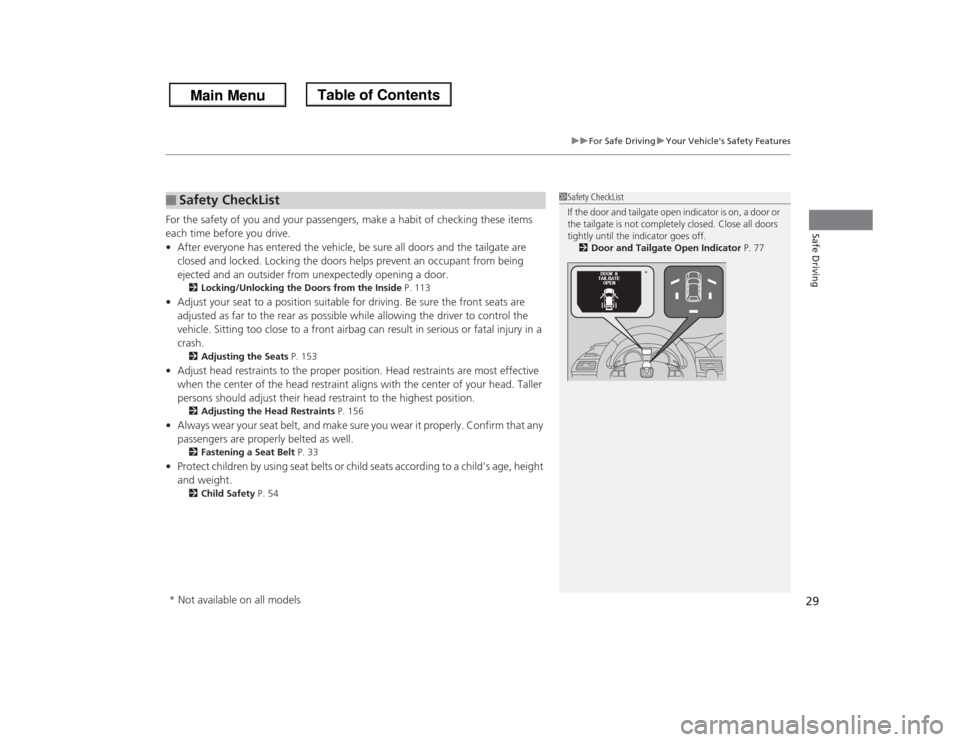
1Safety CheckList
If the door and tailgate open indicator is on, a door or
the tailgate is not completely closed. Close all doors
tightly until the indicator goes off.
2Door and Tailgate Open Indicator P. 77
*
* Not available on all models
Page 31 of 433

30Safe Driving
Seat BeltsAbout Your Seat BeltsSeat belts are the single most effective safety device because they keep you
connected to the vehicle so that you can take advantage of many built-in safety
features. They also help keep you from being thrown against the inside of the
vehicle, against other passengers, or out of the vehicle. When worn properly, seat
belts also keep your body properly positioned in a crash so that you can take full
advantage of the additional protection provided by the airbags.
In addition, seat belts help protect you in almost every type of crash, including:
-frontal impacts
-side impacts
-rear impacts
-rollovers■Lap/shoulder seat belts
All seven or eight seating positions are equipped with lap/shoulder seat belts with
emergency locking retractors. In normal driving the retractor lets you move freely
while keeping some tension on the belt. During a collision or sudden stop the
retractor locks to restrain your body. The second and third row passenger’s seat
belts also have a lockable retractor for use with child seats.2Installing a Child Seat with a Lap/Shoulder Seat Belt P. 62
1About Your Seat Belts
Seat belts cannot completely protect you in every
crash. But in most cases, seat belts can reduce your
risk of serious injury.
Most states and all Canadian provinces and territories
require you to wear seat belts.
3
WARNING
Not wearing a seat belt properly increases
the chance of serious injury or death in a
crash, even though your vehicle has
airbags.
Be sure you and your passengers always
wear seat belts and wear them properly.
Page 32 of 433

Continued
31
uuSeat BeltsuAbout Your Seat Belts
Safe Driving
■Proper use of seat belts
Follow these guidelines for proper use:
•All occupants should sit upright, well back in the seat, and remain in that position
for the duration of the trip. Slouching and leaning reduces the effectiveness of
the belt and can increase the chance of serious injury in a crash.
•Never place the shoulder part of a lap/shoulder seat belt under your arm or
behind your back. This could cause very serious injuries in a crash.
•Two people should never use the same seat belt. If they do, they could be very
seriously injured in a crash.
•Do not put any accessories on the seat belts. Devices intended to improve comfort
or reposition the shoulder part of a seat belt can reduce the protective capability
and increase the chance of serious injury in a crash.
Your vehicle monitors front seat belt use. If
the ignition switch is turned to ON
(w
before
the driver's seat belt is fastened, a beeper will
sound and the indicator will blink. If the driver
does not fasten the belt before the beeper
stops, the indicator will remain on.
The beeper will also periodically sound and
the indicator will blink while driving until the
driver's and front passenger’s seat belts are
fastened.
■
Seat Belt Reminder
1About Your Seat Belts
If a rear seat passenger moves around and extends
the seat belt, the lockable retractor may activate. If
this happens, release the retractor by unfastening the
seat belt and allow the belt to retract completely.
Then refasten the belt.1Seat Belt Reminder
The indicator will also come on if a front passenger
does not fasten their seat belt within 6 seconds after
the ignition switch is turned to ON
(w.
When no one is sitting in the front passenger's seat,
or a child or small adult is riding there, the indicator
will not come on.
This is because the weight sensors in the seat cannot
detect their presence.
*
* Not available on all models
Page 33 of 433
uuSeat BeltsuAbout Your Seat Belts
32Safe Driving
The front seats are equipped with automatic seat belt tensioners to enhance safety.
The tensioners automatically tighten the front seat belts during a moderate-to-
severe frontal collision, sometimes even if the collision is not severe enough to
inflate the front airbags.■
Automatic Seat Belt Tensioners
1Automatic Seat Belt Tensioners
The seat belt tensioners can only operate once.
If a tensioner is activated, the SRS indicator will come
on. Have a dealer replace the tensioner and
thoroughly inspect the seat belt system as it may not
offer protection in a subsequent crash.
During a moderate-to-severe side impact, the
tensioner on that side of the vehicle also activates.
Page 34 of 433
33
uuSeat BeltsuFastening a Seat Belt
Continued
Safe Driving
Fastening a Seat BeltAfter adjusting a front seat to the proper position, and while sitting upright and well
back in the seat:2Adjusting the Seats P. 153
1.Pull the seat belt out slowly.
2.Insert the latch plate into the buckle, then
tug on the belt to make sure the buckle is
secure.
uMake sure that the belt is not twisted or
caught on anything.
1Fastening a Seat Belt
No one should sit in a seat with an inoperative seat
belt or one that does not appear to be working
correctly. Using a seat belt that is not working
properly may not protect the occupant in a crash.
Have a dealer check the belt as soon as possible.
Never insert any foreign objects into the buckle or
retractor mechanism.
Pull out slowly.
Correct
Seated
Posture.
Latch
Plate
Buckle
Page 35 of 433

uuSeat BeltsuFastening a Seat Belt
34Safe Driving
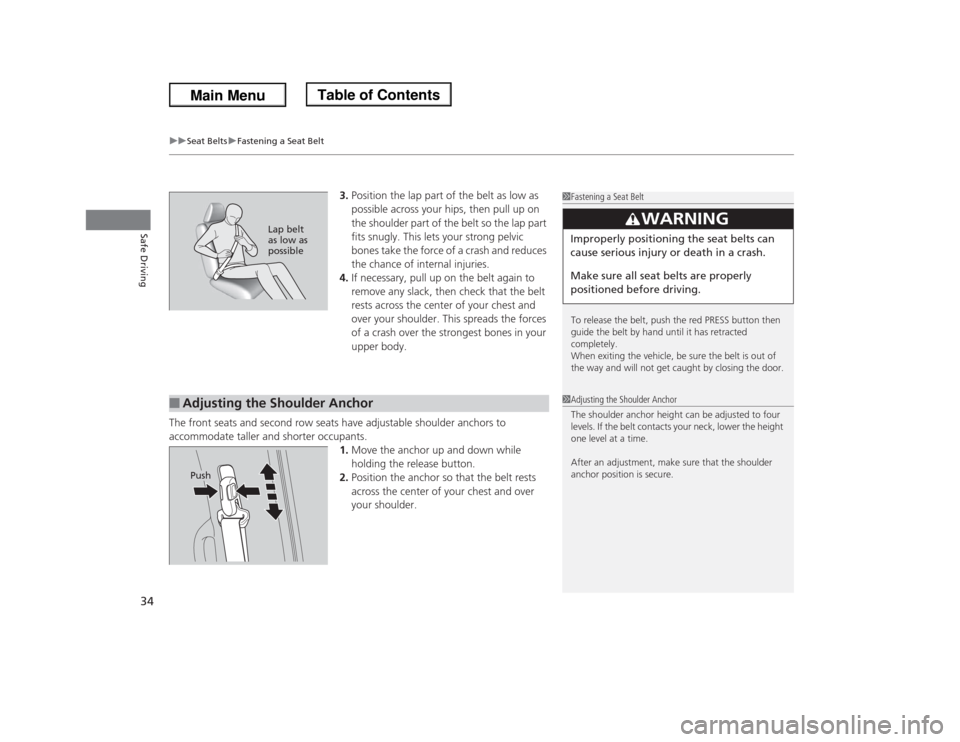
3.Position the lap part of the belt as low as
possible across your hips, then pull up on
the shoulder part of the belt so the lap part
fits snugly. This lets your strong pelvic
bones take the force of a crash and reduces
the chance of internal injuries.
4.If necessary, pull up on the belt again to
remove any slack, then check that the belt
rests across the center of your chest and
over your shoulder. This spreads the forces
of a crash over the strongest bones in your
upper body.
The front seats and second row seats have adjustable shoulder anchors to
accommodate taller and shorter occupants.
1.Move the anchor up and down while
holding the release button.
2.Position the anchor so that the belt rests
across the center of your chest and over
your shoulder.
1Fastening a Seat Belt
To release the belt, push the red PRESS button then
guide the belt by hand until it has retracted
completely.
When exiting the vehicle, be sure the belt is out of
the way and will not get caught by closing the door.
3
WARNING
Improperly positioning the seat belts can
cause serious injury or death in a crash.
Make sure all seat belts are properly
positioned before driving.
Lap belt
as low as
possible
■
Adjusting the Shoulder Anchor
1Adjusting the Shoulder Anchor
The shoulder anchor height can be adjusted to four
levels. If the belt contacts your neck, lower the height
one level at a time.
After an adjustment, make sure that the shoulder
anchor position is secure.
Push
Page 36 of 433
Continued
35
uuSeat BeltsuFastening a Seat Belt
Safe Driving
1.Pull out the seat belt’s small latch plate and
the latch plate from each holding slot in the
ceiling.
2.Line up the triangle marks on the small
latch plate and anchor buckle.
Make sure the seat belt is not twisted.
Attach the belt to the anchor buckle.
■
Seat Belt with Detachable Anchor
1Seat Belt with Detachable Anchor
3
WARNING
Using the seat belt with the detachable
anchor unlatched increases the chance of
serious injury or death in a crash.
Before using the seat belt, make sure the
detachable anchor is correctly latched.