Page 136 of 267
134
Playing FM/AM Radio
Radio Data System (RDS)
Audio
Radio Data System (RDS)Provides text data information related to your selected RDS capable FM station.
Press the TITLE button to turn RDS informati on on or off. When set to ON, the name
of the FM station is displayed on the displa y. When set to OFF, the frequency of the
station is displayed.
H AUDIO button (in FM/AM mode)
AUDIO MENU
RDS Search
Search for FM stations with a strong signal that are broadcasting the selected RDS
category information.
1.Move w or y to select a search
method ( Seek Up, Seek Down ,
Scan ).
2. Rotate i to select a category.
Press u.
Scanning for stations in that
category begins.
If there are no RDS-capable
stations in the area, “NOTHING”
briefly appears on the display.
■RDS Info Display■Searching for Programs by RDS Category
Page 137 of 267
135
Playing FM/AM Radio
Radio Data System (RDS)
Audio
HAUDIO button (in FM/AM mode)
AUDIO MENU
Read Radio Text
Display the radio text information of the selected RDS station.
■ Radio Text Display
1 Radio Text Display
The RDS indicator comes on the display when the
selected RDS station is broadcasting text data.
Page 138 of 267

136Audio
Playing XM® RadioSelecting XM Mode1.Press the XM button.
Press the XM button again, if necess ary, to select the band (XM1, XM2).
2. Select a channel using the buttons (Preset, SCAN), the bars (SKIP, CATEGORY),
and the TUNE knob.
The band and channel are displayed on the display.
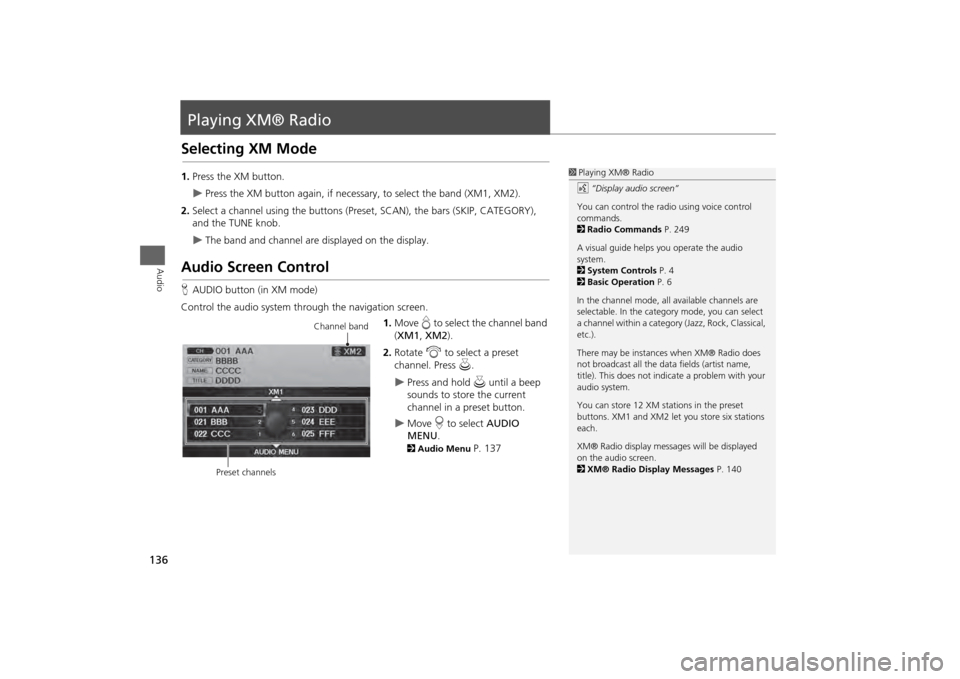
Audio Screen ControlHAUDIO button (in XM mode)
Control the audio system through the navigation screen. 1.Move e to select the channel band
( XM1 , XM2 ).
2. Rotate i to select a preset
channel. Press u.
Press and hold u until a beep
sounds to store the current
channel in a preset button.
Move r to select AUDIO
MENU . 2Audio Menu
P. 137
1Playing XM® Radio
d “Display audio screen”
You can control the radio using voice control
commands.
2 Radio Commands P. 249
A visual guide helps you operate the audio
system.
2 System Controls P. 4
2 Basic Operation P. 6
In the channel mode, all available channels are
selectable. In the categor y mode, you can select
a channel within a category (Jazz, Rock, Classical,
etc.).
There may be instance s when XM® Radio does
not broadcast all the data fields (artist name,
title). This does not indica te a problem with your
audio system.
You can store 12 XM stat ions in the preset
buttons. XM1 and XM2 let you store six stations
each.
XM® Radio display messag es will be displayed
on the audio screen.
2 XM® Radio Display Messages P. 140
Channel band
Preset channels
Page 139 of 267
137
Playing XM® Radio
Audio Menu
Audio
Audio MenuHAUDIO button (in XM mode)
AUDIO MENU
Rotate i to select an item. Press u.
The following items are available:
• Note: Records a 10-second sound file from the current channel.
2Note Function
P. 138
• Sound Setup : Displays the sound preferences screen.
2Adjusting the Sound
P. 166
• Tune : Tunes to the channel you select. Rotate i to select a channel.
• Mode : Sets CH (channel mode) or CAT (category mode) scan mode.
• Channel List : Displays the list of available ch annels. Scroll the list to select a
channel.
• Channel Scan : Scans for channels with a strong signal in the current band and
plays a 10-second sample. Select Channel Scan again to stop scanning and play
the current selection.
• Category Scan : Scans for channels with a strong signal in the selected category in
the current band and plays a 10-second sample. Select Category Scan again to
stop scanning and play the current selection.
Page 140 of 267
138
Playing XM® Radio
Note Function
Audio
Note FunctionRecord a 10-second sound file from the current channel that contains the channel,
category, name, and title information.
1.When tuned to the channel you want to record, press and hold the XM button for
a few seconds to start recording.
2. Press the XM button again to stop the recording if less than 10 seconds have
elapsed.
H AUDIO button (in XM mode)
AUDIO MENU
Note
Rotate i to select a sound file. Press
u to select PLAY.
■Recording a Sound File■Replaying a Sound File
1 Recording a Note
The system can store up to 30 sound files. Each
time you add a new recording, the oldest one is
deleted.
Recorded date
Page 141 of 267
139
Playing XM® Radio
Note Function
Audio
HAUDIO button (in XM mode)
AUDIO MENU
Note
1. Rotate i to select a sound file.
2. Move y to select DELETE .
3. Rotate i to select Delete All or
Delete Selected Item . Press u.
■Deleting a Sound File
Page 142 of 267

140
Playing XM® Radio
XM® Radio Service
Audio
XM® Radio Service1.You need your radio ID ready be fore registering for subscription.
To see the ID in the display, rotate the TUNE knob while in XM mode until “0”
appears in the center display.
2. Have your radio ID and credit card number ready, and either call XM or visit the
XM website to subscribe.
Press the XM button and stay in this mode for about 30 minutes until the service is
activated. Make sure your vehicle is in an open area with good reception.
LOADING: XM is loading the audio or program information.
OFF AIR : The channel is not currently broadcasting.
UPDATING : The encryption code is being updated. Channels 0 and 1 still work
normally.
NO SIGNAL : The signal is too weak in the current location.
--------: No such channel exists, the channel is not part of your subscription, or the
artist or title information is not available.
CHECK ANTENNA : There is a problem with the XM antenna. Contact a dealer.
■Subscribing to XM® Radio■Receiving XM® Radio■XM® Radio Display Messages
1 Subscribing to XM® Radio
Contact Information for XM® Radio:
U.S. : XM® Radio at www.siriusxm.com, or
(800) 852-9696
Canada : XM Canada at www.xmradio.ca , or
(877) 209-00791 Receiving XM® Radio
The XM satellites are in orbit over the equator;
therefore, objects south of the vehicle may cause
satellite reception interr uptions. Satellite signals
are more likely to be bl ocked by tall buildings
and mountains the farther north you travel from
the equator.
You may experience reception problems under
the following circumstances:•In a location with an obstruction to the south
of your vehicle•In tunnels•On the lower level of a multi-tiered road•Large items are carried on the roof rack
Page 143 of 267

141Audio
Playing a DiscSelecting Disc Mode1.Press the CD button to play a CD or other disc.
2. Insert a disc into the disc slot.
The disc automatically begins playing.
3. Select a track using the buttons (Preset, SCAN) and the bars (SKIP, CATEGORY).
The track number and elapsed time ar e displayed on the display. Title
information for audio CDs is displayed if found in the Gracenote® Album Info
(Gracenote® Media Database) stored on the built-in hard disc drive (HDD). Text
information stored on MP3/WMA/ AAC discs is also displayed.
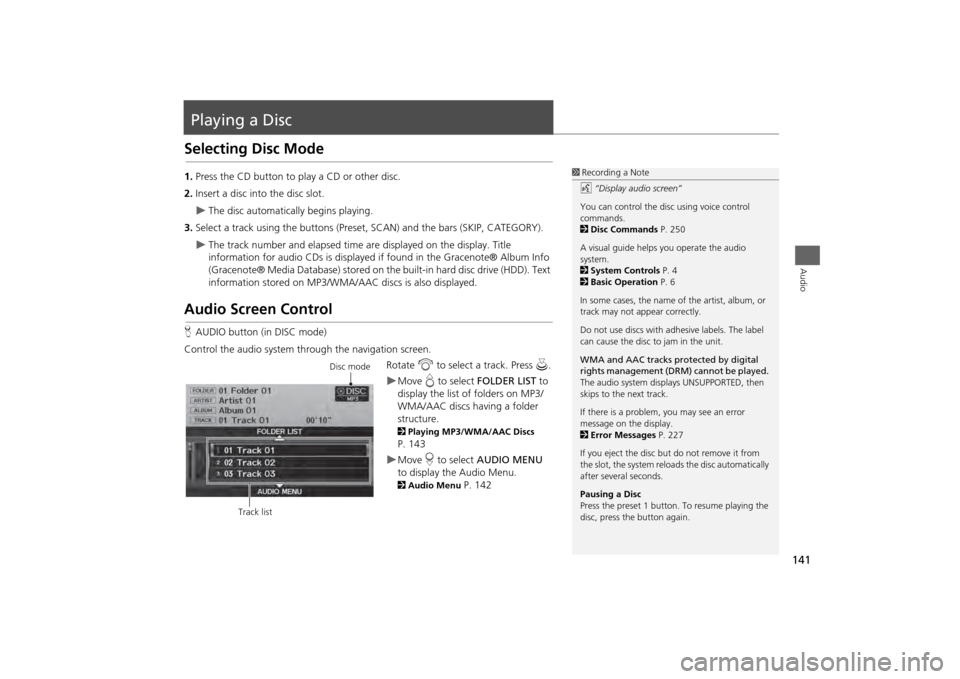
Audio Screen ControlHAUDIO button (in DISC mode)
Control the audio system through the navigation screen. Rotate i to select a track. Press u .
Move e to select FOLDER LIST to
display the list of folders on MP3/
WMA/AAC discs having a folder
structure. 2 Playing MP3/WMA/AAC Discs P. 143Move r to select AUDIO MENU
to display the Audio Menu. 2 Audio Menu
P. 142
1Recording a Note
d “Display audio screen”
You can control the disc using voice control
commands.
2 Disc Commands P. 250
A visual guide helps you operate the audio
system.
2 System Controls P. 4
2 Basic Operation P. 6
In some cases, the name of the artist, album, or
track may not appear correctly.
Do not use discs with a dhesive labels. The label
can cause the disc to jam in the unit.
WMA and AAC tracks protected by digital
rights management (DRM) cannot be played.
The audio system displays UNSUPPORTED, then
skips to the next track.
If there is a problem, you may see an error
message on the display.
2 Error Messages P. 227
If you eject the disc but do not remove it from
the slot, the system reloads the disc automatically
after severa l seconds.
Pausing a Disc
Press the preset 1 button. To resume playing the
disc, press the button again.
Disc mode
Track list