Page 161 of 267
159Audio
Searching for Music Using Song By Voice™ (SBV)Use Song By Voice™ (SBV) to search for and play music from your HDD or iPod®
device using voice commands.
1.Set Song By Voice to ON in the
system setup.
2 Song By Voice™ (SBV)
P. 46
2. Say d “Hard Disc Drive Search” or
d “iPod Search” to activate the
SBV feature for the HDD or iPod®.
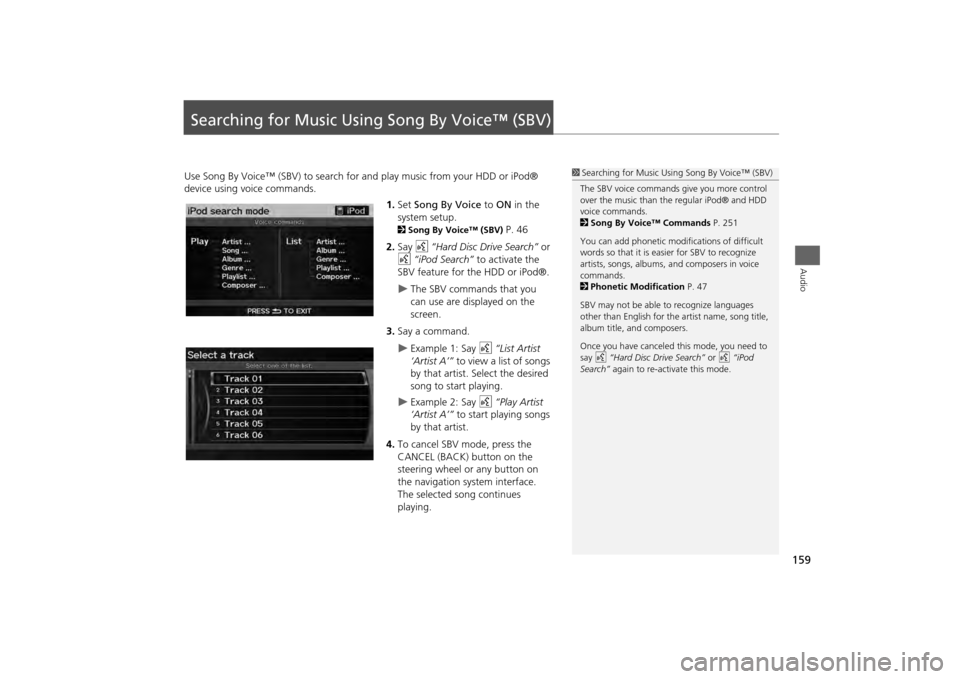
The SBV commands that you
can use are displayed on the
screen.
3. Say a command.
Example 1: Say d “List Artist
‘Artist A’” to view a list of songs
by that artist. Select the desired
song to start playing.
Example 2: Say d “Play Artist
‘Artist A’” to start playing songs
by that artist.
4. To cancel SBV mode, press the
CANCEL (BACK) button on the
steering wheel or any button on
the navigation system interface.
The selected song continues
playing.
1Searching for Music Using Song By Voice™ (SBV)
The SBV voice commands give you more control
over the music than the regular iPod® and HDD
voice commands.
2 Song By Voice™ Commands P. 251
You can add phonetic modi fications of difficult
words so that it is easier for SBV to recognize
artists, songs, albums, and composers in voice
commands.
2 Phonetic Modification P. 47
SBV may not be able to recognize languages
other than English for the artist name, song title,
album title, and composers.
Once you have canceled this mode, you need to
say d “Hard Disc Drive Search” or d “iPod
Search” again to re-activate this mode.
Page 163 of 267
161
Playing a USB Flash Drive
Selecting USB Mode
Audio
Selecting USB Mode1.Connect the USB flash drive to the USB adapter cable in the console
compartment.
2. Press the USB/AUX button until you get to USB mode.
3. Select a track using skip, scan, folder list, or track list.
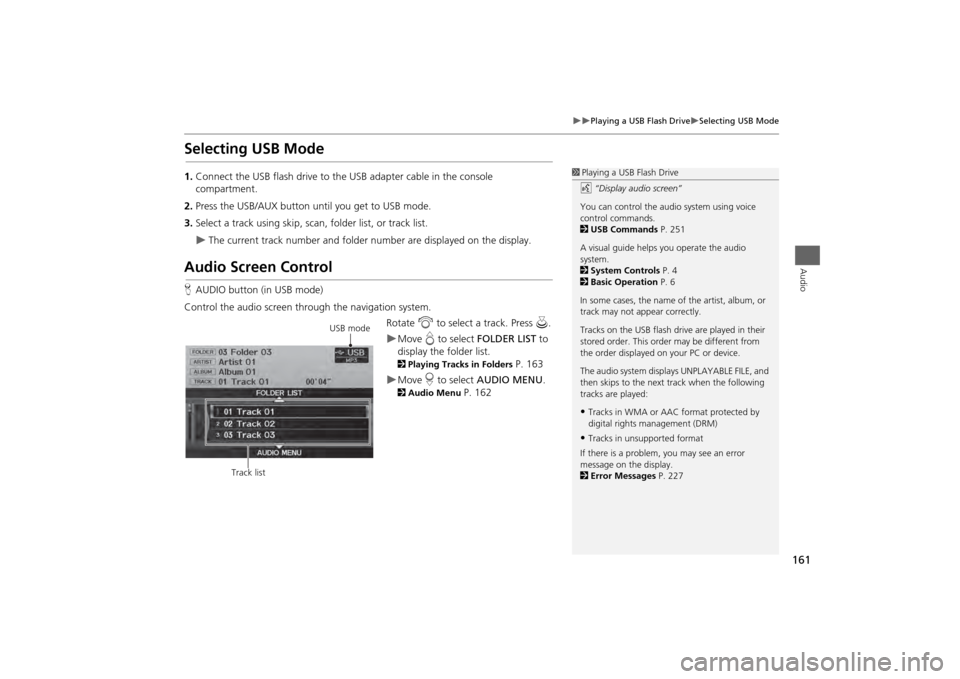
The current track number and folder number are displayed on the display.
Audio Screen ControlHAUDIO button (in USB mode)
Control the audio screen through the navigation system. Rotate i to select a track. Press u .
Move e to select FOLDER LIST to
display the folder list. 2 Playing Tracks in Folders
P. 163
Move r to select AUDIO MENU . 2Audio Menu
P. 162
1Playing a USB Flash Drive
d “Display audio screen”
You can control the audio system using voice
control commands.
2 USB Commands P. 251
A visual guide helps you operate the audio
system.
2 System Controls P. 4
2 Basic Operation P. 6
In some cases, the name of the artist, album, or
track may not appear correctly.
Tracks on the USB flash drive are played in their
stored order. This orde r may be different from
the order displayed on your PC or device.
The audio system displa ys UNPLAYABLE FILE, and
then skips to the next track when the following
tracks are played:•Tracks in WMA or AAC format protected by
digital rights management (DRM)•Tracks in unsupported format
If there is a problem, you may see an error
message on the display.
2 Error Messages P. 227
USB mode
Track list
Page 167 of 267
165
Playing Bluetooth® Audio
Switching to HFL Mode
Audio
Switching to HFL Mode
1.If you receive a call when
Bluetooth ® Audio is playing, press
the h (Pick-Up) button on the
steering wheel to answer the call. 2 Bluetooth® HandsFreeLink® P. 170
2. Press the j (Hang-Up) button to
end the call, and Bluetooth® Audio
is resumed.
Audio Screen ControlH AUDIO button (in BT mode)
AUDIO MENU
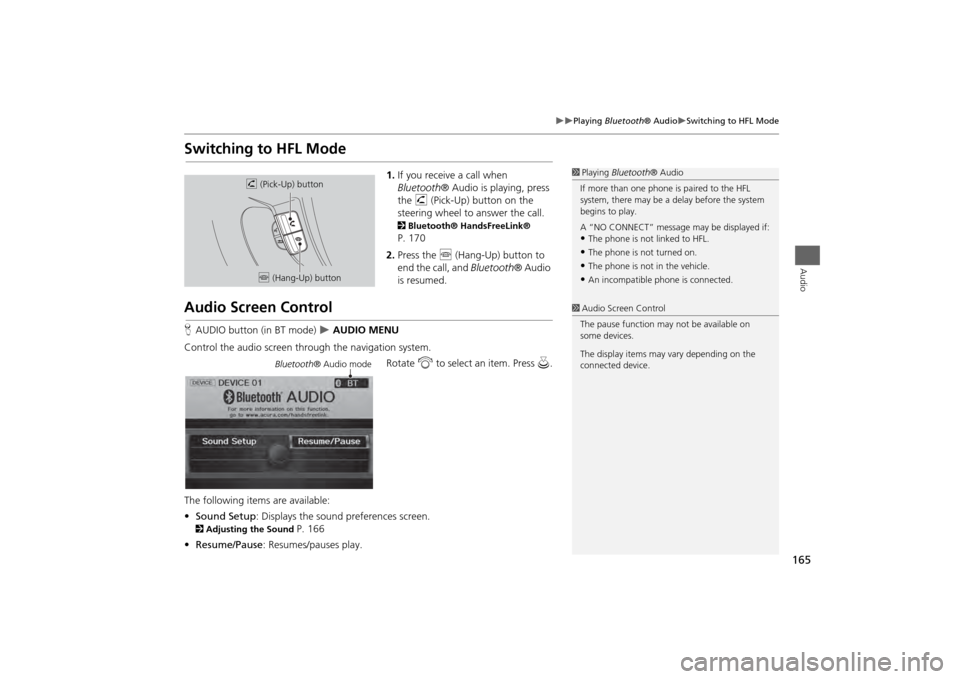
Control the audio screen through the navigation system. Rotate i to select an item. Press u.
The following items are available:
• Sound Setup : Displays the sound preferences screen.
2Adjusting the Sound
P. 166
• Resume/Pause : Resumes/pauses play.
1Playing Bluetooth ® Audio
If more than one phone is paired to the HFL
system, there may be a delay before the system
begins to play.
A “NO CONNECT” message may be displayed if:•The phone is not linked to HFL.•The phone is not turned on.•The phone is not in the vehicle.•An incompatible phone is connected.
h (Pick-Up) button
j (Hang-Up) button
1Audio Screen Control
The pause function may not be available on
some devices.
The display items may vary depending on the
connected device.
Bluetooth ® Audio mode
Page 168 of 267
166Audio
Adjusting the SoundHAUDIO button
AUDIO MENU
Sound Setup
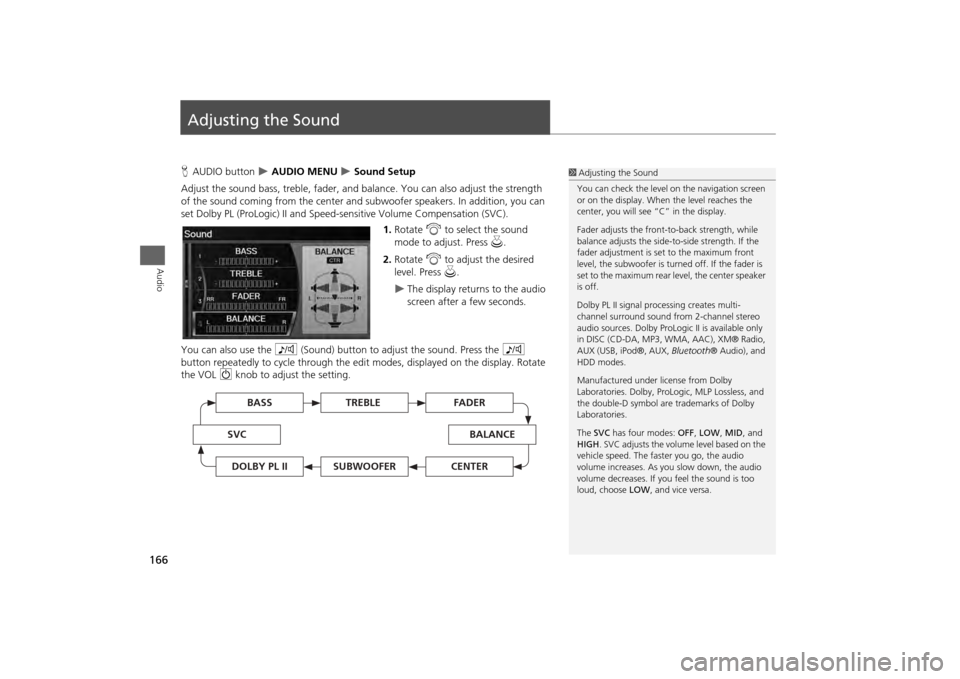
Adjust the sound bass, treble, fader, and ba lance. You can also adjust the strength
of the sound coming from the center and subwoofer speakers. In addition, you can
set Dolby PL (ProLogic) II and Speed-s ensitive Volume Compensation (SVC).
1.Rotate i to select the sound
mode to adjust. Press u.
2. Rotate i to adjust the desired
level. Press u.
The display returns to the audio
screen after a few seconds.
You can also use the 8 (Sound) button to adjust the sound. Press the 8
button repeatedly to cycle through the edit modes, displayed on the display. Rotate
the VOL 9 knob to adjust the setting.
1Adjusting the Sound
You can check the level on the navigation screen
or on the display. When the level reaches the
center, you will see “C” in the display.
Fader adjusts the front-t o-back strength, while
balance adjusts the side-to-side strength. If the
fader adjustment is set to the maximum front
level, the subwoofer is turned off. If the fader is
set to the maximum rear level, the center speaker
is off.
Dolby PL II signal proc essing creates multi-
channel surround sound fro m 2-channel stereo
audio sources. Dolby ProL ogic II is available only
in DISC (CD-DA, MP3, WMA, AAC), XM® Radio,
AUX (USB, iPod®, AUX, Bluetooth® Audio), and
HDD modes.
Manufactured under license from Dolby
Laboratories. Dolby, ProL ogic, MLP Lossless, and
the double-D symbol are trademarks of Dolby
Laboratories.
The SVC has four modes: OFF, LOW , MID, and
HIGH. SVC adjusts the volume level based on the
vehicle speed. The faster you go, the audio
volume increases. As you slow down, the audio
volume decreases. If you feel the sound is too
loud, choose LOW , and vice versa.
TREBLE
BASS
SVC
BALANCE
FADER
SUBWOOFER
DOLBY PL II
CENTER
Page 172 of 267
170Bluetooth® HandsFreeLink®
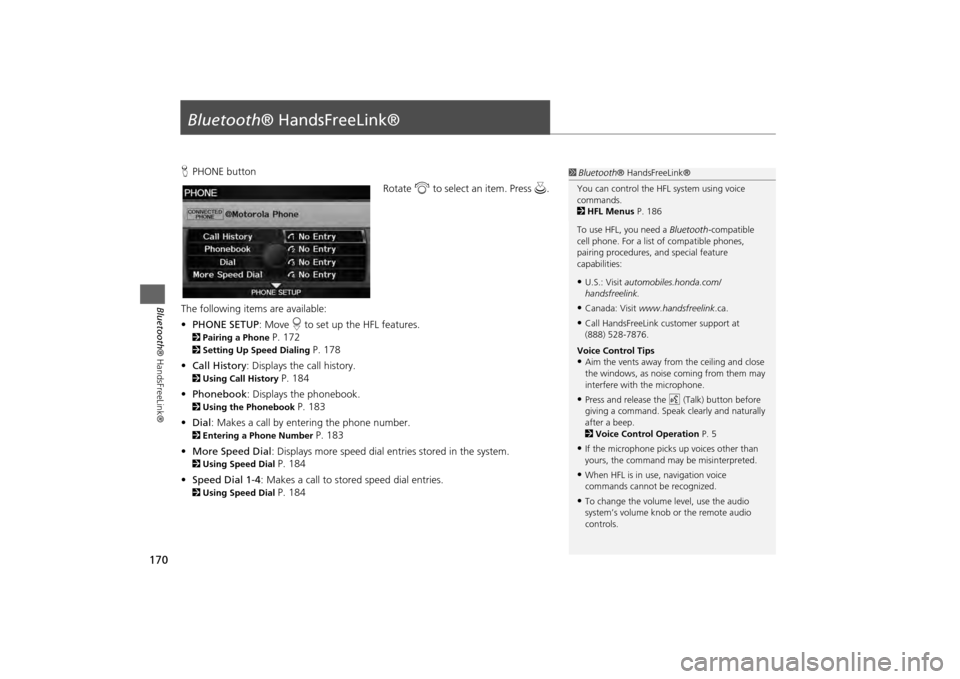
Bluetooth® HandsFreeLink®HPHONE button
Rotate i to select an item. Press u .
The following item s are available:
• PHONE SETUP : Move r to set up the HFL features.2 Pairing a Phone
P. 172
2Setting Up Speed Dialing
P. 178
• Call History : Displays the call history.
2Using Call History
P. 184
• Phonebook : Displays the phonebook.
2Using the Phonebook
P. 183
• Dial : Makes a call by entering the phone number.
2Entering a Phone Number
P. 183
• More Speed Dial : Displays more speed dial en tries stored in the system.
2Using Speed Dial
P. 184
• Speed Dial 1-4 : Makes a call to stored speed dial entries.
2Using Speed Dial
P. 184
1Bluetooth ® HandsFreeLink®
You can control the HFL system using voice
commands.
2 HFL Menus P. 186
To use HFL, you need a Bluetooth-compatible
cell phone. For a list of compatible phones,
pairing procedures, and special feature
capabilities:•U.S.: Visit automobiles.honda.com/
handsfreelink.•Canada: Visit www.handsfreelink .ca.•Call HandsFreeLink customer support at
(888) 528-7876.
Voice Control Tips•Aim the vents away from the ceiling and close
the windows, as noise coming from them may
interfere with the microphone.•Press and release the d (Talk) button before
giving a command. Speak clearly and naturally
after a beep.
2 Voice Control Operation P. 5•If the microphone picks up voices other than
yours, the command may be misinterpreted.•When HFL is in use, navigation voice
commands cannot be recognized.•To change the volume level, use the audio
system’s volume knob or the remote audio
controls.
Page 198 of 267
196
Rear Control Panel Operation
Screen and Surround Settings
Rear Entertainment System
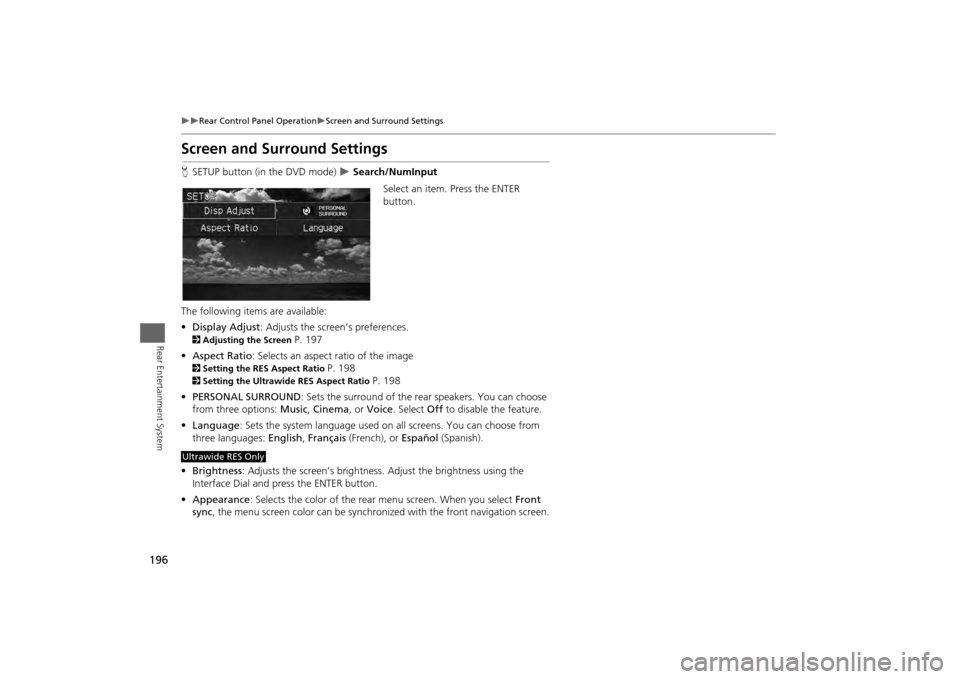
Screen and Surround SettingsHSETUP button (in the DVD mode)
Search/NumInput
Select an item. Press the ENTER
button.
The following item s are available:
• Display Adjust : Adjusts the screen’s preferences.
2Adjusting the Screen
P. 197
• Aspect Ratio : Selects an aspect ratio of the image
2Setting the RES Aspect Ratio
P. 198
2Setting the Ultrawide RES Aspect Ratio
P. 198
• PERSONAL SURROUND : Sets the surround of the rear speakers. You can choose
from three options: Music, Cinema , or Voice . Select Off to disable the feature.
• Language : Sets the system language used on all screens. You can choose from
three languages: English, Français (French), or Español (Spanish).
• Brightness : Adjusts the screen’s brightness. Adjust the brightness using the
Interface Dial and press the ENTER button.
• Appearance : Selects the color of the rear menu screen. When you select Front
sync , the menu screen color can be synchronized with the front navigation screen.
Ultrawide RES Only
Page 211 of 267
209
Other Features
This section describes the useful functions incorporated into the
navigation system to help make your journey easier and more enjoyable.
Trip Computer....................................... 210
Calendar ................................................ 211
Calculator .............................................. 213
Unit Conversion ................................... 213
Information Functions .......................... 215
Scenic Road Information ...................... 215
System/Device Information ................... 215
Map Data Update Status ...................... 216
Key to ZAGAT Ratings .......................... 216
Multi-view Rear Camera ....................... 217
Page 217 of 267
215Other Features
Information FunctionsScenic Road InformationHINFO button
Other
Scenic Road Information
View a list of scenic roads for each state (U.S. only). 1.Rotate i to select a state. Press
u .
2. Rotate i to select a scenic road.
Press u.
3. Rotate i to set the place as a
destination or add to the
destination list. Press u.
System/Device InformationHINFO button
Other
System/Device Information
View database, software, device, and vehicle identification information.
1Scenic Road Information
If you select a scenic road that runs through
multiple states, only the portion of the road in
the selected state is displayed. You can also set
the scenic road as a destination or waypoint.1 System/Device Information
You will need this information when ordering an
update DVD.
2 Obtaining a Navigation Update DVD
P. 237