Page 185 of 573
uuAudio System Basic OperationuAudio with Touch Screen
184
FeaturesSelect to adjust the clock and screen settings. ■ Changing the Clock settings
2 Setting the Clock P. 88
■ Changing the Screen settings
1.Select Screen Settings .
2. Use
(+ , (- or others to adjust the setting.
■Changing the Clock/Screen Settings1Changing the Clock/Screen Settings
The followings are adjustable screen settings:
• Brightness
• Contrast
• Black Level
• Display
Changes between the daytime or nighttime
modes.
• Beep
Mutes a beep that sounds every time you touch the
screen.
• Fade Timer
Sets the screen black out timing.
Select .
Main MenuTable of contents
Page 187 of 573
186
uuAudio System Basic OperationuAudio/Information Screen
Features
Audio/Information Screen
Displays the audio status and wallpaper. From this screen, you can go to various
setup options.
Press the (display) button to change the display.
■Switching the Display
Using the button
(Display) ButtonAudioTrip Computer
(Current Drive)
Clock/Wallpaper Trip Computer
(History of Trip A)
Audio/Information Screen
Main MenuTable of contents
Page 189 of 573

188
uuAudio System Basic OperationuAudio/Information Screen
Features
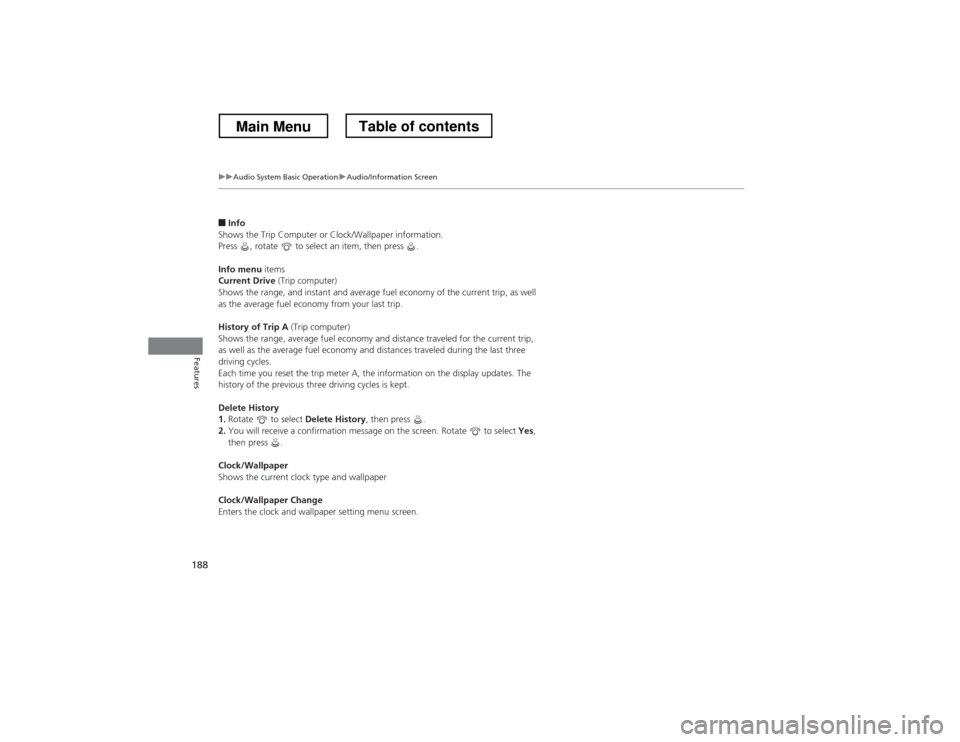
■Info
Shows the Trip Computer or Clock/Wallpaper information.
Press , rotate to select an item, then press .
Info menu items
Current Drive (Trip computer)
Shows the range, and instant and average fuel economy of the current trip, as well
as the average fuel economy from your last trip.
History of Trip A (Trip computer)
Shows the range, average fuel economy and distance traveled for the current trip,
as well as the average fuel economy and distances traveled during the last three
driving cycles.
Each time you reset the trip meter A, the information on the display updates. The
history of the previous three driving cycles is kept.
Delete History 1. Rotate to select Delete History, then press .
2. You will receive a confirmation message on the screen. Rotate to select Yes,
then press .
Clock/Wallpaper
Shows the current clock type and wallpaper
Clock/Wallpaper Change
Enters the clock and wallpaper setting menu screen.
Main MenuTable of contents
Page 190 of 573

Continued189
uuAudio System Basic OperationuAudio/Information Screen
Features
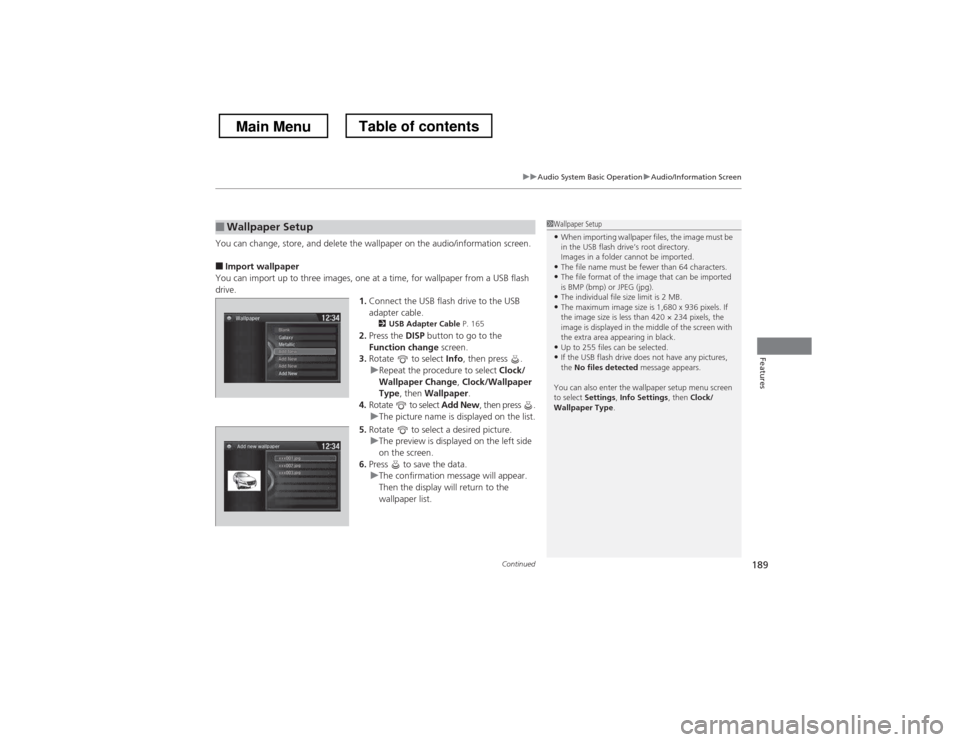
You can change, store, and delete the wallpaper on the audio/information screen. ■Import wallpaper
You can import up to three images, one at a time, for wallpaper from a USB flash drive. 1.Connect the USB flash drive to the USB
adapter cable.
2 USB Adapter Cable P. 165
2. Press the DISP button to go to the
Function change screen.
3. Rotate to select Info, then press .
uRepeat the procedure to select Clock/
Wallpaper Change , Clock/Wallpaper
Type , then Wallpaper .
4. Rotate to select Add New, then press .
uThe picture name is displayed on the list.
5. Rotate to select a desired picture.
uThe preview is displayed on the left side
on the screen.
6. Press to save the data.
uThe confirmation message will appear.
Then the display will return to the
wallpaper list.
■Wallpaper Setup1Wallpaper Setup
• When importing wallpaper files, the image must be
in the USB flash drive’s root directory.
Images in a folder cannot be imported.
• The file name must be fewer than 64 characters.
• The file format of the image that can be imported
is BMP (bmp) or JPEG (jpg).
• The individual file size limit is 2 MB.
• The maximum image size is 1,680 x 936 pixels. If
the image size is less than 420 × 234 pixels, the
image is displayed in the middle of the screen with
the extra area appearing in black.
• Up to 255 files can be selected.
• If the USB flash drive does not have any pictures, the No files detected message appears.
You can also enter the wallpaper setup menu screen
to select Settings , Info Settings , then Clock/
Wallpaper Type .
Main MenuTable of contents
Page 191 of 573

uuAudio System Basic OperationuAudio/Information Screen
190
Features
■ Select wallpaper
1. Press the DISP button to go to the Function change screen.
2. Rotate to select Info, then press .
uRepeat the procedure to select Clock/Wallpaper change, Clock/Wallpaper
Type , then Wallpaper .
uThe screen changes to the wallpaper list.
3. Rotate to select a desired wallpaper.
uThe preview is displayed on the left side on the screen.
4. Press .
uThe pop-up menu appears on the screen.
5. Rotate to select Set, then press .
uThe display will return to the wallpaper list.
■ Delete wallpaper
1. Press the DISP button to go to the Function change screen.
2. Rotate to select Info, then press .
uRepeat the procedure to select Clock/Wallpaper change, Clock/Wallpaper
Type , then Wallpaper .
uThe screen changes to the wallpaper list.
3. Rotate to select a wallpaper that you want to delete.
uThe preview is displayed on the left side on the screen.
4. Press .
uThe pop-up menu appears on the screen.
5. Rotate to select Delete, then press .
uThe confirmation message will appear.
6. Rotate to select OK, then press to delete completely.
uThe display will return to the wallpaper list.
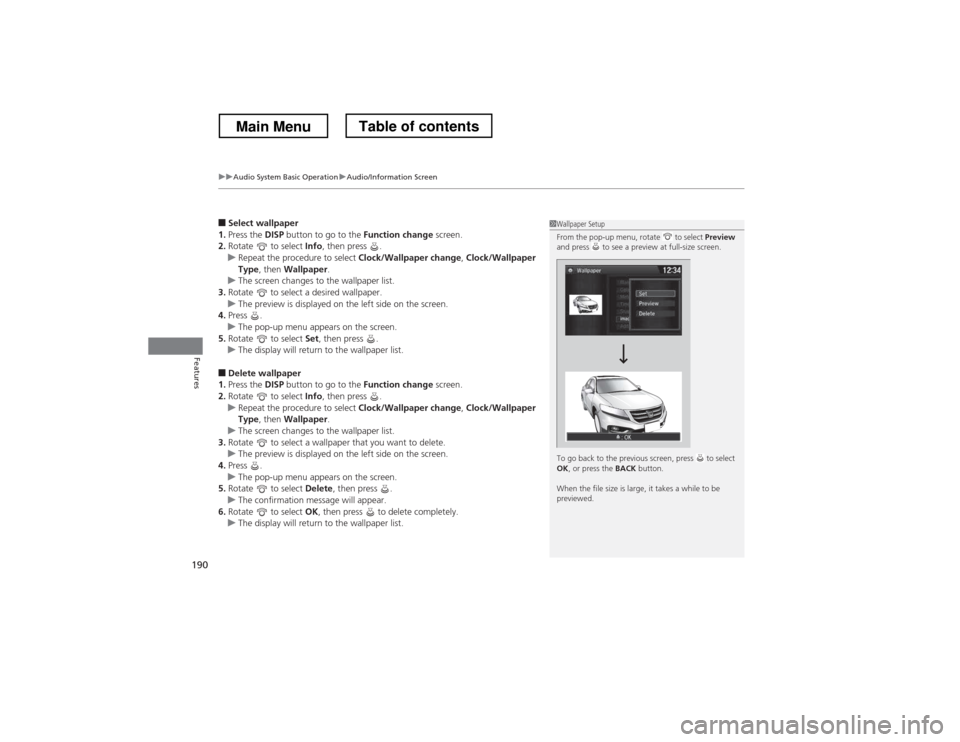
1Wallpaper Setup
From the pop-up menu, rotate to select Preview
and press to see a preview at full-size screen.
To go back to the previous screen, press to select OK , or press the BACK button.
When the file size is large, it takes a while to be
previewed.
Main MenuTable of contents
Page 193 of 573
192
uuAudio System Basic OperationuDisplay Setup
Features
Display Setup
You can change the brightness or color theme of the audio/information screen.1.Press the DISP button to go to the Settings
screen.
2. Rotate to select System Settings, then
press .
uRepeat the procedure to select Display.
3. Rotate to select Brightness, then press
.
4. Rotate to adjust the setting.
1. Press the DISP button to go to the Settings
screen.
2. Rotate to select System Settings, then
press .
uRepeat the procedure to select Others.
3. Rotate to select Background Color,
then press .
4. Rotate to select the setting you want,
then press .
■Changing the Screen Brightness1Changing the Screen Brightness
You can change the Contrast and Black Level
settings in the same manner.
■Changing the Screen
Page 194 of 573
193
uuAudio System Basic OperationuPlaying AM/FM Radio
Continued
Features
Playing AM/FM Radio
Audio/Information Screen
Audio with Touch ScreenTune Up/Down Icons
Select or to tune the radio
frequency.
BACK Button
Press to go back to the previous
display.
MENU/SEL (Selector) Knob
Press and turn to select an item,
then press to set your selection.
VOL/ (Volume/Power) Knob
Press to turn the audio system on
and off.
Turn to adjust the volume.
Source
Select to change a band or change
an audio source.
To listen to a stored channel,
select
1-6 (AM) or 1-12 (FM).
Presets
Select to store a station.
Skip/Seek Icons
Select or to search up and
down the selected band for a
station with a strong signal.More
Select to display the menu items.
Main MenuTable of contents
Page 195 of 573
uuAudio System Basic OperationuPlaying AM/FM Radio
194
Features
To store a station: 1. Tune to the selected station.
2. Press to switch to the Audio menu screen.
3. Rotate to select Save Preset, then press .
4. Rotate to select the preset number you want to store that station, then press
.
2. Select More.
3. Select Save Preset .
4. Select the preset number you want to store that station.
■Preset Memory1Playing AM/FM Radio
The ST indicator appears on the display indicating
stereo FM broadcasts.
Stereo reproduction in AM is not available.
Switching the Audio Mode
Press the SOURCE button on the steering wheel.
2 Audio Remote Controls P. 168
You can also switch the mode by pressing and selecting Change Source on the Audio menu
screen.
You can store 6 AM stations and 12 FM stations into
the preset memory.
MENU/SEL (Selector) Knob
Audio with Touch Screen
Main MenuTable of contents