Page 252 of 346
251
Maintenance
This chapter discusses basic maintenance.
Before Performing Maintenance
Inspection and Maintenance ............ 252Safety When Performing Maintenance .... 253Parts and Fluids Used in Maintenance
Service ........................................... 254
Maintenance Minder
TM..................... 255
Maintenance Under the Hood
Maintenance Items Under the Hood ..... 259Opening the Hood ........................... 260
Recommended Engine Oil ................ 261
Oil Check ......................................... 262
Adding Engine Oil ............................ 263Changing the Engine Oil and Oil Filter .. 264
Engine Coolant ................................ 266
Transmission Fluid ............................ 268
Brake Fluid ....................................... 269
Refilling Window Washer Fluid......... 270
Replacing Light Bulbs....................... 271Checking and Maintaining Wiper
Blades.......................................... 277Checking and Maintaining Tires
Checking Tires ................................. 279
Tire and Loading Information Label .. 280
Tire Labeling .................................... 280DOT Tire Quality Grading (U.S. Vehicles) .. 282Wear Indicators................................ 284Tire Service Life ................................ 284
Tire and Wheel Replacement ........... 285
Tire Rotation .................................... 286
Winter Tires ..................................... 287
12 Volt Battery.................................. 288
Remote Transmitter Care
Replacing the Button Battery ........... 289
Climate Control System Maintenance...... 290Cleaning
Interior Care .................................... 291
Exterior Care.................................... 293
Page 271 of 346
270
uuMaintenance Under the HooduRefilling Window Washer Fluid
Maintenance
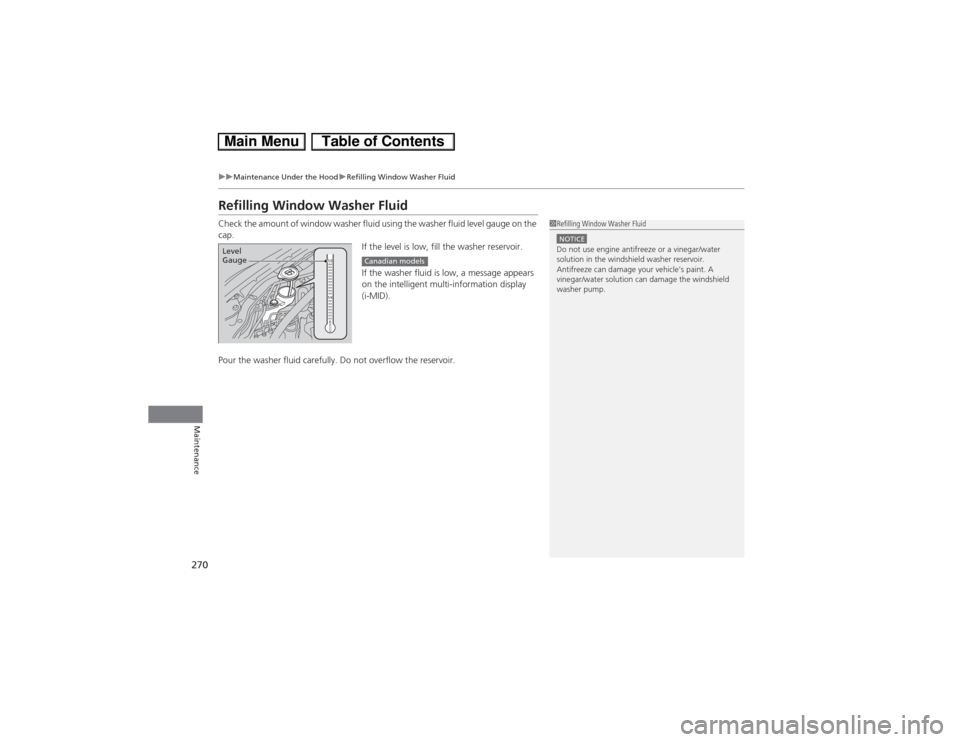
Refilling Window Washer FluidCheck the amount of window washer fluid using the washer fluid level gauge on the
cap.
If the level is low, fill the washer reservoir.
If the washer fluid is low, a message appears
on the intelligent multi-information display
(i-MID).
Pour the washer fluid carefully. Do not overflow the reservoir.
1Refilling Window Washer FluidNOTICEDo not use engine antifreeze or a vinegar/water
solution in the windshield washer reservoir.
Antifreeze can damage your vehicle’s paint. A
vinegar/water solution can damage the windshield
washer pump.
Level
Gauge
Canadian models
Page 278 of 346
277
Continued
Maintenance
Checking and Maintaining Wiper BladesChecking Wiper BladesIf the wiper blade rubber has deteriorated, it will leave streaks and the metal wiper
arm may scratch the window glass.Changing the Wiper Blade Rubber
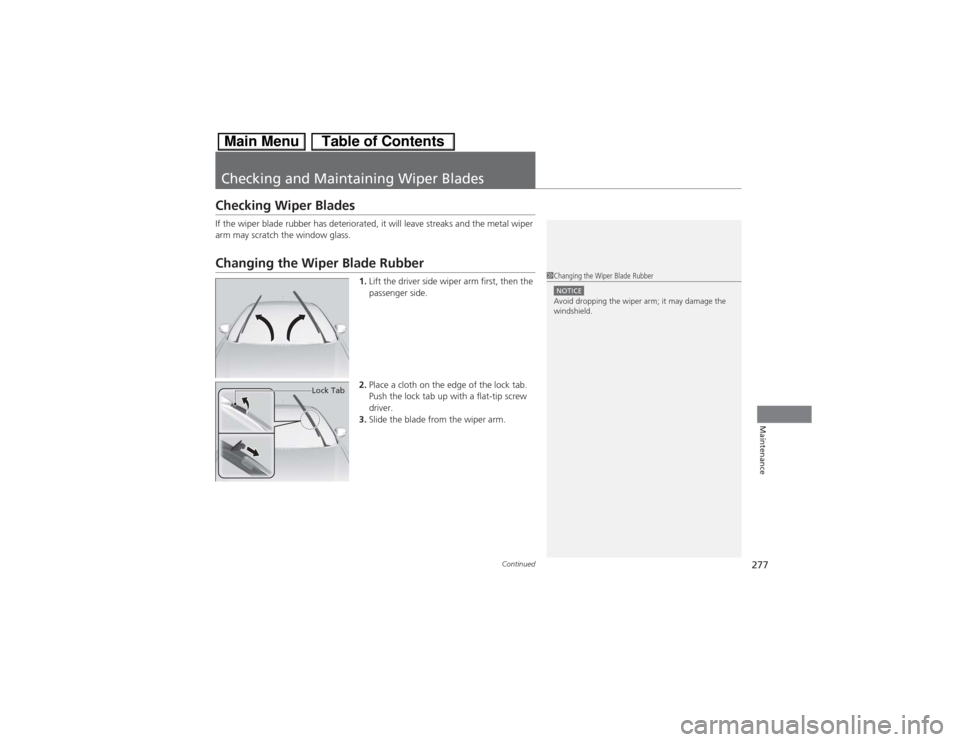
1.Lift the driver side wiper arm first, then the
passenger side.
2.Place a cloth on the edge of the lock tab.
Push the lock tab up with a flat-tip screw
driver.
3.Slide the blade from the wiper arm.
1Changing the Wiper Blade RubberNOTICEAvoid dropping the wiper arm; it may damage the
windshield.
Lock Tab
Page 291 of 346
290Maintenance
Climate Control System MaintenanceDust and Pollen FilterThe Climate Control system is equipped with a dust and pollen filter that collects
pollen, dust, and other debris in the air. The Maintenance Minder
TM messages will let
you know when to replace the filter.
We recommend that you replace the dust and pollen filter sooner when using your
vehicle in areas with high concentrations of dust.
1Dust and Pollen Filter
If the airflow from the climate control system
deteriorates noticeably, and the windows fog up
easily, the filter may need to be replaced. Please
contact a dealer for replacement.
Page 294 of 346
293
uuCleaninguExterior Care
Continued
Maintenance
Exterior CareDust off the vehicle body after you drive.
Regularly inspect your vehicle for scratches on painted surfaces. A scratch on a
painted surface can result in body rust. If you find a scratch, promptly repair it.
Wash the vehicle regularly. Wash more frequently when driving in the following
conditions:
•If driving on roads with road salt.
•If driving in coastal areas.
•If tar, soot, bird droppings, insects, or tree sap are stuck to painted surfaces.
Make sure to follow the instructions indicated on the automated car wash:
•Remove the audio antenna.
•Fold in the door mirrors.
•Keep sufficient distance between the cleaning nozzle and the vehicle body.
•Take particular care around the windows. Standing too close may cause water to
enter the vehicle interior. Do not spray water into the engine compartment.■Washing the Vehicle■Using an Automated Car Wash■Using High Pressure Cleaners
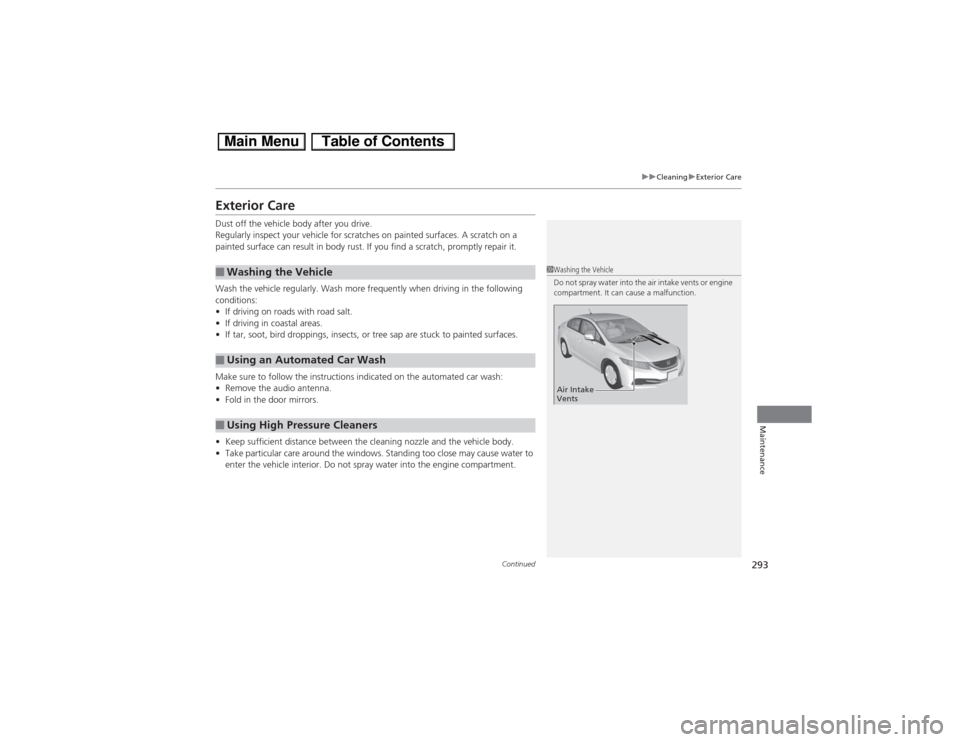
1Washing the Vehicle
Do not spray water into the air intake vents or engine
compartment. It can cause a malfunction.Air Intake
Vents
Page 295 of 346
uuCleaninguExterior Care
294Maintenance
A good coat of automotive body wax helps protect your vehicle’s paint from the
elements. Wax will wear off over time and expose your vehicle’s paint to the
elements, so reapply as necessary.
If you get gasoline, oil, engine coolant, or battery fluid on resin coated parts, they
may be stained or the coating may peel. Promptly wipe it away using a soft cloth and
clean water.
Wipe using a glass cleaner.
Aluminum is susceptible to deterioration caused by salt and other road
contaminants. Use a sponge and mild detergent to wipe away promptly.
Be careful not to use harsh chemicals (including some commercial wheel cleaners) or
a stiff brush. They can damage the clear coat of the aluminum alloy wheels that
helps keep the aluminum from corroding and tarnishing.■Applying Wax■Maintaining the Bumpers and Other Resin Coated Parts■Cleaning the Window■Maintaining Aluminum Wheels
1Applying WaxNOTICEChemical solvents and strong cleaners can damage
the paint, metal, and plastic on your vehicle. Wipe up
spills immediately.1Maintaining the Bumpers and Other Resin Coated Parts
Ask a dealer about the correct coating material when
you want to repair the painted surface of the parts
made of resin.1Cleaning the Window
Wires are mounted to the inside of the rear window.
Wipe along the same direction as the wires with a
soft cloth so as not to damage them.
Page 301 of 346
uuIf a Tire Goes FlatuTemporarily Repairing a Flat Tire
300Handling the Unexpected
4.Plug in the compressor to the accessory
power socket.
uBe careful not to pinch the cord in a
door or window.
5.Start the engine.
uKeep the engine running while injecting
sealant and air.
2Carbon Monoxide Gas P. 64
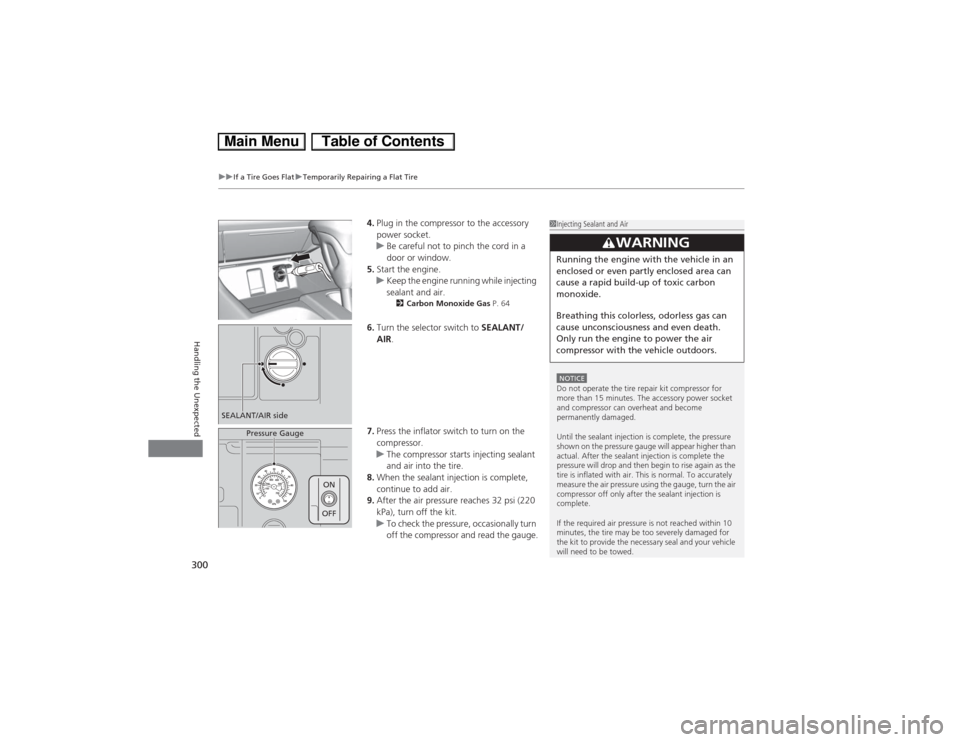
6.Turn the selector switch to SEALANT/
AIR.
7.Press the inflator switch to turn on the
compressor.
uThe compressor starts injecting sealant
and air into the tire.
8.When the sealant injection is complete,
continue to add air.
9.After the air pressure reaches 32 psi (220
kPa), turn off the kit.
uTo check the pressure, occasionally turn
off the compressor and read the gauge.
1Injecting Sealant and AirNOTICEDo not operate the tire repair kit compressor for
more than 15 minutes. The accessory power socket
and compressor can overheat and become
permanently damaged.
Until the sealant injection is complete, the pressure
shown on the pressure gauge will appear higher than
actual. After the sealant injection is complete the
pressure will drop and then begin to rise again as the
tire is inflated with air. This is normal. To accurately
measure the air pressure using the gauge, turn the air
compressor off only after the sealant injection is
complete.
If the required air pressure is not reached within 10
minutes, the tire may be too severely damaged for
the kit to provide the necessary seal and your vehicle
will need to be towed.
3
WARNING
Running the engine with the vehicle in an
enclosed or even partly enclosed area can
cause a rapid build-up of toxic carbon
monoxide.
Breathing this colorless, odorless gas can
cause unconsciousness and even death.
Only run the engine to power the air
compressor with the vehicle outdoors.
SEALANT/AIR side
Pressure Gauge
ON
OFF
Page 305 of 346
uuIf a Tire Goes FlatuTemporarily Repairing a Flat Tire
304Handling the Unexpected
7.Plug in the kit to the accessory power
socket.
uBe careful not to pinch the cord in a
door or window.
8.Start the engine.
uKeep the engine running while injecting
air.
2Carbon Monoxide Gas P. 64
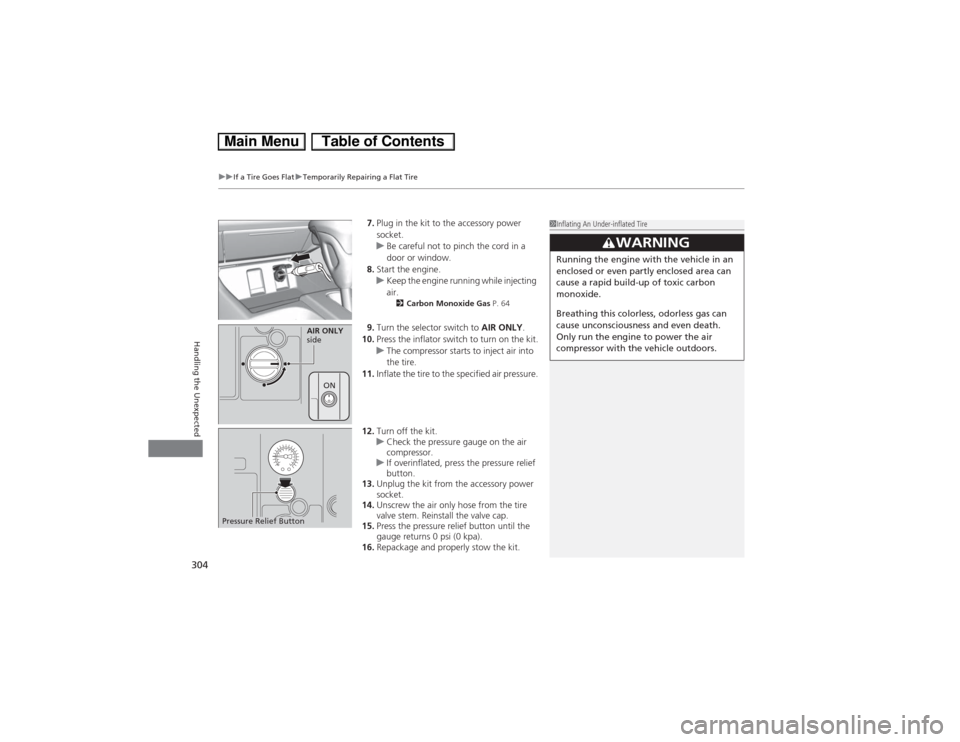
9.Turn the selector switch to AIR ONLY.
10.Press the inflator switch to turn on the kit.
uThe compressor starts to inject air into
the tire.
11.Inflate the tire to the specified air pressure.
12.Turn off the kit.
uCheck the pressure gauge on the air
compressor.
uIf overinflated, press the pressure relief
button.
13.Unplug the kit from the accessory power
socket.
14.Unscrew the air only hose from the tire
valve stem. Reinstall the valve cap.
15.Press the pressure relief button until the
gauge returns 0 psi (0 kpa).
16.Repackage and properly stow the kit.
1Inflating An Under-inflated Tire
3
WARNING
Running the engine with the vehicle in an
enclosed or even partly enclosed area can
cause a rapid build-up of toxic carbon
monoxide.
Breathing this colorless, odorless gas can
cause unconsciousness and even death.
Only run the engine to power the air
compressor with the vehicle outdoors.
AIR ONLY
side
ON
Pressure Relief Button