2013 FORD SUPER DUTY brake light
[x] Cancel search: brake lightPage 259 of 563
•Your vehicle’s brake system and the trailer brake system work
independently of each other. Changing the GAIN setting on the TBC
does not affect the operation of your vehicle’s brakes whether a
trailer is attached or not.
•
When the vehicle is turned off, the TBC output is disabled and the
display and module are shut down. The TBC module and display turn
on when the ignition is turned from the off position to the on position.
•The TBC is only a factory-installed or dealer-installed item. Ford is not
responsible for warranty or performance of the TBC due to misuse or
customer installation.
Trailer Lamps
Trailer lamps are required on most towed vehicles. Make sure all running
lights, brake lights, turn signals and hazard lights are working. Contact
your authorized dealer or trailer rental agency for proper instructions
and equipment for hooking up the lamps.
Using a Step Bumper (If Equipped)
The rear bumper is equipped with an integral hitch and only requires a
ball with a one inch (25.4 millimeter) shank diameter. The bumper has a
5000 pound (2268 kilogram) trailer weight and 500 pound (227
kilogram) tongue weight capacity.
If it is necessary to relocate the trailer hitch ball position, a
frame-mounted trailer hitch must be installed.
Before Towing a Trailer
Practice turning, stopping and backing up to get the feel of the
vehicle-trailer combination before starting on a trip. When turning, make
wider turns so the trailer wheels will clear curbs and other obstacles.
When Towing a Trailer
•Do not drive faster than 70 mph (113 km/h) during the first 500 miles
(800 kilometers) and do not make full-throttle starts.
•Check your hitch, electrical connections and trailer wheel lug nuts
thoroughly after you have traveled 50 miles (80 kilometers).
•Place the gearshift lever in positionPto aid in engine and
transmission cooling and A/C efficiency during hot weather while
stopped in traffic.
•Turn off the speed control. The speed control may turn off
automatically when you are towing on long, steep grades.
258Towing
2013 F-250/350/450/550(f23)
Owners Guide gf, 1st Printing
USA(fus)
Page 266 of 563
•Add particular accessories to your vehicle (e.g.; bug deflectors,
rollbars or light bars, running boards, ski racks).
•Drive with the wheels out of alignment.
Conditions
•Heavily loading a vehicle or towing a trailer may reduce fuel economy
at any speed.
•Carrying unnecessary weight may reduce fuel economy (approximately
1 mpg [0.4 km/L] is lost for every 400 lb [180 kg] of weight carried).
•Adding certain accessories to your vehicle (for example bug
deflectors, rollbars/light bars, running boards, ski/luggage racks) may
reduce fuel economy.
•To maximize the fuel economy, drive with the tonneau cover installed
(if equipped).
•Using fuel blended with alcohol may lower fuel economy.
•Fuel economy may decrease with lower temperatures during the first
8–10 miles (12–16 km) of driving.
•Driving on flat terrain offers improved fuel economy as compared to
driving on hilly terrain.
•Transmissions give their best fuel economy when operated in the top
cruise gear and with steady pressure on the gas pedal.
•Four-wheel-drive operation (if equipped) is less fuel efficient than
two-wheel-drive operation.
•Close windows for high speed driving.
DRIVING THROUGH WATER
Note:Driving through deep water may allow water into the transmission
and engine causing internal damage. Have the fluid checked and, if water
is found, replace the fluid.
Do not drive quickly through standing water, especially if the depth is
unknown. Traction or brake capability may be limited and if the ignition
system gets wet, your engine may stall. Water may also enter your
engine’s air intake and severely damage your engine.
Driving Hints265
2013 F-250/350/450/550(f23)
Owners Guide gf, 1st Printing
USA(fus)
Page 267 of 563
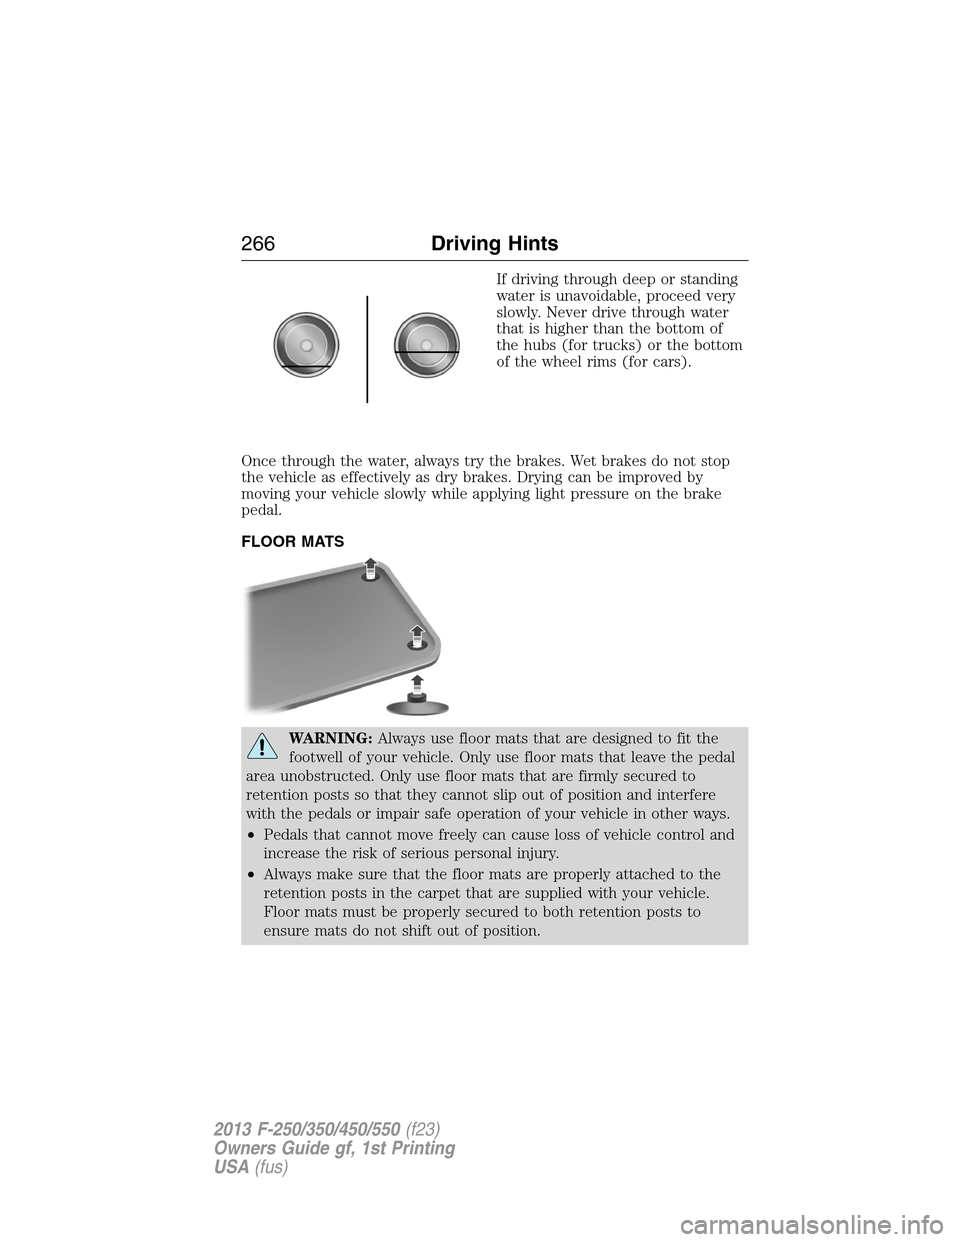
If driving through deep or standing
water is unavoidable, proceed very
slowly. Never drive through water
that is higher than the bottom of
the hubs (for trucks) or the bottom
of the wheel rims (for cars).
Once through the water, always try the brakes. Wet brakes do not stop
the vehicle as effectively as dry brakes. Drying can be improved by
moving your vehicle slowly while applying light pressure on the brake
pedal.
FLOOR MATS
WARNING:Always use floor mats that are designed to fit the
footwell of your vehicle. Only use floor mats that leave the pedal
area unobstructed. Only use floor mats that are firmly secured to
retention posts so that they cannot slip out of position and interfere
with the pedals or impair safe operation of your vehicle in other ways.
•Pedals that cannot move freely can cause loss of vehicle control and
increase the risk of serious personal injury.
•Always make sure that the floor mats are properly attached to the
retention posts in the carpet that are supplied with your vehicle.
Floor mats must be properly secured to both retention posts to
ensure mats do not shift out of position.
266Driving Hints
2013 F-250/350/450/550(f23)
Owners Guide gf, 1st Printing
USA(fus)
Page 293 of 563
Fuse or relay
locationFuse amp
ratingProtected circuits
3 30A Smart window motor
4 10A Interior lights, Hood lamp
5 20A Moonroof
6 5A Driver seat module
7 7.5A Driver seat switch, Driver lumbar
motor
8 10A Power mirror switch
9 10A Upfitter relay #3
10 10A Run/accessory relay, Customer
access feed
11 10A Instrument cluster
12 15A Interior lighting, Lighted running
board lamps
13 15A Right turn signals and brake
lamps, Right trailer tow stop turn
relay
14 15A Left turn signals and brake lamps,
Left trailer tow stop turn relay
15 15A High-mounted stop lamps, Backup
lamps, Trailer tow backup relay,
Reverse signal interior mirror
16 10A Right low beam headlamp
17 10A Left low beam headlamp
18 10A Keypad illumination, Passive
anti-theft indicator, Powertrain
control module, Brake shift
interlock
19 20A Subwoofer, Amplifier
20 20A Power door locks
21 10A Brake on/off switch
22 20A Horn
23 15A Not used (spare)
292Fuses
2013 F-250/350/450/550(f23)
Owners Guide gf, 1st Printing
USA(fus)
Page 307 of 563
If you notice any of the following:
•the engine coolant temperature gauge moves fully into the red (hot)
area
•the coolant temperature warning light illuminates
•the service engine soon indicator illuminates
1. Pull off the road as soon as safely possible and place the vehicle in P
(Park).
2. Leave the engine running until the coolant temperature gauge needle
moves away from the H range. After several minutes, if this does not
happen, follow the remaining steps.
3. Turn the engine off and wait for it to cool before checking the coolant
level.
WARNING:Never remove the coolant reservoir cap while the
engine is running or hot.
4. If the coolant level is normal, you may restart your engine and
continue on.
5. If the coolant is low, add coolant, restart the engine and take your
vehicle to an authorized dealer. SeeAdding engine coolantin this
chapter for more information.
Refer to fail-safe cooling for additional information.
TRANSMISSION FLUID CHECK
Checking Automatic Transmission Fluid (If Equipped)
Refer to yourScheduled Maintenance Informationfor scheduled
intervals for fluid checks and changes. Your transmission does not
consume fluid. However, the fluid level should be checked if the
transmission is not working properly, i.e., if the transmission slips or
shifts slowly or if you notice some sign of fluid leakage.
Automatic transmission fluid expands when warmed. To obtain an
accurate fluid check, drive the vehicle until it is at normal operating
temperature (approximately 20 miles [30 km]). Verify that the
transmission fluid temperature gauge, located on the instrument cluster,
is within normal range.
1. Drive the vehicle 20 miles (30 km) or until it reaches normal operating
temperature.
2. Park the vehicle on a level surface and engage the parking brake.
306Maintenance
2013 F-250/350/450/550(f23)
Owners Guide gf, 1st Printing
USA(fus)
Page 326 of 563
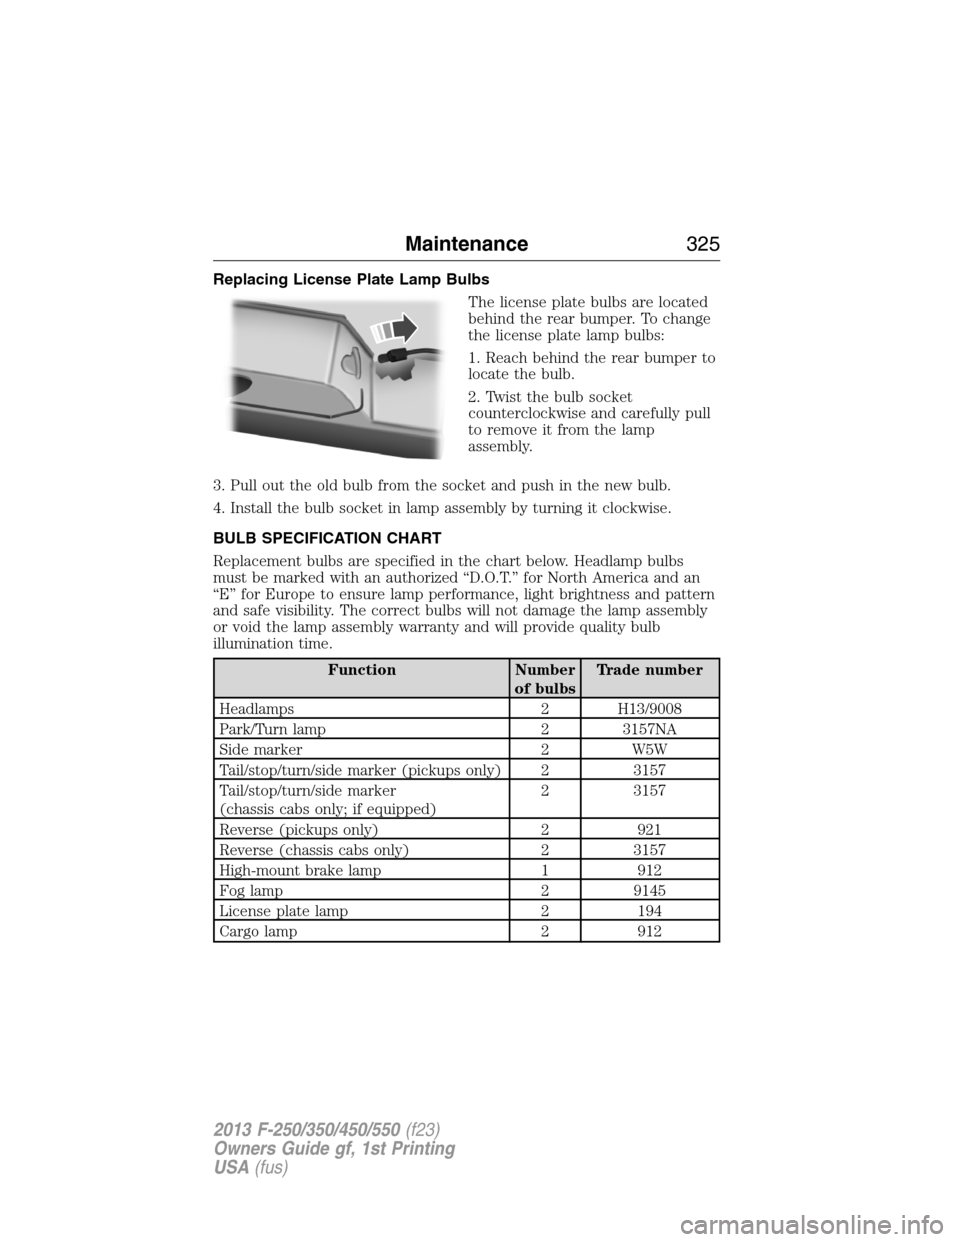
Replacing License Plate Lamp Bulbs
The license plate bulbs are located
behind the rear bumper. To change
the license plate lamp bulbs:
1. Reach behind the rear bumper to
locate the bulb.
2. Twist the bulb socket
counterclockwise and carefully pull
to remove it from the lamp
assembly.
3. Pull out the old bulb from the socket and push in the new bulb.
4. Install the bulb socket in lamp assembly by turning it clockwise.
BULB SPECIFICATION CHART
Replacement bulbs are specified in the chart below. Headlamp bulbs
must be marked with an authorized “D.O.T.” for North America and an
“E” for Europe to ensure lamp performance, light brightness and pattern
and safe visibility. The correct bulbs will not damage the lamp assembly
or void the lamp assembly warranty and will provide quality bulb
illumination time.
Function Number
of bulbsTrade number
Headlamps 2 H13/9008
Park/Turn lamp 2 3157NA
Side marker 2 W5W
Tail/stop/turn/side marker (pickups only) 2 3157
Tail/stop/turn/side marker
(chassis cabs only; if equipped)2 3157
Reverse (pickups only) 2 921
Reverse (chassis cabs only) 2 3157
High-mount brake lamp 1 912
Fog lamp 2 9145
License plate lamp 2 194
Cargo lamp 2 912
Maintenance325
2013 F-250/350/450/550(f23)
Owners Guide gf, 1st Printing
USA(fus)
Page 336 of 563
•Never apply any cleaning chemical to hot or warm wheel rims or
covers.
•Some automatic car washes may cause damage to the finish on your
wheel rims or covers. Industrial-strength (heavy-duty) cleaners, or
cleaning chemicals, in combination with brush agitation to remove
brake dust and dirt, could wear away the clear coat finish over time.
•Do not use hydrofluoric acid-based or high caustic-based wheel
cleaners, steel wool, fuels or strong household detergent.
•To remove tar and grease, use Motorcraft® Bug and Tar Remover.
VEHICLE STORAGE
If you plan on storing your vehicle for an extended period of time
(30 days or more), read the following maintenance recommendations to
make sure your vehicle stays in good operating condition.
All motor vehicles and their components were engineered and tested for
reliable, regular driving. Long term storage under various conditions may
lead to component degradation or failure unless specific precautions are
taken to preserve the components.
General
•Store all vehicles in a dry, ventilated place.
•Protect from sunlight, if possible.
•If vehicles are stored outside, they require regular maintenance to
protect against rust and damage.
Body
•Wash vehicle thoroughly to remove dirt, grease, oil, tar or mud from
exterior surfaces, rear-wheel housing and underside of front fenders.
•Periodically wash vehicles stored in exposed locations.
•Touch-up raw or primed metal to prevent rust.
•Cover chrome and stainless steel parts with a thick coat of auto wax
to prevent discoloration. Re-wax as necessary when the vehicle is
washed.
•Lubricate all hood, door and trunk lid hinges, and latches with a light
grade oil.
•Cover interior trim to prevent fading.
•Keep all rubber parts free from oil and solvents.
Vehicle Care335
2013 F-250/350/450/550(f23)
Owners Guide gf, 1st Printing
USA(fus)
Page 351 of 563
Note:Do not reduce tire pressure to change the ride characteristics of
the vehicle. If you do not maintain the inflation pressure at the levels
specified by Ford, your vehicle may experience a condition known as
shimmy. Shimmy is a severe vibration and oscillation in the steering
wheel after the vehicle travels over a bump or dip in the road that does
not dampen out by itself. Shimmy may result from significant
under-inflation of the tires, improper tires (load range, size, or type), or
vehicle modifications such as lift-kits. In the event that your vehicle
experiences shimmy, you should slowly reduce speed by either lifting off
the accelerator pedal or lightly applying the brakes. The shimmy will
cease as the vehicle speed decreases.
Maximum Inflation Pressureis the tire manufacturer’s maximum
permissible pressure or the pressure at which the maximum load can be
carried by the tire. This pressure is normally higher than the
manufacturer’s recommended cold inflation pressure which can be found
on the Safety Compliance Certification Label (affixed to either the door
hinge pillar, door-latch post, or the door edge that meets the door-latch
post, next to the driver’s seating position), or Tire Label which is located
on the B-Pillar or the edge of the driver’s door. The cold inflation
pressure should never be set lower than the recommended pressure on
the Safety Compliance Certification Label or Tire Label.
When weather temperature changes occur, tire inflation pressures also
change. A 10°F (6°C) temperature drop can cause a corresponding drop
of 1 psi (7 kPa) in inflation pressure. Check your tire pressures
frequently and adjust them to the proper pressure which can be found
on the Safety Compliance Certification Label or Tire Label.
To check the pressure in your tire(s):
1. Make sure the tires are cool, meaning they are not hot from driving
even a mile.
If you are checking tire pressure when the tire is hot (for example,
driven more than 1 mile [1.6 kilometers]), never bleed or reduce air
pressure. The tires are hot from driving and it is normal for pressures to
increase above recommended cold pressures. A hot tire at or below
recommended cold inflation pressure could be significantly
under-inflated.
Note:If you have to drive a distance to get air for your tire(s), check
and record the tire pressure first and add the appropriate air pressure
when you get to the pump. It is normal for tires to heat up and the air
pressure inside to go up as you drive.
350Wheels and Tires
2013 F-250/350/450/550(f23)
Owners Guide gf, 1st Printing
USA(fus)