2013 FORD FUSION (AMERICAS) service
[x] Cancel search: servicePage 254 of 458

CHANGING THE 12V BATTERY
WARNINGS
Batteries normally produce explosive
gases which can cause personal
injury. Therefore, do not allow
flames, sparks or lighted substances to
come near the battery. When working near
the battery, always shield your face and
protect your eyes. Always provide proper
ventilation. When lifting a plastic-cased battery,
excessive pressure on the end walls
could cause acid to flow through the
vent caps, resulting in personal injury and
damage to the vehicle or battery. Lift the
battery with a battery carrier or with your
hands on opposite corners. Keep batteries out of reach of
children. Batteries contain sulfuric
acid. Avoid contact with skin, eyes or
clothing. Shield your eyes when working
near the battery to protect against possible
splashing of acid solution. In case of acid
contact with skin or eyes, flush
immediately with water for a minimum of
15 minutes and get prompt medical
attention. If acid is swallowed, call a
physician immediately. Your vehicle is equipped with a
Motorcraft® maintenance-free battery
which normally does not require additional
water during its life of service.
Note:
If your battery has a cover/shield,
make sure it is reinstalled after the battery
has been cleaned or replaced.
Note: See an authorized dealer for low
voltage battery access, testing, or
replacement. When a low voltage battery replacement
is necessary, see an authorized dealer to
replace the low voltage battery with a Ford
recommended replacement low voltage
battery that matches the electrical
requirements of the vehicle
To ensure proper operation of the battery
management system (BMS), do not allow
a technician to connect any electrical
device ground connection directly to the
low voltage battery negative post. A
connection at the low voltage battery
negative post can cause inaccurate
measurements of the battery condition
and potential incorrect system operation.
Note:
Note: If a person adds electrical or
electronic accessories or components to the
vehicle, the accessories or components may
adversely affect the low voltage battery
performance and durability and may also
affect the performance of other electrical
systems in the vehicle.
For longer, trouble-free operation, keep the
top of the battery clean and dry. Also,
make certain the battery cables are always
tightly fastened to the battery terminals.
If you see any corrosion on the battery or
terminals, remove the cables from the
terminals and clean with a wire brush. You
can neutralize the acid with a solution of
baking soda and water.
When a battery replacement is required,
the battery should only be replaced with
a Ford recommended replacement battery
that matches the electrical requirements
of the vehicle.
Because your vehicle ’s engine is
electronically-controlled by a computer,
some engine control settings are
maintained by power from the low voltage
battery. Some engine computer settings,
like the idle trim and fuel trim strategy,
optimize the driveability and performance
of the engine. Some other computer
settings, like the clock and radio station
251
Fusion/Mondeo (CC7) Maintenance
Page 259 of 458

1. Remove the six fasteners securing the
front fascia to the front trim cover.
2. Remove the three bumper cover upper
screws.
3. Remove the fastener at the inboard side of the headlamp to be serviced. 4. Remove the two headlamp assembly
screws. 5.
Remove the lower three wheelhousing
fasteners. 256
Fusion/Mondeo (CC7) MaintenanceE159693 E159694 E159695 E159696
Page 260 of 458
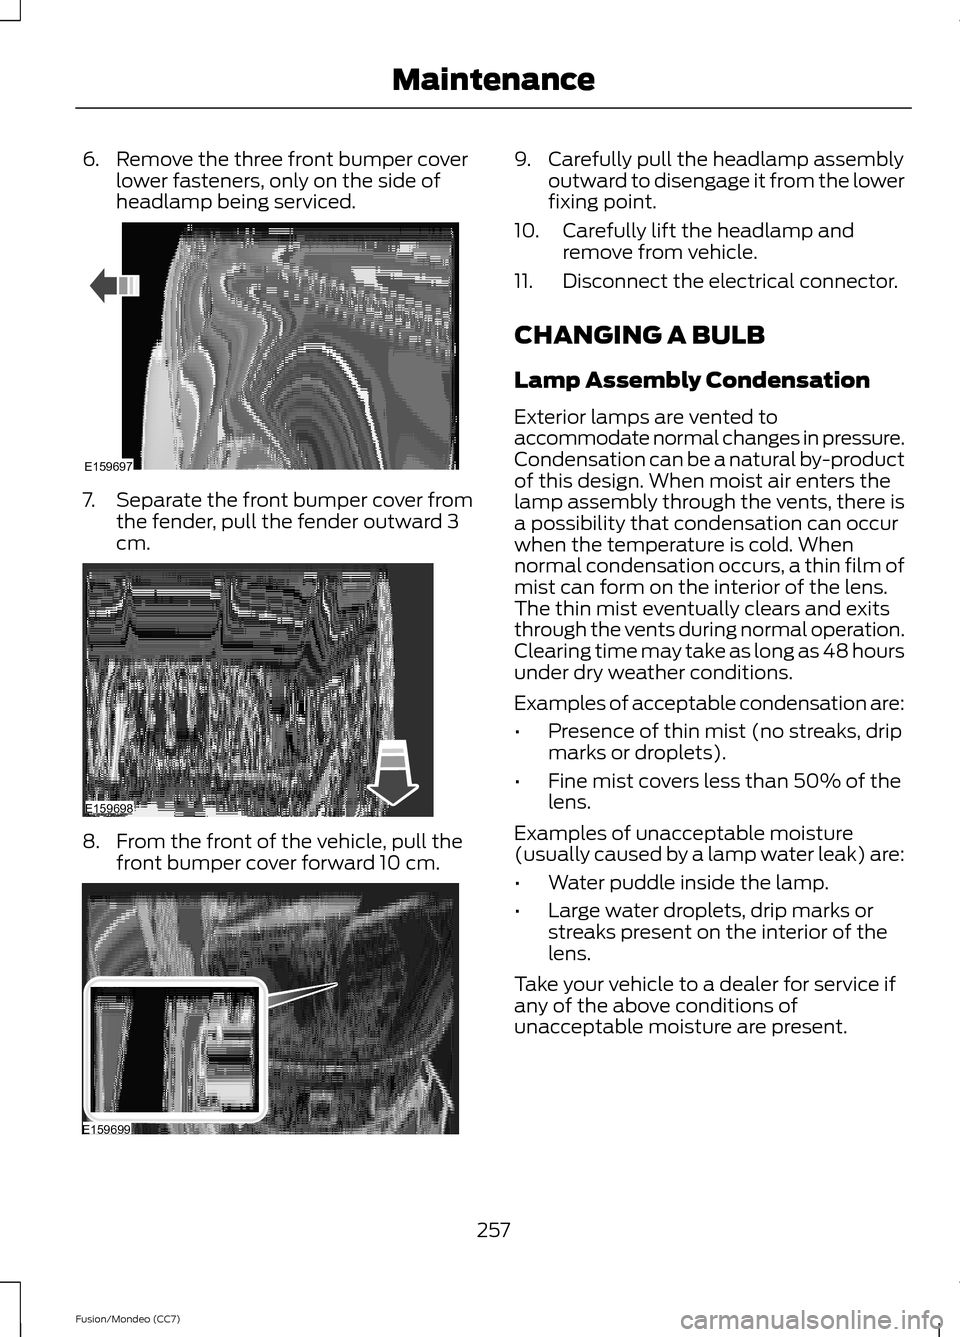
6. Remove the three front bumper cover
lower fasteners, only on the side of
headlamp being serviced. 7.
Separate the front bumper cover from
the fender, pull the fender outward 3
cm. 8. From the front of the vehicle, pull the
front bumper cover forward 10 cm. 9. Carefully pull the headlamp assembly
outward to disengage it from the lower
fixing point.
10. Carefully lift the headlamp and remove from vehicle.
11. Disconnect the electrical connector.
CHANGING A BULB
Lamp Assembly Condensation
Exterior lamps are vented to
accommodate normal changes in pressure.
Condensation can be a natural by-product
of this design. When moist air enters the
lamp assembly through the vents, there is
a possibility that condensation can occur
when the temperature is cold. When
normal condensation occurs, a thin film of
mist can form on the interior of the lens.
The thin mist eventually clears and exits
through the vents during normal operation.
Clearing time may take as long as 48 hours
under dry weather conditions.
Examples of acceptable condensation are:
• Presence of thin mist (no streaks, drip
marks or droplets).
• Fine mist covers less than 50% of the
lens.
Examples of unacceptable moisture
(usually caused by a lamp water leak) are:
• Water puddle inside the lamp.
• Large water droplets, drip marks or
streaks present on the interior of the
lens.
Take your vehicle to a dealer for service if
any of the above conditions of
unacceptable moisture are present.
257
Fusion/Mondeo (CC7) MaintenanceE159697 E159698 E159699
Page 261 of 458
Replacing the Headlamp Bulbs
WARNING
Handle a halogen headlamp bulb
carefully and keep out of children
’s
reach. Grasp the bulb by only its
plastic base and do not touch the glass.
The oil from your hand could cause the
bulb to break the next time the headlamps
are operated. Note:
If the bulb is accidentally touched, it
should be cleaned with rubbing alcohol
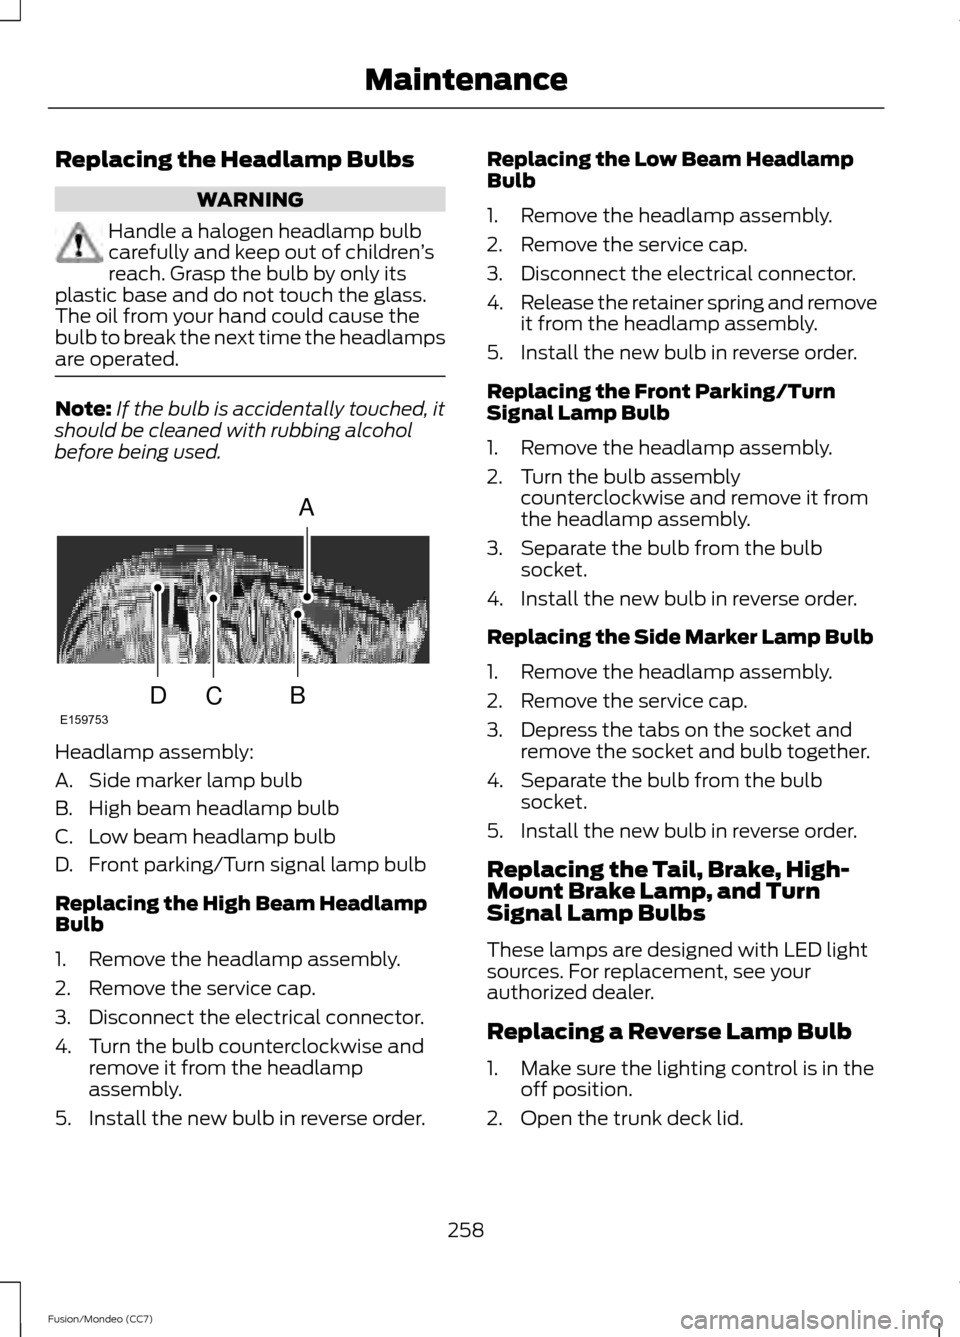
before being used. Headlamp assembly:
A. Side marker lamp bulb
B. High beam headlamp bulb
C. Low beam headlamp bulb
D. Front parking/Turn signal lamp bulb
Replacing the High Beam Headlamp
Bulb
1. Remove the headlamp assembly.
2. Remove the service cap.
3. Disconnect the electrical connector.
4. Turn the bulb counterclockwise and
remove it from the headlamp
assembly.
5. Install the new bulb in reverse order. Replacing the Low Beam Headlamp
Bulb
1. Remove the headlamp assembly.
2. Remove the service cap.
3. Disconnect the electrical connector.
4.
Release the retainer spring and remove
it from the headlamp assembly.
5. Install the new bulb in reverse order.
Replacing the Front Parking/Turn
Signal Lamp Bulb
1. Remove the headlamp assembly.
2. Turn the bulb assembly counterclockwise and remove it from
the headlamp assembly.
3. Separate the bulb from the bulb socket.
4. Install the new bulb in reverse order.
Replacing the Side Marker Lamp Bulb
1. Remove the headlamp assembly.
2. Remove the service cap.
3. Depress the tabs on the socket and remove the socket and bulb together.
4. Separate the bulb from the bulb socket.
5. Install the new bulb in reverse order.
Replacing the Tail, Brake, High-
Mount Brake Lamp, and Turn
Signal Lamp Bulbs
These lamps are designed with LED light
sources. For replacement, see your
authorized dealer.
Replacing a Reverse Lamp Bulb
1. Make sure the lighting control is in the off position.
2. Open the trunk deck lid.
258
Fusion/Mondeo (CC7) MaintenanceA
BCDE159753
Page 269 of 458
4.
Remove the soaked cloth and if it is not
soiled badly, use this cloth to clean the
area by using a rubbing motion for 60
seconds.
5. Following this, wipe area dry with a clean, white, cotton cloth.
CLEANING LEATHER SEATS (IF
EQUIPPED)
For routine cleaning, wipe the surface with
a soft, damp cloth. For more thorough
cleaning, wipe the surface with a mild soap
and water solution. Dry the area with a soft
cloth. In Canada, use Motorcraft® Vinyl
Cleaner.
If the leather cannot be completely
cleaned using a mild soap and water
solution, the leather may be cleaned using
a commercially available leather cleaning
product designed for automotive interiors.
Note: To check for compatibility, first test
any cleaner or stain remover on an
inconspicuous part of the leather.
You should:
• remove dust and loose dirt with a
vacuum cleaner.
• clean spills and stains as quickly as
possible.
• To check for compatibility, first test any
cleaner or stain remover on an
inconspicuous part of the leather.
Do not use the following products as these
may damage the leather:
• oil/petroleum-based leather
conditioners.
• household cleaners.
• alcohol solutions.
• solvents or cleaners intended for
rubber, vinyl and plastics. CLEANING THE ALLOY
WHEELS
Note:
Do not apply a cleaning chemical to
warm or hot wheel rims and covers.
Note: Some automatic car washes may
cause damage to the finish on your wheel
rims and covers.
Note: Industrial-strength or heavy-duty
cleaners in combination with brush agitation
to remove brake dust and dirt, could wear
away the clear coat finish over a period time.
Note: Do not use hydrofluoric acid-based
or high caustic-based wheel cleaners, steel
wool, fuels or strong household detergents.
Note: If you intend parking your vehicle for
an extended period after cleaning the
wheels with a wheel cleaner, drive your
vehicle for a few minutes before doing so.
This will reduce the risk of increased
corrosion of the brake discs.
Alloy wheels and wheel covers are coated
with a clear coat paint finish. To maintain
their condition we recommend that you:
• Clean the wheels weekly, with the
recommended Ford service wheel and
tire cleaner. Apply using
manufacturer's instructions. Use
Motorcraft® Wheel and Tire Cleaner
(ZC-37-A).
• Use a sponge to remove heavy
deposits of dirt and brake dust
accumulation.
• Rinse thoroughly with a strong stream
of water when you have completed the
cleaning process.
• To remove tar and grease, use
Motorcraft® Bug and Tar Remover
(ZC-42).
266
Fusion/Mondeo (CC7) Vehicle Care
Page 272 of 458

TIRE CARE
Important information for 235/40R19
low-profile tires and wheels If your
vehicle is equipped with 235/40R19 tires,
they are low-profile tires. These tires and
wheels are designed to give your vehicle a
sport appearance. With low-profile tires,
you may notice an increase in road noise
and faster tire wear, depending on road
conditions and driving styles. Due to their
design, low-profile tires and wheels are
more prone to road damage from potholes,
rough or unpaved roads, car wash rails and
curb contact than standard tires and
wheels.
Note: Your vehicle ’s warranty does not
cover these types of damage. Tires should
always be kept at the correct inflation
pressures and extra caution should be taken
when operating on rough roads to avoid
impacts that could cause wheel and tire
damage.
Information About Uniform Tire
Quality Grading Tire Quality Grades apply to new
pneumatic passenger car tires. The Quality
grades can be found where applicable on
the tire sidewall between tread shoulder
and maximum section width. For example:
Treadwear 200 Traction AA
Temperature A
. These Tire Quality Grades are determined
by standards that the United States
Department of Transportation has set.
Tire Quality Grades apply to new
pneumatic passenger car tires. They do
not apply to deep tread, winter-type snow
tires, space-saver or temporary use spare
tires, light truck or LT type tires, tires with
nominal rim diameters of 10 to 12 inches
or limited production tires as defined in
Title 49 Code of Federal Regulations Part
575.104 (c)(2).
U.S. Department of Transportation Tire
quality grades:
The U.S. Department of
Transportation requires Ford Motor
Company to give you the following
information about tire grades exactly as
the government has written it.
Treadwear
The treadwear grade is a comparative
rating based on the wear rate of the tire
when tested under controlled conditions
on a specified government test course. For
example, a tire graded 150 would wear 1 ½
times as well on the government course
as a tire graded 100. The relative
performance of tires depends upon the
actual conditions of their use, however,
and may depart significantly from the norm
due to variations in driving habits, service
practices, and differences in road
characteristics and climate.
Traction AA A B C
Note: The traction grade assigned to this
tire is based on straight-ahead braking
traction tests, and does not include
acceleration, cornering, hydroplaning or
peak traction characteristics.
269
Fusion/Mondeo (CC7) Wheels and TiresE142542
Page 275 of 458
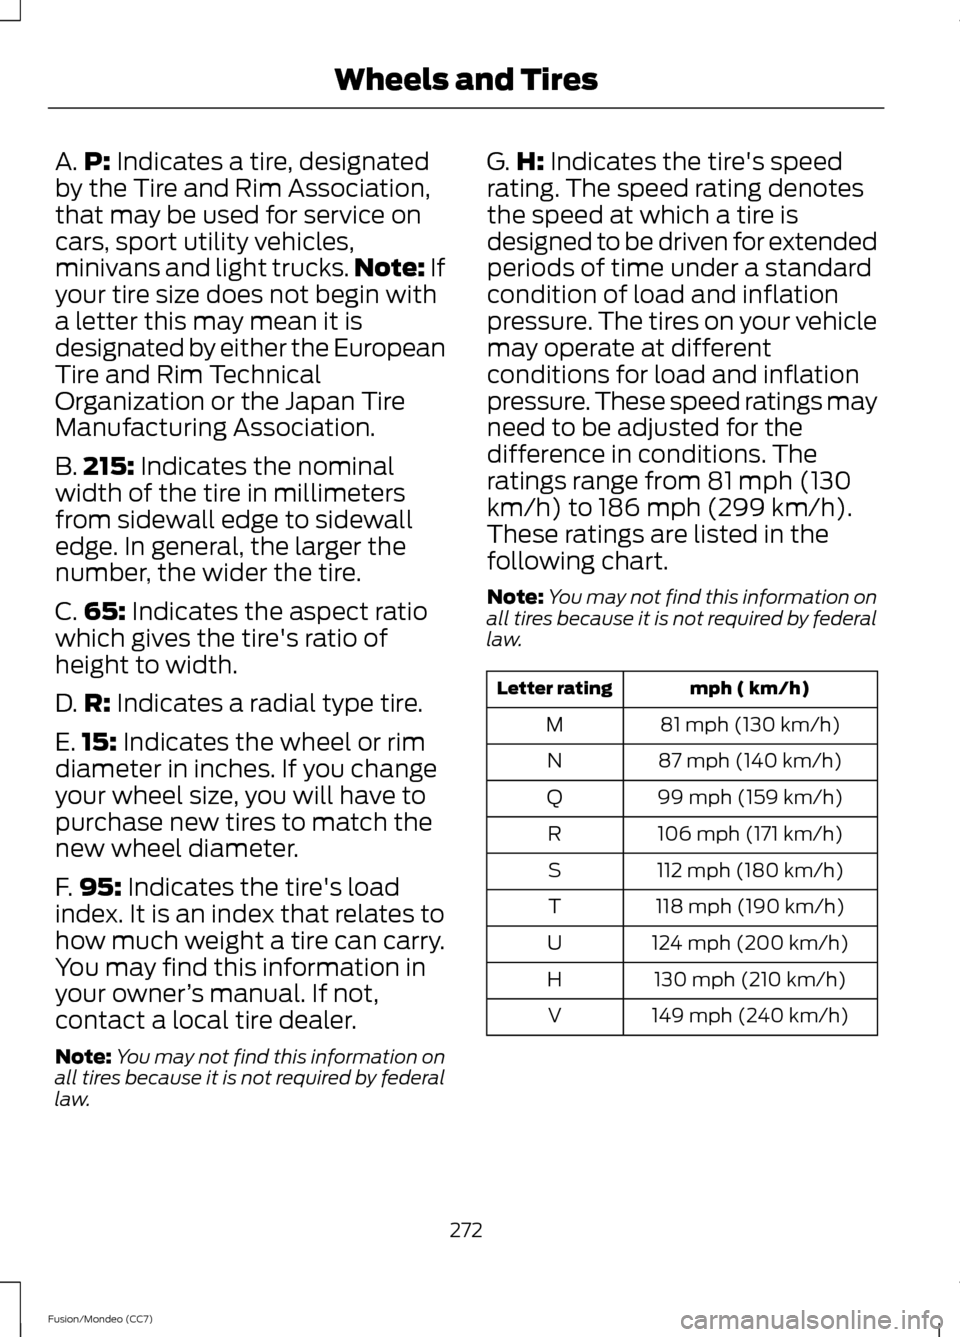
A.
P: Indicates a tire, designated
by the Tire and Rim Association,
that may be used for service on
cars, sport utility vehicles,
minivans and light trucks. Note:
If
your tire size does not begin with
a letter this may mean it is
designated by either the European
Tire and Rim Technical
Organization or the Japan Tire
Manufacturing Association.
B. 215:
Indicates the nominal
width of the tire in millimeters
from sidewall edge to sidewall
edge. In general, the larger the
number, the wider the tire.
C. 65:
Indicates the aspect ratio
which gives the tire's ratio of
height to width.
D. R:
Indicates a radial type tire.
E. 15:
Indicates the wheel or rim
diameter in inches. If you change
your wheel size, you will have to
purchase new tires to match the
new wheel diameter.
F. 95:
Indicates the tire's load
index. It is an index that relates to
how much weight a tire can carry.
You may find this information in
your owner ’s manual. If not,
contact a local tire dealer.
Note: You may not find this information on
all tires because it is not required by federal
law. G.
H:
Indicates the tire's speed
rating. The speed rating denotes
the speed at which a tire is
designed to be driven for extended
periods of time under a standard
condition of load and inflation
pressure. The tires on your vehicle
may operate at different
conditions for load and inflation
pressure. These speed ratings may
need to be adjusted for the
difference in conditions. The
ratings range from 81 mph (130
km/h) to 186 mph (299 km/h).
These ratings are listed in the
following chart.
Note: You may not find this information on
all tires because it is not required by federal
law. mph ( km/h)
Letter rating
81 mph (130 km/h)
M
87 mph (140 km/h)
N
99 mph (159 km/h)
Q
106 mph (171 km/h)
R
112 mph (180 km/h)
S
118 mph (190 km/h)
T
124 mph (200 km/h)
U
130 mph (210 km/h)
H
149 mph (240 km/h)
V
272
Fusion/Mondeo (CC7) Wheels and Tires
Page 278 of 458
A.
LT: Indicates a tire, designated
by the Tire and Rim Association,
that is intended for service on light
trucks.
B. Load Range and Load
Inflation Limits:
Indicates the
tire's load-carrying capabilities
and its inflation limits.
C. Maximum Load Dual lb (kg)
at psi (kPa) cold:
Indicates the
maximum load and tire pressure
when the tire is used as a dual;
defined as four tires on the rear
axle (a total of six or more tires on
the vehicle).
D. Maximum Load Single lb
(kg) at psi (kPa) cold:
Indicates
the maximum load and tire
pressure when the tire is used as
a single; defined as two tires
(total) on the rear axle.
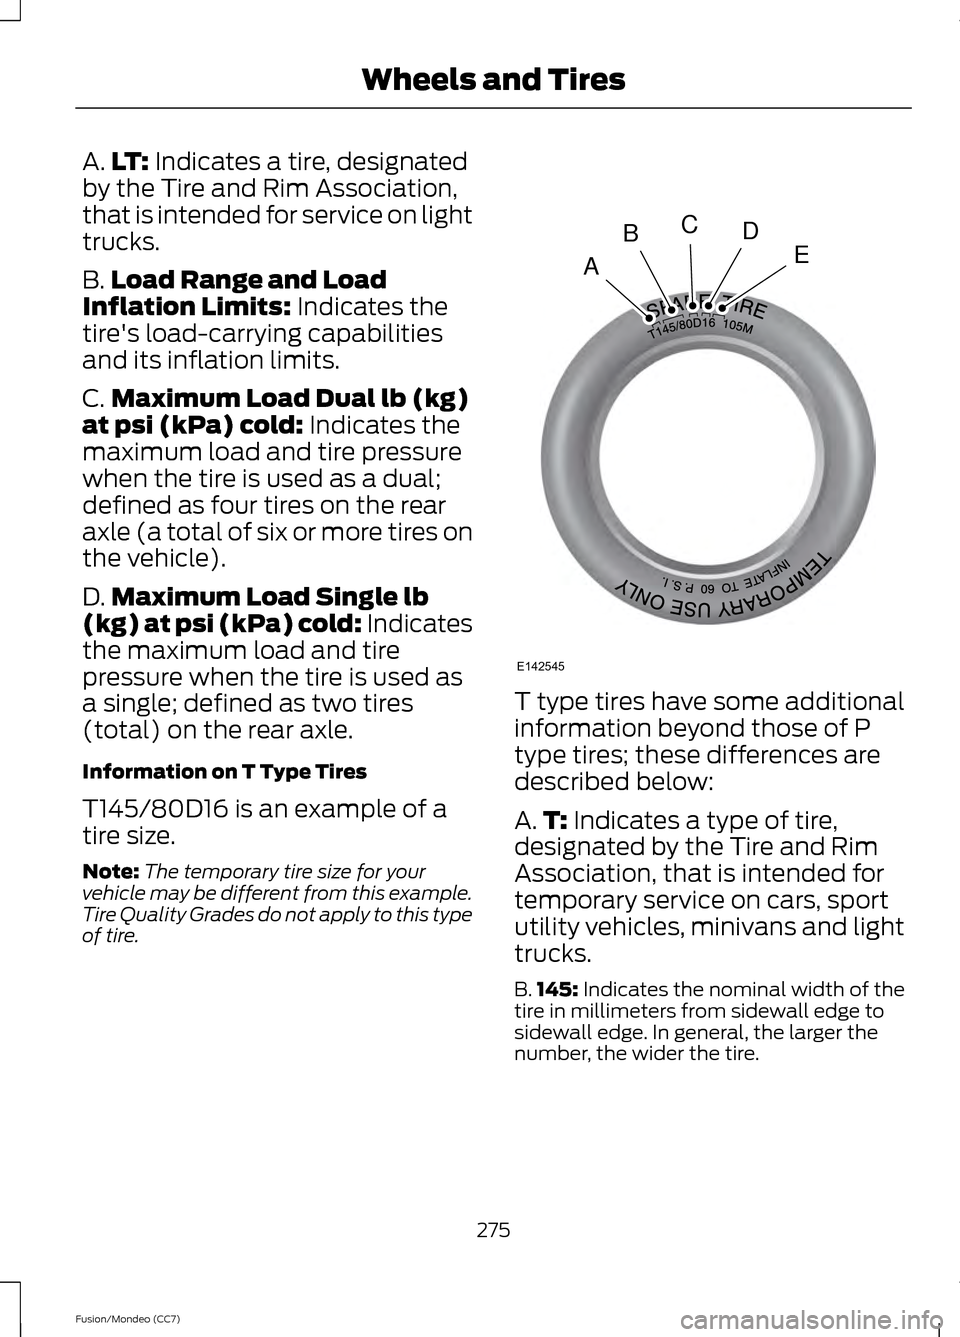
Information on T Type Tires
T145/80D16 is an example of a
tire size.
Note: The temporary tire size for your
vehicle may be different from this example.
Tire Quality Grades do not apply to this type
of tire. T type tires have some additional
information beyond those of P
type tires; these differences are
described below:
A.
T:
Indicates a type of tire,
designated by the Tire and Rim
Association, that is intended for
temporary service on cars, sport
utility vehicles, minivans and light
trucks.
B. 145:
Indicates the nominal width of the
tire in millimeters from sidewall edge to
sidewall edge. In general, the larger the
number, the wider the tire.
275
Fusion/Mondeo (CC7) Wheels and TiresA
BCDE
E142545