2013 FORD FUSION (AMERICAS) ECO mode
[x] Cancel search: ECO modePage 142 of 458

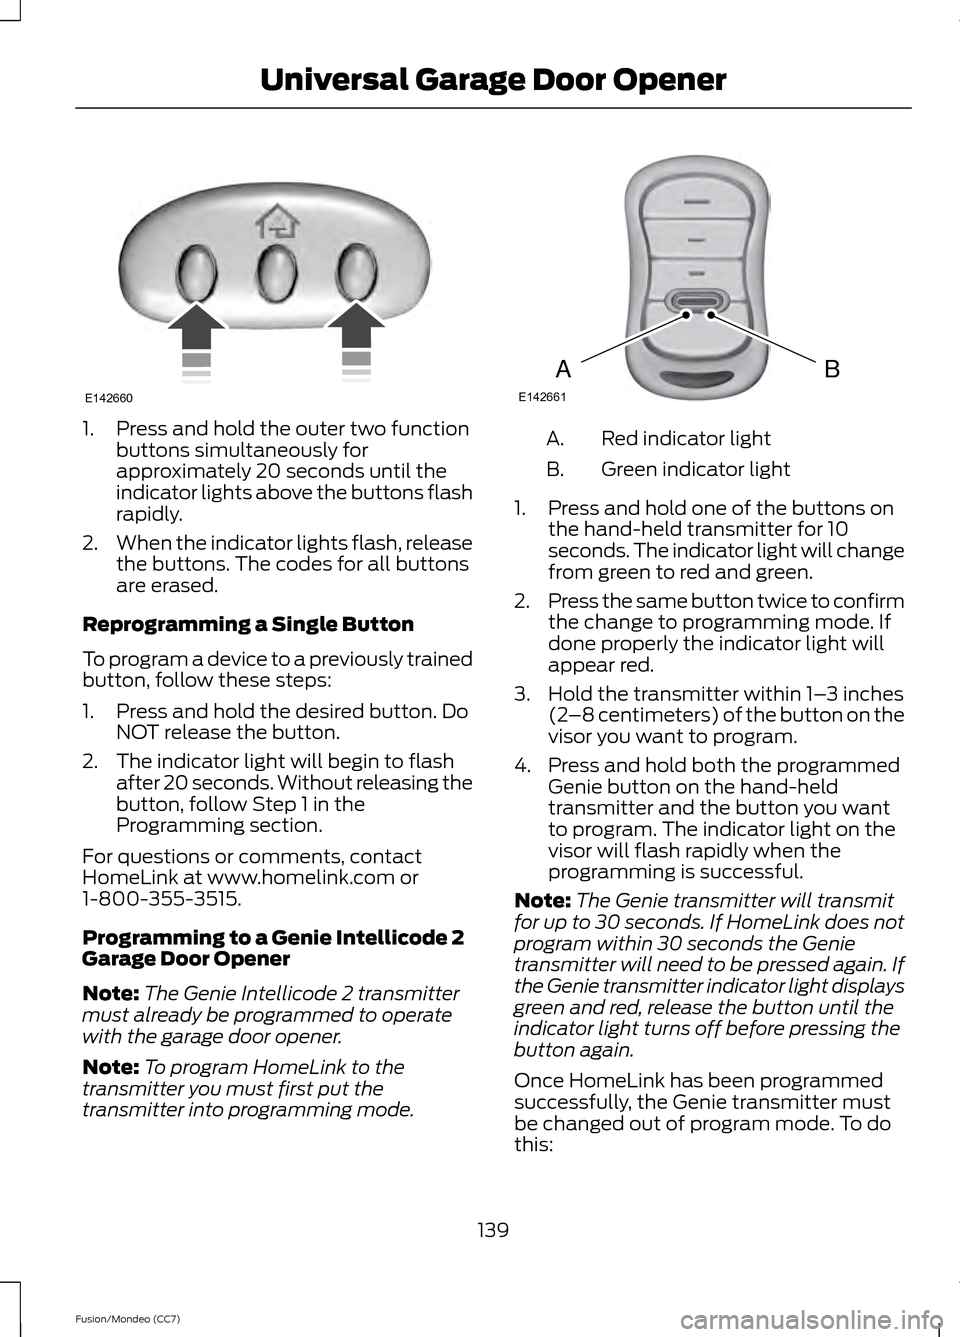
1. Press and hold the outer two function
buttons simultaneously for
approximately 20 seconds until the
indicator lights above the buttons flash
rapidly.
2. When the indicator lights flash, release
the buttons. The codes for all buttons
are erased.
Reprogramming a Single Button
To program a device to a previously trained
button, follow these steps:
1. Press and hold the desired button. Do NOT release the button.
2. The indicator light will begin to flash after 20 seconds. Without releasing the
button, follow Step 1 in the
Programming section.
For questions or comments, contact
HomeLink at www.homelink.com or
1-800-355-3515.
Programming to a Genie Intellicode 2
Garage Door Opener
Note: The Genie Intellicode 2 transmitter
must already be programmed to operate
with the garage door opener.
Note: To program HomeLink to the
transmitter you must first put the
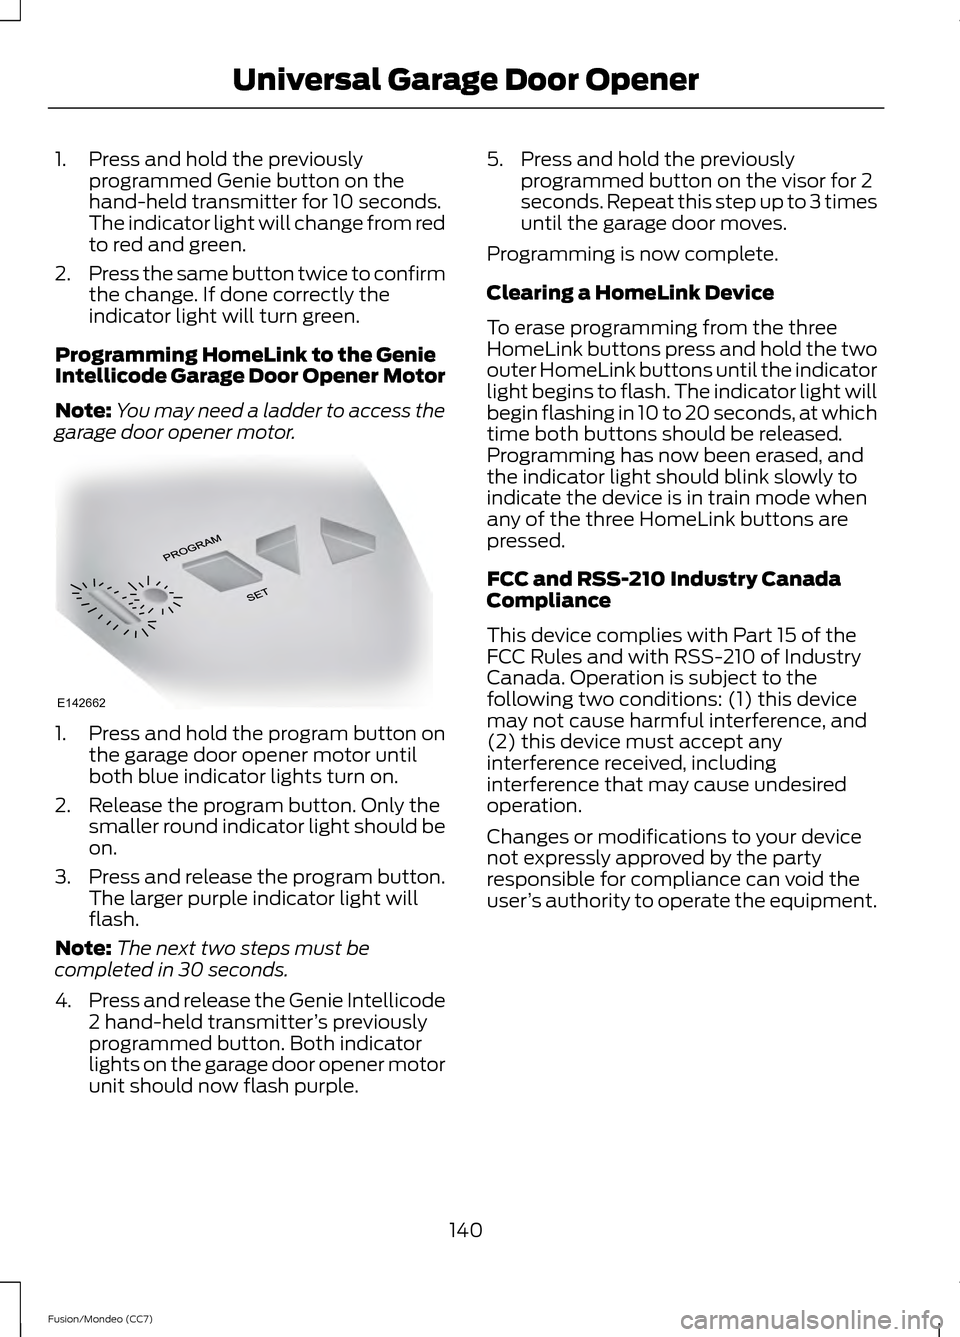
transmitter into programming mode. Red indicator light
A.
Green indicator light
B.
1. Press and hold one of the buttons on the hand-held transmitter for 10
seconds. The indicator light will change
from green to red and green.
2. Press the same button twice to confirm
the change to programming mode. If
done properly the indicator light will
appear red.
3. Hold the transmitter within 1– 3 inches
(2 –8 centimeters) of the button on the
visor you want to program.
4. Press and hold both the programmed Genie button on the hand-held
transmitter and the button you want
to program. The indicator light on the
visor will flash rapidly when the
programming is successful.
Note: The Genie transmitter will transmit
for up to 30 seconds. If HomeLink does not
program within 30 seconds the Genie
transmitter will need to be pressed again. If
the Genie transmitter indicator light displays
green and red, release the button until the
indicator light turns off before pressing the
button again.
Once HomeLink has been programmed
successfully, the Genie transmitter must
be changed out of program mode. To do
this:
139
Fusion/Mondeo (CC7) Universal Garage Door OpenerE142660 BAE142661
Page 143 of 458

1. Press and hold the previously
programmed Genie button on the
hand-held transmitter for 10 seconds.
The indicator light will change from red
to red and green.
2. Press the same button twice to confirm
the change. If done correctly the
indicator light will turn green.
Programming HomeLink to the Genie
Intellicode Garage Door Opener Motor
Note: You may need a ladder to access the
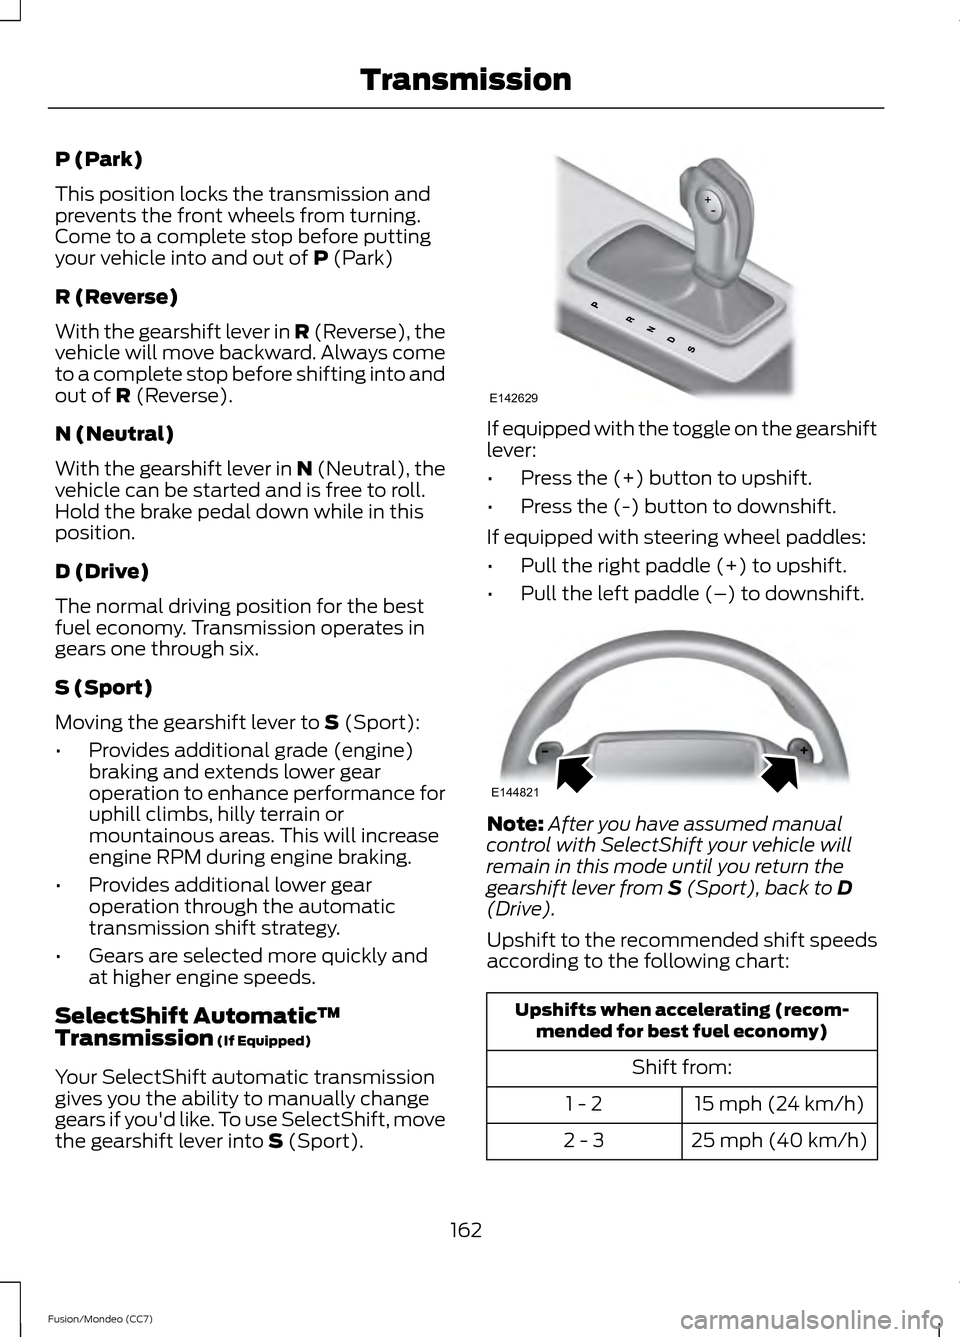
garage door opener motor. 1. Press and hold the program button on
the garage door opener motor until
both blue indicator lights turn on.
2. Release the program button. Only the smaller round indicator light should be
on.
3. Press and release the program button.
The larger purple indicator light will
flash.
Note: The next two steps must be
completed in 30 seconds.
4. Press and release the Genie Intellicode
2 hand-held transmitter ’s previously
programmed button. Both indicator
lights on the garage door opener motor
unit should now flash purple. 5. Press and hold the previously
programmed button on the visor for 2
seconds. Repeat this step up to 3 times
until the garage door moves.
Programming is now complete.
Clearing a HomeLink Device
To erase programming from the three
HomeLink buttons press and hold the two
outer HomeLink buttons until the indicator
light begins to flash. The indicator light will
begin flashing in 10 to 20 seconds, at which
time both buttons should be released.
Programming has now been erased, and
the indicator light should blink slowly to
indicate the device is in train mode when
any of the three HomeLink buttons are
pressed.
FCC and RSS-210 Industry Canada
Compliance
This device complies with Part 15 of the
FCC Rules and with RSS-210 of Industry
Canada. Operation is subject to the
following two conditions: (1) this device
may not cause harmful interference, and
(2) this device must accept any
interference received, including
interference that may cause undesired
operation.
Changes or modifications to your device
not expressly approved by the party
responsible for compliance can void the
user ’s authority to operate the equipment.
140
Fusion/Mondeo (CC7) Universal Garage Door OpenerE142662
Page 148 of 458

Ignition Modes
The keyless starting system has three
modes:
•
Off: Turns the ignition off.
• Without applying the brake pedal,
press and release the button once
when the ignition is in the on mode,
or when the engine is running but
the vehicle is not moving.
• On:
All electrical circuits are
operational and the warning lamps and
indicators illuminate.
• Without applying the brake pedal,
press and release the button once.
• Start:
Starts the engine.
• Press the brake pedal, and then
press the button for any length of
time. An indicator light on the
button illuminates when then
ignition is on and when the engine
starts.
STARTING A GASOLINE
ENGINE
When you start the engine, the idle speed
increases, this helps to warm up the
engine. If the engine idle speed does not
slow down automatically, have your
vehicle checked by an authorized dealer. Before starting the engine check the
following:
•
Make sure all occupants have fastened
their safety belts.
• Make sure the headlamps and
electrical accessories are off.
• Make sure the parking brake is on.
• Move the transmission selector lever
to position P (automatic transmission)
or neutral (manual transmission).
• Turn the ignition key to position
II. If
your vehicle is equipped with a keyless
ignition, see the following instructions.
Vehicles with an Ignition Key
Note: Do not touch the accelerator pedal.
1. Fully press the brake pedal. If your vehicle is equipped with a manual
transmission, fully press the clutch
pedal also.
2. Turn the key to position
III to start the
engine. Release the key when the
engine starts.
Note: The engine may continue cranking
for up to 15 seconds or until it starts.
Note: If you cannot start the engine on the
first try, wait for a short period and try again.
Vehicles with Keyless Start
Note: Do not touch the accelerator pedal.
1. Fully press the brake pedal.
2. Press the button.
The system does not function if:
• The key frequencies are jammed.
• The key battery has no charge.
If you are unable to start the engine, do the
following:
145
Fusion/Mondeo (CC7) Starting and Stopping the EngineE144447
Page 165 of 458

P (Park)
This position locks the transmission and
prevents the front wheels from turning.
Come to a complete stop before putting
your vehicle into and out of P (Park)
R (Reverse)
With the gearshift lever in R (Reverse), the
vehicle will move backward. Always come
to a complete stop before shifting into and
out of
R (Reverse).
N (Neutral)
With the gearshift lever in N (Neutral), the
vehicle can be started and is free to roll.
Hold the brake pedal down while in this
position.
D (Drive)
The normal driving position for the best
fuel economy. Transmission operates in
gears one through six.
S (Sport)
Moving the gearshift lever to
S (Sport):
• Provides additional grade (engine)
braking and extends lower gear
operation to enhance performance for
uphill climbs, hilly terrain or
mountainous areas. This will increase
engine RPM during engine braking.
• Provides additional lower gear
operation through the automatic
transmission shift strategy.
• Gears are selected more quickly and
at higher engine speeds.
SelectShift Automatic ™
Transmission
(If Equipped)
Your SelectShift automatic transmission
gives you the ability to manually change
gears if you'd like. To use SelectShift, move
the gearshift lever into
S (Sport). If equipped with the toggle on the gearshift
lever:
•
Press the (+) button to upshift.
• Press the (-) button to downshift.
If equipped with steering wheel paddles:
• Pull the right paddle (+) to upshift.
• Pull the left paddle (–) to downshift. Note:
After you have assumed manual
control with SelectShift your vehicle will
remain in this mode until you return the
gearshift lever from
S (Sport), back to D
(Drive).
Upshift to the recommended shift speeds
according to the following chart: Upshifts when accelerating (recom-
mended for best fuel economy)
Shift from:15 mph (24 km/h)
1 - 2
25 mph (40 km/h)
2 - 3
162
Fusion/Mondeo (CC7) TransmissionE142629 E144821
Page 169 of 458

USING ALL-WHEEL DRIVE
All-wheel drive uses all four wheels to
power the vehicle. This increases traction,
enabling you to drive over terrain and road
conditions that a conventional two-wheel
drive vehicle cannot. The AWD system is
active all the time and requires no input
from the operator.
Note:
Your AWD vehicle is not intended for
off-road use. The AWD feature gives your
vehicle some limited off-road capabilities
in which driving surfaces are relatively level,
obstruction-free and otherwise similar to
normal on-road driving conditions.
Operating your vehicle under other than
those conditions could subject the vehicle
to excessive stress which might result in
damage which is not covered under your
warranty.
Note: A warning message will be displayed
in the information display when an AWD
system fault is present See Information
Messages (page 91). An AWD system fault
will cause the AWD system to default to
front-wheel drive only mode. When this
warning message is displayed, have your
vehicle serviced at an authorized dealer
Note: A warning message will be displayed
in the information display if the AWD system
has overheated
See Information
Messages (page 91). This condition may
occur if the vehicle was operated in extreme
conditions with excessive wheel slip, such
as deep sand. To resume normal AWD
function as soon as possible, stop the
vehicle in a safe location and stop the
engine for at least 10 minutes. After the
engine has been restarted and the AWD
system has adequately cooled, the warning
message will turn off and normal AWD
function will return. Do not use a spare tire of a different size
other than the tire provided. If the
mini-spare tire is installed, the AWD
system may disable automatically and
enter front-wheel drive only mode to
protect driveline components. This
condition will be indicated by a warning in
the information display See Information
Messages
(page 91). If there is a warning
message in the information display from
using the spare tire, this indicator should
turn off after reinstalling the repaired or
replaced normal road tire and cycling the
ignition off and on. It is recommended to
reinstall the repaired or replaced road tire
as soon as possible. Major dissimilar tire
sizes between the front and rear axles
could cause the AWD system to stop
functioning and default to front-wheel
drive or damage the AWD system.
Driving In Special Conditions With
All-Wheel Drive (AWD)
AWD vehicles are equipped for driving on
sand, snow, mud and rough roads and have
operating characteristics that are
somewhat different from conventional
vehicles, both on and off the highway.
Under severe operating conditions, the A/C
may cycle on and off to protect
overheating of the engine.
Basic operating principles in special
conditions
• Drive slower in strong crosswinds which
can affect the normal steering
characteristics of your vehicle.
• Be extremely careful when driving on
pavement made slippery by loose sand,
water, gravel, snow or ice.
166
Fusion/Mondeo (CC7) All-Wheel Drive
(If Equipped)
Page 195 of 458

A message displays if something obstructs
the radar signals from the sensor. The
sensor is located behind a fascia cover
near the driver side of the lower grille. The
system cannot detect a vehicle ahead and
will not function when something obstructs
the radar signals. The following table lists
possible causes and actions for this
message displaying. Action
Cause
Clean the grille surface in front of the radaror remove the object causing the obstruc- tion.
The surface of the radar in the grille is dirty
or obstructed in some way.
Wait a short time. It may take several
minutes for the radar to detect that it is no longer obstructed
The surface of the radar in the grille is clean
but the message remains in the display.
Do not use the system in these conditionbecause it may not detect any vehicles ahead.
Heavy rain or snow is interfering with the
radar signals.
Do not use the system in these conditionbecause it may not detect any vehicles ahead.
Swirling water, or snow or ice on the surface
of the road may interfere with the radar signals.
Wait a short time or switch to normal cruisecontrol.
You are in a desert or remote area with no
other vehicles and no roadside objects.
Due to the nature of radar technology, it is
possible to get a blockage warning and not
be blocked. This can happen, for example,
when driving in sparse rural or desert
environments. A false blocked condition
will either self clear or clear after a key
cycle.
Switching to Normal Cruise
Control WARNING
Normal cruise control will not brake
due to slower vehicles. Always be
aware of which mode is selected and
apply the brakes when necessary. You can manually change from adaptive
cruise control to normal cruise control
through the information display. The cruise control indicator light
replaces the adaptive cruise
control indicator light if you
select normal cruise control. The gap
setting will not display, the system will not
automatically respond to lead vehicles and
automatic braking will activate. The
system defaults to adaptive cruise control
when you start the engine.
192
Fusion/Mondeo (CC7) Cruise ControlE71340
Page 197 of 458

The status bar will travel from left to right
as the calculated alertness level
decreases. As the rest icon is approached
the color turns from green to yellow and
then finally red when a rest break should
be taken.
•
Green - No rest required.
• Yellow - First (temporary) warning.
• Red - Second warning.
Note: If you have recently received a
warning; you should consider resting, even
if the current assessment is with the typical
range.
Note: The alertness level will be shown in
grey if the camera sensor cannot track the
road lane markings or if the vehicle speed
drops below approximately 40 mph (65
km/h).
Resetting the System
You can reset the system by either:
• Switching the ignition off and on.
• Stopping the vehicle and then opening
and closing the driver ’s door.
LANE KEEPING SYSTEM (IF
EQUIPPED) WARNING
The system is designed to aid the
driver. It is not intended to replace
the driver
’s attention and judgment.
The driver is still responsible to drive with
due care and attention. Note:
The system needs to be activated by
the driver at each key cycle.
Note: The system works above 40 mph (64
km/h).
Note: The system works as long as one lane
marking can be detected by the camera. Note:
If the camera is blocked or if the
windshield is damaged, the system may not
function.
Note: When Aid mode is on and the system
detects no driver steering activity for a short
continuous period of time, the system alerts
the driver to put their hands on the steering
wheel. The system may detect a light
grip/touch on the steering wheel as hands
off driving.
The system detects unintentional drifting
toward the outside of the lane and alerts
and/or aids the driver to stay in the lane
through the steering system and
instrument cluster display. The system
automatically detects and tracks the road
lane markings using a camera that is
mounted behind the interior rear view
mirror.
Switching the System On and Off
Note: The system defaults to off each time
the vehicle is started, unless a MyKey® is
detected. If a MyKey® is detected, the
system is defaulted to on and the Alert
mode is automatically selected.
Note: If a MyKey® is detected, pressing the
button will not affect the on/off status of
the system. Only the Mode, Sensitivity and
Intensity settings can be changed when a
MyKey® is present. To turn the system on, press the
button located on the left
steering wheel stalk. The button
must be pressed each time the vehicle is
started. The system can be turned off by
pressing the button again.
194
Fusion/Mondeo (CC7) Driving Aids
Page 200 of 458

Why does the vehicle not come back into the middle of the lane always, as expected, in
the Aid or Aid + Alert mode?
High cross winds
Large road crown
Rough roads, grooves, shoulder drop-offs
Heavy uneven loading of the vehicle or improper tire inflation pressure
If the tires have been exchanged (including snow tires), or the suspension has been
modified
BLIND SPOT MONITOR
Blind Spot Information System
(BLIS®) with Cross Traffic Alert (If
Equipped) WARNING
To help avoid injuries, NEVER use the
BLIS as a replacement for using the
interior and exterior mirrors and
looking over your shoulder before changing
lanes. BLIS is not a replacement for careful
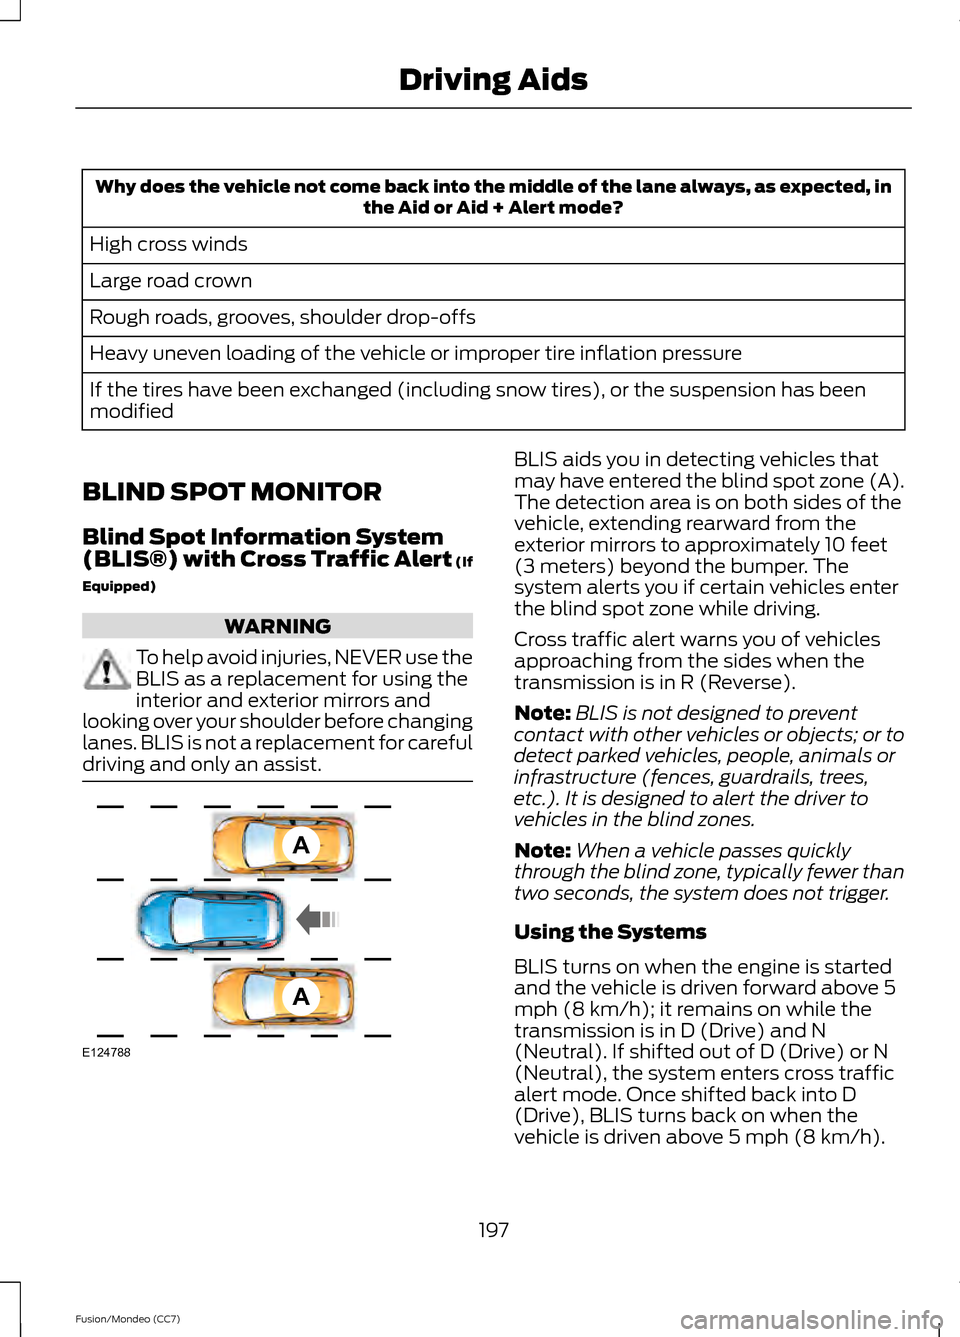
driving and only an assist. BLIS aids you in detecting vehicles that
may have entered the blind spot zone (A).
The detection area is on both sides of the
vehicle, extending rearward from the
exterior mirrors to approximately 10 feet
(3 meters) beyond the bumper. The
system alerts you if certain vehicles enter
the blind spot zone while driving.
Cross traffic alert warns you of vehicles
approaching from the sides when the
transmission is in R (Reverse).
Note:
BLIS is not designed to prevent
contact with other vehicles or objects; or to
detect parked vehicles, people, animals or
infrastructure (fences, guardrails, trees,
etc.). It is designed to alert the driver to
vehicles in the blind zones.
Note: When a vehicle passes quickly
through the blind zone, typically fewer than
two seconds, the system does not trigger.
Using the Systems
BLIS turns on when the engine is started
and the vehicle is driven forward above 5
mph (8 km/h); it remains on while the
transmission is in D (Drive) and N
(Neutral). If shifted out of D (Drive) or N
(Neutral), the system enters cross traffic
alert mode. Once shifted back into D
(Drive), BLIS turns back on when the
vehicle is driven above 5 mph (8 km/h).
197
Fusion/Mondeo (CC7) Driving AidsA
A
E124788