2013 FORD F250 brakes
[x] Cancel search: brakesPage 262 of 577
The gain should be set to provide the maximum trailer braking assistance
while making sure the trailer wheels do not lock when using the brakes.
Locked trailer wheels may lead to trailer instability.
1. Make sure the trailer brakes are in good working condition,
functioning normally and properly adjusted. See your trailer dealer if
necessary.
2. Hook up the trailer and make the electrical connections according to
the trailer manufacturer’s instructions.
3. When you plug in a trailer with electric or electric-over-hydraulic
brakes,TRAILER CONNECTEDappears in the information display.
4. Use the gain adjustment (+ and -) buttons to increase or decrease
the gain setting to the desired starting point. A gain setting of 6.0 is a
good starting point for heavier loads.
5. In a traffic-free environment, tow the trailer on a dry, level surface at
a speed of 20–25 mph (30–40 km/h) and squeeze the manual control
lever completely.
6. If the trailer wheels lock up, indicated by squealing tires, reduce the
gain setting. If the trailer wheels turn freely, increase the gain setting.
Repeat Steps 5 and 6 until the gain setting is at a point just below
trailer wheel lock-up. If towing a heavier trailer, trailer wheel lock-up
may not be attainable even with the maximum gain setting of 10.
Explanation of Information Display Warning Messages
Note:An authorized dealer can diagnose the trailer brake controller to
determine exactly which trailer fault has occurred. However, your Ford
warranty doesnotcover this diagnosis if the fault is with the trailer.
TRAILER BRAKE MODULE FAULT:Displays in response to faults
sensed by the trailer brake controller, accompanied by a single chime.
If this message appears, contact an authorized dealer as soon as possible
for diagnosis and repair. The controller may still function, but
performance may be degraded.
WIRING FAULT ON TRAILER:Displays when there is a short circuit
on the electric brake output wire. If theWIRING FAULT ON TRAILER
message displays, accompanied by a single chime, with no trailer
connected, the problem is with your vehicle wiring between the trailer
brake controller and the 7–pin connector at the bumper. If the message
only displays with a trailer connected, the problem is with the trailer
wiring. Consult your trailer dealer for assistance. This can be a short to
ground (such as a chaffed wire), short to voltage (such as a pulled pin
on trailer emergency breakaway battery) or the trailer brakes may be
drawing too much current.
Towing261
2013 F-250/350/450/550(f23)
Owners Guide gf, 3rd Printing, December 2012
USA(fus)
Page 263 of 577
Points to Remember
Note:Do not attempt removal of the trailer brake controller without
consulting theWorkshop Manual.Damage to the unit may result.
•Adjust gain setting before using the trailer brake controller for the
first time.
•Adjust gain setting, using the procedure above, whenever road,
weather and trailer or vehicle loading conditions change from when
the gain was initially set.
•Only use the manual control lever for proper adjustment of the gain
during trailer setup. Misuse, such as application during trailer sway,
could cause instability of trailer or tow vehicle.
•Avoid towing in adverse weather conditions. The trailer brake
controller does not provide anti-lock control of the trailer wheels.
Trailer wheels can lock up on slippery surfaces, resulting in reduced
stability of trailer and tow vehicle.
•The trailer brake controller is equipped with a feature that reduces
output at vehicle speeds below 11 mph (18 km/h) so trailer and
vehicle braking is not jerky or harsh. This feature is only available
when applying the brakes using your vehicle’s brake pedal, not the
controller.
•The controller interacts with the brake control system and powertrain
control system of your vehicle to provide the best performance on
different road conditions.
•Your vehicle’s brake system and the trailer brake system work
independently of each other. Changing the gain setting on the
controller does not affect the operation of your vehicle’s brakes
whether you attach a trailer or not.
•When you turn the engine off, the controller output is disabled and
the display and module shut down. The controller module and display
turn on when you turn the ignition on.
•The trailer brake controller is only a factory-installed or
dealer-installed item. Ford is not responsible for warranty or
performance of the controller due to misuse or customer installation.
262Towing
2013 F-250/350/450/550(f23)
Owners Guide gf, 3rd Printing, December 2012
USA(fus)
Page 264 of 577
Trailer Lamps
WARNING:Never connect any trailer lamp wiring to the
vehicle’s tail lamp wiring; this may damage the electrical system
resulting in a fire. Contact an authorized dealer as soon as possible for
assistance in proper trailer tow wiring installation. Additional electrical
equipment may be required.
Trailer lamps are required on most towed vehicles. Make sure all running
lights, brake lights, turn signals and hazard lights are working.
Using a Step Bumper (If Equipped)
The rear bumper is equipped with an integral hitch and only requires a
ball with a one-inch (25.4 millimeter) shank diameter. The bumper has a
5000-pound (2268 kilogram) trailer weight and a 500-pound (227 kilogram)
tongue weight capacity.
If it is necessary to relocate the hitch ball position, you must install a
frame-mounted trailer hitch.
Before Towing a Trailer
Practice turning, stopping and backing up to get the feel of your
vehicle-trailer combination before starting on a trip. When turning,
make wider turns so the trailer wheels clear curbs and other obstacles.
When Towing a Trailer
•Do not drive faster than 70 mph (113 km/h) during the first 500 miles
(800 kilometers).
•Do not make full-throttle starts.
•Check your hitch, electrical connections and trailer wheel lug nuts
thoroughly after you have traveled 50 miles (80 kilometers).
•When stopped in congested or heavy traffic during hot weather, place
the gearshift in positionPto aid engine and transmission cooling and
to help A/C performance.
•Turn off the speed control with heavy loads or in hilly terrain.
The speed control may turn off automatically when you are towing
on long, steep grades.
•Shift to a lower gear when driving down a long or steep hill. Do not
apply the brakes continuously, as they may overheat and become less
effective.
Towing263
2013 F-250/350/450/550(f23)
Owners Guide gf, 3rd Printing, December 2012
USA(fus)
Page 272 of 577
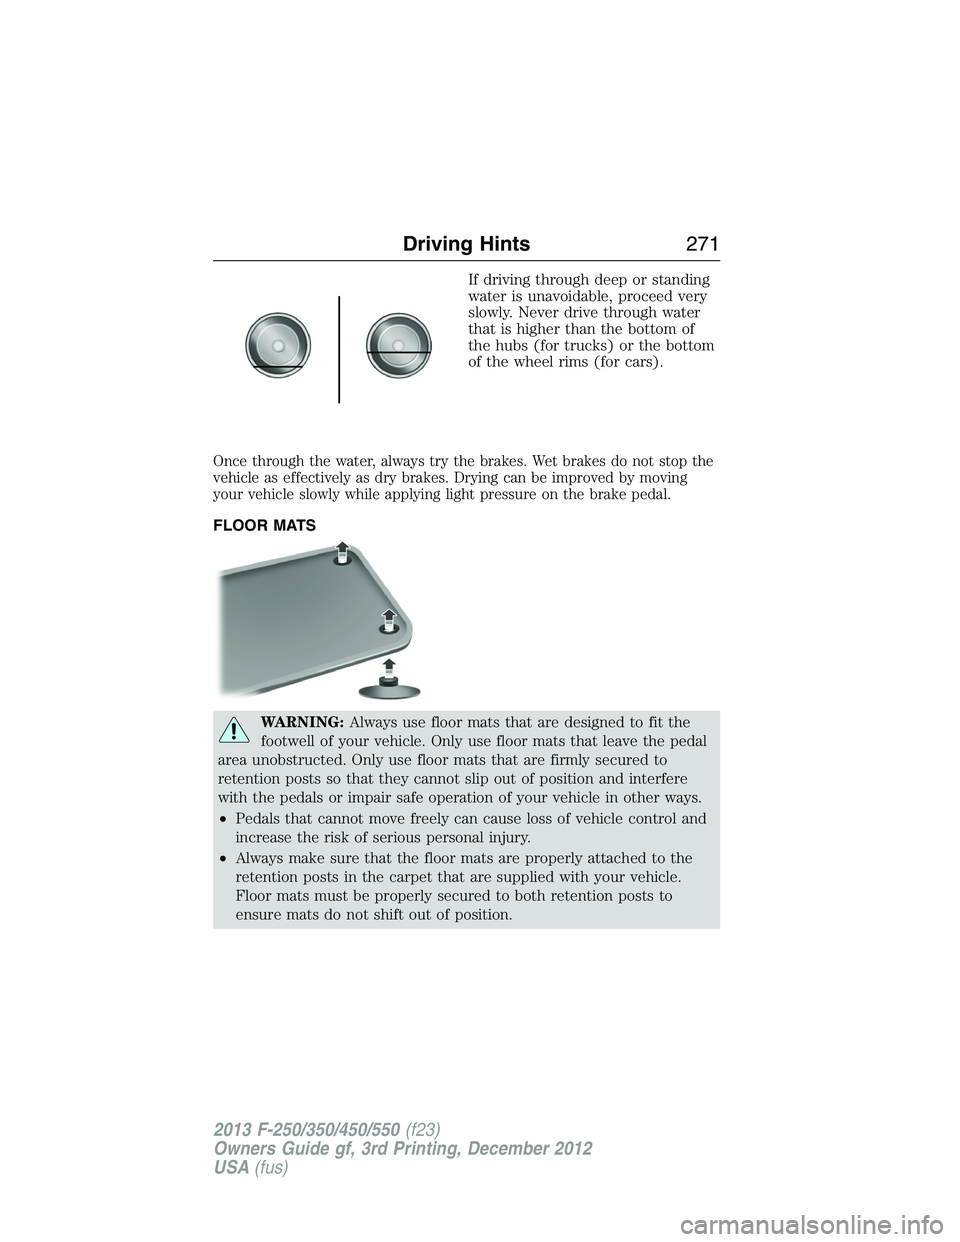
If driving through deep or standing
water is unavoidable, proceed very
slowly. Never drive through water
that is higher than the bottom of
the hubs (for trucks) or the bottom
of the wheel rims (for cars).
Once through the water, always try the brakes. Wet brakes do not stop the
vehicle as effectively as dry brakes. Drying can be improved by moving
your vehicle slowly while applying light pressure on the brake pedal.
FLOOR MATS
WARNING:Always use floor mats that are designed to fit the
footwell of your vehicle. Only use floor mats that leave the pedal
area unobstructed. Only use floor mats that are firmly secured to
retention posts so that they cannot slip out of position and interfere
with the pedals or impair safe operation of your vehicle in other ways.
•Pedals that cannot move freely can cause loss of vehicle control and
increase the risk of serious personal injury.
•Always make sure that the floor mats are properly attached to the
retention posts in the carpet that are supplied with your vehicle.
Floor mats must be properly secured to both retention posts to
ensure mats do not shift out of position.
Driving Hints271
2013 F-250/350/450/550(f23)
Owners Guide gf, 3rd Printing, December 2012
USA(fus)
Page 343 of 577
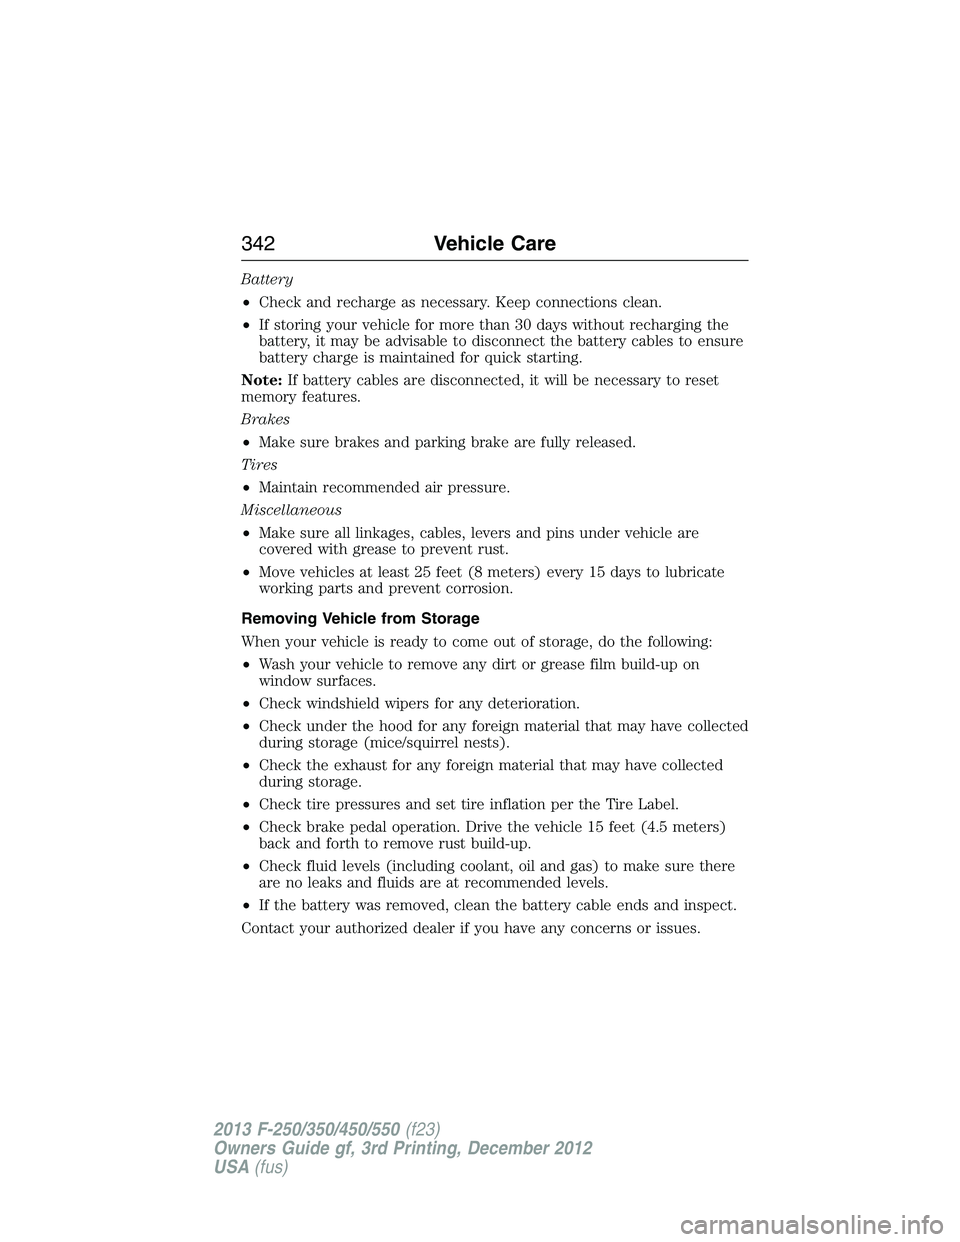
Battery
•Check and recharge as necessary. Keep connections clean.
•If storing your vehicle for more than 30 days without recharging the
battery, it may be advisable to disconnect the battery cables to ensure
battery charge is maintained for quick starting.
Note:If battery cables are disconnected, it will be necessary to reset
memory features.
Brakes
•Make sure brakes and parking brake are fully released.
Tires
•Maintain recommended air pressure.
Miscellaneous
•Make sure all linkages, cables, levers and pins under vehicle are
covered with grease to prevent rust.
•Move vehicles at least 25 feet (8 meters) every 15 days to lubricate
working parts and prevent corrosion.
Removing Vehicle from Storage
When your vehicle is ready to come out of storage, do the following:
•Wash your vehicle to remove any dirt or grease film build-up on
window surfaces.
•Check windshield wipers for any deterioration.
•Check under the hood for any foreign material that may have collected
during storage (mice/squirrel nests).
•Check the exhaust for any foreign material that may have collected
during storage.
•Check tire pressures and set tire inflation per the Tire Label.
•Check brake pedal operation. Drive the vehicle 15 feet (4.5 meters)
back and forth to remove rust build-up.
•Check fluid levels (including coolant, oil and gas) to make sure there
are no leaks and fluids are at recommended levels.
•If the battery was removed, clean the battery cable ends and inspect.
Contact your authorized dealer if you have any concerns or issues.
342Vehicle Care
2013 F-250/350/450/550(f23)
Owners Guide gf, 3rd Printing, December 2012
USA(fus)
Page 355 of 577
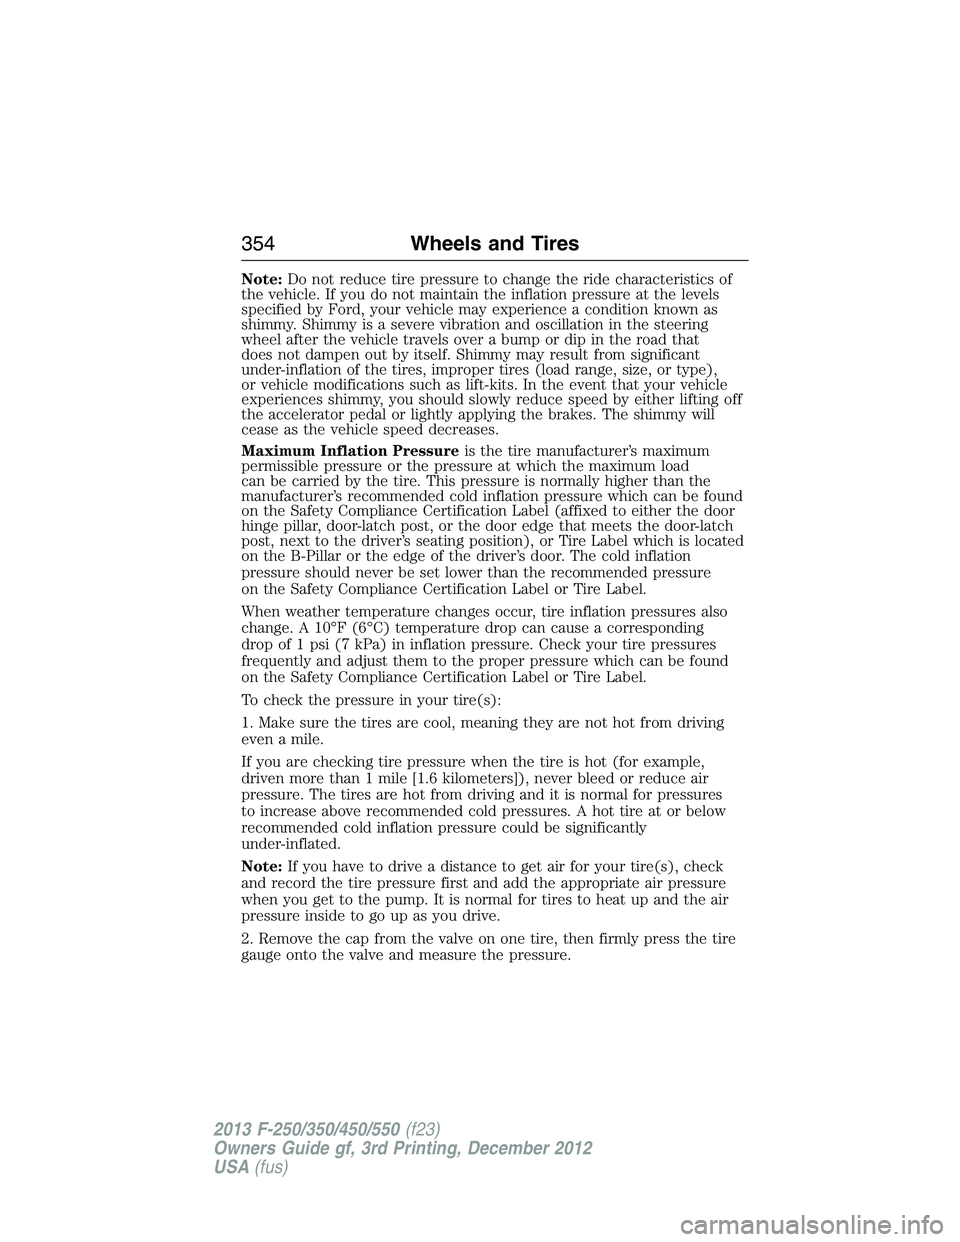
Note:Do not reduce tire pressure to change the ride characteristics of
the vehicle. If you do not maintain the inflation pressure at the levels
specified by Ford, your vehicle may experience a condition known as
shimmy. Shimmy is a severe vibration and oscillation in the steering
wheel after the vehicle travels over a bump or dip in the road that
does not dampen out by itself. Shimmy may result from significant
under-inflation of the tires, improper tires (load range, size, or type),
or vehicle modifications such as lift-kits. In the event that your vehicle
experiences shimmy, you should slowly reduce speed by either lifting off
the accelerator pedal or lightly applying the brakes. The shimmy will
cease as the vehicle speed decreases.
Maximum Inflation Pressureis the tire manufacturer’s maximum
permissible pressure or the pressure at which the maximum load
can be carried by the tire. This pressure is normally higher than the
manufacturer’s recommended cold inflation pressure which can be found
on the Safety Compliance Certification Label (affixed to either the door
hinge pillar, door-latch post, or the door edge that meets the door-latch
post, next to the driver’s seating position), or Tire Label which is located
on the B-Pillar or the edge of the driver’s door. The cold inflation
pressure should never be set lower than the recommended pressure
on the Safety Compliance Certification Label or Tire Label.
When weather temperature changes occur, tire inflation pressures also
change. A 10°F (6°C) temperature drop can cause a corresponding
drop of 1 psi (7 kPa) in inflation pressure. Check your tire pressures
frequently and adjust them to the proper pressure which can be found
on the Safety Compliance Certification Label or Tire Label.
To check the pressure in your tire(s):
1. Make sure the tires are cool, meaning they are not hot from driving
even a mile.
If you are checking tire pressure when the tire is hot (for example,
driven more than 1 mile [1.6 kilometers]), never bleed or reduce air
pressure. The tires are hot from driving and it is normal for pressures
to increase above recommended cold pressures. A hot tire at or below
recommended cold inflation pressure could be significantly
under-inflated.
Note:If you have to drive a distance to get air for your tire(s), check
and record the tire pressure first and add the appropriate air pressure
when you get to the pump. It is normal for tires to heat up and the air
pressure inside to go up as you drive.
2. Remove the cap from the valve on one tire, then firmly press the tire
gauge onto the valve and measure the pressure.
354Wheels and Tires
2013 F-250/350/450/550(f23)
Owners Guide gf, 3rd Printing, December 2012
USA(fus)
Page 570 of 577
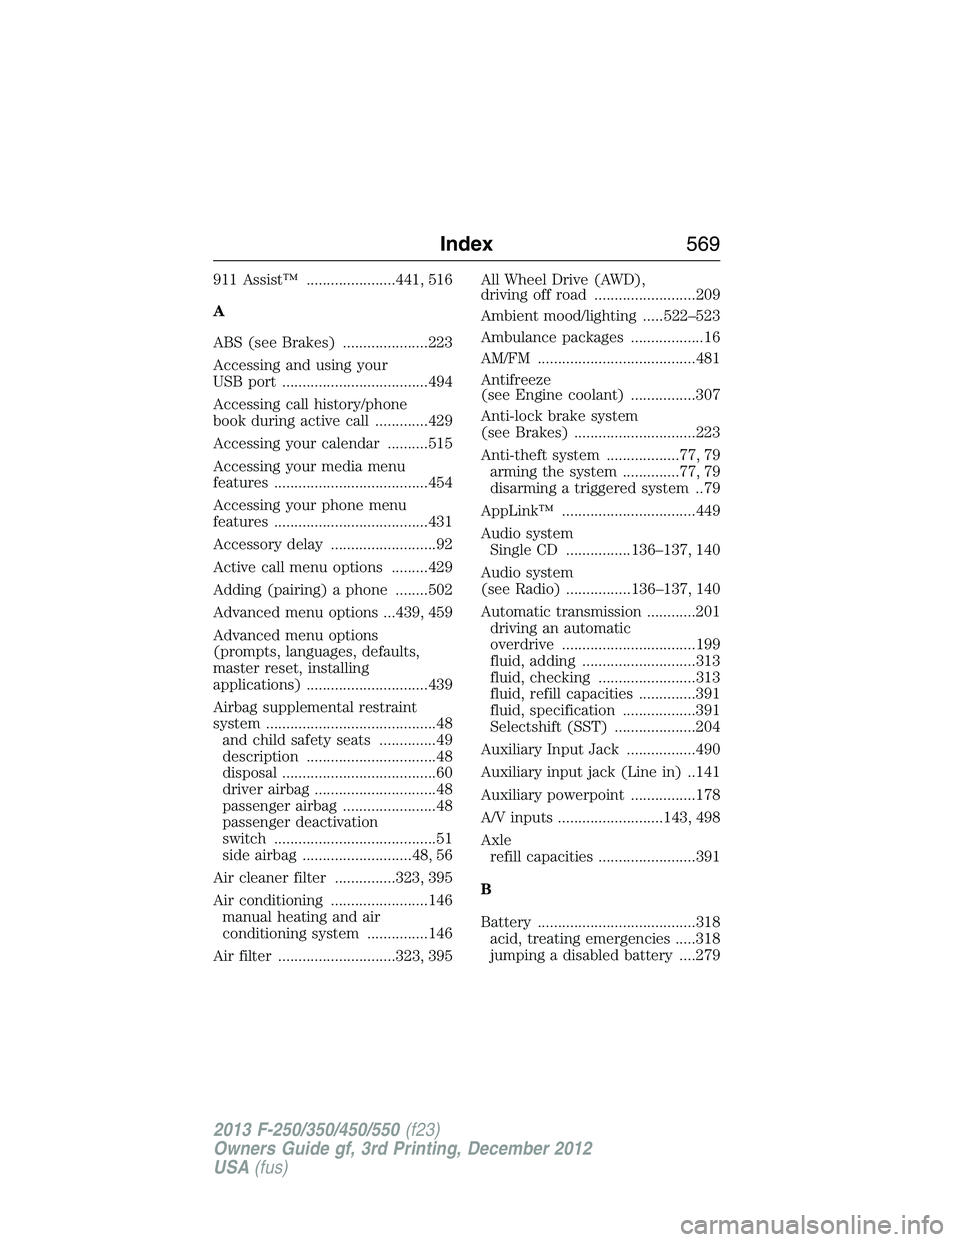
911 Assist™ ......................441, 516
A
ABS (see Brakes) .....................223
Accessing and using your
USB port ....................................494
Accessing call history/phone
book during active call .............429
Accessing your calendar ..........515
Accessing your media menu
features ......................................454
Accessing your phone menu
features ......................................431
Accessory delay ..........................92
Active call menu options .........429
Adding (pairing) a phone ........502
Advanced menu options ...439, 459
Advanced menu options
(prompts, languages, defaults,
master reset, installing
applications) ..............................439
Airbag supplemental restraint
system ..........................................48
and child safety seats ..............49
description ................................48
disposal ......................................60
driver airbag ..............................48
passenger airbag .......................48
passenger deactivation
switch ........................................51
side airbag ...........................48, 56
Air cleaner filter ...............323, 395
Air conditioning ........................146
manual heating and air
conditioning system ...............146
Air filter .............................323, 395All Wheel Drive (AWD),
driving off road .........................209
Ambient mood/lighting .....522–523
Ambulance packages ..................16
AM/FM .......................................481
Antifreeze
(see Engine coolant) ................307
Anti-lock brake system
(see Brakes) ..............................223
Anti-theft system ..................77, 79
arming the system ..............77, 79
disarming a triggered system ..79
AppLink™ .................................449
Audio system
Single CD ................136–137, 140
Audio system
(see Radio) ................136–137, 140
Automatic transmission ............201
driving an automatic
overdrive .................................199
fluid, adding ............................313
fluid, checking ........................313
fluid, refill capacities ..............391
fluid, specification ..................391
Selectshift (SST) ....................204
Auxiliary Input Jack .................490
Auxiliary input jack (Line in) ..141
Auxiliary powerpoint ................178
A/V inputs ..........................143, 498
Axle
refill capacities ........................391
B
Battery .......................................318
acid, treating emergencies .....318
jumping a disabled battery ....279
Index569
2013 F-250/350/450/550(f23)
Owners Guide gf, 3rd Printing, December 2012
USA(fus)
Page 571 of 577
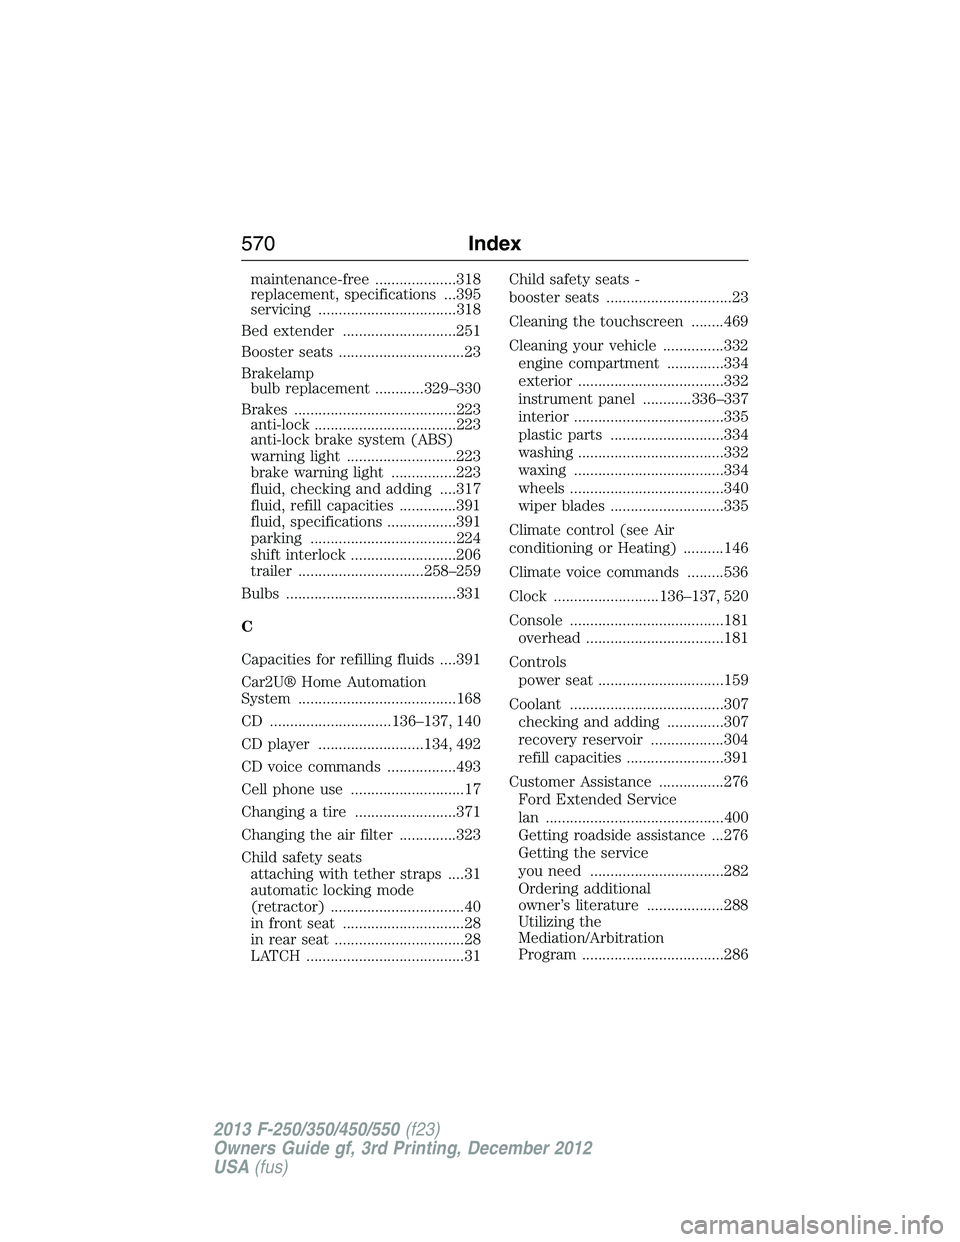
maintenance-free ....................318
replacement, specifications ...395
servicing ..................................318
Bed extender ............................251
Booster seats ...............................23
Brakelamp
bulb replacement ............329–330
Brakes ........................................223
anti-lock ...................................223
anti-lock brake system (ABS)
warning light ...........................223
brake warning light ................223
fluid, checking and adding ....317
fluid, refill capacities ..............391
fluid, specifications .................391
parking ....................................224
shift interlock ..........................206
trailer ...............................258–259
Bulbs ..........................................331
C
Capacities for refilling fluids ....391
Car2U® Home Automation
System .......................................168
CD ..............................136–137, 140
CD player ..........................134, 492
CD voice commands .................493
Cell phone use ............................17
Changing a tire .........................371
Changing the air filter ..............323
Child safety seats
attaching with tether straps ....31
automatic locking mode
(retractor) .................................40
in front seat ..............................28
in rear seat ................................28
LATCH .......................................31Child safety seats -
booster seats ...............................23
Cleaning the touchscreen ........469
Cleaning your vehicle ...............332
engine compartment ..............334
exterior ....................................332
instrument panel ............336–337
interior .....................................335
plastic parts ............................334
washing ....................................332
waxing .....................................334
wheels ......................................340
wiper blades ............................335
Climate control (see Air
conditioning or Heating) ..........146
Climate voice commands .........536
Clock ..........................136–137, 520
Console ......................................181
overhead ..................................181
Controls
power seat ...............................159
Coolant ......................................307
checking and adding ..............307
recovery reservoir ..................304
refill capacities ........................391
Customer Assistance ................276
Ford Extended Service
lan ............................................400
Getting roadside assistance ...276
Getting the service
you need .................................282
Ordering additional
owner’s literature ...................288
Utilizing the
Mediation/Arbitration
Program ...................................286
570Index
2013 F-250/350/450/550(f23)
Owners Guide gf, 3rd Printing, December 2012
USA(fus)