2013 FORD F SERIES MOTORHOME AND COMMERCIAL CHASSIS ECO mode
[x] Cancel search: ECO modePage 5 of 157
ABOUT THIS MANUAL
Thank you for choosing Ford. We recommend that you take some time to
get to know your vehicle by reading this manual. The more that you
know about it, the greater the safety and pleasure you will get from
driving it.
WARNING:Always drive with due care and attention when
using and operating the controls and features on your vehicle.
Note:This manual describes a range of product features and options,
sometimes before they are generally available. Therefore, you may find
options in this manual that are not found on your vehicle.
Note:Some of the illustrations in this manual may be used for different
models, so they may appear different than your vehicle.. However, the
essential information in the illustrations is always correct.
Note:Always use and operate your vehicle in line with all applicable
laws and regulations.
Note:Pass on this manual when selling your vehicle. It is an integral
part of the vehicle.
Protecting the Environment
You must play your part in protecting the environment. Correct
vehicle usage and the authorized disposal of waste, cleaning
and lubrication materials are significant steps toward this aim.
SYMBOL GLOSSARY
WARNING:You risk death or serious injury to yourself and
others if you do not follow the instruction highlighted by the
warning symbol.
These are some of the symbols you may see on your vehicle.
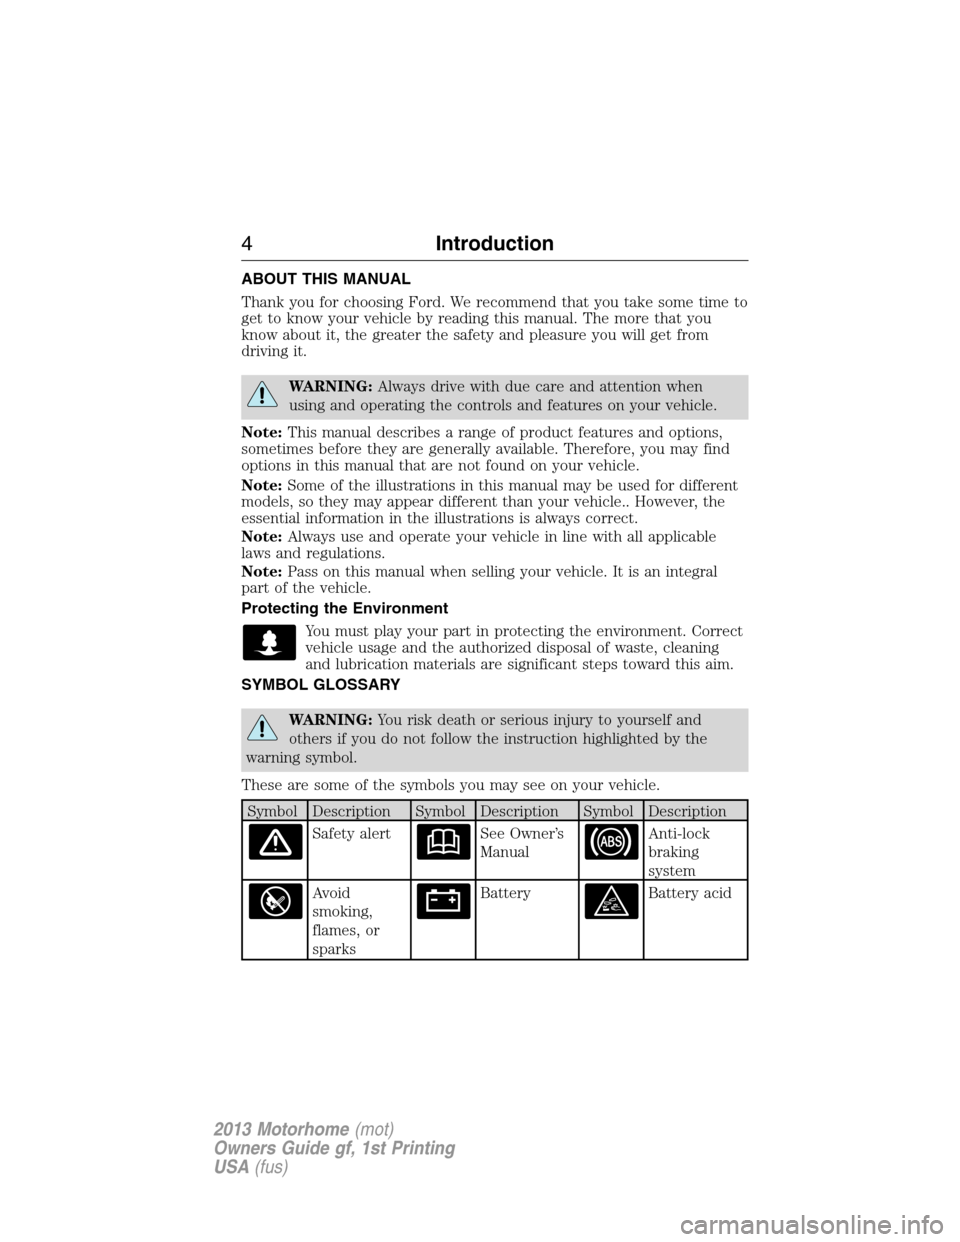
Symbol Description Symbol Description Symbol Description
Safety alertSee Owner’s
ManualAnti-lock
braking
system
Avoid
smoking,
flames, or
sparksBatteryBattery acid
4Introduction
2013 Motorhome(mot)
Owners Guide gf, 1st Printing
USA(fus)
Page 21 of 157
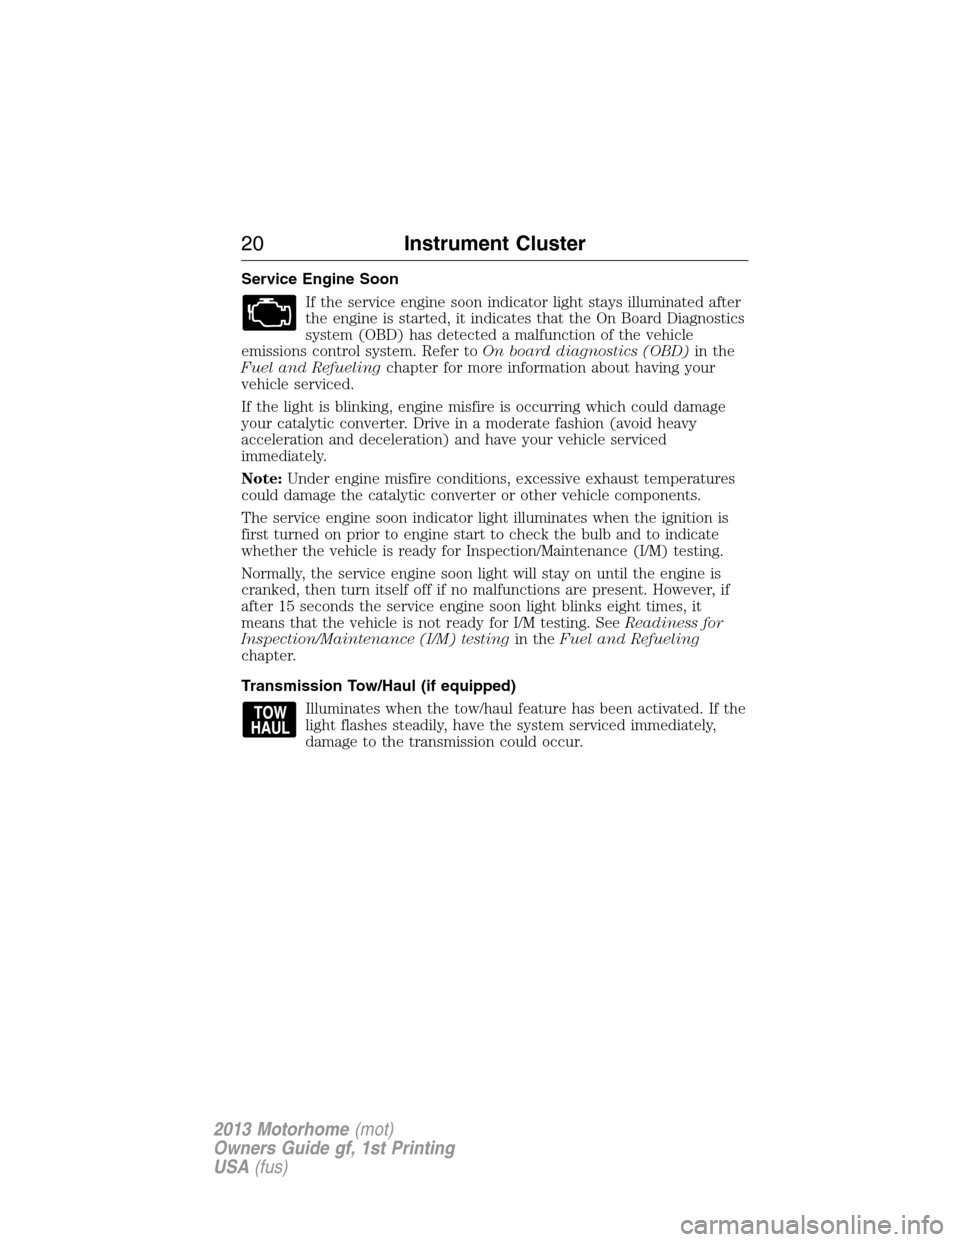
Service Engine Soon
If the service engine soon indicator light stays illuminated after
the engine is started, it indicates that the On Board Diagnostics
system (OBD) has detected a malfunction of the vehicle
emissions control system. Refer toOn board diagnostics (OBD)in the
Fuel and Refuelingchapter for more information about having your
vehicle serviced.
If the light is blinking, engine misfire is occurring which could damage
your catalytic converter. Drive in a moderate fashion (avoid heavy
acceleration and deceleration) and have your vehicle serviced
immediately.
Note:Under engine misfire conditions, excessive exhaust temperatures
could damage the catalytic converter or other vehicle components.
The service engine soon indicator light illuminates when the ignition is
first turned on prior to engine start to check the bulb and to indicate
whether the vehicle is ready for Inspection/Maintenance (I/M) testing.
Normally, the service engine soon light will stay on until the engine is
cranked, then turn itself off if no malfunctions are present. However, if
after 15 seconds the service engine soon light blinks eight times, it
means that the vehicle is not ready for I/M testing. SeeReadiness for
Inspection/Maintenance (I/M) testingin theFuel and Refueling
chapter.
Transmission Tow/Haul (if equipped)
Illuminates when the tow/haul feature has been activated. If the
light flashes steadily, have the system serviced immediately,
damage to the transmission could occur.
20Instrument Cluster
2013 Motorhome(mot)
Owners Guide gf, 1st Printing
USA(fus)
Page 42 of 157
Grade braking downshift mode is immediately exited if the Tow/Haul
mode is deactivated or if the accelerator pedal is depressed beyond a
minimum threshold.
To deactivate the tow/haul feature and return to normal driving mode,
press the button on the end of the gearshift lever. The TOW HAUL light
will no longer be illuminated.
When you shut-off and restart the engine, the transmission will
automatically return to normal D (Overdrive) mode (tow/haul off).
WARNING:Do not use the tow/haul feature when driving in icy
or slippery conditions as the increased engine braking can cause
the rear wheels to slide and the vehicle to swing around with the
possible loss of vehicle control.
3 (Third)
Transmission starts and operates in third gear only.
Used for improved traction on slippery roads. Selecting 3 (Third)
provides engine braking.
2 (Second)
Use 2 (Second) to start-up on slippery roads or to provide additional
engine braking on downgrades.
1 (First)
•Provides maximum engine braking
•Allows upshifts by moving gearshift lever
•The transmission will not downshift into 1 (First) at high speeds; it
will downshift to a lower gear and then shift into 1 (First) when the
vehicle reaches slower speeds.
Forced downshifts
•Allowed in D (Overdrive) with the tow/haul feature on or off
•Press the accelerator to the floor.
•Allows transmission to select an appropriate gear
Transmission41
2013 Motorhome(mot)
Owners Guide gf, 1st Printing
USA(fus)
Page 61 of 157
BREAKING-IN
You need to break in new tires for approximately 300 miles
(480 kilometers). During this time, your vehicle may exhibit some unique
driving characteristics. Avoid driving too fast during the first 1000 miles
(1600 kilometers). Vary your speed frequently and change up through
the gears early. Do not labor the engine. Do not tow during the first
1000 miles (1600 kilometers).
ECONOMICAL DRIVING
Fuel economy is affected by several things such as how you drive, the
conditions you drive under and how you maintain your vehicle.
There are some things to keep in mind that may improve your fuel
economy:
•Accelerate and slow down in a smooth, moderate fashion.
•Drive at steady speeds without stopping.
•Anticipate stops; slowing down may eliminate the need to stop.
•Combine errands and minimize stop-and-go driving.
•Close the windows for high-speed driving.
•Drive at reasonable speeds (traveling at 55 mph [88 km/h] uses 15%
less fuel than traveling at 65 mph [105 km/h]).
•Keep the tires properly inflated and use only the recommended size.
•Use the recommended engine oil.
•Perform all regularly scheduled maintenance.
There are also some things you may not want to do because they may
reduce your fuel economy:
•Sudden or hard accelerations.
•Rev the engine before turning it off.
•Idle for periods longer than one minute.
•Warm up your vehicle on cold mornings.
•Use the air conditioner or front defroster.
•Use the speed control in hilly terrain.
•Rest your foot on the brake pedal while driving.
•Drive a heavily loaded vehicle or tow a trailer.
60Driving Hints
2013 Motorhome(mot)
Owners Guide gf, 1st Printing
USA(fus)
Page 66 of 157
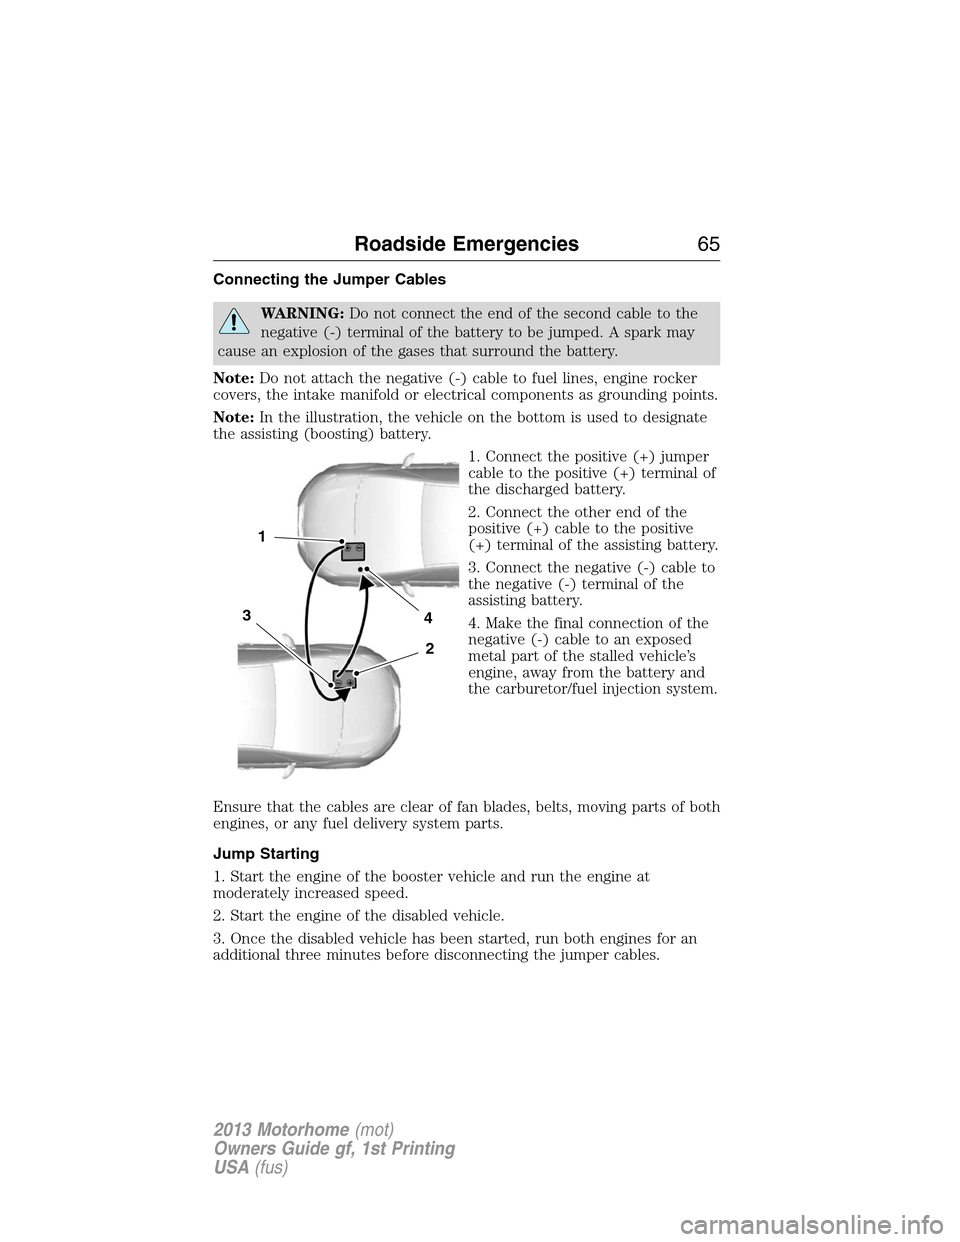
Connecting the Jumper Cables
WARNING:Do not connect the end of the second cable to the
negative (-) terminal of the battery to be jumped. A spark may
cause an explosion of the gases that surround the battery.
Note:Do not attach the negative (-) cable to fuel lines, engine rocker
covers, the intake manifold or electrical components as grounding points.
Note:In the illustration, the vehicle on the bottom is used to designate
the assisting (boosting) battery.
1. Connect the positive (+) jumper
cable to the positive (+) terminal of
the discharged battery.
2. Connect the other end of the
positive (+) cable to the positive
(+) terminal of the assisting battery.
3. Connect the negative (-) cable to
the negative (-) terminal of the
assisting battery.
4. Make the final connection of the
negative (-) cable to an exposed
metal part of the stalled vehicle’s
engine, away from the battery and
the carburetor/fuel injection system.
Ensure that the cables are clear of fan blades, belts, moving parts of both
engines, or any fuel delivery system parts.
Jump Starting
1. Start the engine of the booster vehicle and run the engine at
moderately increased speed.
2. Start the engine of the disabled vehicle.
3. Once the disabled vehicle has been started, run both engines for an
additional three minutes before disconnecting the jumper cables.
4
2
1
3
Roadside Emergencies65
2013 Motorhome(mot)
Owners Guide gf, 1st Printing
USA(fus)
Page 92 of 157
WARNING:Never remove the coolant reservoir cap while the
engine is running or hot.
You have limited engine power when in the fail-safe mode, so drive the
vehicle with caution. The vehicle will not be able to maintain high-speed
operation and the engine will run rough. Remember that the engine is
capable of completely shutting down automatically to prevent engine
damage, therefore:
1. Pull off the road as soon as safely possible and turn off the engine.
2. Arrange for the vehicle to be taken to an authorized dealer.
3. If this is not possible, wait a short period for the engine to cool.
4. Check the coolant level and replenish if low.
5. Re-start the engine and take your vehicle to an authorized dealer.
Note:Driving the vehicle without repairing the engine problem increases
the chance of engine damage. Take your vehicle to an authorized dealer
as soon as possible.
TRANSMISSION FLUID CHECK
Automatic transmission
WARNING:The dipstick cap and surrounding components may
be hot; gloves are recommended.
Note:Automatic transmission fluid expands when warmed. To obtain an
accurate fluid check, drive the vehicle until it is at normal operating
temperature (approximately 20 miles [30 km]). If your vehicle has been
operated for an extended period at high speeds, in city traffic during hot
weather or pulling a trailer, the vehicle should be turned off for about
30 minutes to allow fluid to cool to normal operating temperature 150°F
- 170°F (66°C - 77°C) before checking.
Refer to yourscheduled maintenance informationfor scheduled
intervals for fluid checks and changes. Your transmission does not
consume fluid. However, the fluid level should be checked if the
transmission is not working properly, i.e., if the transmission slips or
shifts slowly or if you notice some sign of fluid leakage.
1. Drive the vehicle 20 miles (30 km) or until it reaches normal operating
temperature.
2. Park the vehicle on a level surface and engage the parking brake.
Maintenance91
2013 Motorhome(mot)
Owners Guide gf, 1st Printing
USA(fus)