Page 171 of 576
D. Fold strap
•Fold:pull the fold strap (D). Pull it back up to reset.
•Remove:fold the head restraint. Press and hold both of the
unlock/remove buttons (C), then pull up on the head restraint.
•Reinstall:align the steel stems into the guide sleeves and push the
head restraint down until it locks.
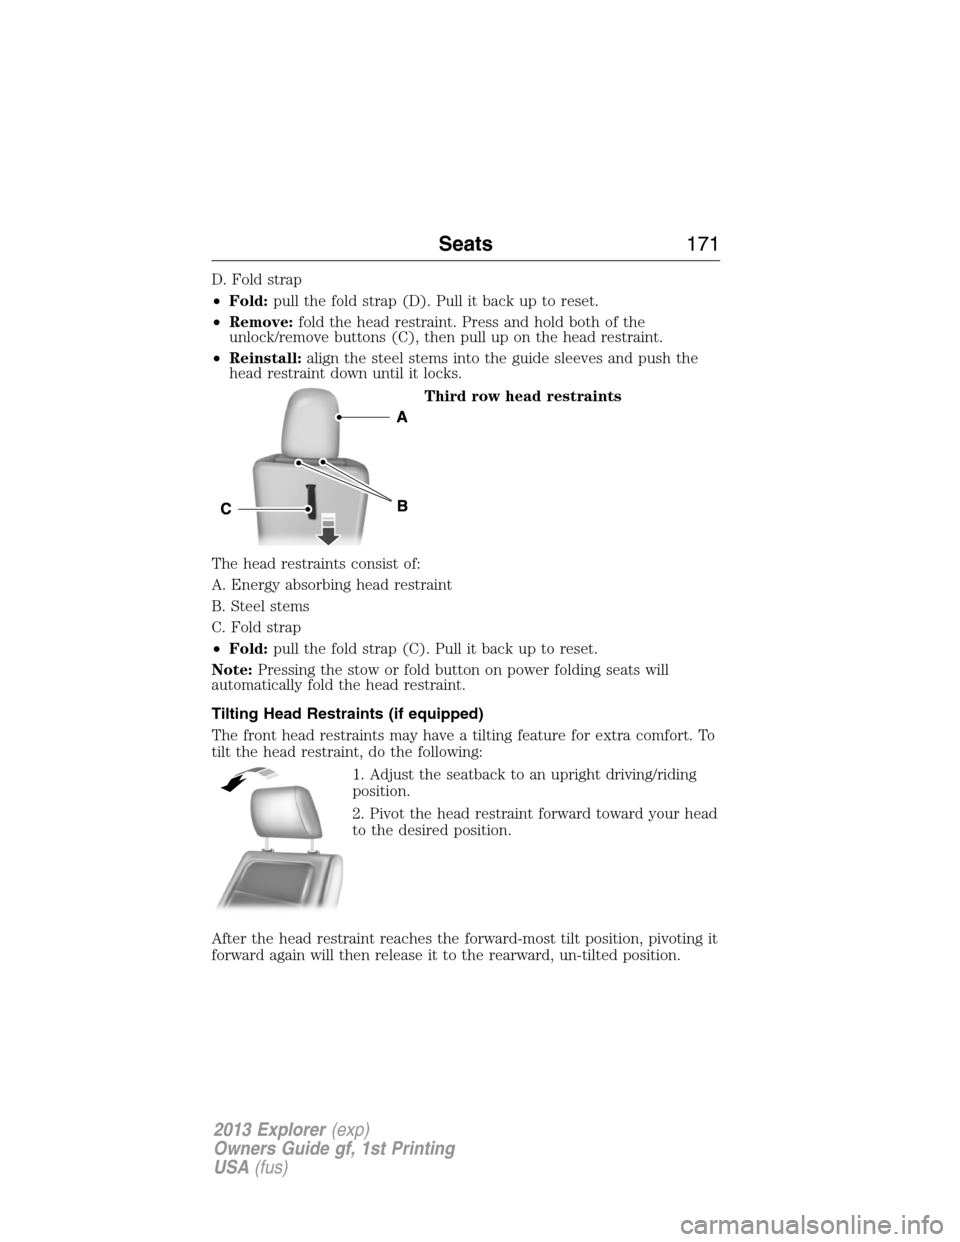
Third row head restraints
The head restraints consist of:
A. Energy absorbing head restraint
B. Steel stems
C. Fold strap
•Fold:pull the fold strap (C). Pull it back up to reset.
Note:Pressing the stow or fold button on power folding seats will
automatically fold the head restraint.
Tilting Head Restraints (if equipped)
The front head restraints may have a tilting feature for extra comfort. To
tilt the head restraint, do the following:
1. Adjust the seatback to an upright driving/riding
position.
2. Pivot the head restraint forward toward your head
to the desired position.
After the head restraint reaches the forward-most tilt position, pivoting it
forward again will then release it to the rearward, un-tilted position.
Seats171
2013 Explorer(exp)
Owners Guide gf, 1st Printing
USA(fus)
Page 175 of 576
Recalling memory positions with the remote control
The memory positions are also recalled when you press unlock on your
remote control (if the transmitter is programmed to a memory position)
or, when you enter a valid personal entry code that is programmed to a
memory position. If the easy entry feature is enabled, the seat will first
move to the easy entry position. The seat will move to the final position
when the key is in the ignition or when the push button start system (if
equipped) is put in accessory mode/started.
To program the memory feature to a remote control, refer toKeys and
remote control.
Easy entry/exit feature (if equipped)
This feature automatically moves the driver’s seat rearward 2 in. (5 cm)
when:
•the transmission is in N (Neutral) or P (Park)
•the key is removed from the ignition cylinder or the push button start
system (if equipped) is switched off.
The seat will move to the original position when:
•the transmission is in N (Neutral) or P (Park)
•the key is placed in the ignition cylinder or when the push button start
system (if equipped) is put in accessory mode/started.
The easy entry feature can be turned off or on through the information
display.
HEATED SEATS (IF EQUIPPED)
WARNING:Persons who are unable to feel pain to the skin
because of advanced age, chronic illness, diabetes, spinal cord
injury, medication, alcohol use, exhaustion, or other physical conditions,
must exercise care when using the seat heater. The seat heater may
cause burns even at low temperatures, especially if used for long
periods of time. Do not place anything on the seat that insulates against
heat, such as a blanket or cushion, because this may cause the seat
heater to overheat. Do not puncture the seat with pins, needles, or
other pointed objects because this may damage the heating element
which may cause the seat heater to overheat. An overheated seat may
cause serious personal injury.
Seats175
2013 Explorer(exp)
Owners Guide gf, 1st Printing
USA(fus)
Page 177 of 576
To operate the heated seats:
Press the heated seat symbol/button to cycle through the
various heat settings and off. Warmer settings are indicated
by more indicator lights.
If the engine falls below 350 rpm while the heated seats are on, the
feature will turn itself off and will need to be reactivated.
Cooled seats
The cooled seats will only function when the engine is running.
To operate the cooled seats:
Press the cooled seat symbol/button to cycle through the
various cooling settings and off. Cooler settings are
indicated by more indicator lights.
If the engine falls below 350 rpm while the cooled seats are on, the
feature will turn itself off and will need to be reactivated.
Note:When the heated/cooled front seat is active, you will be able to
hear the fan operating inside the seat. This is normal.
Heated and cooled seat air filter replacement (if equipped)
The climate controlled seat system includes air filters that must be
replaced periodically. Refer toScheduled maintenance information.
The filters are located under each front seat and can be accessed from
the 2nd row foot-well area. Move the front seats all the way forward and
to the full up positions to ease access.
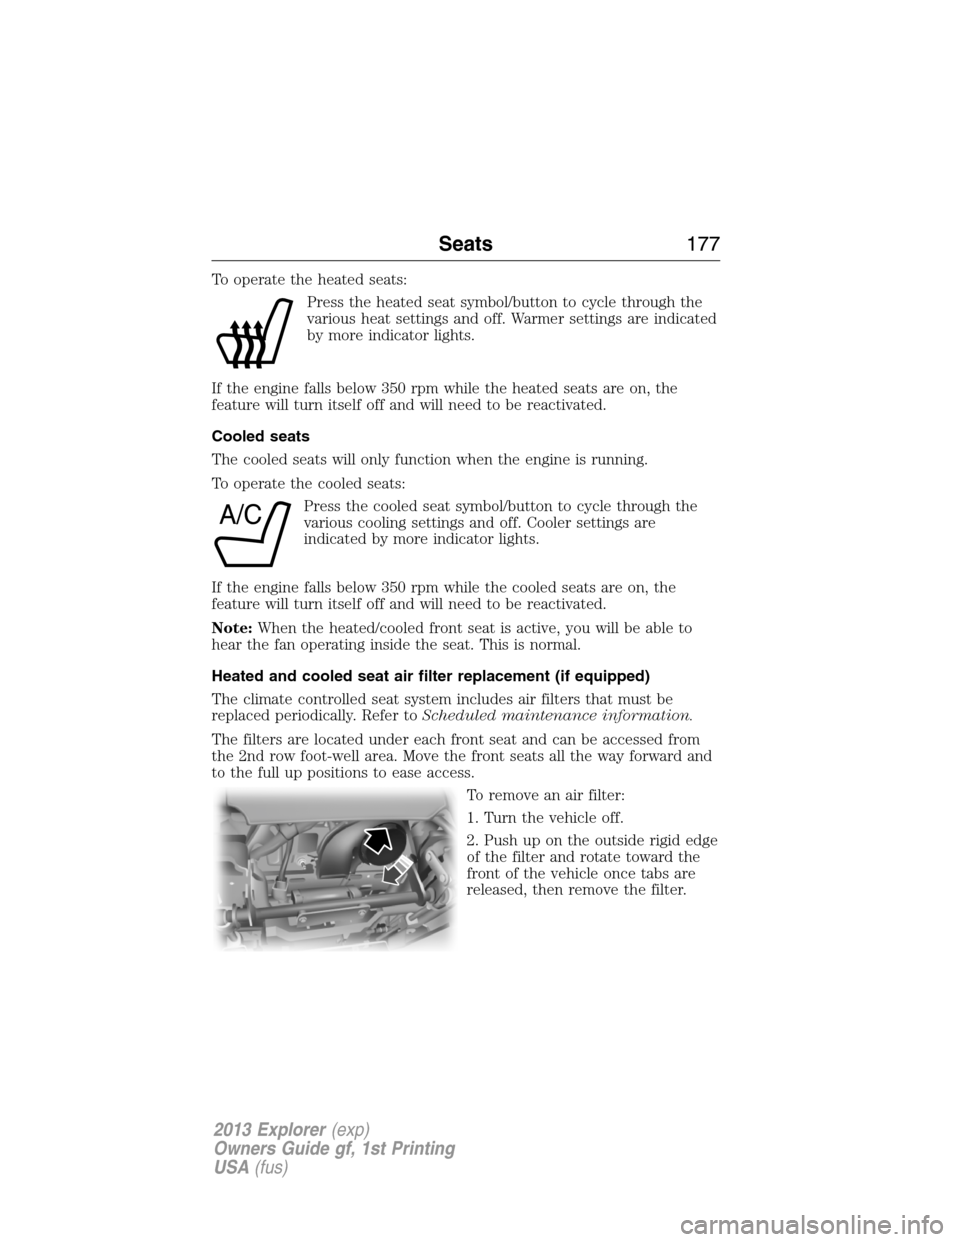
To remove an air filter:
1. Turn the vehicle off.
2. Push up on the outside rigid edge
of the filter and rotate toward the
front of the vehicle once tabs are
released, then remove the filter.
A/C
Seats177
2013 Explorer(exp)
Owners Guide gf, 1st Printing
USA(fus)
Page 179 of 576
Fold-flat seatback
Lift the handle and fold the seatback
forward until it is flat.
Note:For the bench seats, make sure the center safety belt is unbuckled
before folding the seatback.
Moving the seats backwards and
forwards (if equipped)
Third row seats
Third row seat access (manual seats)
Note:Remove items from the second row seat and ensure that no bulky
objects such as purses or briefcases are on the floor in front of the
second row seats before tumbling them.
Note:For second row bench seats, make sure the center safety belt is
unbuckled before folding the seatback.
Note:You may have to move the front row seat forward to allow the 2nd
row seat to be fully tumbled.
Note:You may have to lower the center head restraint (if equipped) if
needed. SeeHead restraintsearlier.
Seats179
2013 Explorer(exp)
Owners Guide gf, 1st Printing
USA(fus)
Page 185 of 576
Folding the third row manual seat
1. Remove all objects from the seat and stowage tub.
2. Fold the outboard head restraint
by pulling the head restraint release
strap.
3. From the rear of the vehicle, fold
the seatback by pulling and holding
the number 1 strap while pushing
the seatback forward. Release strap
once seatback starts rotating
forward.
4. Release the cushion latches by pulling the
number 2 strap while pulling on the strap
located at the top of the seatback to tumble
the seat all the way into the tub in the floor.
Note:Do not use the seat anchors as cargo tie downs.
1
Seats185
2013 Explorer(exp)
Owners Guide gf, 1st Printing
USA(fus)
Page 186 of 576
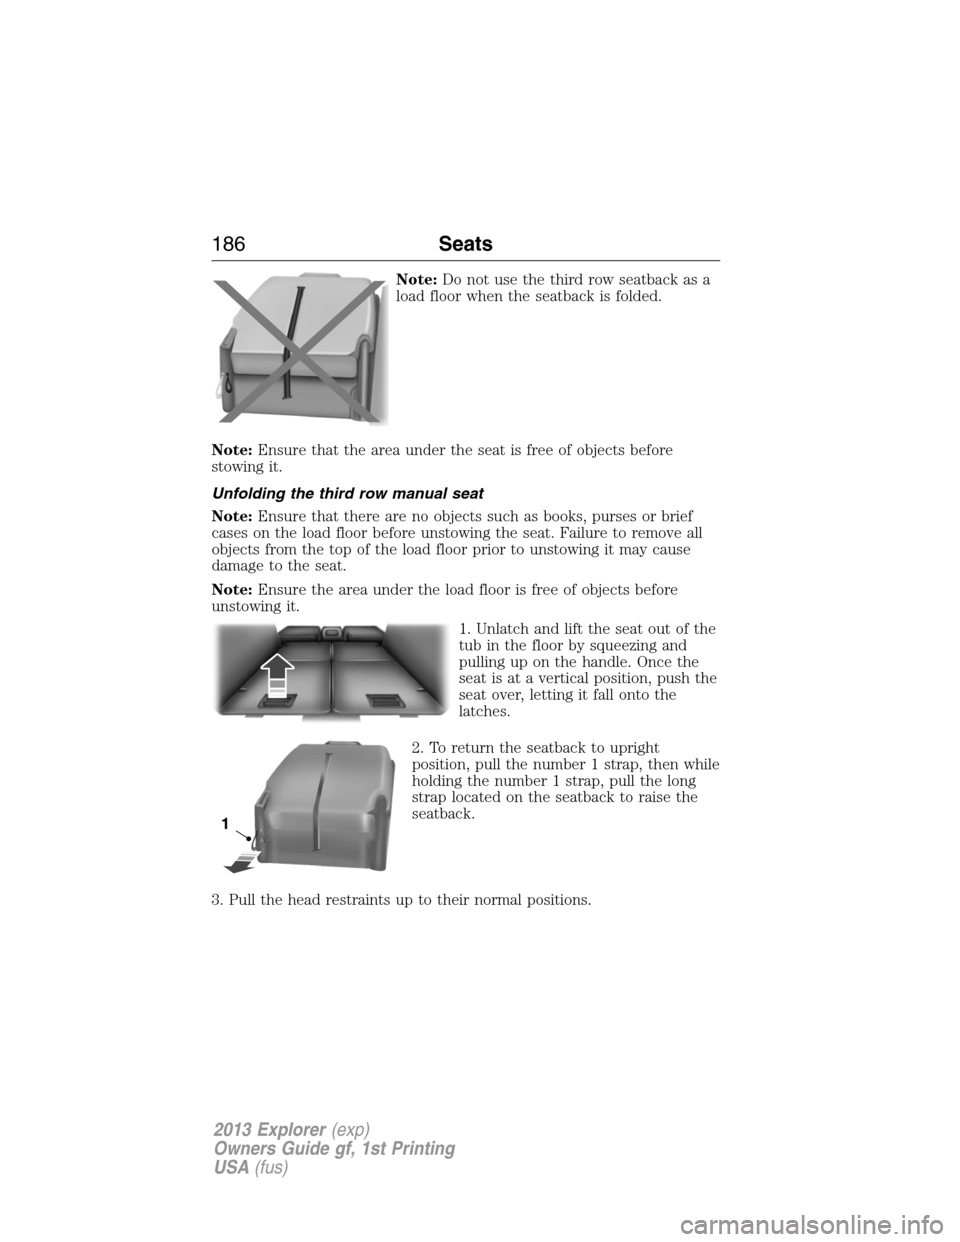
Note:Do not use the third row seatback as a
load floor when the seatback is folded.
Note:Ensure that the area under the seat is free of objects before
stowing it.
Unfolding the third row manual seat
Note:Ensure that there are no objects such as books, purses or brief
cases on the load floor before unstowing the seat. Failure to remove all
objects from the top of the load floor prior to unstowing it may cause
damage to the seat.
Note:Ensure the area under the load floor is free of objects before
unstowing it.
1. Unlatch and lift the seat out of the
tub in the floor by squeezing and
pulling up on the handle. Once the
seat is at a vertical position, push the
seat over, letting it fall onto the
latches.
2. To return the seatback to upright
position, pull the number 1 strap, then while
holding the number 1 strap, pull the long
strap located on the seatback to raise the
seatback.
3. Pull the head restraints up to their normal positions.
186Seats
2013 Explorer(exp)
Owners Guide gf, 1st Printing
USA(fus)
Page 188 of 576
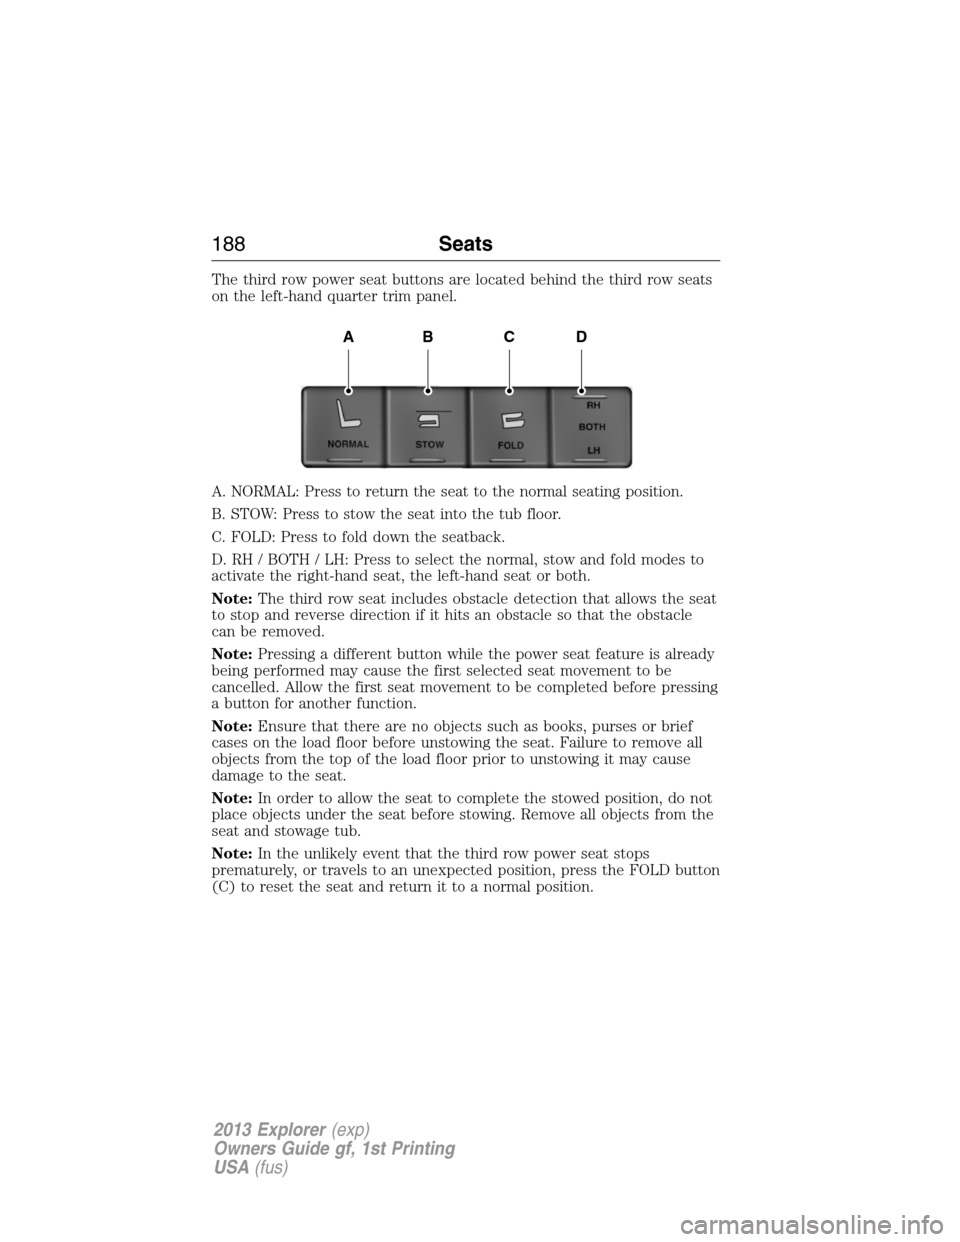
The third row power seat buttons are located behind the third row seats
on the left-hand quarter trim panel.
A. NORMAL: Press to return the seat to the normal seating position.
B. STOW: Press to stow the seat into the tub floor.
C. FOLD: Press to fold down the seatback.
D. RH / BOTH / LH: Press to select the normal, stow and fold modes to
activate the right-hand seat, the left-hand seat or both.
Note:The third row seat includes obstacle detection that allows the seat
to stop and reverse direction if it hits an obstacle so that the obstacle
can be removed.
Note:Pressing a different button while the power seat feature is already
being performed may cause the first selected seat movement to be
cancelled. Allow the first seat movement to be completed before pressing
a button for another function.
Note:Ensure that there are no objects such as books, purses or brief
cases on the load floor before unstowing the seat. Failure to remove all
objects from the top of the load floor prior to unstowing it may cause
damage to the seat.
Note:In order to allow the seat to complete the stowed position, do not
place objects under the seat before stowing. Remove all objects from the
seat and stowage tub.
Note:In the unlikely event that the third row power seat stops
prematurely, or travels to an unexpected position, press the FOLD button
(C) to reset the seat and return it to a normal position.
ABCD
188Seats
2013 Explorer(exp)
Owners Guide gf, 1st Printing
USA(fus)
Page 354 of 576
For fabric, carpets, cloth seats, safety belts and seats equipped with side
airbags:
•Remove dust and loose dirt with a vacuum cleaner.
•Remove light stains and soil with Motorcraft�Professional Strength
Carpet & Upholstery Cleaner.
•If grease or tar is present on the material, spot-clean the area first
with Motorcraft�Spot and Stain Remover. In Canada, use Motorcraft�
Multi-Purpose Cleaner.
•If a ring forms on the fabric after spot cleaning, clean the entire area
immediately (but do not oversaturate) or the ring will set.
•Do not use household cleaning products or glass cleaners, which can
stain and discolor the fabric and affect the flame retardant abilities of
the seat materials.
CLEANING THE INSTRUMENT PANEL AND INSTRUMENT CLUSTER
LENS
WARNING:Do not use chemical solvents or strong detergents
when cleaning the steering wheel or instrument panel to avoid
contamination of the airbag system.
Clean the instrument panel and cluster lens with a clean, damp, white
cotton cloth, then use a clean and dry white cotton cloth to dry these
areas.
•Avoid cleaners or polishes that increase the gloss of the upper portion
of the instrument panel. The dull finish in this area helps protect the
driver from undesirable windshield reflection.
•Be certain to wash or wipe your hands clean if you have been in
contact with certain products such as insect repellent and suntan
lotion in order to avoid possible damage to the interior painted
surfaces.
•Do not use household or glass cleaners as these may damage the finish
of the instrument panel, interior trim and cluster lens.
•Do not allow air fresheners and hand sanitizers to spill on interior
surfaces. If a spill occurs, wipe off immediately. Damage may not be
covered by your warranty.
354Vehicle Care
2013 Explorer(exp)
Owners Guide gf, 1st Printing
USA(fus)