Page 2 of 576

MyKey 69
Settings, MyKey.......................................69
Creating.............................................70
Clearing.............................................71
System status.........................................71
Remote start, MyKey...................................71
Troubleshooting, MyKey.................................73
Locks 75
Locking and unlocking..................................75
SecuriCode™ keyless entry keypad.........................84
Security 86
SecuriLock�passive anti-theft system.......................86
Anti-theft alarm.......................................89
Steering Wheel 90
Adjusting the steering wheel..............................90
Steering wheel controls..................................92
Pedals 95
Adjustable pedals......................................95
Wipers and Washers 96
Windshield wipers......................................96
Rain-sensing wipers....................................96
Windshield washers.....................................97
Rear-window wiper and washer............................97
Lighting 98
Lighting control.......................................98
Autolamps...........................................99
Instrument lighting dimmer...............................99
Headlamp exit delay...................................100
Daytime running lamps.................................100
2Table of Contents
2013 Explorer(exp)
Owners Guide gf, 1st Printing
USA(fus)
Page 7 of 576

Washer fluid check....................................337
Battery.............................................337
Checking the wiper blades...............................339
Air filter(s)..........................................341
Adjusting the headlamps................................342
Changing a bulb......................................344
Bulb specification chart.................................349
Vehicle Care 350
Cleaning products.....................................350
Cleaning the exterior...................................350
Waxing.............................................352
Repairing minor paint damage............................352
Cleaning the engine...................................352
Cleaning the windows and wiper blades.....................353
Cleaning the interior...................................353
Cleaning the instrument panel and instrument cluster lens.......354
Cleaning leather seats..................................355
Cleaning the alloy wheels...............................355
Vehicle storage.......................................356
Wheels and Tires 359
Tire care...........................................362
Using snow chains.....................................377
Tire Pressure Monitoring System (TPMS)....................378
Changing a road wheel.................................383
Technical specifications.................................391
Wheel lug nut torque..................................391
Capacities and Specifications 392
Part numbers........................................397
Vehicle identification number.............................397
Vehicle certification label................................398
Transmission code designation............................399
Table of Contents7
2013 Explorer(exp)
Owners Guide gf, 1st Printing
USA(fus)
Page 79 of 576

Illuminated Entry
The interior lamps, parking lamps and puddle lamps (if equipped)
illuminate when the integrated keyhead transmitter, intelligent access key
or the keyless entry keypad is used to unlock the vehicle.
The system will turn off the lights if:
•the ignition is turned on
•the lock button on the remote control is pressed
•the vehicle is locked using the keyless entry keypad
•after 25 seconds of illumination.
The lights will not turn off if:
•they have been turned on with the dimmer control
•any door is open.
Illuminated Exit
The interior lamps and select exterior lamps will illuminate when all
doors are closed, the ignition is turned off and the key is removed from
the ignition (integrated keyhead transmitter only).
The lamps will turn off if all the doors remain closed and:
•25 seconds elapse
•the key is inserted in the ignition (integrated keyhead transmitter
only)
•the START/STOP button is pressed (intelligent access key only).
Battery Saver
If the courtesy lamps, dome lamps or headlamps are left on, the battery
saver will shut them off 10 minutes after the ignition has been turned off.
Accessory Mode Battery Saver for Intelligent Access Keys
(If Equipped)
If you shut off the engine and leave the ignition in the on or accessory
mode, the ignition will shut off after 30 minutes.
Locks79
2013 Explorer(exp)
Owners Guide gf, 1st Printing
USA(fus)
Page 98 of 576
LIGHTING CONTROL
A. Off
B. Parking lamps, instrument panel
lamps, license plate lamps and tail
lamps
C. Headlamps
High Beams
Push the lever forward to switch the
high beams on.
Push the lever forward again or pull
the lever toward you to switch the
high beams off.
Headlamp Flasher
Pull toward you slightly to activate and
release to deactivate.
98Lighting
2013 Explorer(exp)
Owners Guide gf, 1st Printing
USA(fus)
Page 99 of 576

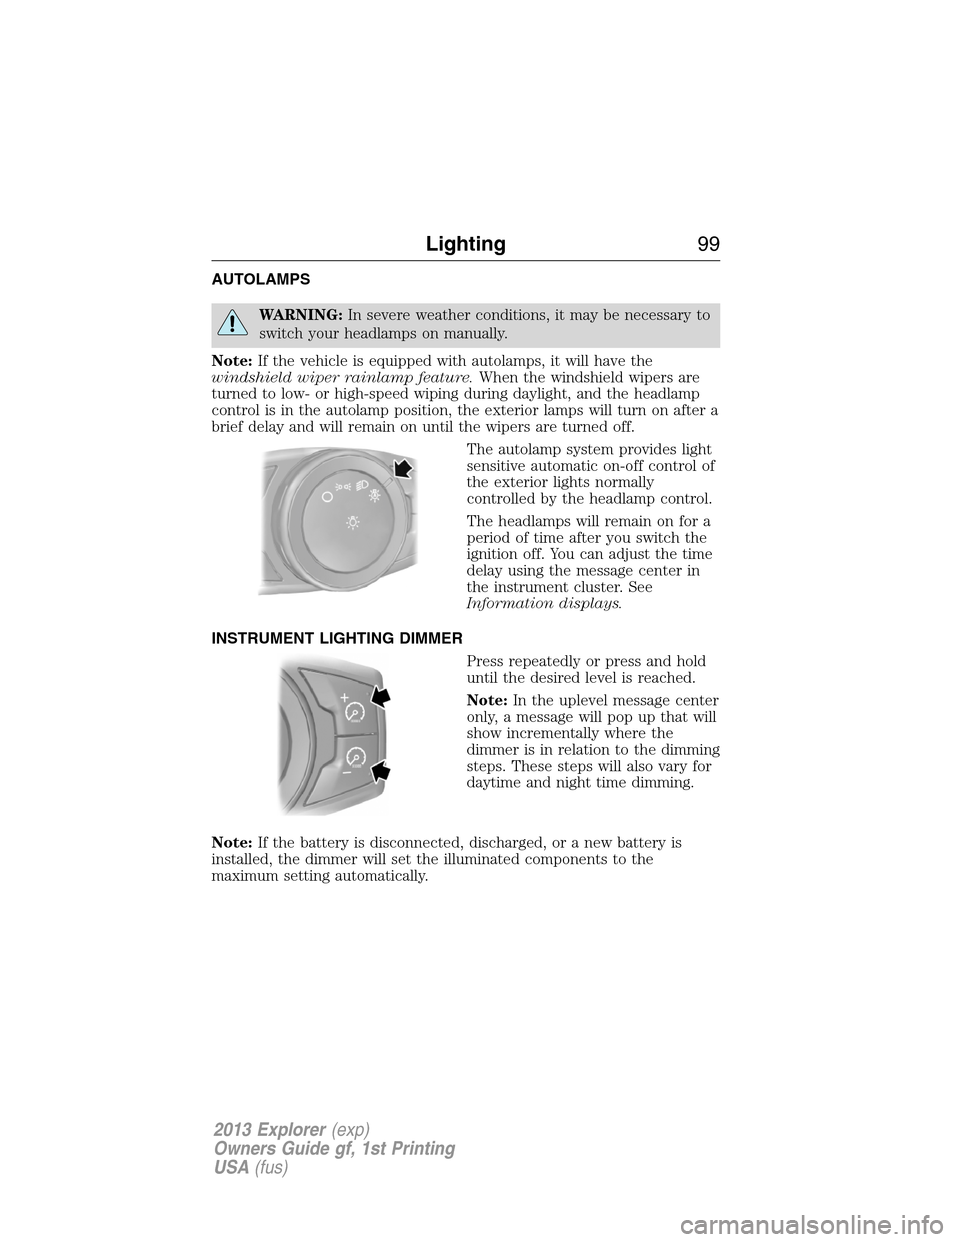
AUTOLAMPS
WARNING:In severe weather conditions, it may be necessary to
switch your headlamps on manually.
Note:If the vehicle is equipped with autolamps, it will have the
windshield wiper rainlamp feature.When the windshield wipers are
turned to low- or high-speed wiping during daylight, and the headlamp
control is in the autolamp position, the exterior lamps will turn on after a
brief delay and will remain on until the wipers are turned off.
The autolamp system provides light
sensitive automatic on-off control of
the exterior lights normally
controlled by the headlamp control.
The headlamps will remain on for a
period of time after you switch the
ignition off. You can adjust the time
delay using the message center in
the instrument cluster. See
Information displays.
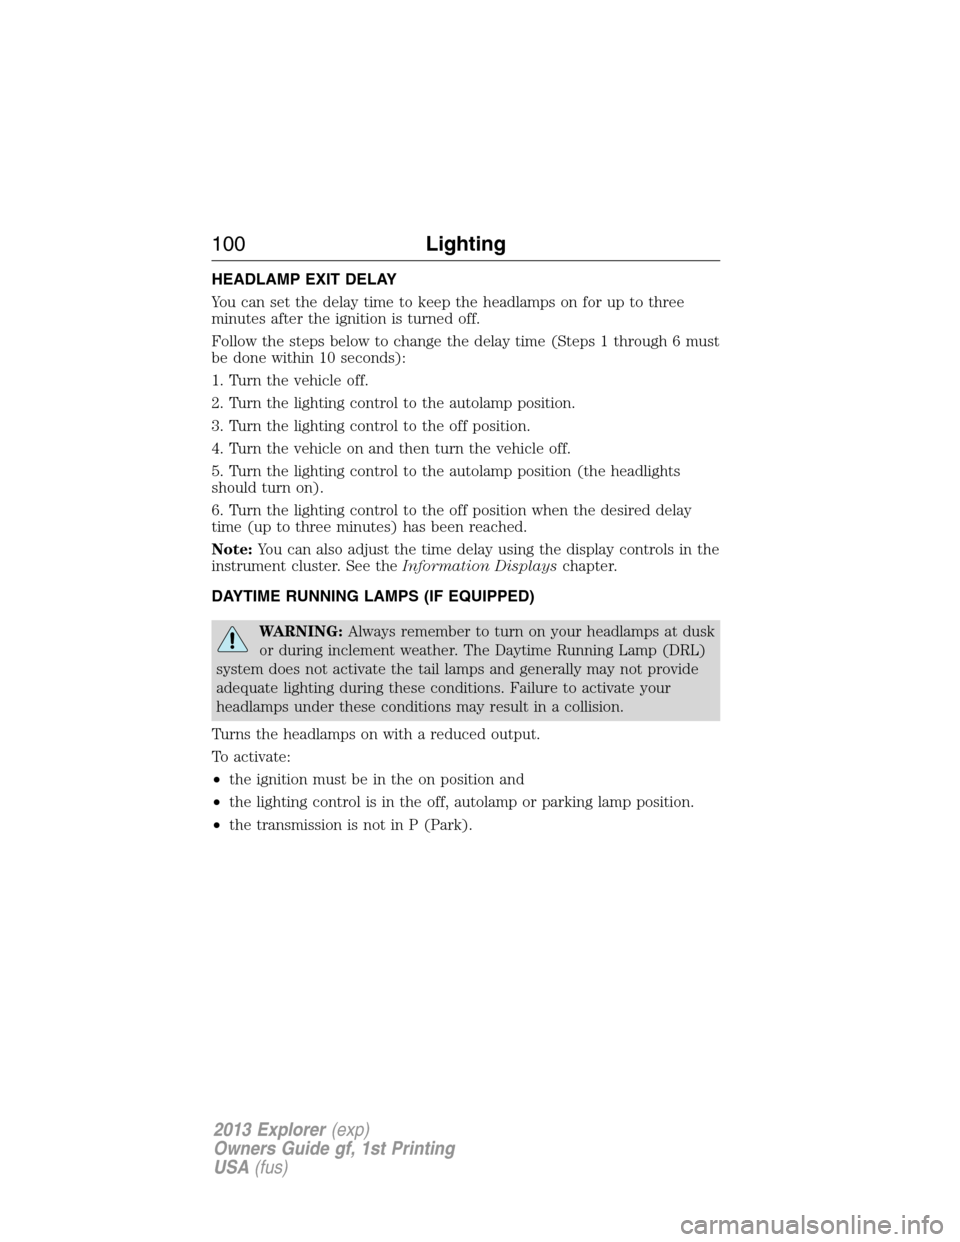
INSTRUMENT LIGHTING DIMMER
Press repeatedly or press and hold
until the desired level is reached.
Note:In the uplevel message center
only, a message will pop up that will
show incrementally where the
dimmer is in relation to the dimming
steps. These steps will also vary for
daytime and night time dimming.
Note:If the battery is disconnected, discharged, or a new battery is
installed, the dimmer will set the illuminated components to the
maximum setting automatically.
Lighting99
2013 Explorer(exp)
Owners Guide gf, 1st Printing
USA(fus)
Page 100 of 576

HEADLAMP EXIT DELAY
You can set the delay time to keep the headlamps on for up to three
minutes after the ignition is turned off.
Follow the steps below to change the delay time (Steps 1 through 6 must
be done within 10 seconds):
1. Turn the vehicle off.
2. Turn the lighting control to the autolamp position.
3. Turn the lighting control to the off position.
4. Turn the vehicle on and then turn the vehicle off.
5. Turn the lighting control to the autolamp position (the headlights
should turn on).
6. Turn the lighting control to the off position when the desired delay
time (up to three minutes) has been reached.
Note:You can also adjust the time delay using the display controls in the
instrument cluster. See theInformation Displayschapter.
DAYTIME RUNNING LAMPS (IF EQUIPPED)
WARNING:Always remember to turn on your headlamps at dusk
or during inclement weather. The Daytime Running Lamp (DRL)
system does not activate the tail lamps and generally may not provide
adequate lighting during these conditions. Failure to activate your
headlamps under these conditions may result in a collision.
Turns the headlamps on with a reduced output.
To activate:
•the ignition must be in the on position and
•the lighting control is in the off, autolamp or parking lamp position.
•the transmission is not in P (Park).
100Lighting
2013 Explorer(exp)
Owners Guide gf, 1st Printing
USA(fus)
Page 102 of 576
•Severe rain, snow or fog is detected.
•The camera is blocked.
Activating the system
Switch the system on within the information display. SeeInformation
displays.
Turn the lighting control to the
autolamps position.
Manually overriding the system
When the automatic control has
activated high beams, pushing or
pulling the stalk will provide a
temporary override to low beam.
To permanently deactivate the system use the information display menu
or turn the lighting control switch from autolamps to headlamps.
FRONT FOG LAMPS
The fog lamps can be turned on when the
lighting control is in the headlamps, parking
lamps or autolamps positions and the high
beams are not turned on.
102Lighting
2013 Explorer(exp)
Owners Guide gf, 1st Printing
USA(fus)
Page 118 of 576
Engine coolant temperature (RTT)
Illuminates when the engine coolant temperature is high. Stop
the vehicle as soon as possible, switch off the engine and let
cool.
Fog lamps
Illuminates when the fog lamps are turned on.
Grade assist (if equipped) (RTT)
Illuminates when grade assist is turned on.
Heads up display (if equipped)
A red beam of lights will illuminate on the windshield in certain
instances when using adaptive cruise control and/or the collision
warning system. It will also illuminate momentarily when you
start your vehicle to make sure the display works.
Hill descent (if equipped) (RTT)
Illuminates when hill descent is turned on.
High beams
Illuminates when the high-beam headlamps are on.
Lane keeping system (if equipped) (RTT)
Illuminates when the lane keeping system is activated.
Low fuel (RTT)
Illuminates when the fuel level in the fuel tank is at or near
empty.
11 8Instrument Cluster
2013 Explorer(exp)
Owners Guide gf, 1st Printing
USA(fus)