Page 148 of 576

When you select: You can:
G. OK Allows you to confirm commands with special
phone and media features. If your vehicle is
equipped with SYNC, refer to theSYNC
chapter for more information.
H. Eject Eject the CD.
I. Power and Volume Press the power control to turn the system on
and off.
Turn to adjust the volume.
J. CLOCK Set the time. Use the center arrow controls to
move between options and set time.
K. SOUND Allows you to adjust the sound settings
(Treble, Bass, Middle, Fade and Balance).
1. Press Menu.
2. Scroll until Audio is selected and press OK.
3. Scroll to select Sound and press OK.
L. MENU Allows you to access many functions of the
audio system. Refer toMenu structure
following this table.
M. PHONE Access SYNC phone features.
N. AUX Access your auxiliary input jack. Refer to
Auxiliary input jacklater in this chapter.
O. SIRIUS Access SIRIUS satellite radio features.
Menu Structure
Note:Depending on your system, some options may appear slightly
different, not at all or on-screen and able to be selected using the
function buttons.
Press MENU.
Press the up and down arrow buttons to scroll through the options (if
active).
Press the right arrow to enter a menu. Press the left arrow to exit a
menu.
148Audio System
2013 Explorer(exp)
Owners Guide gf, 1st Printing
USA(fus)
Page 149 of 576
Menu structure
RadioScan
RBDS/RDS Set category
SIRIUS optionsScan
Show ESN
Channel guide Tune channel
Skip channel
Lock channel
Set category
Alerts
Unlock all stations
Skip no stations
Parental lock (PIN)
Audio settingsSCV level
Sound
CDScan all
Scan folder
CD compression
Display settingsDimming Automatic
Daylight
Language English
French
Spanish
Temp setting Fahrenheit
Celsius
Clock settingsSet time
Set date
12/24 hour
Audio System149
2013 Explorer(exp)
Owners Guide gf, 1st Printing
USA(fus)
Page 280 of 576

For proper function of the roof rack system, loads must be placed
directly on crossbars affixed to the roof rack side rails. Your vehicle may
be equipped with factory-installed crossbars. Ford Genuine Accessory
crossbars, designed specifically for your vehicle, are also recommended
for use with your roof rack system.
Ensure that the load is securely fastened. Check the tightness of the load
before driving and at each fuel stop.
Adjusting the Crossbars (If Equipped)
Note:Wind noise can be minimized by either removing or repositioning
the crossbars when they are not is use. Position the rear crossbar fully
rearward and the front crossbar 10 inches (25 centimeters) from the
front end-cap.
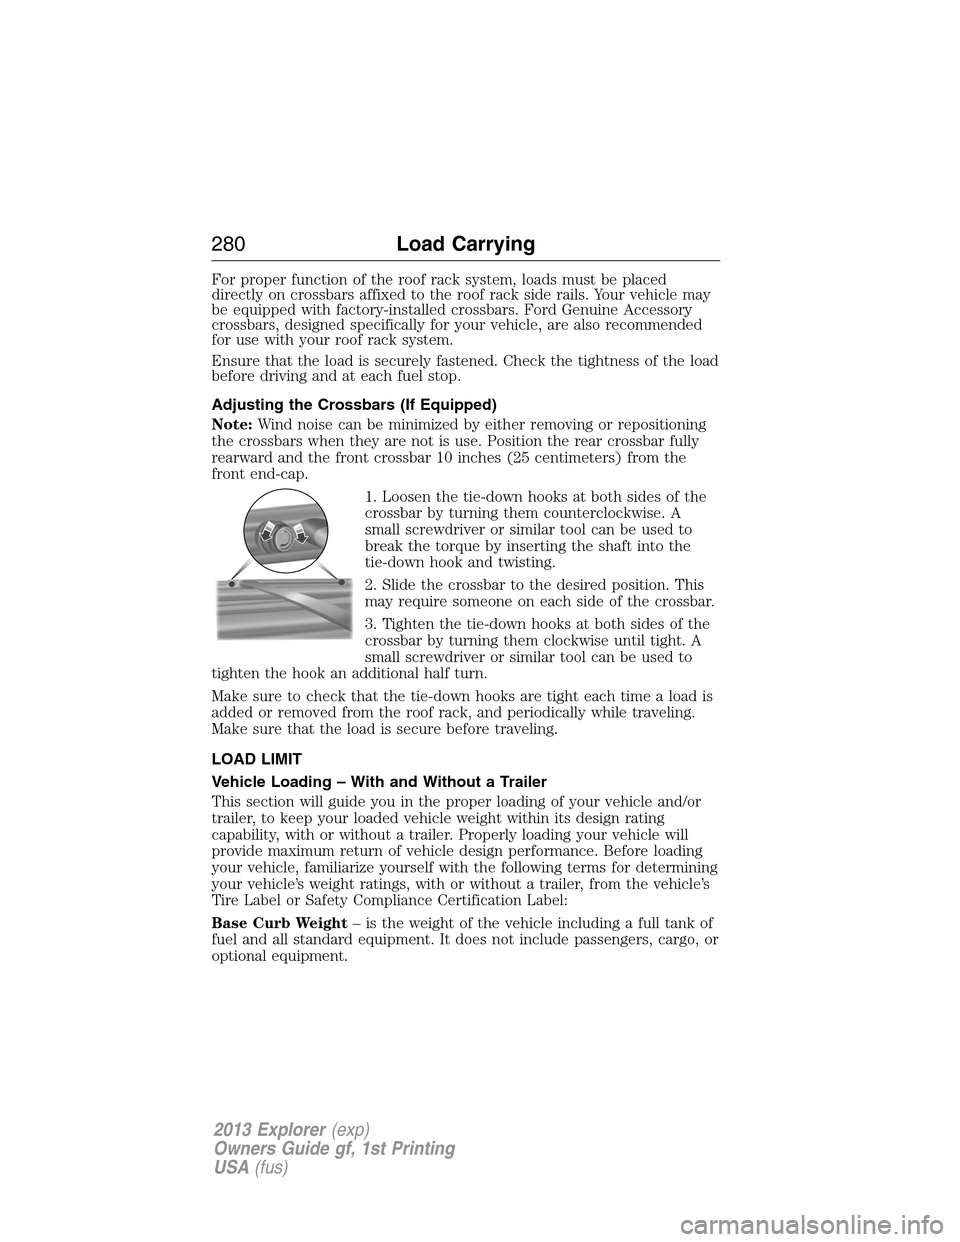
1. Loosen the tie-down hooks at both sides of the
crossbar by turning them counterclockwise. A
small screwdriver or similar tool can be used to
break the torque by inserting the shaft into the
tie-down hook and twisting.
2. Slide the crossbar to the desired position. This
may require someone on each side of the crossbar.
3. Tighten the tie-down hooks at both sides of the
crossbar by turning them clockwise until tight. A
small screwdriver or similar tool can be used to
tighten the hook an additional half turn.
Make sure to check that the tie-down hooks are tight each time a load is
added or removed from the roof rack, and periodically while traveling.
Make sure that the load is secure before traveling.
LOAD LIMIT
Vehicle Loading – With and Without a Trailer
This section will guide you in the proper loading of your vehicle and/or
trailer, to keep your loaded vehicle weight within its design rating
capability, with or without a trailer. Properly loading your vehicle will
provide maximum return of vehicle design performance. Before loading
your vehicle, familiarize yourself with the following terms for determining
your vehicle’s weight ratings, with or without a trailer, from the vehicle’s
Tire Label or Safety Compliance Certification Label:
Base Curb Weight– is the weight of the vehicle including a full tank of
fuel and all standard equipment. It does not include passengers, cargo, or
optional equipment.
280Load Carrying
2013 Explorer(exp)
Owners Guide gf, 1st Printing
USA(fus)
Page 290 of 576

Trailer Tow Connector (Vehicles Equipped with a Trailer Tow/Prep
Package)
The trailer tow connector is located under the rear bumper, on the
driver’s side of the vehicle.
Color Function
1. Dark Green Right turn signal/brake lamp/hazard flasher
2. Yellow Left turn signal/brake lamp/hazard flasher
3. Brown Tail lamps/parking lamps
4. White Ground
Trailer hitch cover
Your vehicle is equipped with a removable trailer hitch trim cover. To
remove the trim cover:
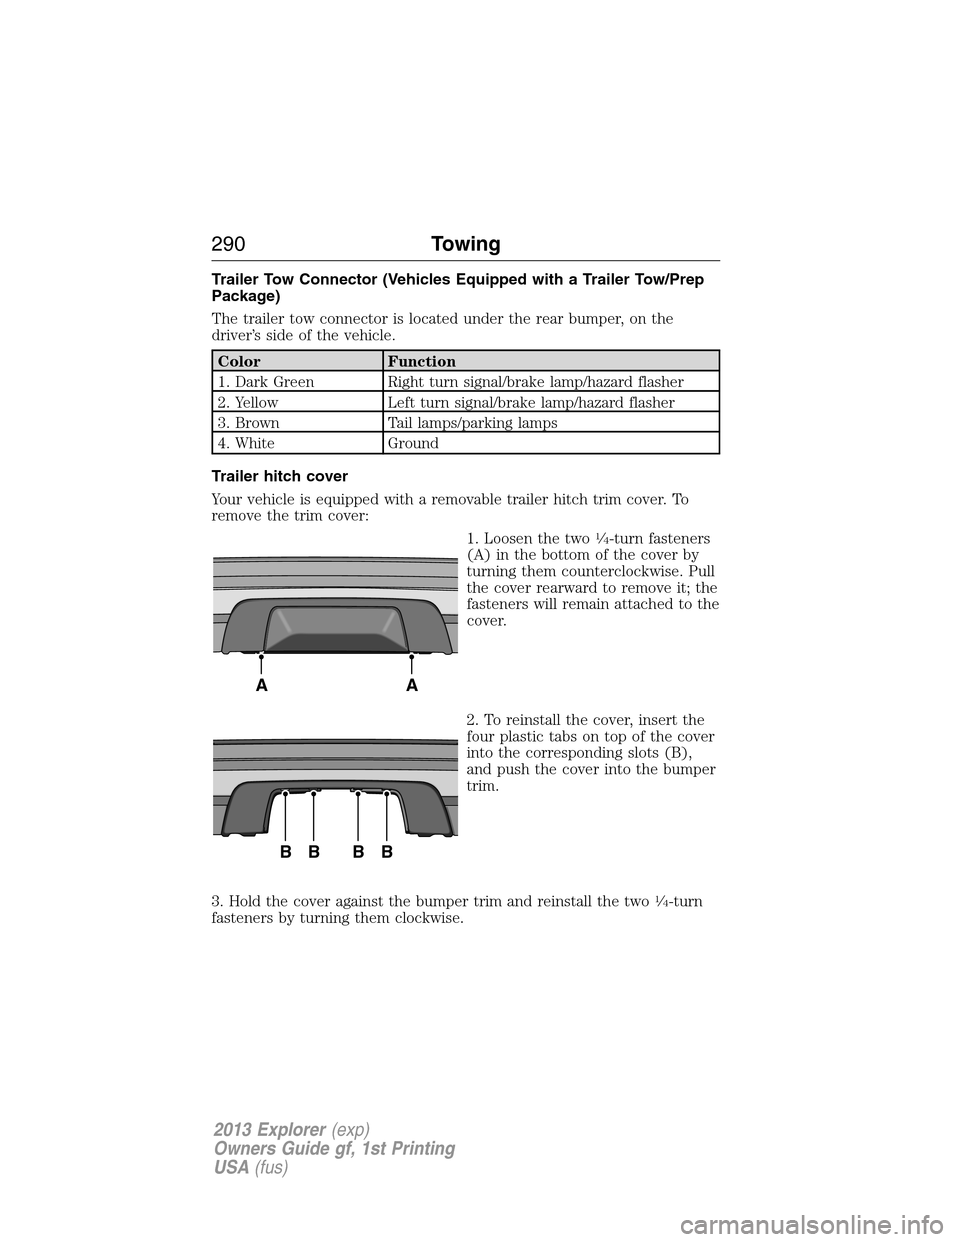
1. Loosen the two
1�4-turn fasteners
(A) in the bottom of the cover by
turning them counterclockwise. Pull
the cover rearward to remove it; the
fasteners will remain attached to the
cover.
2. To reinstall the cover, insert the
four plastic tabs on top of the cover
into the corresponding slots (B),
and push the cover into the bumper
trim.
3. Hold the cover against the bumper trim and reinstall the two
1�4-turn
fasteners by turning them clockwise.
AA
BBBB
290Towing
2013 Explorer(exp)
Owners Guide gf, 1st Printing
USA(fus)
Page 338 of 576

Battery relearn
Because your vehicle’s engine is electronically controlled by a computer,
some control conditions are maintained by power from the battery. When
the battery is disconnected or a new battery is installed, the engine must
relearn its idle and fuel trim strategy for optimum driveability and
performance. To begin this process:
1. With the vehicle at a complete stop, set the parking brake.
2. Put the gearshift lever in P (Park), turn off all accessories and start
the engine.
3. Run the engine until it reaches normal operating temperature.
4. Allow the engine to idle for at least one minute.
5. Turn the A/C on and allow the engine to idle for at least one minute.
6. Drive the vehicle to complete the relearning process.
•The vehicle may need to be driven to relearn the idle and fuel trim
strategy.
•Note:If you do not allow the engine to relearn its idle trim, the idle
quality of your vehicle may be adversely affected until the idle trim is
eventually relearned.
When the battery is disconnected or a new battery installed, the
transmission must relearn its adaptive strategy. As a result of this, the
transmission may shift firmly. This operation is considered normal and
will not affect function or durability of the transmission. Over time the
adaptive learning process will fully update transmission operation to its
optimum shift feel.
If the battery has been disconnected or a new battery has been installed,
the clock and the preset radio stations must be reset once the battery is
reconnected.
Always dispose of automotive batteries in a responsible manner. Follow
your local authorized standards for disposal. Call your local authorized
recycling center to find out more about recycling automotive batteries.
Battery management system
The battery management system (BMS) monitors battery conditions and
takes actions to extend battery life. If excessive battery drain is detected,
the system may temporarily disable certain electrical features to protect
the battery. Those electrical accessories affected include rear defrost,
heated /cooled seats, climate control fan, heated steering wheel, audio
and navigation system. A message may be displayed on the instrument
338Maintenance
2013 Explorer(exp)
Owners Guide gf, 1st Printing
USA(fus)
Page 343 of 576

3. Turn on the low beam headlamps to illuminate the wall or screen and
open the hood. To see a clearer light pattern for adjusting, block the light
from one headlamp while adjusting the other.
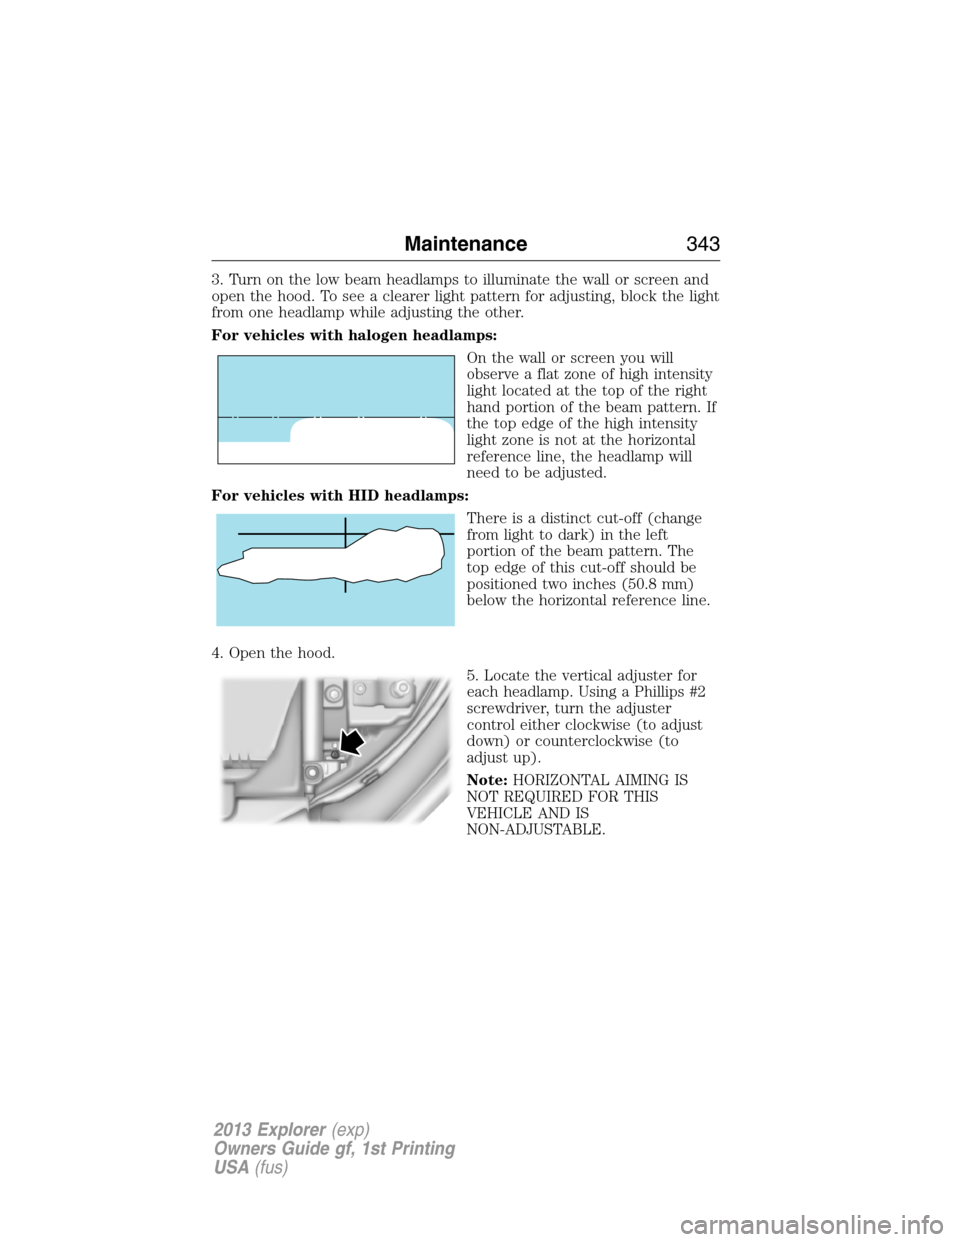
For vehicles with halogen headlamps:
On the wall or screen you will
observe a flat zone of high intensity
light located at the top of the right
hand portion of the beam pattern. If
the top edge of the high intensity
light zone is not at the horizontal
reference line, the headlamp will
need to be adjusted.
For vehicles with HID headlamps:
There is a distinct cut-off (change
from light to dark) in the left
portion of the beam pattern. The
top edge of this cut-off should be
positioned two inches (50.8 mm)
below the horizontal reference line.
4. Open the hood.
5. Locate the vertical adjuster for
each headlamp. Using a Phillips #2
screwdriver, turn the adjuster
control either clockwise (to adjust
down) or counterclockwise (to
adjust up).
Note:HORIZONTAL AIMING IS
NOT REQUIRED FOR THIS
VEHICLE AND IS
NON-ADJUSTABLE.
Maintenance343
2013 Explorer(exp)
Owners Guide gf, 1st Printing
USA(fus)
Page 345 of 576
Replacing headlamp bulbs
WARNING:Handle a halogen headlamp bulb carefully and keep
out of children’s reach. Grasp the bulb only by its plastic base and
do not touch the glass. The oil from your hand could cause the bulb to
break the next time the headlamps are operated.
Note:If the bulb is accidentally touched, it should be cleaned with
rubbing alcohol before being used.
1. Make sure that the headlamp control is in the off position.
2. Open the hood.
3. Remove the bulb cover.
4. Turn the bulb base counterclockwise and remove
it.
5. Disconnect the electrical connector.
Reverse steps to reinstall bulb(s).
Replacing HID headlamp bulbs (if equipped)
The headlamps on your vehicle use a “high intensity discharge” source.
These lamps operate at a high voltage. When the bulb is burned out, the
bulb and starter capsule assembly must be replaced by your authorized
dealer.
Maintenance345
2013 Explorer(exp)
Owners Guide gf, 1st Printing
USA(fus)
Page 346 of 576
Front parking lamp/turn signal and sidemarker bulbs
1. Make sure that the headlamp control is
in the off position.
2. Open the hood.
3. Remove the hood overslam bumper
tower to service park/turn or sidemarker
bulbs (if needed).
Replacing front parking lamp/turn signal bulbs
1. Rotate the bulb socket
counterclockwise and remove it from
the lamp assembly.
2. Pull the bulb straight out of the
socket.
Reverse steps to reinstall bulb(s).
Replacing sidemarker bulbs
1. Rotate the bulb socket
counterclockwise and remove it from
the lamp assembly.
2. Pull the bulb straight out of the
socket.
Reverse steps to reinstall bulb(s).
346Maintenance
2013 Explorer(exp)
Owners Guide gf, 1st Printing
USA(fus)