2013 FORD EXPEDITION light
[x] Cancel search: lightPage 151 of 497

When this button is pressed, the display only shows the rear temperature
setting. After the rear setting changes are completed on the front
control, the display automatically shows both climate settings.
F.Passenger temperature control:Press and turn to increase or
decrease the air temperature on the passenger side of the vehicle.
G.Rear defrost:Press to turn the heated windows and mirrors on and
off. SeeHeated windows and mirrorslater in this chapter for more
information.
H.Auxiliary climate control fan speed:Press to turn on the auxiliary
climate control system or to adjust the rear fan speed from the front
control.
I.Recirculated air:Press to switch between outside air and
recirculated air. Using recirculated air can reduce the time needed to
cool the interior and reduce unwanted odors from entering your vehicle.
J.A/C:Press to turn air conditioning on or off. Air conditioning cools the
vehicle using outside air. To improve air conditioning when starting your
vehicle, drive with the windows slightly open for two to three minutes.
K.Footwell/Defrost:Distributes air through the windshield defroster
vents, demister vents and floor vents.
L.Footwell:Distributes air through the floor vents.
M.Instrument panel/Footwell:Distributes air through the instrument
panel vents, floor vents, and demister vents.
N.Instrument panel:Distributes air through the instrument panel
vents.
O.Manual override controls:Press buttons I through P to override
automatic control (AUTO). To return to automatic operation, press
AUTO.
P.Front fan speed control:Controls the volume of air circulated in
your vehicle. Press to increase or decrease fan speed.
Q.OFF:Turn the climate control system off. When the system is off,
outside air is prevented from entering the vehicle.
R.Driver temperature control:Press to turn the climate control
system on and off. Turn to increase or decrease the air temperature for
the driver side of the vehicle.
This control also adjusts the passenger side temperature when dual zone
operation is disengaged.
Climate Control151
2013 Expedition(exd)
Owners Guide gf, 1st Printing
USA(fus)
Page 152 of 497

DUAL AUTOMATIC TEMPERATURE CONTROL SYSTEM WITH
HEATED AND COOLED SEATS
A.AUTO:Press to turn on fully automatic operation. Select the desired
temperature using the temperature control. The system automatically
determines fan speed, air distribution, A/C operation, and outside or
recirculated air, to heat or cool the vehicle to maintain the selected
temperature.
B.A/C:Press to turn air conditioning on or off. Air conditioning cools
the vehicle using outside air. To improve air conditioning when starting
your vehicle, drive with the windows slightly open for two to three
minutes.
C.EXT:Press to display the outside temperature. Press again to display
the interior temperature.
Note:The exterior temperature reading is more accurate when the
vehicle is moving.
D.Recirculated air:Press to switch between outside air and
recirculated air. Using recirculated air can reduce the time needed to
cool the interior and reduce unwanted odors from entering your vehicle.
E.Defrost:Distributes air through the windshield defroster vents and
demister vents. This setting can also be used to defog and clear the
windshield of a thin covering of ice.
AUTO
OFF
A/C EXT
FREAR
R
R R
R
A
PONMLKJI
EF
G
H
R
Q
BDC
152Climate Control
2013 Expedition(exd)
Owners Guide gf, 1st Printing
USA(fus)
Page 158 of 497
SITTING IN THE CORRECT POSITION
WARNING:Sitting improperly out of position or with the
seatback reclined too far can take off weight from the seat
cushion and affect the passenger sensing system, resulting in serious
injury or death in a crash. Always sit upright against your seatback,
with your feet on the floor.
WARNING:Do not recline the seatback as this can cause the
occupant to slide under the seat’s safety belt, resulting in severe
personal injury in the event of a collision.
WARNING:Do not place objects higher than the seatbacks to
reduce the risk of injury in a collision or during heavy braking or
when stopping suddenly.
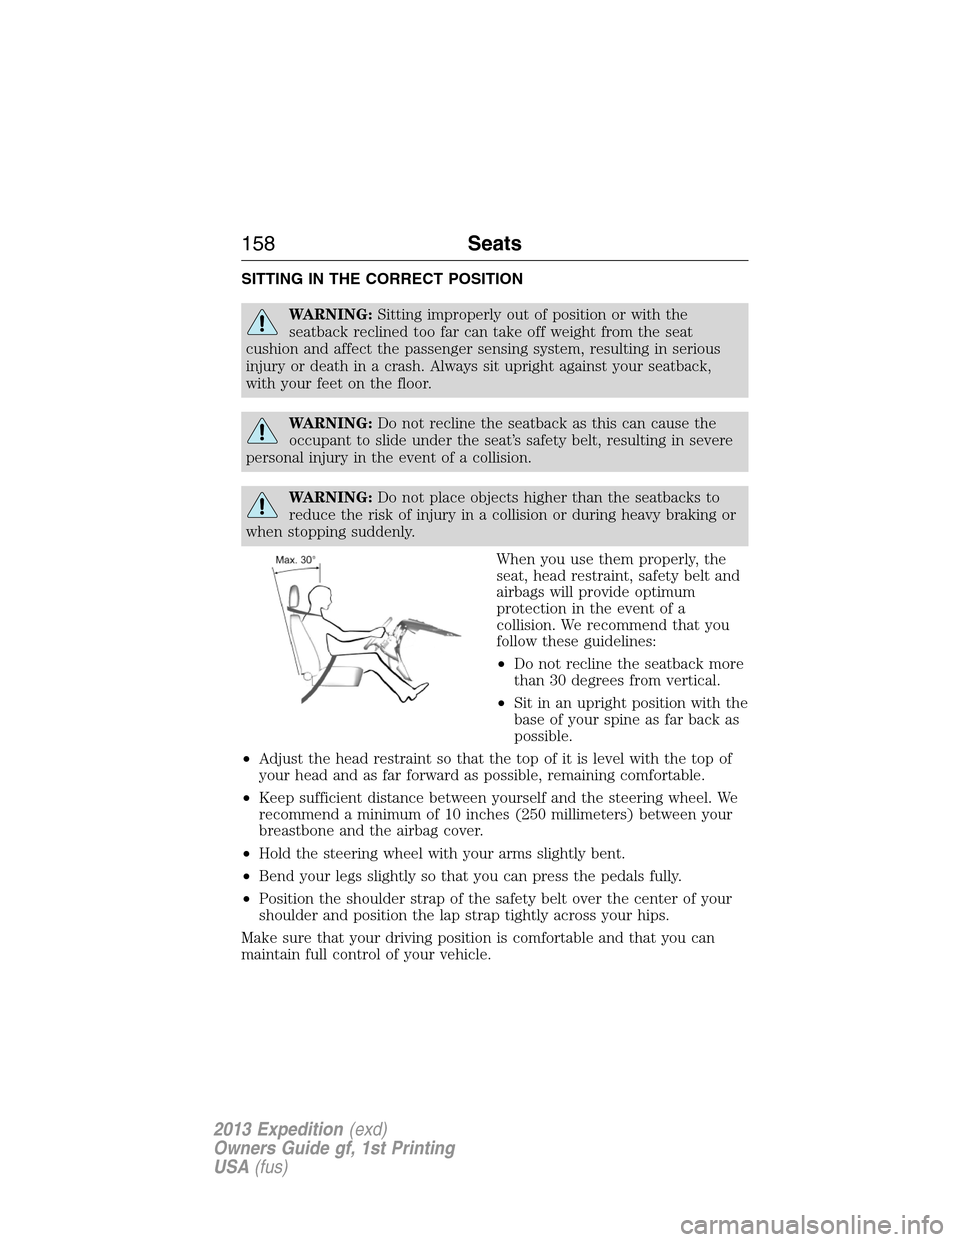
When you use them properly, the
seat, head restraint, safety belt and
airbags will provide optimum
protection in the event of a
collision. We recommend that you
follow these guidelines:
•Do not recline the seatback more
than 30 degrees from vertical.
•Sit in an upright position with the
base of your spine as far back as
possible.
•Adjust the head restraint so that the top of it is level with the top of
your head and as far forward as possible, remaining comfortable.
•Keep sufficient distance between yourself and the steering wheel. We
recommend a minimum of 10 inches (250 millimeters) between your
breastbone and the airbag cover.
•Hold the steering wheel with your arms slightly bent.
•Bend your legs slightly so that you can press the pedals fully.
•Position the shoulder strap of the safety belt over the center of your
shoulder and position the lap strap tightly across your hips.
Make sure that your driving position is comfortable and that you can
maintain full control of your vehicle.
158Seats
2013 Expedition(exd)
Owners Guide gf, 1st Printing
USA(fus)
Page 163 of 497
POWER SEATS (IF EQUIPPED)
WARNING:Before returning the seat back to its original
position, make sure that cargo or any objects are not trapped
behind the seat back.
WARNING:Never adjust the driver’s seat or seat back when the
vehicle is moving.
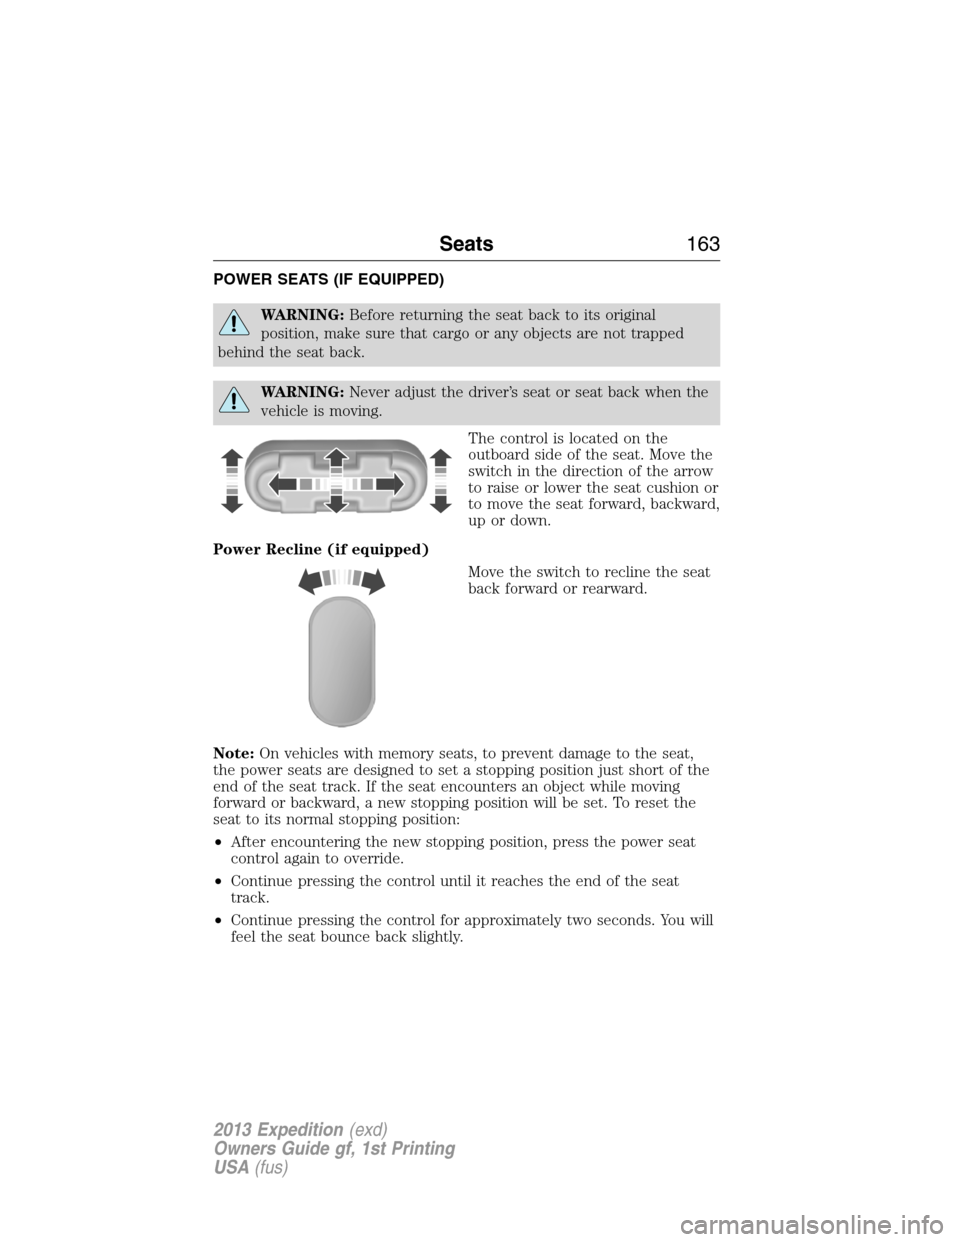
The control is located on the
outboard side of the seat. Move the
switch in the direction of the arrow
to raise or lower the seat cushion or
to move the seat forward, backward,
up or down.
Power Recline (if equipped)
Move the switch to recline the seat
back forward or rearward.
Note:On vehicles with memory seats, to prevent damage to the seat,
the power seats are designed to set a stopping position just short of the
end of the seat track. If the seat encounters an object while moving
forward or backward, a new stopping position will be set. To reset the
seat to its normal stopping position:
•After encountering the new stopping position, press the power seat
control again to override.
•Continue pressing the control until it reaches the end of the seat
track.
•Continue pressing the control for approximately two seconds. You will
feel the seat bounce back slightly.
Seats163
2013 Expedition(exd)
Owners Guide gf, 1st Printing
USA(fus)
Page 166 of 497
Climate Controlled Seats (If Equipped)
Heated Seats
WARNING:Persons who are unable to feel pain to the skin
because of advanced age, chronic illness, diabetes, spinal cord
injury, medication, alcohol use, exhaustion, or other physical conditions,
must exercise care when using the seat heater. The seat heater may
cause burns even at low temperatures, especially if used for long
periods of time. Do not place anything on the seat that insulates against
heat, such as a blanket or cushion, because this may cause the seat
heater to overheat. Do not puncture the seat with pins, needles, or
other pointed objects because this may damage the heating element
which may cause the seat heater to overheat. An overheated seat may
cause serious personal injury.
Note:Do not do the following:
•Place heavy objects on the seat
•Operate the seat heater if water or any other liquid is spilled on the
seat. Allow the seat to dry thoroughly.
The heated seats will only function when the engine is running.
To operate the heated seats:
Press the heated seat symbol to cycle through the various
heat settings and off. Warmer settings are indicated by
more indicator lights.
Cooled Seats
The cooled seats will only function when the engine is running.
To operate the cooled seats:
Press the cooled seat symbol to cycle through the various
cooling settings and off. Cooler settings are indicated by
more indicator lights.
If the engine falls below 350 RPMs while the cooled seats are on, the
feature will turn itself off and will need to be reactivated.
A/C
166Seats
2013 Expedition(exd)
Owners Guide gf, 1st Printing
USA(fus)
Page 175 of 497
Rear Heated Seats (if equipped)
WARNING:Persons who are unable to feel pain to the skin
because of advanced age, chronic illness, diabetes, spinal cord
injury, medication, alcohol use, exhaustion, or other physical conditions,
must exercise care when using the seat heater. The seat heater may
cause burns even at low temperatures, especially if used for long
periods of time. Do not place anything on the seat that insulates against
heat, such as a blanket or cushion, because this may cause the seat
heater to overheat. Do not puncture the seat with pins, needles, or
other pointed objects because this may damage the heating element
which may cause the seat heater to overheat. An overheated seat may
cause serious personal injury.
Note:Do not do the following:
•Place heavy objects on the seat
•Operate the seat heater if water or any other liquid is spilled on the
seat. Allow the seat to dry thoroughly.
The rear seat heat controls are located on the rear of the center console.
The heated seats only operate when the ignition is on. To operate the
heated seats:
Press the heated seat button to cycle through the various
heat settings and off. Warmer settings are indicated by
more indicator lights.
3rd Row Seats
Make sure that no objects are on the floor in front of the third row seats
or on the seat cushion before lowering them. Make sure that the head
restraints are lowered and the second row seats are not reclined.
Seats175
2013 Expedition(exd)
Owners Guide gf, 1st Printing
USA(fus)
Page 180 of 497
Note:We recommend that upon the sale or lease termination of your
vehicle, you erase the programmed function buttons for security reasons.
SeeErasing the Function Button Codeslater in this section.
Note:You can program a maximum of three devices. To change or
replace any of the three devices after it has been initially programmed,
you must first erase the current settings. SeeErasing the Function
Button Codeslater in this section.
Note:Programming the system to a community gate will require a
unique set of instructions depending on the gate system model. Contact
the help line at 1-866-572-2728 for further information.
Note:If you accidently enter the program mode by pressing and
releasing the outer two buttons or all three buttons simultaneously, do
not press any button until the module times out after a few seconds and
resets to normal mode. When the module has timed out, all three LED
lamps will flash rapidly for a few seconds then turn off. Any settings
should remain as previously set.
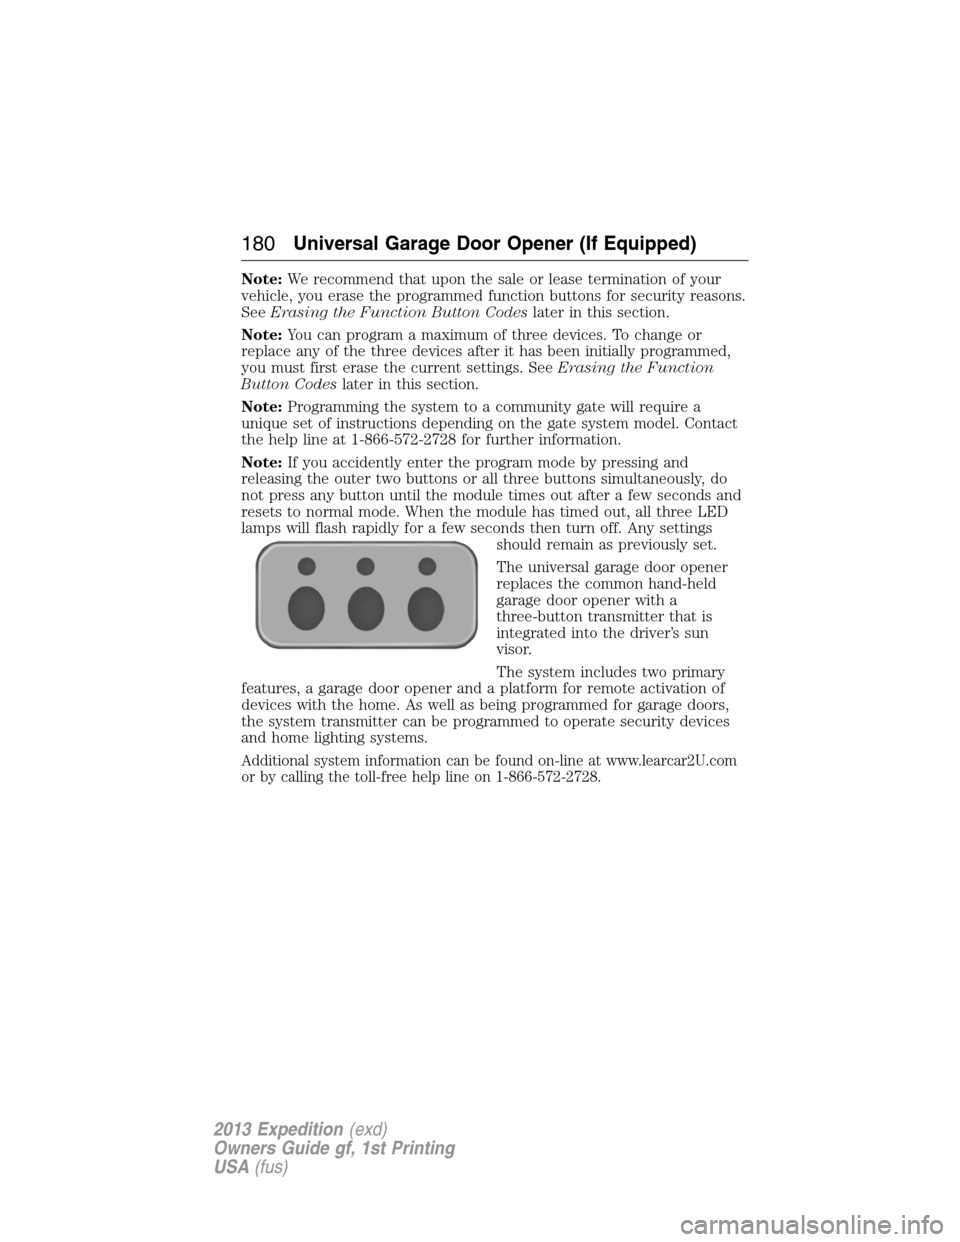
The universal garage door opener
replaces the common hand-held
garage door opener with a
three-button transmitter that is
integrated into the driver’s sun
visor.
The system includes two primary
features, a garage door opener and a platform for remote activation of
devices with the home. As well as being programmed for garage doors,
the system transmitter can be programmed to operate security devices
and home lighting systems.
Additional system information can be found on-line at www.learcar2U.com
or by calling the toll-free help line on 1-866-572-2728.
180Universal Garage Door Opener (If Equipped)
2013 Expedition(exd)
Owners Guide gf, 1st Printing
USA(fus)
Page 184 of 497
Note:We recommend that upon the sale or lease termination of your
vehicle, you erase the programmed function buttons for security reasons.
SeeErasing the function button codeslater in this section.
Note:You can program a maximum of three devices. To change or
replace any of the three devices after it has been initially programmed,
you must first erase the current settings. SeeErasing the function
button codeslater in this section.
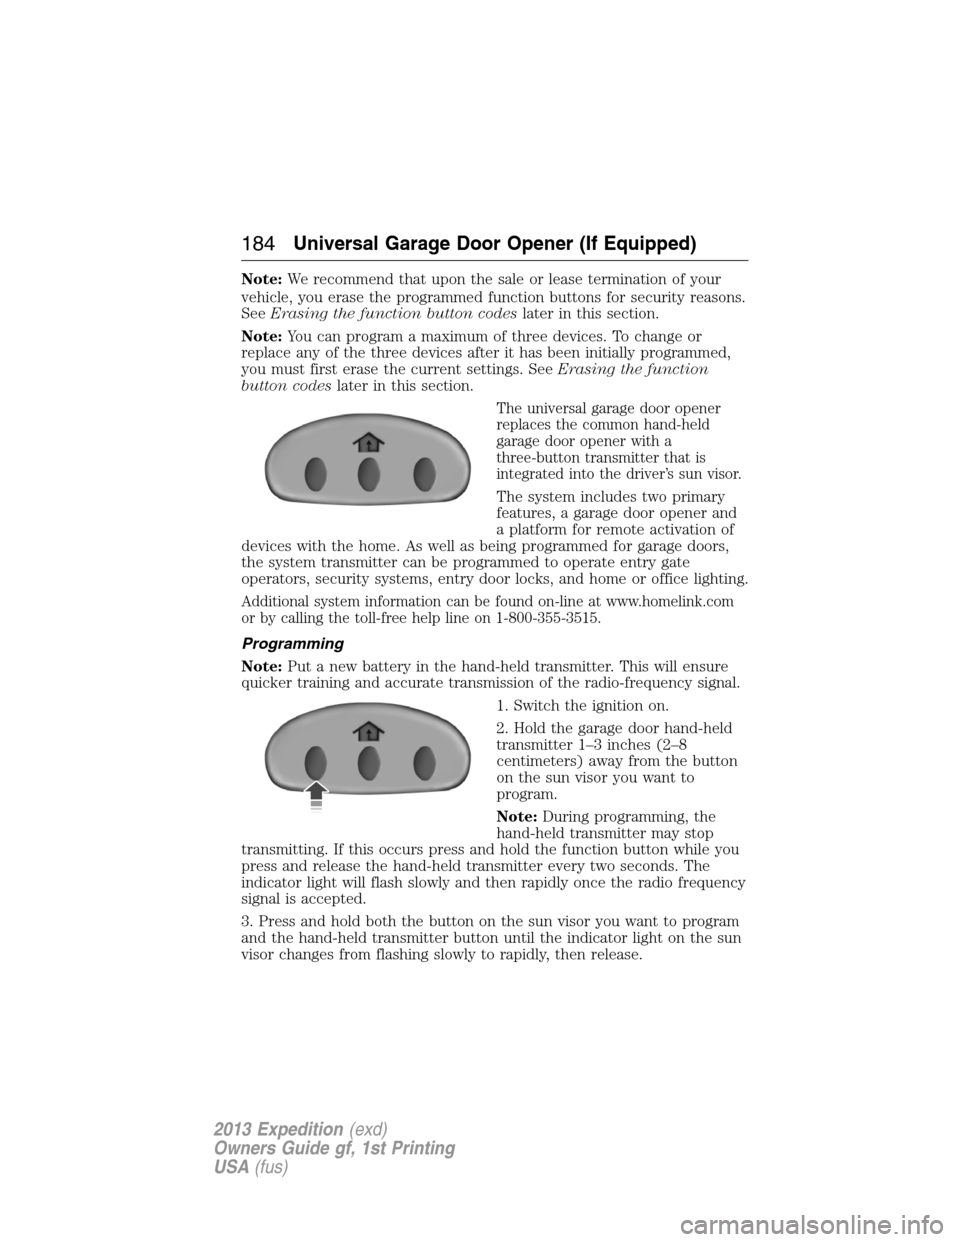
The universal garage door opener
replaces the common hand-held
garage door opener with a
three-button transmitter that is
integrated into the driver’s sun visor.
The system includes two primary
features, a garage door opener and
a platform for remote activation of
devices with the home. As well as being programmed for garage doors,
the system transmitter can be programmed to operate entry gate
operators, security systems, entry door locks, and home or office lighting.
Additional system information can be found on-line at www.homelink.com
or by calling the toll-free help line on 1-800-355-3515.
Programming
Note:Put a new battery in the hand-held transmitter. This will ensure
quicker training and accurate transmission of the radio-frequency signal.
1. Switch the ignition on.
2. Hold the garage door hand-held
transmitter 1–3 inches (2–8
centimeters) away from the button
on the sun visor you want to
program.
Note:During programming, the
hand-held transmitter may stop
transmitting. If this occurs press and hold the function button while you
press and release the hand-held transmitter every two seconds. The
indicator light will flash slowly and then rapidly once the radio frequency
signal is accepted.
3. Press and hold both the button on the sun visor you want to program
and the hand-held transmitter button until the indicator light on the sun
visor changes from flashing slowly to rapidly, then release.
184Universal Garage Door Opener (If Equipped)
2013 Expedition(exd)
Owners Guide gf, 1st Printing
USA(fus)