Page 287 of 497
The fuses are coded as follows:
Fuse/Relay
LocationFuse Amp
RatingProtected Circuits
1 30A Driver window
2 15A Driver side memory module
3 15A Audio rear seat controls, Satellite
radio, SYNC�
4 30A Not used (spare)
5 10A Keypad illumination, 3rd row seat
enable, Brake shift interlock,
Smart fuse panel logic power
6 20A Turn signals
7 10A Low beam headlamps (left)
8 10A Low beam headlamps (right)
9 15A Interior lights
10 15A Switch backlighting, Puddle lamps
Fuses287
2013 Expedition(exd)
Owners Guide gf, 1st Printing
USA(fus)
Page 309 of 497
Replacing Front Parking Lamp, Turn Signal, and Side Marker Bulbs
1. Make sure that the headlamp control is in the off position.
2. Open the hood.
3. At the back of the headlamp,
remove the two headlamp assembly
retainer bolts.
4. Slide headlamp assembly forward
and off the retaining tab to expose
the back of the headlamp assembly.
5. Rotate the bulb socket
counterclockwise and remove from
the lamp assembly.
6. Carefully pull the bulb out of the
socket and push in the new bulb.
7. Install the bulb socket into the
lamp assembly and rotate clockwise.
8. Install the headlamp assembly
and secure with two retainer bolts.
Maintenance309
2013 Expedition(exd)
Owners Guide gf, 1st Printing
USA(fus)
Page 310 of 497
Replacing Tail, Stop, Turn Signal, Side Marker, and Backup Lamp
Bulbs
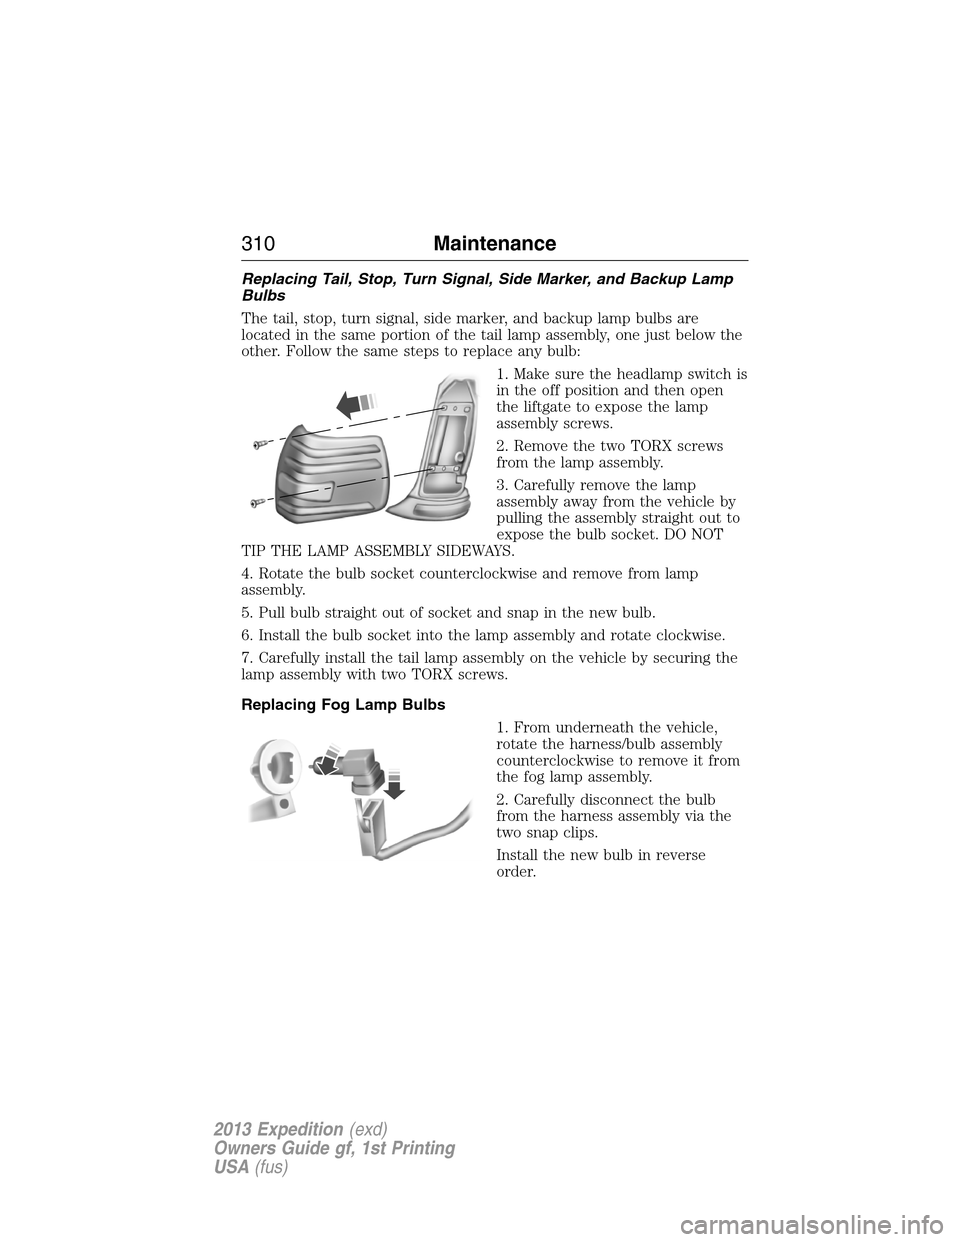
The tail, stop, turn signal, side marker, and backup lamp bulbs are
located in the same portion of the tail lamp assembly, one just below the
other. Follow the same steps to replace any bulb:
1. Make sure the headlamp switch is
in the off position and then open
the liftgate to expose the lamp
assembly screws.
2. Remove the two TORX screws
from the lamp assembly.
3. Carefully remove the lamp
assembly away from the vehicle by
pulling the assembly straight out to
expose the bulb socket. DO NOT
TIP THE LAMP ASSEMBLY SIDEWAYS.
4. Rotate the bulb socket counterclockwise and remove from lamp
assembly.
5. Pull bulb straight out of socket and snap in the new bulb.
6. Install the bulb socket into the lamp assembly and rotate clockwise.
7. Carefully install the tail lamp assembly on the vehicle by securing the
lamp assembly with two TORX screws.
Replacing Fog Lamp Bulbs
1. From underneath the vehicle,
rotate the harness/bulb assembly
counterclockwise to remove it from
the fog lamp assembly.
2. Carefully disconnect the bulb
from the harness assembly via the
two snap clips.
Install the new bulb in reverse
order.
310Maintenance
2013 Expedition(exd)
Owners Guide gf, 1st Printing
USA(fus)
Page 311 of 497
Replacing License Plate Lamp Bulbs
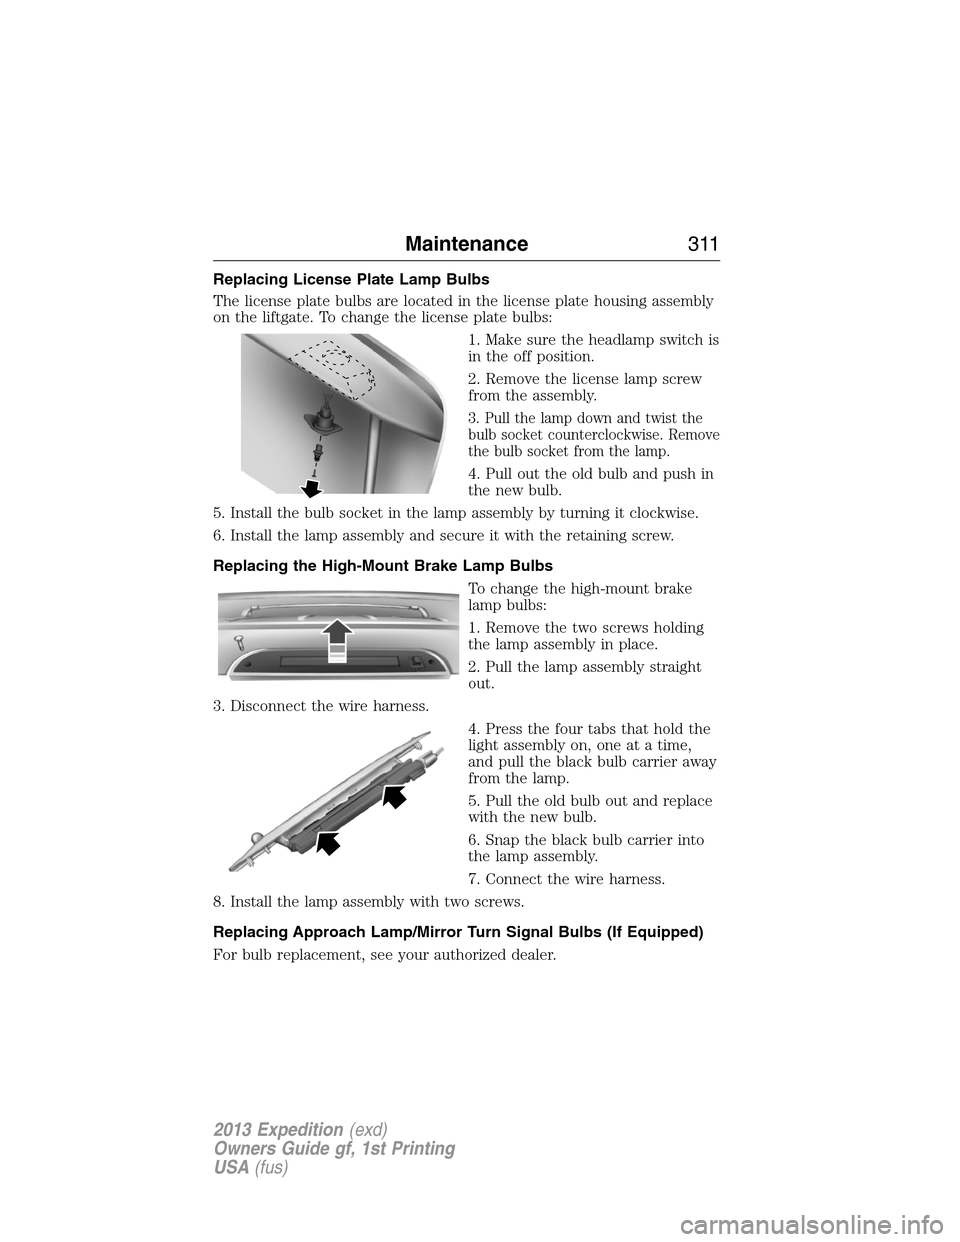
The license plate bulbs are located in the license plate housing assembly
on the liftgate. To change the license plate bulbs:
1. Make sure the headlamp switch is
in the off position.
2. Remove the license lamp screw
from the assembly.
3. Pull the lamp down and twist the
bulb socket counterclockwise. Remove
the bulb socket from the lamp.
4. Pull out the old bulb and push in
the new bulb.
5. Install the bulb socket in the lamp assembly by turning it clockwise.
6. Install the lamp assembly and secure it with the retaining screw.
Replacing the High-Mount Brake Lamp Bulbs
To change the high-mount brake
lamp bulbs:
1. Remove the two screws holding
the lamp assembly in place.
2. Pull the lamp assembly straight
out.
3. Disconnect the wire harness.
4. Press the four tabs that hold the
light assembly on, one at a time,
and pull the black bulb carrier away
from the lamp.
5. Pull the old bulb out and replace
with the new bulb.
6. Snap the black bulb carrier into
the lamp assembly.
7. Connect the wire harness.
8. Install the lamp assembly with two screws.
Replacing Approach Lamp/Mirror Turn Signal Bulbs (If Equipped)
For bulb replacement, see your authorized dealer.
Maintenance311
2013 Expedition(exd)
Owners Guide gf, 1st Printing
USA(fus)
Page 312 of 497
BULB SPECIFICATION CHART
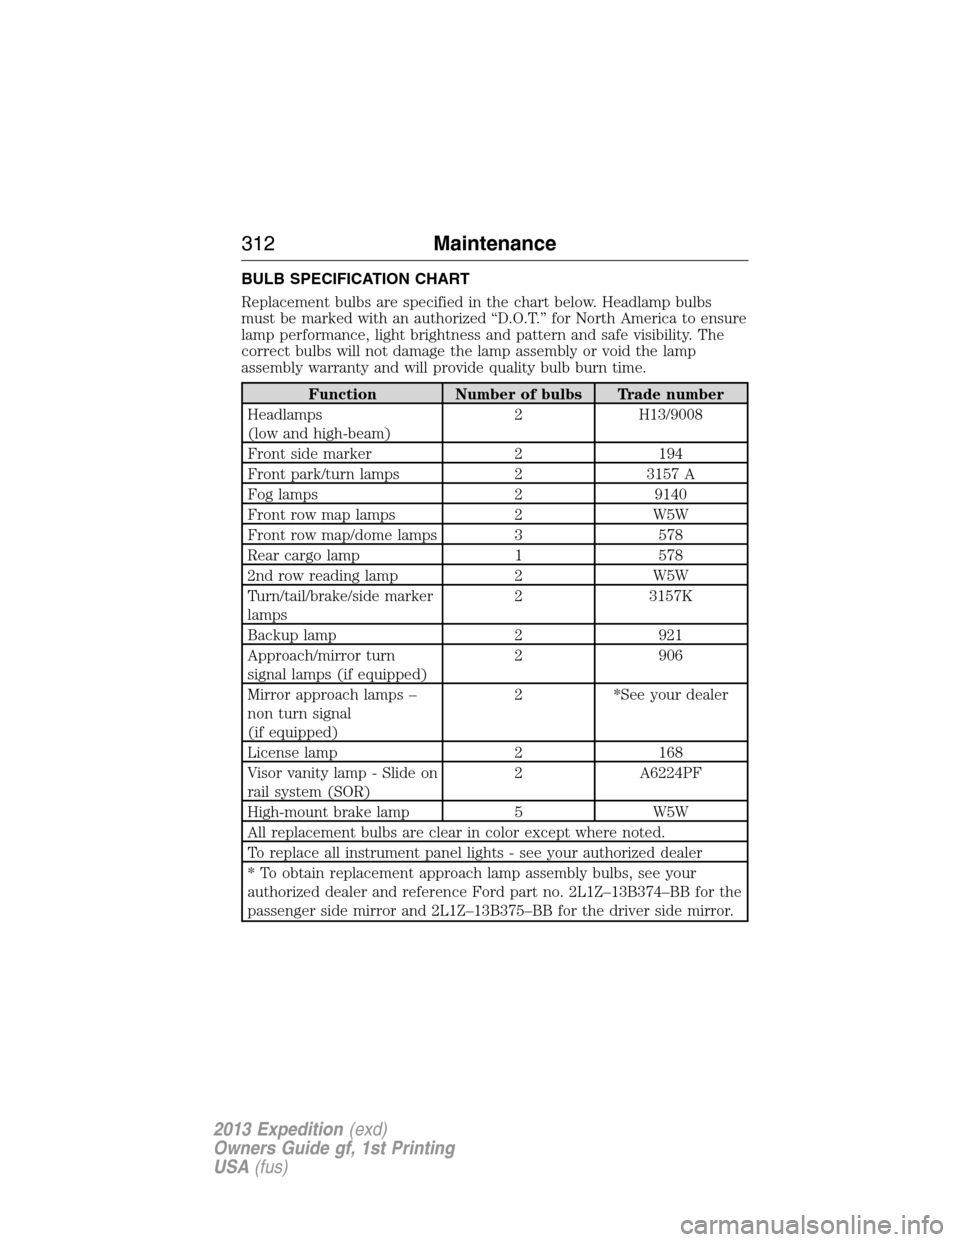
Replacement bulbs are specified in the chart below. Headlamp bulbs
must be marked with an authorized “D.O.T.” for North America to ensure
lamp performance, light brightness and pattern and safe visibility. The
correct bulbs will not damage the lamp assembly or void the lamp
assembly warranty and will provide quality bulb burn time.
Function Number of bulbs Trade number
Headlamps
(low and high-beam)2 H13/9008
Front side marker 2 194
Front park/turn lamps 2 3157 A
Fog lamps 2 9140
Front row map lamps 2 W5W
Front row map/dome lamps 3 578
Rear cargo lamp 1 578
2nd row reading lamp 2 W5W
Turn/tail/brake/side marker
lamps2 3157K
Backup lamp 2 921
Approach/mirror turn
signal lamps (if equipped)2 906
Mirror approach lamps –
non turn signal
(if equipped)2 *See your dealer
License lamp 2 168
Visor vanity lamp - Slide on
rail system (SOR)2 A6224PF
High-mount brake lamp 5 W5W
All replacement bulbs are clear in color except where noted.
To replace all instrument panel lights - see your authorized dealer
* To obtain replacement approach lamp assembly bulbs, see your
authorized dealer and reference Ford part no. 2L1Z–13B374–BB for the
passenger side mirror and 2L1Z–13B375–BB for the driver side mirror.
312Maintenance
2013 Expedition(exd)
Owners Guide gf, 1st Printing
USA(fus)
Page 399 of 497
Pre-defined text message options
I need more directions
I love you
Too funny
Can’t wait to see you
I’m stuck in traffic
Accessing Your Phone Settings
These are phone-dependent features. Your phone settings allow you to
access and adjust features such as your ring tone, text message
notification, modify your phone book and also set up automatic download.
1. Press the phone button.
2. Scroll until Phone Settings appears, then press OK.
3. Scroll to select from the following options:
When you select: You can:
Phone StatusSee the provider, name, signal power, battery
power and roaming status of your connected
phone.
Press OK to select and scroll to view the
information. When done, press OK again to
return to the phone status menu.
Set RingerSelect which ring tone sounds during an
incoming call (one of the system’s or your
phone’s).
1. Press OK to select and scroll to hear Ringer
1, Ringer 2, Ringer 3 and Phone Ringer.
2. Press OK to select.
Note:If your phone supports in-band ringing,
your phone’s ringer sounds when Phone
Ringer is chosen.
Message NotificationHave the option of hearing an audible tone to
notify you when a text message arrives.
1. Press OK to select and scroll between
Message Notification On or Message
Notification Off.
2. Press OK to select.
SYNC�399
2013 Expedition(exd)
Owners Guide gf, 1st Printing
USA(fus)
Page 428 of 497
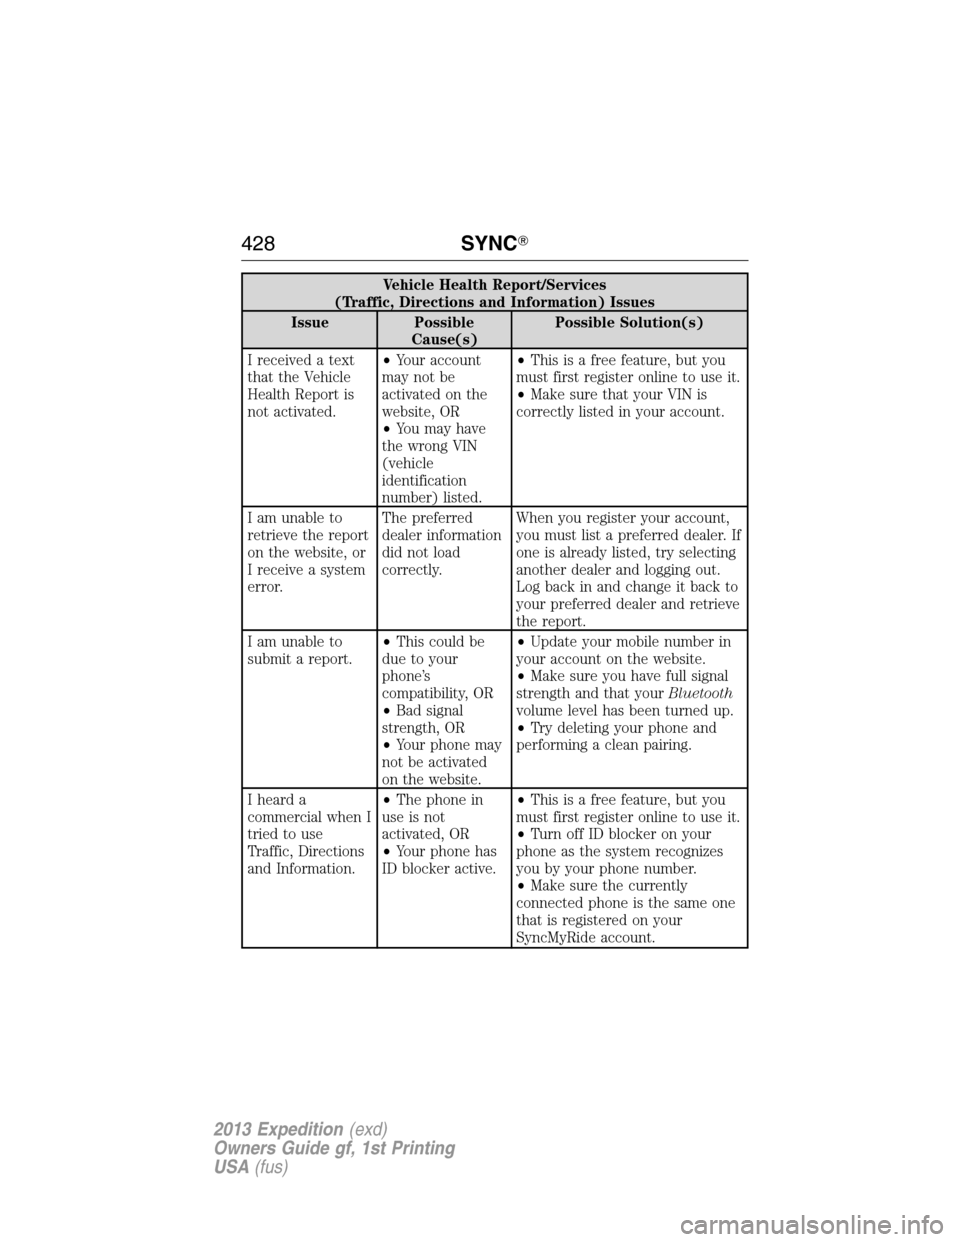
Vehicle Health Report/Services
(Traffic, Directions and Information) Issues
Issue Possible
Cause(s)Possible Solution(s)
I received a text
that the Vehicle
Health Report is
not activated.•Your account
may not be
activated on the
website, OR
•You may have
the wrong VIN
(vehicle
identification
number) listed.•This is a free feature, but you
must first register online to use it.
•Make sure that your VIN is
correctly listed in your account.
I am unable to
retrieve the report
on the website, or
I receive a system
error.The preferred
dealer information
did not load
correctly.When you register your account,
you must list a preferred dealer. If
one is already listed, try selecting
another dealer and logging out.
Log back in and change it back to
your preferred dealer and retrieve
the report.
I am unable to
submit a report.•This could be
due to your
phone’s
compatibility, OR
•Bad signal
strength, OR
•Your phone may
not be activated
on the website.•Update your mobile number in
your account on the website.
•Make sure you have full signal
strength and that yourBluetooth
volume level has been turned up.
•Try deleting your phone and
performing a clean pairing.
I heard a
commercial when I
tried to use
Traffic, Directions
and Information.•The phone in
use is not
activated, OR
•Your phone has
ID blocker active.•This is a free feature, but you
must first register online to use it.
•Turn off ID blocker on your
phone as the system recognizes
you by your phone number.
•Make sure the currently
connected phone is the same one
that is registered on your
SyncMyRide account.
428SYNC�
2013 Expedition(exd)
Owners Guide gf, 1st Printing
USA(fus)
Page 433 of 497
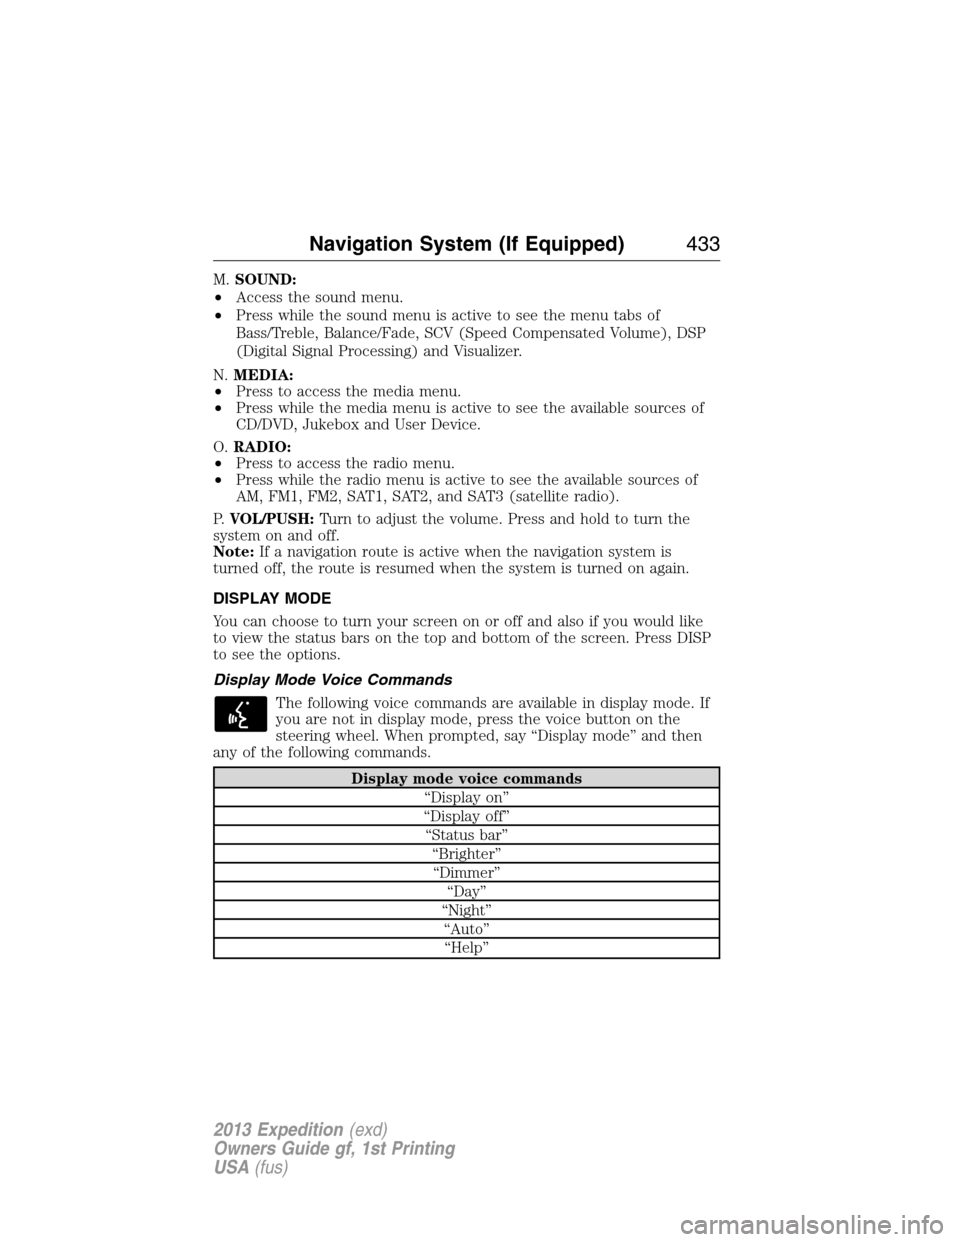
M.SOUND:
•Access the sound menu.
•Press while the sound menu is active to see the menu tabs of
Bass/Treble, Balance/Fade, SCV (Speed Compensated Volume), DSP
(Digital Signal Processing) and Visualizer.
N.MEDIA:
•Press to access the media menu.
•Press while the media menu is active to see the available sources of
CD/DVD, Jukebox and User Device.
O.RADIO:
•Press to access the radio menu.
•Press while the radio menu is active to see the available sources of
AM, FM1, FM2, SAT1, SAT2, and SAT3 (satellite radio).
P.VOL/PUSH:Turn to adjust the volume. Press and hold to turn the
system on and off.
Note:If a navigation route is active when the navigation system is
turned off, the route is resumed when the system is turned on again.
DISPLAY MODE
You can choose to turn your screen on or off and also if you would like
to view the status bars on the top and bottom of the screen. Press DISP
to see the options.
Display Mode Voice Commands
The following voice commands are available in display mode. If
you are not in display mode, press the voice button on the
steering wheel. When prompted, say “Display mode” and then
any of the following commands.
Display mode voice commands
“Display on”
“Display off”
“Status bar”
“Brighter”
“Dimmer”
“Day”
“Night”
“Auto”
“Help”
Navigation System (If Equipped)433
2013 Expedition(exd)
Owners Guide gf, 1st Printing
USA(fus)