2013 DODGE VIPER park assist
[x] Cancel search: park assistPage 3 of 100

INTRODUCTION/WELCOME
WELCOME FROM CHRYSLER
GROUP LLC..................2
CONTROLS AT A GLANCE
DRIVER COCKPIT ...............4
INSTRUMENT CLUSTER ...........6
GETTING STARTED
KEYFOB ....................8
ENGINE STARTING/STOPPING .......9
THEFT ALARM .................9
SEATBELT ...................10
SUPPLEMENTAL RESTRAINT
SYSTEM (SRS) — AIR BAGS ........10
CHILD RESTRAINTS .............11
FRONT SEATS ................14
ADJUSTABLE PEDALS ...........16
ADJUSTABLE FOOT REST ..........16
TILT / TELESCOPING STEERING
COLUMN ...................17
OPERATING YOUR VEHICLE
ENGINE BREAK-IN RECOMMENDATIONS —
SRT 10 VERSIONS .............18
TURN SIGNALS/WIPER/WASHER/HIGH
BEAMS LEVER ................19
HEADLIGHT SWITCH ............20
SPEED CONTROL ...............20
MANUAL TRANSMISSION 1 TO 4 SKIP
SHIFT .....................21
AUTOMATIC TEMPERATURE
CONTROL (ATC) ...............22
PARKVIEW
®REAR BACK-UP CAMERA . . 23
ELECTRONICS
YOUR VEHICLE'S SOUND SYSTEM ....24
IDENTIFYING YOUR RADIO .........26
Uconnect™ Access (Available on Uconnect™
8.4A and Uconnect™ 8.4AN) ........27
Uconnect™ 8.4A ...............30
Uconnect™ 8.4AN ..............43
STEERING WHEEL AUDIO CONTROLS . . 58
ELECTRONIC VEHICLE INFORMATION
CENTER (EVIC) ................58
PROGRAMMABLE FEATURES .......59
UNIVERSAL GARAGE DOOR OPENER
(HomeLink
®) .................61
POWER OUTLETS ..............63
UTILITY
TRAILER TOWING WEIGHTS
(MAXIMUM TRAILER WEIGHT
RATINGS)...................64
RECREATIONAL TOWING
(BEHIND MOTORHOME, ETC.) ......64
SRT
LAUNCH MODE................65
ELECTRONIC CONTROL DAMPING
SYSTEM ....................66
PERFORMANCE FEATURES ........67
SUMMER/THREE-SEASON TIRES .....67
WHAT TO DO IN EMERGENCIES
INSTRUMENT CLUSTER WARNING
LIGHTS....................68
IF YOUR ENGINE OVERHEATS .......71
TIREFIT KIT .................72
JUMP-STARTING ...............78
TOWING A DISABLED VEHICLE ......80
FREEING A STUCK VEHICLE ........80
EVENT DATA RECORDER (EDR) ......81
MAINTAINING YOUR VEHICLE
ENGINE COMPARTMENT..........82
FLUIDS AND CAPACITIES ..........83
MAINTENANCE CHART ...........84
SRT – MAINTENANCE RECORD ......85
FUSES .....................86
TIRE PRESSURES ..............89
WHEEL AND WHEEL TRIM CARE .....90
EXTERIOR BULBS ..............90
CONSUMER ASSISTANCE
CHRYSLER GROUP LLC
CUSTOMER CENTER ............91
CHRYSLER CANADA INC.
CUSTOMER CENTER ............91
ASSISTANCE FOR THE HEARING
IMPAIRED ...................91
PUBLICATIONS ORDERING ........91
REPORTING SAFETY DEFECTS IN
THE 50 UNITED STATES AND
WASHINGTON, D.C. .............92
MOPAR ACCESSORIES
AUTHENTIC ACCESSORIES
BY MOPAR®.................93
INDEX....................94
FAQ (How To?)
FREQUENTLY ASKED QUESTIONS ....96
TABLE OF CONTENTS
Page 30 of 100

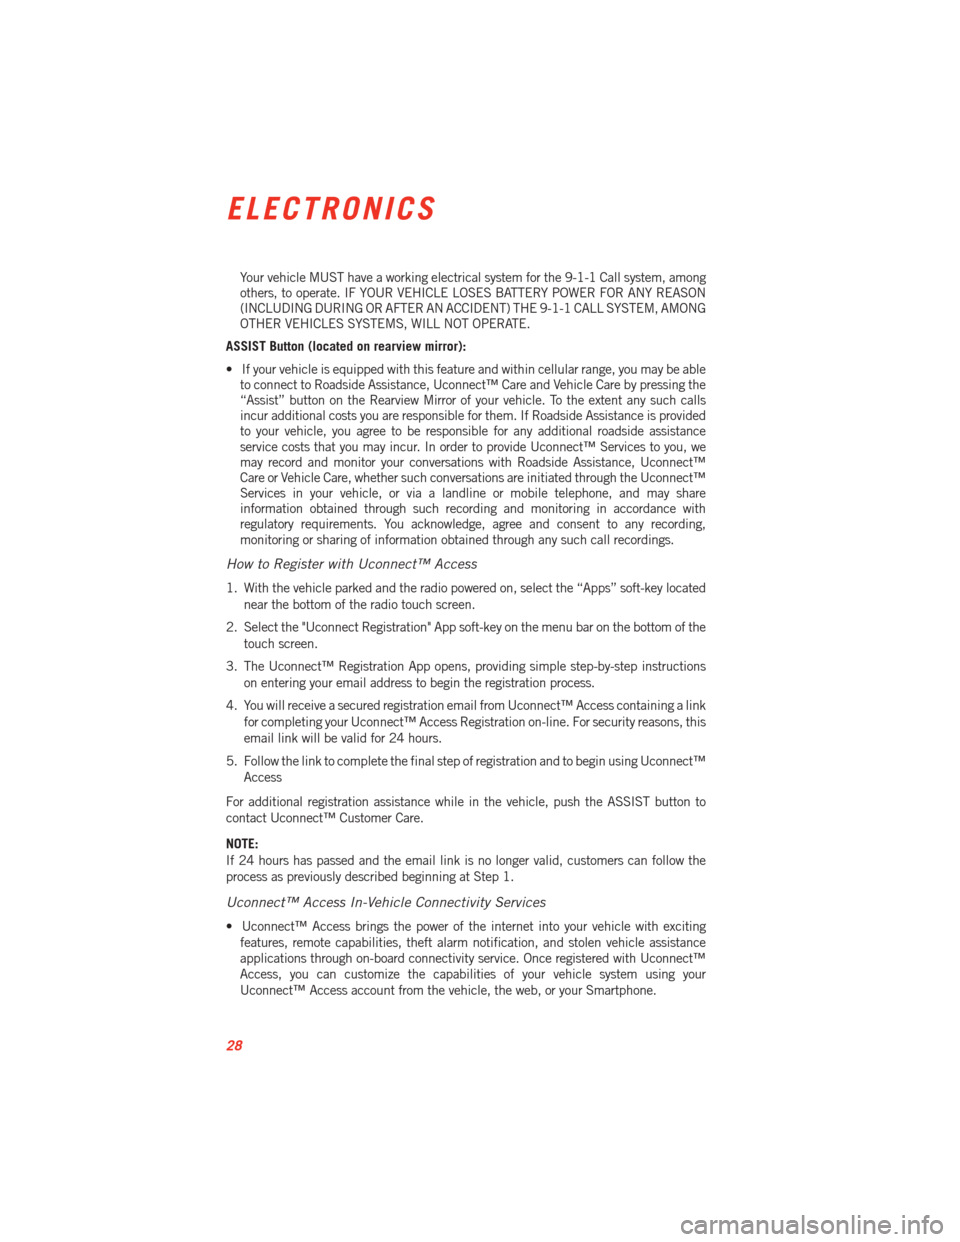
Your vehicle MUST have a working electrical system for the 9-1-1 Call system, among
others, to operate. IF YOUR VEHICLE LOSES BATTERY POWER FOR ANY REASON
(INCLUDING DURING OR AFTER AN ACCIDENT) THE 9-1-1 CALL SYSTEM, AMONG
OTHER VEHICLES SYSTEMS, WILL NOT OPERATE.
ASSIST Button (located on rearview mirror):
• If your vehicle is equipped with this feature and within cellular range, you may be able to connect to Roadside Assistance, Uconnect™ Care and Vehicle Care by pressing the
“Assist” button on the Rearview Mirror of your vehicle. To the extent any such calls
incur additional costs you are responsible for them. If Roadside Assistance is provided
to your vehicle, you agree to be responsible for any additional roadside assistance
service costs that you may incur. In order to provide Uconnect™ Services to you, we
may record and monitor your conversations with Roadside Assistance, Uconnect™
Care or Vehicle Care, whether such conversations are initiated through the Uconnect™
Services in your vehicle, or via a landline or mobile telephone, and may share
information obtained through such recording and monitoring in accordance with
regulatory requirements. You acknowledge, agree and consent to any recording,
monitoring or sharing of information obtained through any such call recordings.
How to Register with Uconnect™ Access
1. With the vehicle parked and the radio powered on, select the “Apps” soft-key located
near the bottom of the radio touch screen.
2. Select the "Uconnect Registration" App soft-key on the menu bar on the bottom of the touch screen.
3. The Uconnect™ Registration App opens, providing simple step-by-step instructions on entering your email address to begin the registration process.
4. You will receive a secured registration email from Uconnect™ Access containing a link for completing your Uconnect™ Access Registration on-line. For security reasons, this
email link will be valid for 24 hours.
5. Follow the link to complete the final step of registration and to begin using Uconnect™ Access
For additional registration assistance while in the vehicle, push the ASSIST button to
contact Uconnect™ Customer Care.
NOTE:
If 24 hours has passed and the email link is no longer valid, customers can follow the
process as previously described beginning at Step 1.
Uconnect™ Access In-Vehicle Connectivity Services
• Uconnect™ Access brings the power of the internet into your vehicle with exciting features, remote capabilities, theft alarm notification, and stolen vehicle assistance
applications through on-board connectivity service. Once registered with Uconnect™
Access, you can customize the capabilities of your vehicle system using your
Uconnect™ Access account from the vehicle, the web, or your Smartphone.
ELECTRONICS
28
Page 61 of 100

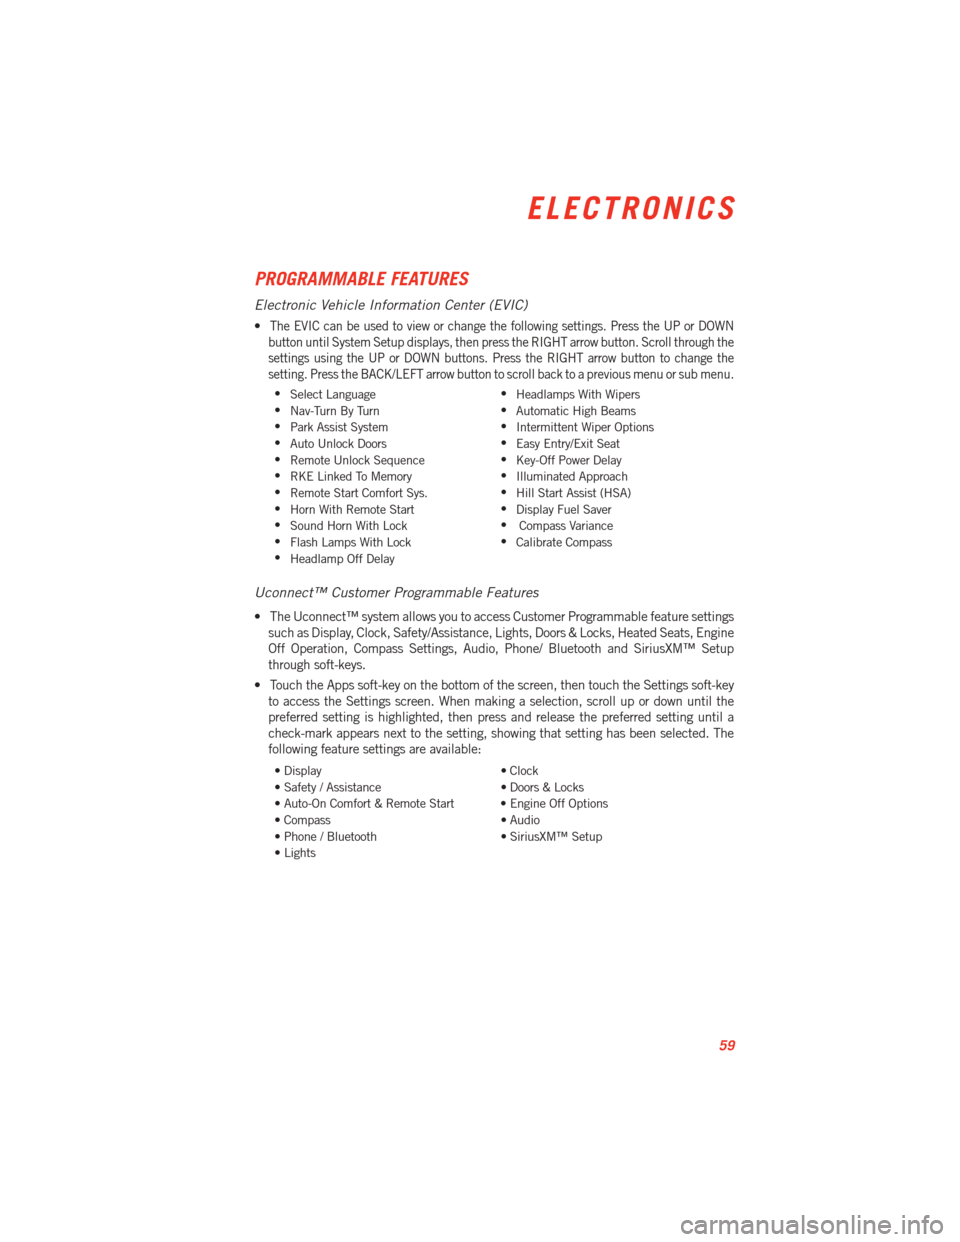
PROGRAMMABLE FEATURES
Electronic Vehicle Information Center (EVIC)
•The EVIC can be used to view or change the following settings. Press the UP or DOWN
button until System Setup displays, then press the RIGHT arrow button. Scroll through the
settings using the UP or DOWN buttons. Press the RIGHT arrow button to change the
setting. Press the BACK/LEFT arrow button to scroll back to a previous menu or sub menu.
• Select Language •
Headlamps With Wipers
• Nav-Turn By Turn •
Automatic High Beams
• Park Assist System •
Intermittent Wiper Options
• Auto Unlock Doors •
Easy Entry/Exit Seat
• Remote Unlock Sequence •
Key-Off Power Delay
• RKE Linked To Memory •
Illuminated Approach
• Remote Start Comfort Sys. •
Hill Start Assist (HSA)
• Horn With Remote Start •
Display Fuel Saver
• Sound Horn With Lock •
Compass Variance
• Flash Lamps With Lock •
Calibrate Compass
• Headlamp Off Delay
Uconnect™ Customer Programmable Features
• The Uconnect™ system allows you to access Customer Programmable feature settings
such as Display, Clock, Safety/Assistance, Lights, Doors & Locks, Heated Seats, Engine
Off Operation, Compass Settings, Audio, Phone/ Bluetooth and SiriusXM™ Setup
through soft-keys.
• Touch the Apps soft-key on the bottom of the screen, then touch the Settings soft-key to access the Settings screen. When making a selection, scroll up or down until the
preferred setting is highlighted, then press and release the preferred setting until a
check-mark appears next to the setting, showing that setting has been selected. The
following feature settings are available:
• Display • Clock
• Safety / Assistance • Doors & Locks
• Auto-On Comfort & Remote Start • Engine Off Options
• Compass • Audio
• Phone / Bluetooth • SiriusXM™ Setup
• Lights
ELECTRONICS
59
Page 63 of 100

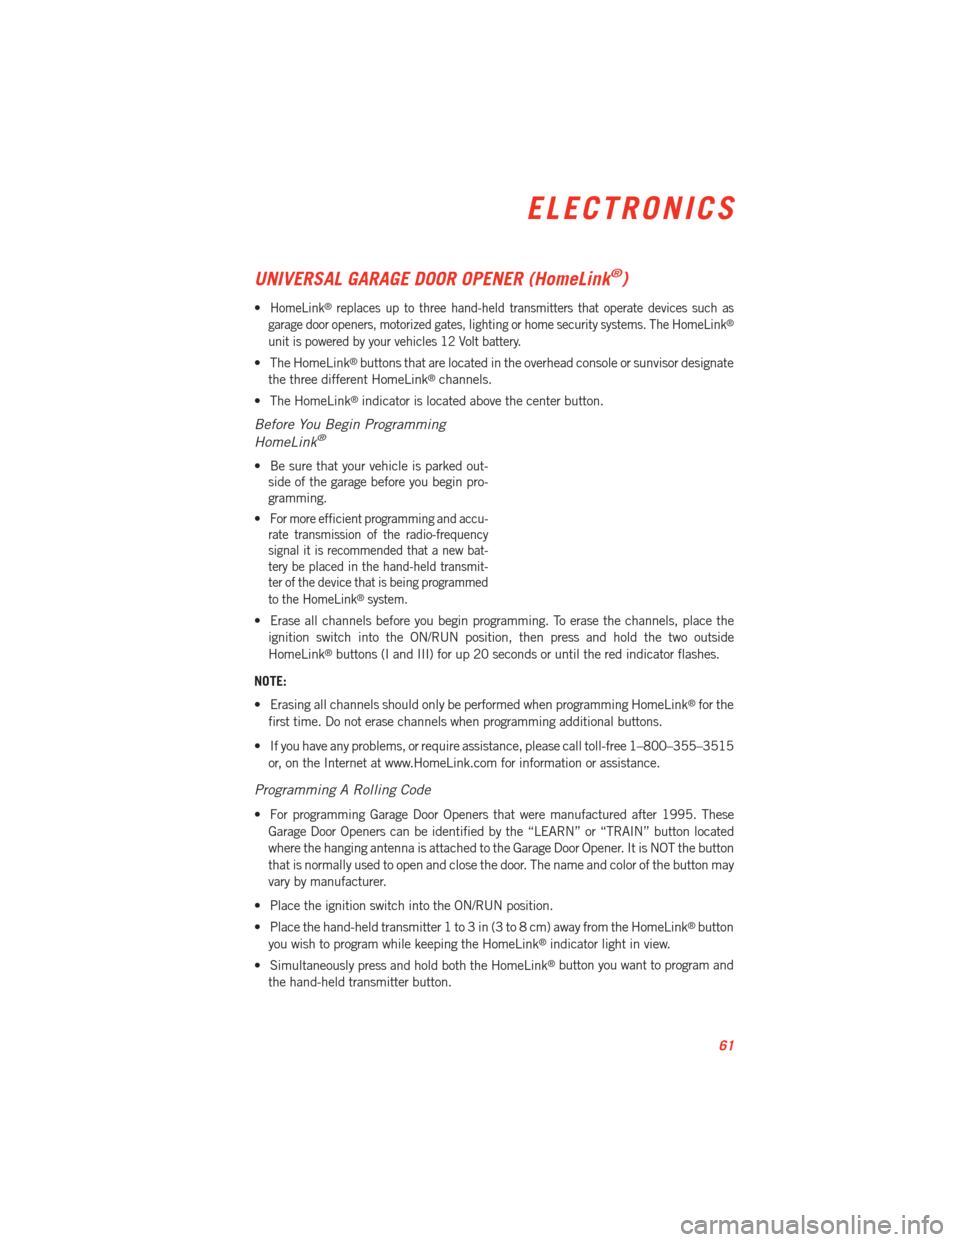
UNIVERSAL GARAGE DOOR OPENER (HomeLink®)
•HomeLink®replaces up to three hand-held transmitters that operate devices such as
garage door openers, motorized gates, lighting or home security systems. The HomeLink®
unit is powered by your vehicles 12 Volt battery.
• The HomeLink®buttons that are located in the overhead console or sunvisor designate
the three different HomeLink®channels.
• The HomeLink
®indicator is located above the center button.
Before You Begin Programming
HomeLink®
• Be sure that your vehicle is parked out- side of the garage before you begin pro-
gramming.
•
For more efficient programming and accu-
rate transmission of the radio-frequency
signal it is recommended that a new bat-
tery be placed in the hand-held transmit-
ter of the device that is being programmed
to the HomeLink
®system.
• Erase all channels before you begin programming. To erase the channels, place the
ignition switch into the ON/RUN position, then press and hold the two outside
HomeLink
®buttons (I and III) for up 20 seconds or until the red indicator flashes.
NOTE:
• Erasing all channels should only be performed when programming HomeLink
®for the
first time. Do not erase channels when programming additional buttons.
• If you have any problems, or require assistance, please call toll-free 1–800–355–3515 or, on the Internet at www.HomeLink.com for information or assistance.
Programming A Rolling Code
• For programming Garage Door Openers that were manufactured after 1995. TheseGarage Door Openers can be identified by the “LEARN” or “TRAIN” button located
where the hanging antenna is attached to the Garage Door Opener. It is NOT the button
that is normally used to open and close the door. The name and color of the button may
vary by manufacturer.
• Place the ignition switch into the ON/RUN position.
• Place the hand-held transmitter 1 to 3 in (3 to 8 cm) away from the HomeLink
®button
you wish to program while keeping the HomeLink®indicator light in view.
• Simultaneously press and hold both the HomeLink
®button you want to program and
the hand-held transmitter button.
ELECTRONICS
61
Page 76 of 100

3. Place the TIREFIT kit flat on the ground next to the deflated tire.
4. Remove the cap from the valve stem and then screw the fitting at the end of theSealant Hose (6) onto the valve stem.
5. Uncoil the Power Plug (8) and insert the plug into the vehicle’s 12 Volt power outlet.
6. Do not remove foreign objects (e.g., screws or nails) from the tire.
(C) Injecting TIREFIT Sealant Into The Deflated Tire:
• Always start the engine before turning ON the TIREFIT kit.
NOTE:
Manual transmission vehicles must have the parking brake engaged and the shift lever in
NEUTRAL.
• After pressing the Power Button (4), the sealant (white fluid) will flow from the Sealant Bottle (1) through the Sealant Hose (6) and into the tire.
NOTE:
Sealant may leak out through the puncture in the tire.
• If the sealant (white fluid) does not flow within 0 – 10 seconds through the Sealant
Hose (6):
1. Press the Power Button (4) to turn Off the TIREFIT kit. Disconnect the Sealant Hose (6) from the valve stem. Make sure the valve stem is free of debris. Reconnect the
Sealant Hose (6) to the valve stem. Check that the Mode Select Knob (5) is in the
Sealant Mode position and not Air Mode. Press the Power Button (4) to turn On the
TIREFIT kit.
2. Connect the Power Plug (8) to a different 12 Volt power outlet in your vehicle or another vehicle, if available. Make sure the engine is running before turning ON the
TIREFIT kit.
3. The Sealant Bottle (1) may be empty due to previous use. Call for assistance.
NOTE:
If the Mode Select Knob (5) is on Air Mode and the pump is operating, air will dispense
from the Air Pump Hose (7) only, not the Sealant Hose (6).
• If the sealant (white fluid) does flow through the Sealant Hose (6):
1. Continue to operate the pump until sealant is no longer flowing through hose (typically takes 30 - 70 seconds). As the sealant flows through the Sealant Hose (6), the
Pressure Gauge (3) can read as high as 70 psi (5 kPa). The Pressure Gauge (3) will
decrease quickly from approximately 70 psi (5 kPa) to the actual tire pressure when
the Sealant Bottle (1) is empty.
2. The pump will start to inject air into the tire immediately after the Sealant Bottle (1) is empty. Continue to operate the pump and inflate the tire to the pressure indicated
on the tire pressure label on the driver-side latch pillar (recommended pressure).
Check the tire pressure by looking at the Pressure Gauge (3).
WHAT TO DO IN EMERGENCIES
74
Page 95 of 100

AUTHENTIC ACCESSORIES BY MOPAR®
• The following highlights just some of the many Authentic Viper Accessories by Moparfeaturing a fit, finish, and functionality specifically for your Viper.
• In choosing Authentic Accessories you gain far more than expressive style, premium protection, or extreme entertainment, you also benefit from enhancing your vehicle
with accessories that have been thoroughly tested and factory-approved.
• For the full line of Authentic Viper Accessories by Mopar, visit your local dealership or online at mopar.com.
EXTERIOR:
• Rear Go-Wing Spoiler • Body Decal Kit • Hood
• Molded Splash Guards • Full Vehicle Cover • Fuel Filler Doors
• Custom Wheels • Graphics Packages • Quad Exhaust Tips
• Hood Venting System
INTERIOR:
• Premium Carpet Floor Mats • Katzkin Leather Seats • Bright Pedal Kit
• Door Sill Guards • Pedal Kit • Shifters
• Slush Mats
ELECTRONICS:
• Portable NavigationSystems • Uconnect™ Web (WiFi) • Uconnect™ Phone
• iPod
®Adapter • Media Center Upgrades • Remote Start
• Kicker®Double SubWoofer • Electronic Vehicle Tracking
System • Ecometer
• Rear Park Assist
• iPod®is a registered trademark of Apple, Inc.
• Kicker
®is a registered trademark of Stillwater Designs and Audio, Inc.
MOPAR ACCESSORIES
93