Page 9 of 132
Indicators
- Turn Signal Indicators
- High Beam Indicator
- Front Fog Light Indicator
- Vehicle Security Indicator*
- Electronic Stability Control(ESC) Off Indicator*
- Electronic Speed Control ONIndicator
- Electronic Speed Control SetIndicator
Odometer Messages door - Door Ajar noFUSE* - Fuse Fault
gATE* - Liftgate Ajar CHAngE OIL* - Change Engine Oil
gASCAP - Fuel Cap Fault LoCOOL - Low Coolant
LoW tirE* - Low Tire Pressure
* If equipped
** Bulb Check with Key On
CONTROLS AT A GLANCE
7
Page 10 of 132

KEY FOB
Locking And Unlocking The
Doors/Liftgate
• Press the LOCK button once to lock all thedoors and the liftgate. Press the UNLOCK
button once to unlock the driver’s door
only and twice within five seconds to un-
lock all the doors and liftgate.
• All doors can be programmed to unlock on the first press of the UNLOCK button.
Refer to Programmable Features in the
Electronics section of this guide.
Panic Alarm
• Press the PANIC button once to turn the panic alarm on.
• Wait approximately three seconds and press the button a second time to turn the panic alarm off.
Power Liftgate
• ress the LIFTGATE button twice within five seconds to power open/close the Power Liftgate. If the button is pressed twice again while the liftgate is being power closed, the
liftgate will reverse to the full open position.
Power Sliding Doors
• Press the LEFT or RIGHT Power Sliding Door button twice within five seconds to power open/close the Power Sliding Door. If the button is pressed twice again while the door is
being power closed, the door will reverse to the full open position.
Emergency Key
• Should the battery in the vehicle or the Key Fob transmitter go dead, there is an emergency key located in the Key Fob that can be used for locking and unlocking the
doors. To remove the emergency key, slide the button at the top of the Key Fob sideways
with your thumb and then pull the key out with your other hand.
GETTING STARTED
8
Page 11 of 132

WARNING!
• Never leave children alone in a vehicle, or with access to an unlocked vehicle.Allowing children to be in a vehicle unattended is dangerous for a number of reasons.
A child or others could be severely injured or killed. Children should be warned not to
touch the parking brake, brake pedal, or the shift lever. Do not leave the Key Fob inside
the vehicle, or in a location accessible to children. A child could start the vehicle,
operate power windows, other controls, or move the vehicle.
• Do not leave children or animals inside parked vehicles in hot weather. Interior heat
build-up may cause them to be severely injured or killed.
• Keep Key Fob transmitters away from children. Operation of the Remote Start
System, windows, door locks or other controls could cause serious injury or death.
REMOTE START
• Press the REMOTE START buttonx2on the Key Fob twice within five seconds. Pressing
the REMOTE START button a third time shuts the engine off.
• To drive the vehicle, press the UNLOCK button, insert the Key Fob in the ignition and turn to the ON/RUN position.
• With remote start, the engine will only run for 15 minutes (timeout) unless the ignition Key Fob is placed in the ON/RUN position.
• The vehicle must be started with the Key Fob after two consecutive timeouts.
WARNING!
• Do not start or run an engine in a closed garage or confined area. Exhaust gas contains Carbon Monoxide (CO) which is odorless and colorless. Carbon Monoxide is
poisonous and can cause you or others to be severely injured or killed when inhaled.
• Keep Key Fob transmitters away from children. Operation of the Remote Start
System, windows, door locks or other controls could cause you and others to be
severely injured or killed.
THEFT ALARM
To Arm:
• Press the Key Fob LOCK button or the power door lock switch while the door is open.
To Disarm:
• Press the Key Fob UNLOCK button or turn the ignition to the ON/RUN position.
GETTING STARTED
9
Page 12 of 132

SEAT BELT
• Be sure everyone in your vehicle is in a seat and using a seat belt properly.
• Position the lap belt across your thighs, below your abdomen. To remove slack in the lapportion, pull up a bit on the shoulder belt. To loosen the lap belt if it is too tight, tilt the
latch plate and pull on the lap belt. A snug belt reduces the risk of sliding under the belt
in a collision.
• Position the shoulder belt on your chest so that it is comfortable and not resting on your neck. The retractor will withdraw any slack in the belt.
• A shoulder belt placed behind you will not protect you from injury during a collision. You are more likely to hit your head in a collision if you do not wear your shoulder belt. The lap
and shoulder belt are meant to be used together.
• A belt that is too loose will not protect you properly. In a sudden stop you could move too far forward, increasing the possibility of injury. Wear your seat belt snugly.
• A frayed or torn belt could rip apart in a collision and leave you with no protection. Inspect the belt system periodically, checking for cuts, frays, or loose parts. Damaged parts must
be replaced immediately. Do not disassemble or modify the system. Seat belt assem-
blies must be replaced after a collision if they have been damaged (bent retractor, torn
webbing, etc.).
• The seat belts for both front seating positions are equipped with pretensioning devices that are designed to remove slack from the seat belt in the event of a collision.
• A deployed pretensioner or a deployed air bag must be replaced immediately.
WARNING!
In a collision, you and your passengers can suffer much greater injuries if you are not
buckled up properly. You can strike the interior of your vehicle or other passengers, or you
can be thrown out of the vehicle. Always be sure you and others in your vehicle are
buckled up properly.
SUPPLEMENTAL RESTRAINT SYSTEM (SRS) — AIR BAGS
• This vehicle has Advanced Front Air Bags for both the driver and right front passenger as a supplement to the seat belt restraint system. The Advanced Front Air Bags will not
deploy in every type of collision.
• Advanced Front Air Bags are designed to provide additional protection by supplementing the seat belts in certain frontal collisions depending on several factors, including the
severity and type of collision. Advanced Front Air Bags are not expected to reduce the
risk of injury in rear, side, or rollover collisions.
• This vehicle is equipped with Supplemental Side Air Bag Inflatable Curtains to protect the driver, front and rear passengers sitting next to a window.
GETTING STARTED
10
Page 13 of 132

• This vehicle is equipped with Supplemental Seat-Mounted Side Air Bags to provideenhanced protection to help protect an occupant during a side impact.
• This vehicle is equipped with a Supplemental Driver Side Knee Air Bag to provide enhanced protection and work together with the Driver Advanced Front Air Bag during a
frontal impact.
• If the Air Bag Warning Light
is not on during starting, stays on, or turns on while
driving, have the vehicle serviced by an authorized service center immediately.
• Refer to the Owner's Manual on the DVD for further details regarding the Supplemental Restraint System (SRS).
WARNING!
• Relying on the air bags alone could lead to more severe injuries in a collision. The air
bags work with your seat belt to restrain you properly. In some collisions, the air bags
won't deploy at all. Always wear your seat belts even though you have air bags.
• Being too close to the steering wheel or instrument panel during Advanced Front Air
Bag deployment could cause serious injury, including death. Air bags need room to
inflate. Sit back, comfortably extending your arms to reach the steering wheel or
instrument panel.
• Supplemental Side Air Bag Inflatable Curtains and Supplemental Seat-Mounted Side
Air Bags need room to inflate. Do not lean against the door or window. Sit upright in
the center of the seat.
• Being too close to the Supplemental Side Air Bag Inflatable Curtain and/or Seat-
Mounted Side Air Bag during deployment could cause you to be severely injured or
killed.
• Do not drive your vehicle after the air bags have deployed. If you are involved in
another collision, the air bags will not be in place to protect you.
• After any collision, the vehicle should be taken to an authorized dealer immediately.
CHILD RESTRAINTS
• Children 12 years and under should ride properly buckled up in a rear seat, if available. According to crash statistics, children are safer when properly restrained in the rear
seats rather than in the front.
• Every state in the United States and all Canadian provinces require that small children ride in proper restraint systems. This is the law, and you can be prosecuted for ignoring it.
NOTE:
• For additional information, refer to www.seatcheck.org or call 1–866–SEAT-CHECK (1–866–732–8243).
• Canadian residents, should refer to Transport Canada’s website for additional informa- tion http://www.tc.gc.ca/eng/roadsafety/safedrivers-childsafety-index-53.htm.
GETTING STARTED
11
Page 14 of 132

Installing The LATCH - Compatible Child Restraint System
•
Each vehicle, except commercial cargo vehicles, is equipped with the child restraint anchor-
age system called LATCH, which stands for Lower Anchors and Tether for CHildren.
• Two LATCH child restraint anchorage systems are installed on all second-row seats and in the center position on all third row fold-in-floor seats.
• Second-row seats also feature tether strap anchorages, located in the rear surface of the seatback.
• In addition, all third row fold-in-floor seats are equipped with a child restraint tether anchor at the center seating position.
Installing The Lower Attachments:
• The vehicle lower anchorages are round bars located at the rear of the seat cushion where it meets the seatback.
• Loosen the child seat adjusters on the lower child restraint attachment straps to
ease the installation.
NOTE:
It is recommended to loosen the top tether
strap and route it loosely prior to securing
the lower anchors so the top tether strap is
not trapped between the vehicle seat and
child restraint.
• Attach the lower child restraint attach- ment straps to the vehicle’s lower anchor
bars. Ensure that the lower attachment strap is firmly engaged and that the hook is
secure.
• Tighten the lower attachment strap while firmly pushing the child restraint rearward and downward into the vehicle seat. Remove all slack in the lower attachment straps.
Installing The Top Tether Strap (With Either Lower Anchors Or Vehicle Seat Belt):
• Route the top tether strap under the adjustable head restraint between the steel posts.
• Provide enough slack for the tether strap to reach the tether anchor located near
the bottom of the seat back.
• Clip tether hook to tether anchor. Ensure that the hook is firmly engaged and se-
cure.
• Remove all slack and tighten tether strap according to child restraint manufactur-
er’s instructions.
NOTE:
The top tether strap is always to be secured,
regardless of if the child restraint is installed with the lower anchors or the vehicle seat belt.
GETTING STARTED
12
Page 15 of 132

Installing The Child Restraint Using The Vehicle Seat Belts
• To install a child restraint, first, pull enough of the seat belt webbing from the retractor toroute it through the belt path of the child restraint and slide the latch plate into the
buckle.
• Next, extract all the seat belt webbing out of the retractor and then allow the belt to retract into the retractor. Finally, pull on any excess webbing to tighten the lap portion
around the child restraint. Any seat belt system will loosen with time, so check the belt
occasionally, and pull it tight if necessary.
• Once you have completed securing the child restraint with the seat belt, secure the top tether strap.
WARNING!
• In a collision, an unrestrained child, even a tiny baby, can become a projectile inside
the vehicle. The force required to hold even an infant on your lap could become so
great that you could not hold the child, no matter how strong you are. The child and
others could be severely injured or killed. Any child riding in your vehicle should be in
a proper restraint for the child's size.
• Failure to comply with the following conditions could result in you and others being
severely injured or killed:
• Be certain that the seat cushion is locked securely into position before usingthe seat. An improperly latched seat cushion could cause passengers to be
severely injured or killed.
• An incorrectly anchored tether strap could lead to increased head motion and
possible injury to the child. Use only the anchor positions directly behind the child
seat to secure a child restraint top tether strap.
• Rearward-facing child seats must never be used in the front seat of a vehicle with a
front passenger air bag. An air bag deployment could cause severe injury or death to
infants in this position.
GETTING STARTED
13
Page 16 of 132

FRONT SEATS
Power Seat
• The power seat switch controls forward/back, up/down, and tilt adjustment.
• The recline switch, located on the out- board side of the seat, controls seatback
adjustment.
Power Lumbar
• Push the switch forward to increase the lumbar support. Push the switch rearward
to decrease the lumbar support.
Manual Seat Adjustment
Forward/Rearward
• Lift up on the adjusting bar located at the front of the seat near the floor and release
it when the seat is at the desired position.
Then, using body pressure, move forward
and backward on the seat to be sure that
the seat adjusters have latched.
Recliner
• Lift the recliner lever located on the out- board side of the seat, lean back and re-
lease at the desired position.
Memory Seat
•
The memory seat feature allows you to
save two different driver seating positions,
driver's outside mirror, adjustable brake
and accelerator pedals, and radio station
preset settings. The memory seat buttons
are located on the driver's door panel.
• Adjust all memory profile settings, press
the SET button then press 1 or 2 within five
seconds.
• To program a Key Fob to the memory po- sition, press and release the LOCK button
within 10 seconds on the Key Fob to be
programmed.
GETTING STARTED
14
 1
1 2
2 3
3 4
4 5
5 6
6 7
7 8
8 9
9 10
10 11
11 12
12 13
13 14
14 15
15 16
16 17
17 18
18 19
19 20
20 21
21 22
22 23
23 24
24 25
25 26
26 27
27 28
28 29
29 30
30 31
31 32
32 33
33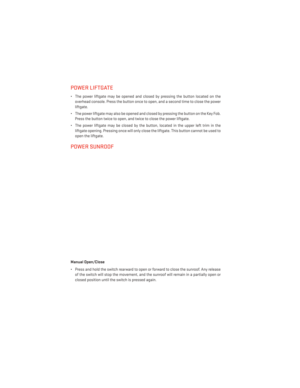 34
34 35
35 36
36 37
37 38
38 39
39 40
40 41
41 42
42 43
43 44
44 45
45 46
46 47
47 48
48 49
49 50
50 51
51 52
52 53
53 54
54 55
55 56
56 57
57 58
58 59
59 60
60 61
61 62
62 63
63 64
64 65
65 66
66 67
67 68
68 69
69 70
70 71
71 72
72 73
73 74
74 75
75 76
76 77
77 78
78 79
79 80
80 81
81 82
82 83
83 84
84 85
85 86
86 87
87 88
88 89
89 90
90 91
91 92
92 93
93 94
94 95
95 96
96 97
97 98
98 99
99 100
100 101
101 102
102 103
103 104
104 105
105 106
106 107
107 108
108 109
109 110
110 111
111 112
112 113
113 114
114 115
115 116
116 117
117 118
118 119
119 120
120 121
121 122
122 123
123 124
124 125
125 126
126 127
127 128
128 129
129 130
130 131
131 Off Indicator*
- Electronic Speed Control ONIndi")