Page 224 of 520
This system conveniently allows the driver to select a
variety of useful information by pressing the switches
mounted on the steering wheel. The EVIC consists of the
following:
•System Status
• Vehicle Information Warning Message Displays
• Tire Pressure Monitor System
• Personal Settings (Customer-Programmable Features)
• Compass Display
• Outside Temperature Display
• Trip Computer Functions
• Uconnect® phone Displays (If Equipped)
• Uconnect® gps Screens (If Equipped)
• Audio Mode Display •
Surround Sound Modes (if equipped with Driver-
Selectable Surround [DSS])
• Performance Features
The system allows the driver to select information by
pressing the following buttons mounted on the steering
wheel:
EVIC Steering Wheel Buttons
222 UNDERSTANDING YOUR INSTRUMENT PANEL
Page 225 of 520
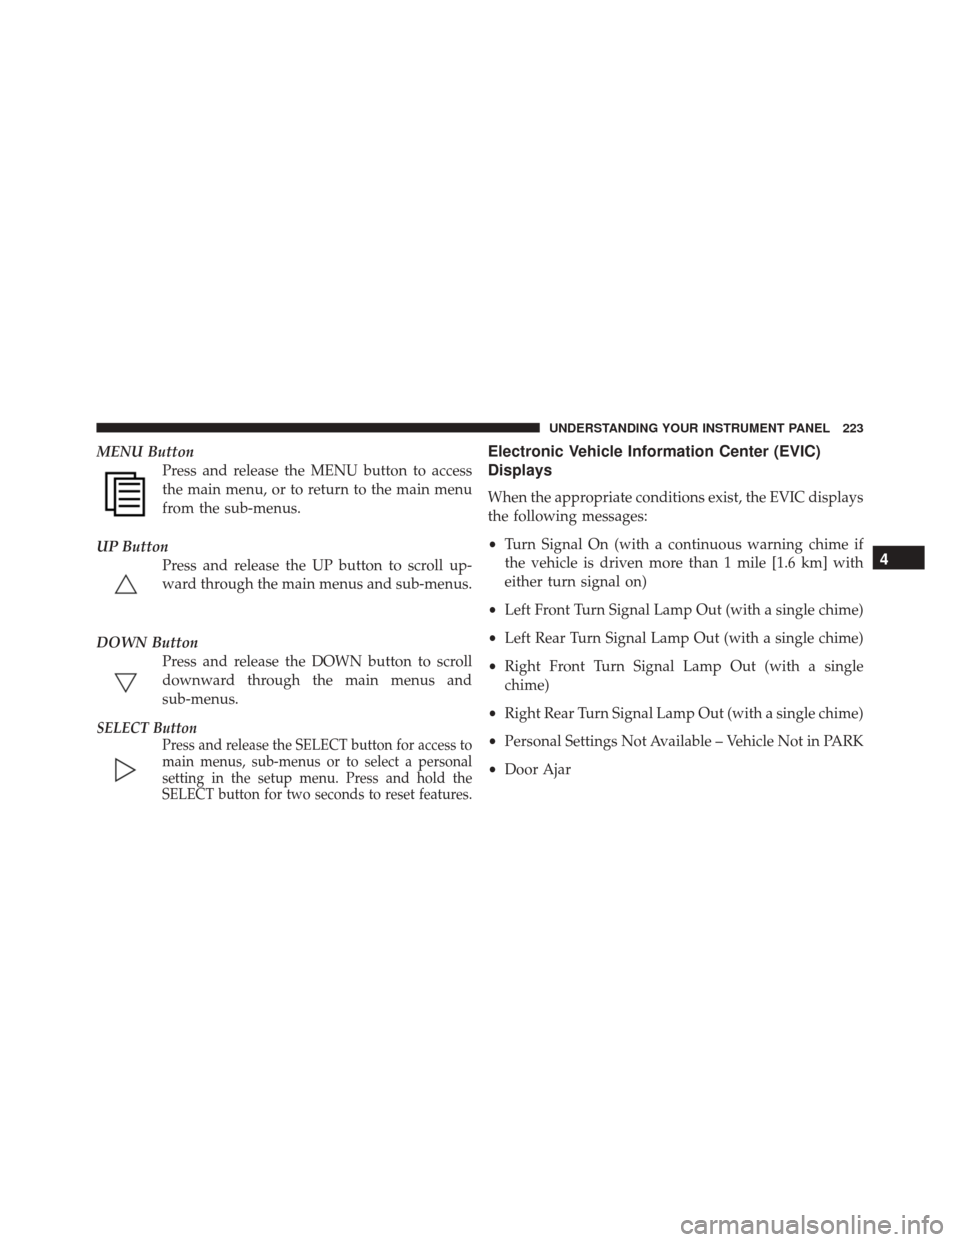
MENU ButtonPress and release the MENU button to access
the main menu, or to return to the main menu
from the sub-menus.
UP Button Press and release the UP button to scroll up-
ward through the main menus and sub-menus.
DOWN Button Press and release the DOWN button to scroll
downward through the main menus and
sub-menus.
SELECT Button Press and release the SELECT button for access to
main menus, sub-menus or to select a personal
setting in the setup menu. Press and hold the
SELECT button for two seconds to reset features.
Electronic Vehicle Information Center (EVIC)
Displays
When the appropriate conditions exist, the EVIC displays
the following messages:
•Turn Signal On (with a continuous warning chime if
the vehicle is driven more than 1 mile [1.6 km] with
either turn signal on)
• Left Front Turn Signal Lamp Out (with a single chime)
• Left Rear Turn Signal Lamp Out (with a single chime)
• Right Front Turn Signal Lamp Out (with a single
chime)
• Right Rear Turn Signal Lamp Out (with a single chime)
• Personal Settings Not Available – Vehicle Not in PARK
• Door Ajar
4
UNDERSTANDING YOUR INSTRUMENT PANEL 223
Page 230 of 520
Display Units of Measure in
To make your selection, press and release the SELECT
button until “ENGLISH” or “METRIC” appears.
To Reset The Display
Reset will only occur while a resettable function is being
displayed. Press and release the SELECT button once to
clear the resettable function being displayed. To reset all
resettable functions, press and release the SELECT button
a second time within three seconds of resetting the
currently-displayed function. (>Reset ALL will display
during this three-second window.)
Performance Features
WARNING!
Measurement of vehicle statistics with the Perfor-
mance Features is intended for off-highway or off-
road use only and should not be done on any public
roadways. It is recommended that these features be
used in a controlled environment and within the
limits of the law. The capabilities of the vehicle as
measured by the performance pages must never be
exploited in a reckless or dangerous manner, which
can jeopardize the user ’s safety or the safety of
others. Only a safe, attentive, and skillful driver can
prevent accidents.
228 UNDERSTANDING YOUR INSTRUMENT PANEL
Page 238 of 520
3. Press the UP or DOWN button until “COMPASSVARIANCE” message and the last variance zone
number displays in the EVIC.
4. Press and release the SELECT button until the proper variance zone is selected according to the map.
5. Press and release the MENU button to exit.
System Warnings (Customer Information
Features)
Press and release the MENU button until “System Warn-
ings” displays in the EVIC, then press and release the
SELECT button. Press the UP or DOWN button to
display any one of the following choices.
• Oil Temperature
Shows the actual oil temperature.
• Oil Pressure
Shows the actual oil pressure. •
Tire Pressure
Shows the actual tire pressure for each tire (EXCLUDING
THE SPARE TIRE).
Personal Settings (Customer-Programmable
Features)
Personal Settings allows the driver to set and recall
features when the transmission is in PARK.
Press and release the MENU button until Personal Set-
tings displays in the EVIC, then press the SELECT button.
Use the UP or DOWN button to display one of the
following choices.
Language
When in this display, you may select one of three
languages for all display nomenclature, including the trip
functions and the Uconnect® gps (if equipped). Press the
236 UNDERSTANDING YOUR INSTRUMENT PANEL
Page 275 of 520
WARNING!
Do not plug in or remove the iPod® or external USB
device while driving. Failure to follow this warning
could result in an accident.
Bluetooth Streaming Audio (BTSA)
Music can be streamed from your cellular phone to the
Uconnect® phone system.
Controlling BTSA Using Radio Buttons
To enter BTSA mode, press either “AUX” button on the
radio or press the VR button and say “Bluetooth Stream-
ing Audio”.
Play Mode
When switched to BTSA mode, some audio devices can
start playing music over the vehicle’s audio system, but
some devices require the music to be initiated on thedevice first, then it will get streamed to the Uconnect®
phone system. Seven devices can be paired to the
Uconnect® phone system, but just one can be selected
and played.
Selecting A Different Audio Device
1. Press the PHONE button to begin.
2. After the
�Ready�prompt and following the beep, say
�Setup�, then say �Select Audio Devices�.
3. Say the name of the audio device or ask the Uconnect® phone system to list the audio devices.
Next Track
Use the SEEK UP button, or press the VR button on the
radio and say “Next Track”, to jump to the next music
track on your cellular phone.
4
UNDERSTANDING YOUR INSTRUMENT PANEL 273
Page 292 of 520
▫Gasoline/Oxygenate Blends ..............376
▫ E-85 Usage In Non-Flex Fuel Vehicles .......376
▫ MMT In Gasoline .....................377
▫ Materials Added To Fuel ................377
▫ Fuel System Cautions ...................378
▫ Carbon Monoxide Warnings .............379
� ADDING FUEL ....................... .379
▫ Fuel Filler Cap (Gas Cap) ...............379
▫ Loose Fuel Filler Cap Message ............381
� VEHICLE LOADING ....................382 ▫
Vehicle Certification Label ...............382
▫ Gross Vehicle Weight Rating (GVWR) .......383
▫ Gross Axle Weight Rating (GAWR) .........383
▫ Overloading ........................ .384
▫ Loading ........................... .384
� TRAILER TOWING .....................384
� RECREATIONAL TOWING (BEHIND
MOTORHOME, ETC.) ...................385
▫ Towing This Vehicle Behind Another Vehicle . .385
290 STARTING AND OPERATING
Page 293 of 520
STARTING PROCEDURES
Before starting your vehicle, adjust your seat, adjust the
inside and outside mirrors, fasten your seat belt, and if
present, instruct all other occupants to buckle their seat
belts.
WARNING!
•When leaving the vehicle, always remove the key
fob from the ignition and lock your vehicle.
• Never leave children alone in a vehicle, or with
access to an unlocked vehicle. Allowing children to
be in a vehicle unattended is dangerous for a
number of reasons. A child or others could be
seriously or fatally injured. Children should be
warned not to touch the parking brake, brake pedal
or the shift lever.
(Continued)
WARNING! (Continued)
•Do not leave the key fob in or near the vehicle (or
in a location accessible to children), and do not
leave the ignition of a vehicle equipped with
Keyless Enter-N-Go™ in the ACC or ON/RUN
mode. A child could operate power windows, other
controls, or move the vehicle.
Manual Transmission – If Equipped
Apply the parking brake, place the shift lever in NEU-
TRAL and press the clutch pedal before starting vehicle.
This vehicle is equipped with a clutch interlocking igni-
tion system. It will not start unless the clutch pedal is
pressed to the floor.
5
STARTING AND OPERATING 291
Page 294 of 520
Normal Starting With Integrated Key – Manual
Transmission
Normal starting of either a cold or a warm engine does
not require pumping or pressing the accelerator pedal.
Press the clutch pedal fully to the floor, and turn the
ignition switch to the START position and release when
the engine starts. If the engine fails to start within 15
seconds, turn the ignition switch to the OFF position,
wait 10 to 15 seconds, then repeat the “Normal Starting”
procedure.
WARNING!
Do not attempt to push or tow your vehicle to get it
started. Unburned fuel could enter the catalytic con-
verter and once the engine has started, ignite and
damage the converter and vehicle. If the vehicle has
a discharged battery, booster cables may be used to
(Continued)
WARNING!(Continued)
obtain a start from another vehicle. This type of start
can be dangerous if done improperly, so follow the
procedure carefully. Refer to “Jump Starting” in
“What To Do In Emergencies” for further informa-
tion.
Automatic Transmission – If Equipped
The shift lever must be in the NEUTRAL or PARK
position before you can start the engine. Apply the brakes
before shifting into any driving gear.
CAUTION!
Damage to the transmission may occur if the follow-
ing precautions are not observed:
(Continued)
292 STARTING AND OPERATING