Page 233 of 260

9.71
05
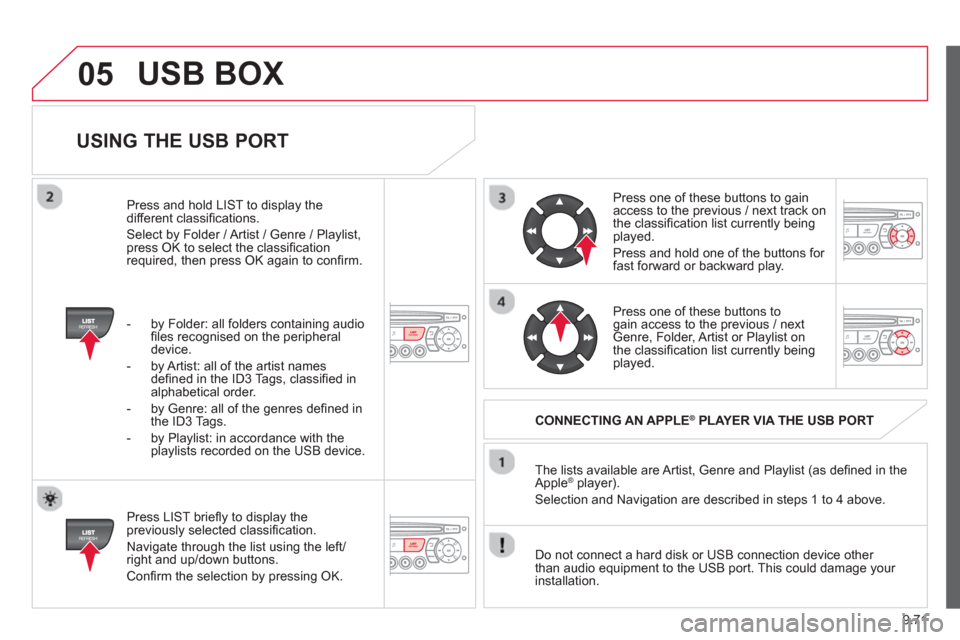
USING THE USB PORT
Press LIST briefl y to display thepreviously selected classifi cation.
Navi
gate through the list using the left/right and up/down buttons.
Confi rm the selection by pressing OK. The lists available are Artist, Genre and Pla
ylist (as defi ned in the
Apple ®player).
Selection and Navigation are described in steps 1 to 4 above.
Do not connect a hard disk or
USB connection device other
than audio equipment to the USB port. This could damage your
installation.
CONNECTING AN APPLE®PLAYER VIA THE USB PORT®
Press one of these buttons to gain
access to the previous / next track on
the classifi cation list currently beingplayed.
Pr
ess and hold one of the buttons for fast forward or backward play.
Pr
ess one of these buttons to gain access to the previous / next
Genre, Folder, Artist or Playlist on
the classifi cation list currently beingplayed.
Press and hold LI
ST to display the different classifi cations.
Select b
y Folder / Artist / Genre / Playlist,press OK to select the classifi cation required, then press OK again to confi rm.
- b
y Folder: all folders containing audio fi les recognised on the peripheraldevice.
- by Artist: all o
f the artist names
defi ned in the ID3 Tags, classifi ed in alphabetical order.
- b
y Genre: all of the genres defi ned in
the ID3 Tags.
- b
y Playlist: in accordance with the
playlists recorded on the USB device.
USB BOX
Page 234 of 260
9.72
05
The display and control is via the portable device. First ad
just the volume of your portable device.
Then ad
just the volume of your audio system.
USING THE AUXILIARY INPUT (AUX)
ADJUSTING THE VOLUME OF
THE AUXILIARY SOURCE
JACK socket or USB port (according to vehicle)
USB BOX
Do not connect a device to both the JACK socket and the USB port at the same time.
Connect the portable device (MP3 player…) to the JACK socket or to
the USB port, using a suitable cable(not supplied).
Press the
SOURCE button several
times in succession and select AUX.
The auxiliar
y input, JACK or USB, allows the connection of a portable device (MP3 player...).
Page 235 of 260

9.73
06BLUETOOTH FUNCTIONS
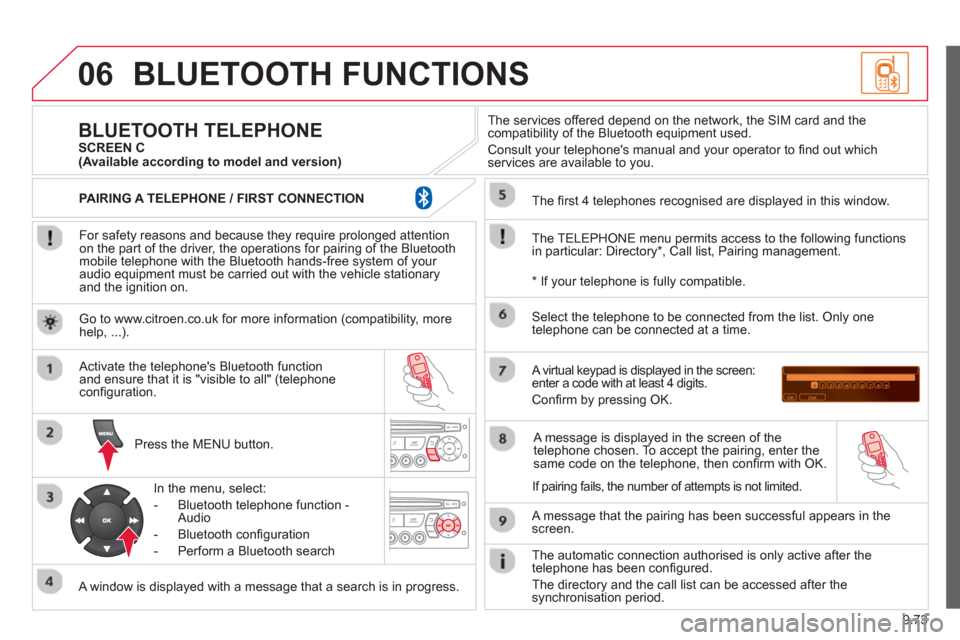
For safety reasons and because they require prolonged attentionon the part of the driver, the operations for pairing of the Bluetooth mobile telephone with the Bluetooth hands-free system of your
audio equipment must be carried out with the vehicle stationary
and the ignition on.
Pr
ess the MENU button.
A window is displayed with a message that a search is in progress.
Activate the telephone's Bluetooth
function
and ensure that it is "visible to all" (telephone confi guration.
In the menu, select:
- Bluetooth telephone
function -
Audio
- Bluetooth confi
guration
- P
erform a Bluetooth search
The services o
ffered depend on the network, the SIM card and thecompatibility of the Bluetooth equipment used.
Consult your telephone's manual and your operator to fi nd out which
services are available to you.
BLUETOOTH TELEPHONE SCREEN C
The TELEPH
ONE menu permits access to the following functions
in particular: Directory * , Call list, Pairing management.
The
fi rst 4 telephones recognised are displayed in this window.
A virtual ke
ypad is displayed in the screen: enter a code with at least 4 digits.
Confi rm by pressing OK.
A messa
ge that the pairing has been successful appears in thescreen.
Select the telephone to be connected from the list.
Only one
telephone can be connected at a time.
A messa
ge is displayed in the screen of the
telephone chosen. To accept the pairing, enter the same code on the telephone, then confi rm with OK.
The automatic connection authorised is onl
y active after the
telephone has been confi gured.
The directory and the call list can be accessed a
fter thesynchronisation period.
(Available according to model and version)
*
If your telephone is fully compatible.
I
f pairing fails, the number of attempts is not limited. Go to www.citroen.co.uk for more information
(compatibility, more help, ...).
PAIRING A TELEPHONE / FIR
ST CONNECTION
Page 236 of 260
9.74
06
RECEIVING A CALL
An incomin
g call is announced by a ring and a superimposed
display in the vehicle's screen.
Select the YES tab on the display
using the buttons and confi rm bypressing OK.
Press this button to acce
pt the call.
MAKING A CALL
From the Bluetooth telephone
function Audio menu, select Manage
the telephone call then Call, Call list or Directory.
Pr
ess this button for more than two seconds for
access to your directory, then navigate with the
thumb wheel.
Or
To dial a number, use your telephone's keypad,with the vehicle stationary.
Durin
g a call, press this button for more than2 seconds.
Confi rm with OK to end the call.
BLUETOOTH FUNCTIONS
ENDING A CALL
Page 237 of 260

9.75
06
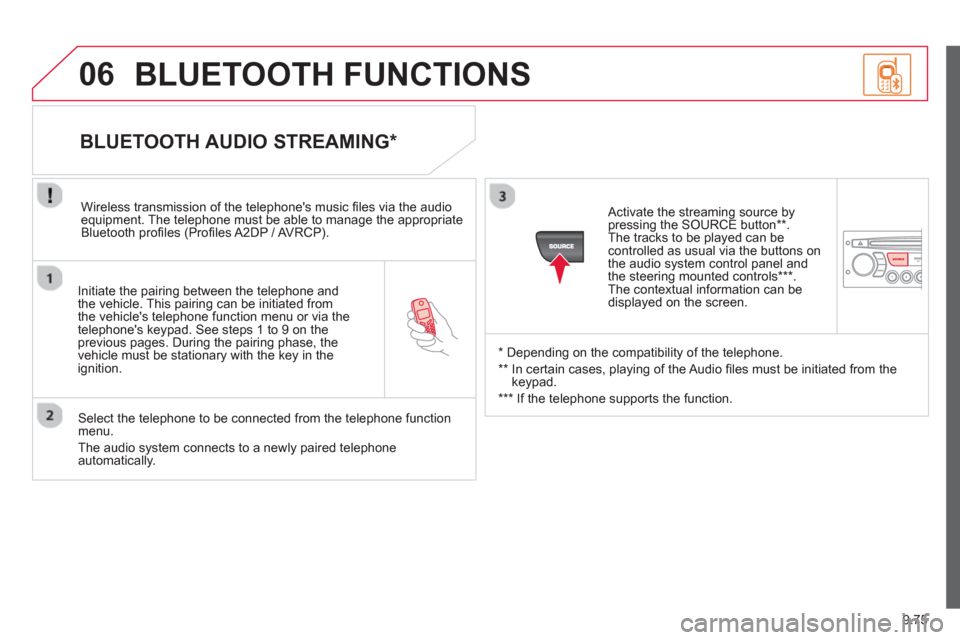
Initiate the pairing between the telephone and
the vehicle. This pairing can be initiated from
the vehicle's telephone function menu or via the
telephone's ke
ypad. See steps 1 to 9 on theprevious pages. During the pairing phase, the
vehicle must be stationary with the key in the
i
gnition.
Select the telephone to be connected from the telephone functionmenu.
The audio s
ystem connects to a newly paired telephone automatically.
BLUETOOTH AUDIO STREAMING *
Wireless transmission of the telephone's music fi les via the audioequipment. The telephone must be able to manage the appropriate
Bluetooth profi les (Profi les A2DP / AVRCP).
*
Depending on the compatibility of the telephone.
**
In certain cases, playing of the Audio fi les must be initiated from the
keypad.
*** If the tele
phone supports the function.
Activate the streaming source by
pressin
g the SOURCE button ** .
The tracks to be played can becontrolled as usual via the buttons on
the audio system control panel and
the steering mounted controls *** .
The contextual information can bedisplayed on the screen.
BLUETOOTH FUNCTIONS
Page 243 of 260
9.81
09 SCREEN MENU MAP
MONOCHROME C
AUDIO FUNCTIONS
alternative frequencies (RDS)
activate / deactivate
FM BAND PREFERENCE
S
regional mode (REG)
activate / deactivate
radio-text information (RDTXT)
activate / deactivate
1
2
3
4
3
4
3
4
PLAY MODES
album repeat (RPT)
activate / deactivate
track random play
(RDM)
activate / deactivate
2
3
4
3
4
TRIP COMPUTER
Distance: x miles ENTER DI
STANCE TO DESTINATION
Diagnostic s
ALERT LOG
Functions activated or deactivated
STAT US OF THE FUNCTIONS *
1
2
3
3
2
3
2
Pressing the MENU button displays:
*
The parameters vary according to vehicle.
Page 244 of 260
9.82
09SCREEN MENU MAP
BLUETOOTH TELEPHONE
Connect/Disconnect a device
Consult the paired device BLUETOOTH CONFIGURATION
Telephone function
Audio Streamin
g function
Delete a
paired device
P
erform a Bluetooth search
Calls lis
t
CALL
Directory
Terminate the current call MANAGE THE TELEPHONE CALL
Activate private mod
e
1
2
3
3
3
4
4
4
2
3
4
2
3
3
video brightness adjustment
DISPLAY CONFIGURATION DEFINE THE VEHICLE PARAMETERS *
PERSONALISATION-CONFIGURATION
normal video
inverse video
bri
ghtness (- +) adjustment
date and time adjustment
day/month/year adjustment
hour
/minute adjustment
choice of 12 h / 24 h mode
choice of units
l/100 km - mp
g - km/l
°
Celsius / °Fahrenheit
CHOICE OF LANGUAGE
1
2
4
3
2
4
4
3
4
4
2
3
4
4
4
* The parameters vary according to vehicle.
Page 245 of 260

9.83
FREQUENTLY ASKED QUESTIONS
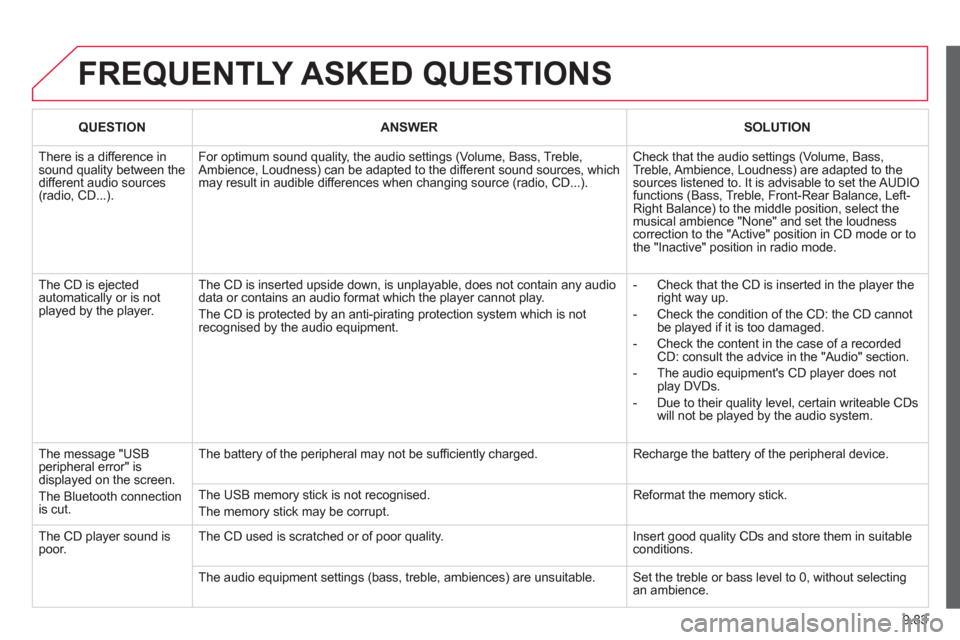
QUESTIONANSWERSOLUTION
There is a difference insound quality between thedifferent audio sources (radio, CD...).
For optimum sound quality, the audio settings (Volume, Bass, Treble,Ambience, Loudness) can be adapted to the different sound sources, whichmay result in audible differences when changing source (radio, CD...).
Check that the audio settings (Volume, Bass, Treble, Ambience, Loudness) are adapted to the sources listened to. It is advisable to set the AUDIOfunctions (Bass, Treble, Front-Rear Balance, Left-Right Balance) to the middle position, select themusical ambience "None" and set the loudness correction to the "Active" position in CD mode or tothe "Inactive" position in radio mode.
The CD is ejected automatically or is not played by the player.
The CD is inserted upside down, is unplayable, does not contain any audio data or contains an audio format which the player cannot play.
The CD is protected by an anti-pirating protection system which is not recognised by the audio equipment.
- Check that the CD is inserted in the player the right way up.
- Check the condition of the CD: the CD cannot be played if it is too damaged.
- Check the content in the case of a recordedCD: consult the advice in the "Audio" section.
- The audio equipment's CD player does not play DVDs.
- Due to their quality level, certain writeable CDswill not be played by the audio system.
The message "USBperipheral error" is displayed on the screen.
The Bluetooth connection is cut.
The battery of the peripheral may not be suffi ciently charged.
Recharge the battery of the peripheral device.
The USB memory stick is not recognised.
The memory stick may be corrupt.
Reformat the memory stick.
The CD player sound is poor. The CD used is scratched or of poor quality.
Insert good quality CDs and store them in suitableconditions.
The audio equipment settings (bass, treble, ambiences) are unsuitable. Set the treble or bass level to 0, without selectingan ambience.