Page 115 of 699
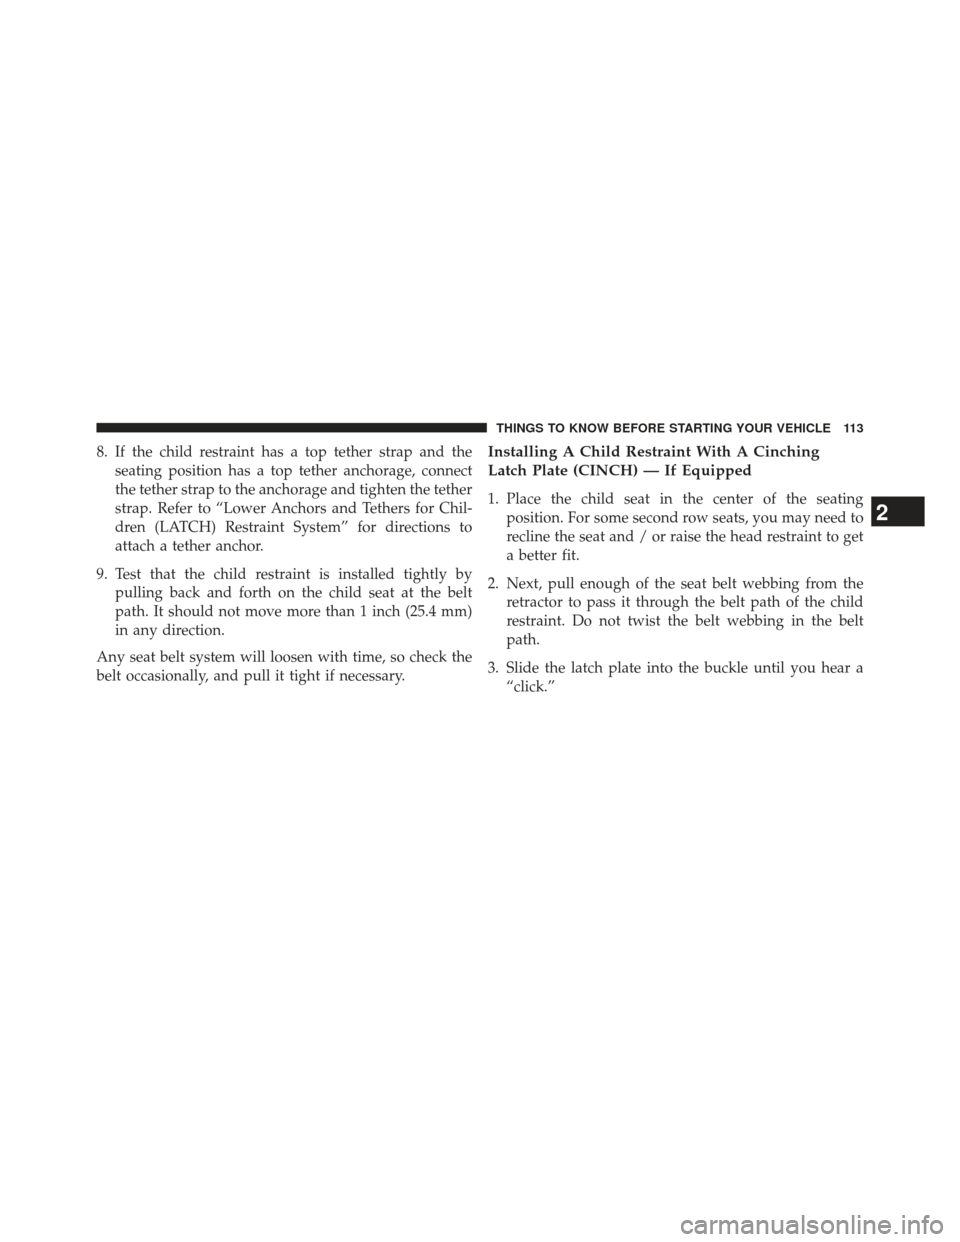
8. If the child restraint has a top tether strap and theseating position has a top tether anchorage, connect
the tether strap to the anchorage and tighten the tether
strap. Refer to “Lower Anchors and Tethers for Chil-
dren (LATCH) Restraint System” for directions to
attach a tether anchor.
9. Test that the child restraint is installed tightly by pulling back and forth on the child seat at the belt
path. It should not move more than 1 inch (25.4 mm)
in any direction.
Any seat belt system will loosen with time, so check the
belt occasionally, and pull it tight if necessary.Installing A Child Restraint With A Cinching
Latch Plate (CINCH) — If Equipped
1. Place the child seat in the center of the seating position. For some second row seats, you may need to
recline the seat and / or raise the head restraint to get
a better fit.
2. Next, pull enough of the seat belt webbing from the retractor to pass it through the belt path of the child
restraint. Do not twist the belt webbing in the belt
path.
3. Slide the latch plate into the buckle until you hear a “click.”
2
THINGS TO KNOW BEFORE STARTING YOUR VEHICLE 113
Page 116 of 699
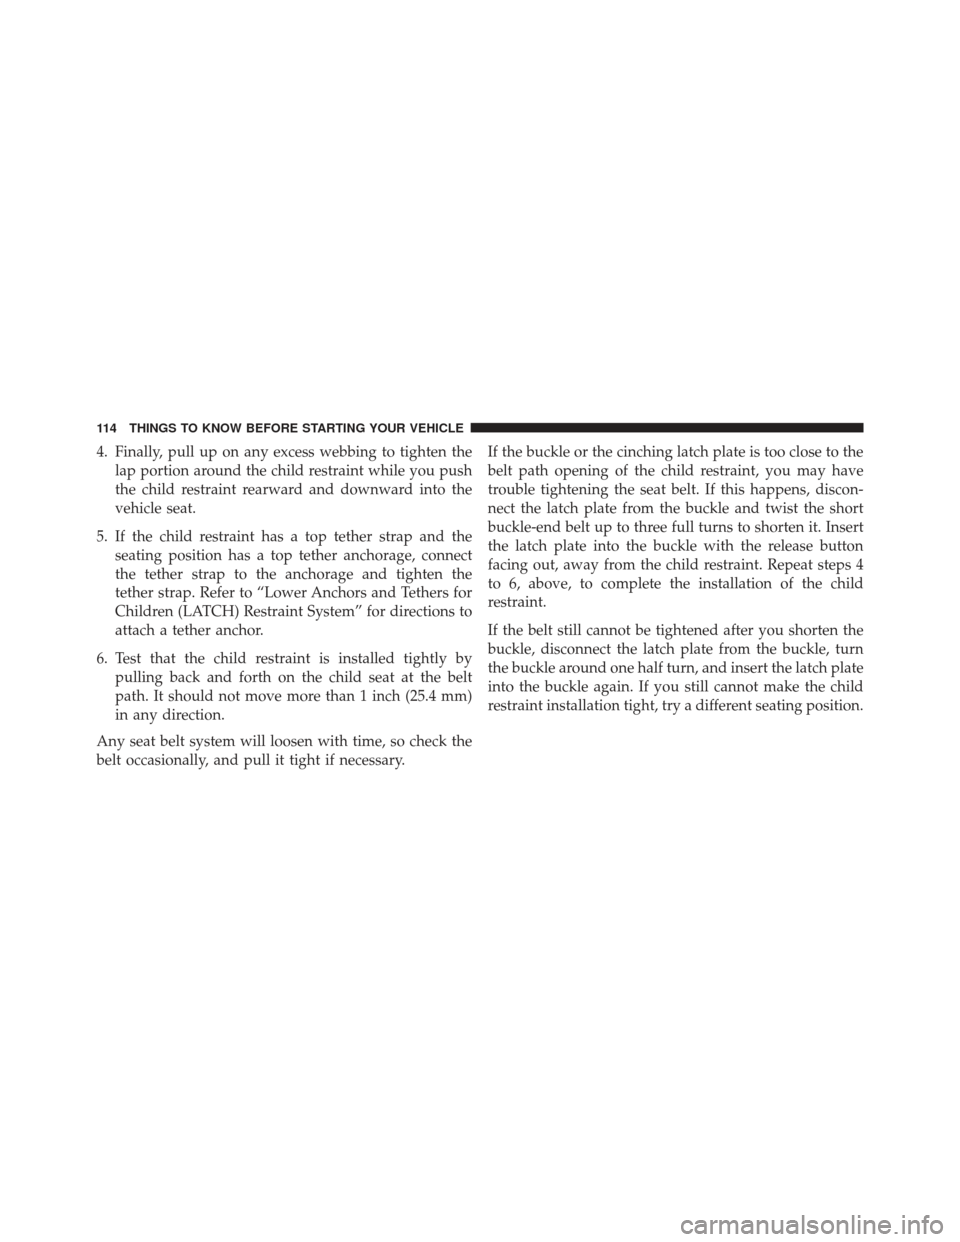
4. Finally, pull up on any excess webbing to tighten thelap portion around the child restraint while you push
the child restraint rearward and downward into the
vehicle seat.
5. If the child restraint has a top tether strap and the seating position has a top tether anchorage, connect
the tether strap to the anchorage and tighten the
tether strap. Refer to “Lower Anchors and Tethers for
Children (LATCH) Restraint System” for directions to
attach a tether anchor.
6. Test that the child restraint is installed tightly by pulling back and forth on the child seat at the belt
path. It should not move more than 1 inch (25.4 mm)
in any direction.
Any seat belt system will loosen with time, so check the
belt occasionally, and pull it tight if necessary. If the buckle or the cinching latch plate is too close to the
belt path opening of the child restraint, you may have
trouble tightening the seat belt. If this happens, discon-
nect the latch plate from the buckle and twist the short
buckle-end belt up to three full turns to shorten it. Insert
the latch plate into the buckle with the release button
facing out, away from the child restraint. Repeat steps 4
to 6, above, to complete the installation of the child
restraint.
If the belt still cannot be tightened after you shorten the
buckle, disconnect the latch plate from the buckle, turn
the buckle around one half turn, and insert the latch plate
into the buckle again. If you still cannot make the child
restraint installation tight, try a different seating position.
114 THINGS TO KNOW BEFORE STARTING YOUR VEHICLE
Page 118 of 699
4. Remove slack in the tether strap according to the childrestraint manufacturer ’s instructions.
WARNING!
•An incorrectly anchored tether strap could lead to
increased head motion and possible injury to the
child. Use only the anchorage position directly
behind the child seat to secure a child restraint top
tether strap.
• If your vehicle is equipped with a split rear seat,
make sure the tether strap does not slip into the
opening between the seatbacks as you remove
slack in the strap.
Transporting Pets
Air Bags deploying in the front seat could harm your pet.
An unrestrained pet could be thrown about and possibly
injured, or injure a passenger during panic braking or in
a collision.
Pets should be restrained in the rear seat in pet harnesses
or pet carriers that are secured by seat belts.
LATCH Anchorages (Third Row 60/40 Anchorage Shown)
116 THINGS TO KNOW BEFORE STARTING YOUR VEHICLE
Page 127 of 699
Periodic Safety Checks You Should Make Outside
The Vehicle
Tires
Examine tires for excessive tread wear and uneven wear
patterns. Check for stones, nails, glass, or other objects
lodged in the tread or sidewall. Inspect the tread for cuts
and cracks. Inspect sidewalls for cuts, cracks and bulges.
Check the wheel nuts for tightness. Check the tires
(including spare) for proper cold inflation pressure.
Lights
Have someone observe the operation of brake lights and
exterior lights while you work the controls. Check turn
signal and high beam indicator lights on the instrument
panel.
Door Latches
Check for positive closing, latching, and locking.
Fluid Leaks
Check area under vehicle after overnight parking for fuel,
engine coolant, oil, or other fluid leaks. Also, if gasoline
fumes are detected or if fuel, power steering fluid, or
brake fluid leaks are suspected, the cause should be
located and corrected immediately.
2
THINGS TO KNOW BEFORE STARTING YOUR VEHICLE 125
Page 196 of 699
While sitting in the seat, pull up on the handle and slide
the seat forward or rearward. Release the bar once you
have reached the desired position. Then, using body
pressure, move forward and rearward on the seat to be
sure that the seat adjusters have latched.
WARNING!
•Adjusting a seat while driving may be dangerous.
Moving a seat while driving could result in loss of
control which could cause a collision and serious
injury or death.
• Seats should be adjusted before fastening the seat
belts and while the vehicle is parked. Serious
injury or death could result from a poorly adjusted
seat belt.
Manual Reclining Seats — If Equipped
For models equipped with manual reclining seats, the
recline lever is located on the outboard side of the seat.
Manual Recline Lever
194 UNDERSTANDING THE FEATURES OF YOUR VEHICLE
Page 197 of 699
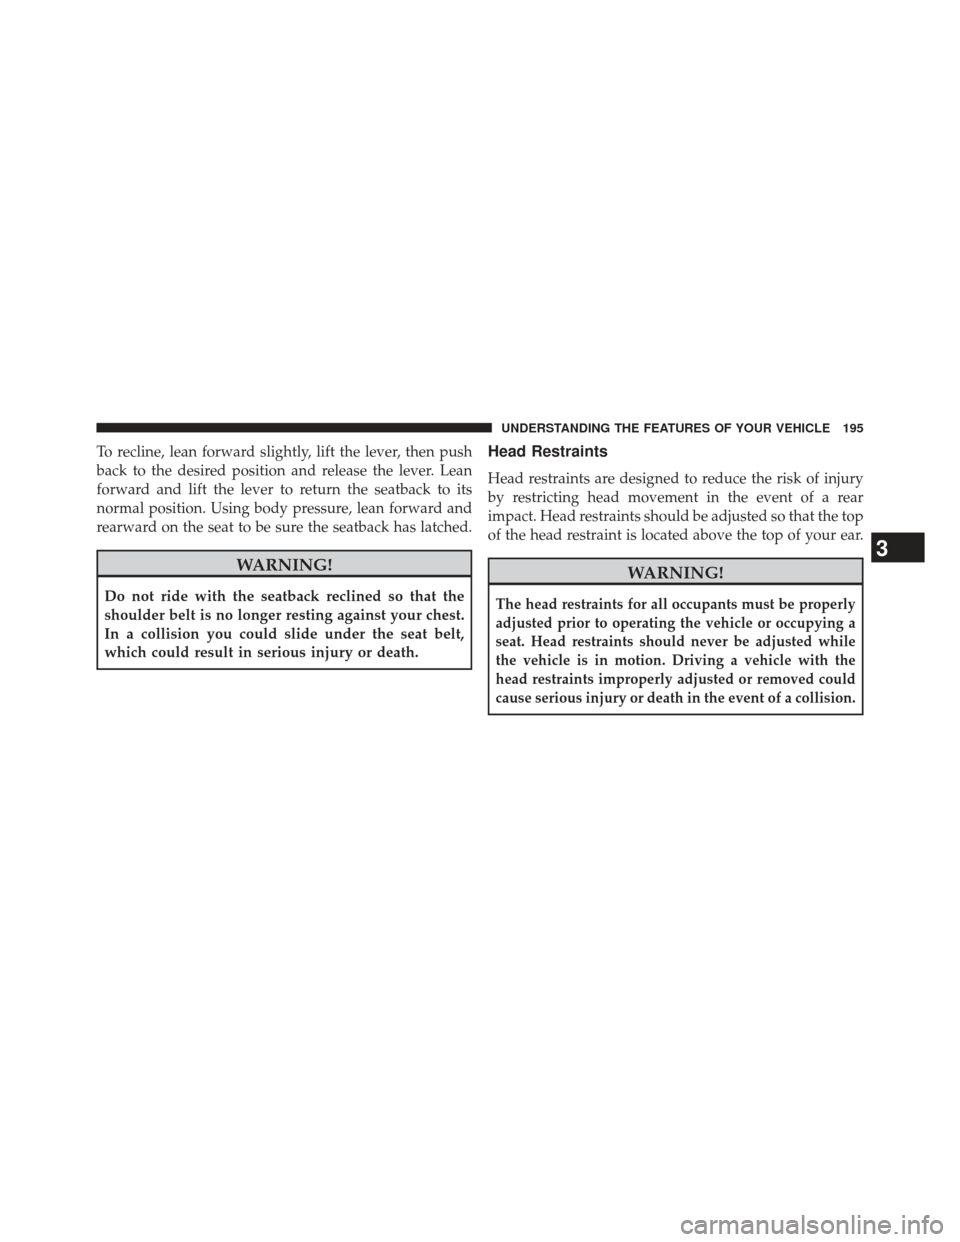
To recline, lean forward slightly, lift the lever, then push
back to the desired position and release the lever. Lean
forward and lift the lever to return the seatback to its
normal position. Using body pressure, lean forward and
rearward on the seat to be sure the seatback has latched.
WARNING!
Do not ride with the seatback reclined so that the
shoulder belt is no longer resting against your chest.
In a collision you could slide under the seat belt,
which could result in serious injury or death.
Head Restraints
Head restraints are designed to reduce the risk of injury
by restricting head movement in the event of a rear
impact. Head restraints should be adjusted so that the top
of the head restraint is located above the top of your ear.
WARNING!
The head restraints for all occupants must be properly
adjusted prior to operating the vehicle or occupying a
seat. Head restraints should never be adjusted while
the vehicle is in motion. Driving a vehicle with the
head restraints improperly adjusted or removed could
cause serious injury or death in the event of a collision.
3
UNDERSTANDING THE FEATURES OF YOUR VEHICLE 195
Page 202 of 699
Stow ’n Go® Seating — If Equipped
On vehicles equipped with Stow ’n Go® seating, the
second and third row seats can be folded into the floor for
convenient storage.
Second Row Stow ’n Go®
On vehicles equipped with Stow ’n Go® seats, the seats
will fold and tumble in one motion.
1. Move the front seat fully forward.
2. Recline the front seatback fully forward.
3. Raise the armrests on the second row seat.
NOTE:Seat will not stow in the storage bin unless the
armrests are raised. 4. Slide the storage bin locking mechanism to the
“LOCK” position and then pull up on the storage bin
latch to open the cover.
Storage Bin Cover Lock Release
200 UNDERSTANDING THE FEATURES OF YOUR VEHICLE
Page 205 of 699
7. Close the storage bin cover.
CAUTION!
The storage bin cover must be locked and flat to
avoid damage from contact with the front seat tracks,
which have minimal clearance to the cover.
WARNING!
In a collision, serious injury could result if the seat
storage bin covers are not properly latched.
•Do not drive the vehicle with the storage bin covers
open.
• Keep the storage bin covers closed and latched
while the vehicle is in motion.
• Do not use a storage bin latch as a tie down.
Seat In Storage Bin
3
UNDERSTANDING THE FEATURES OF YOUR VEHICLE 203