2013 CHRYSLER 300 lock
[x] Cancel search: lockPage 20 of 132

To program your Key Fobs, perform the following:
• Change the ignition to OFF.
• Select desired memory profile 1 or 2.
• Once the profile has been recalled, press and release the SET (S) button on the memoryswitch, then press and release the side of the rocker switch labeled 1 or 2 accordingly.
• (1 or 2) will display in the instrument cluster if the vehicle is equipped with the EVIC.
• Press and release the LOCK button on the Key Fob within 10 seconds.
NOTE:
Your Key Fob can be unlinked to your memory settings by pressing the SET (S) button followed
by the UNLOCK button on the Key Fob in the fourth step.
• Press 1 or 2 to recall the saved positions, or press UNLOCK on the programmed Key Fob.
• Refer to the Owner's Manual on the DVD for further details.
Manual Seat
Forward/Rearward
• Lift up on the adjusting bar located at the front of the seat near the floor and release it
when the seat is at the desired position.
Then, using body pressure, move forward
and backward on the seat to be sure that the
seat adjusters have latched.
Recliner
• Lean forward in the seat and lift the reclinerlever, then lean back to the desired position
and release the lever.
• Lift the lever to return the seatback to an upright position.
CAUTION!
Do not place any article under a power seat or impede its ability to move as it may cause
damage to the seat controls. Seat travel may become limited if movement is stopped by an
obstruction in the seat’s path.
GETTING STARTED
18
Page 21 of 132
WARNING!
• Adjusting a seat while the vehicle is moving is dangerous. The sudden movement of theseat could cause you to lose control. The seat belt might not be properly adjusted, and you
could be severely injured or killed. Only adjust a seat while the vehicle is parked.
• Do not ride with the seatback reclined so that the seat belt is no longer resting against your
chest. In a collision, you could slide under the seat belt and be severely injured or killed.
Use the recliner only when the vehicle is parked.
REAR SEAT
Folding Rear Seatback
• Pull on the loops, located near the outer top of the seatbacks, to fold down either or bothseatbacks. These loops can be tucked away when not in use.
• When the seatback is raised to the upright position, make sure it is latched by strongly
pulling on the top of the seatback above the
seat loop.
WARNING!
• Be certain that the seatback is securely locked into position. If the seatback is not securely
locked into position, the seat will not provide the proper stability for child seats and/or
passengers. An improperly latched seat could cause you and others to severely injured or
killed.
• The cargo area in the rear of the vehicle (with the rear seatbacks in the locked-up or
folded-down position) should not be used as a play area by children when the vehicle is in
motion. They could be severely injured or killed in a collision. Children should be seated
and using the proper restraint system.
GETTING STARTED
19
Page 25 of 132

TILT/TELESCOPING STEERING COLUMN
Manual - Tilt/Telescoping Steering Column
• The tilt/telescoping control handle is located below the steering wheel at the end of thesteering column.
• To unlock the steering column, push the lever downward (toward the floor).
•
To tilt the steering column, move the steering wheel upward or downward as desired. To lengthen
or shorten the steering column, pull the steering wheel outward or push it inward as desired.
• To lock the steering column in position, push the lever upward until fully engaged.
Power - Tilt/Telescoping Steering Column
•The power tilt/telescoping steering control is
located below the turn signal/wiper/washer/
high beam lever on the steering column.
• To tilt the steering column, move the power tilt/telescoping control up or down as de-
sired. To lengthen or shorten the steering
column, pull the control toward you or push
the control away from you as desired.
WARNING!
• Do not adjust the steering wheel while driving. The tilt/telescoping adjustment must be
locked while driving. Adjusting the steering wheel while driving or driving without the
tilt/telescoping adjustment locked could cause the driver to lose control of the vehicle.
Failure to follow this warning may result in you and others being severely injured or killed.
• Moving the steering column while the vehicle is moving is dangerous. Without a stable
steering column, you could lose control of the vehicle and have a collision. Adjust the
column only while the vehicle is stopped.
GETTING STARTED
23
Page 33 of 132
ELECTRONIC SHIFTER – 3.6L ENGINE
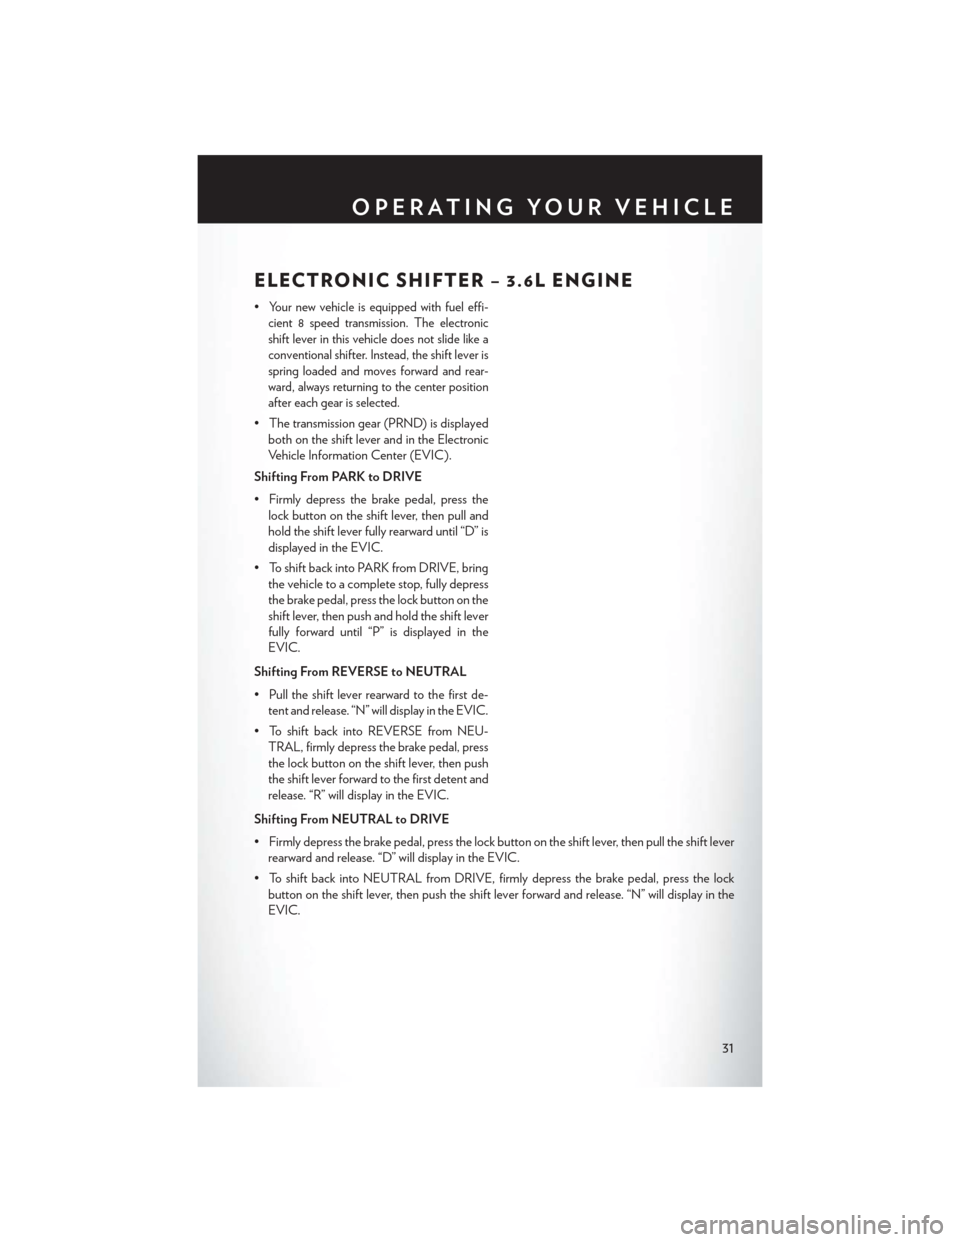
•Your new vehicle is equipped with fuel effi-
cient 8 speed transmission. The electronic
shift lever in this vehicle does not slide like a
conventional shifter. Instead, the shift lever is
spring loaded and moves forward and rear-
ward, always returning to the center position
after each gear is selected.
• The transmission gear (PRND) is displayed both on the shift lever and in the Electronic
Vehicle Information Center (EVIC).
Shifting From PARK to DRIVE
• Firmly depress the brake pedal, press the lock button on the shift lever, then pull and
hold the shift lever fully rearward until “D” is
displayed in the EVIC.
• To shift back into PARK from DRIVE, bring the vehicle to a complete stop, fully depress
the brake pedal, press the lock button on the
shift lever, then push and hold the shift lever
fully forward until “P” is displayed in the
EVIC.
Shifting From REVERSE to NEUTRAL
• Pull the shift lever rearward to the first de- tent and release. “N” will display in the EVIC.
• To shift back into REVERSE from NEU- TRAL, firmly depress the brake pedal, press
the lock button on the shift lever, then push
the shift lever forward to the first detent and
release. “R” will display in the EVIC.
Shifting From NEUTRAL to DRIVE
• Firmly depress the brake pedal, press the lock button on the shift lever, then pull the shift lever rearward and release. “D” will display in the EVIC.
• To shift back into NEUTRAL from DRIVE, firmly depress the brake pedal, press the lock button on the shift lever, then push the shift lever forward and release. “N” will display in the
EVIC.
OPERATING YOUR VEHICLE
31
Page 34 of 132

Shifting From REVERSE to DRIVE
• Bring the vehicle to a complete stop, firmly depress the brake pedal, press the lock button onthe shift lever, then pull the shift lever rearward and release when “D” is displayed in the EVIC.
• To shift back into REVERSE from DRIVE, bring the vehicle to a complete stop, firmly depress the brake pedal, press the lock button on the shift lever, then push the shift lever forward and
release when “R” is displayed in the EVIC.
Shifting From DRIVE to SPORT/LOW
Vehicles Equipped with SPORT Mode
• To shift from DRIVE to SPORT, pull the shift lever rearward until “S” is displayed in the EVIC.
• To shift back into DRIVE from SPORT, pull the shift lever rearward until “D” is displayed in the EVIC.
Vehicles Equipped with LOW Mode
• To shift from DRIVE to LOW, pull the shift lever rearward until “L” is displayed in the EVIC.
• To shift back into DRIVE from LOW, pull the shift lever rearward until “D” is displayed in the EVIC.
TRANSMISSION MODES/AUTOSTICK®
• AUTOSTICK® is only available on sport equipped vehicles.
For Vehicles Equipped With Sport Mode
• This mode is driver selectable and will provide more aggressive shifting and is intended forspirited driving.
• Shifting into SPORT mode can be done anytime the vehicle is in the “D” Drive position. Simply pull the shift lever and release when “S” is displayed in the EVIC. Pulling the shift lever
rearward a second time will return the vehicle to the “D” Drive position.
NOTE:
When the vehicle is in SPORT mode, there is a green “SPORT” message attached with a flag
illuminated in the instrument cluster.
For Vehicles Equipped With Low Mode
• This range should be used for engine braking when descending very steep grades. In this range, the transmission will downshift for increased engine braking. To switch between DRIVE
and LOW mode, pull the shift lever rearward and release when “L” is displayed in the EVIC.
• Shifting into LOW can be done anytime the vehicle is in “D” DRIVE position.
OPERATING YOUR VEHICLE
32
Page 42 of 132
IDENTIFYING YOUR RADIO
Uconnect® 8.4 & 8.4N
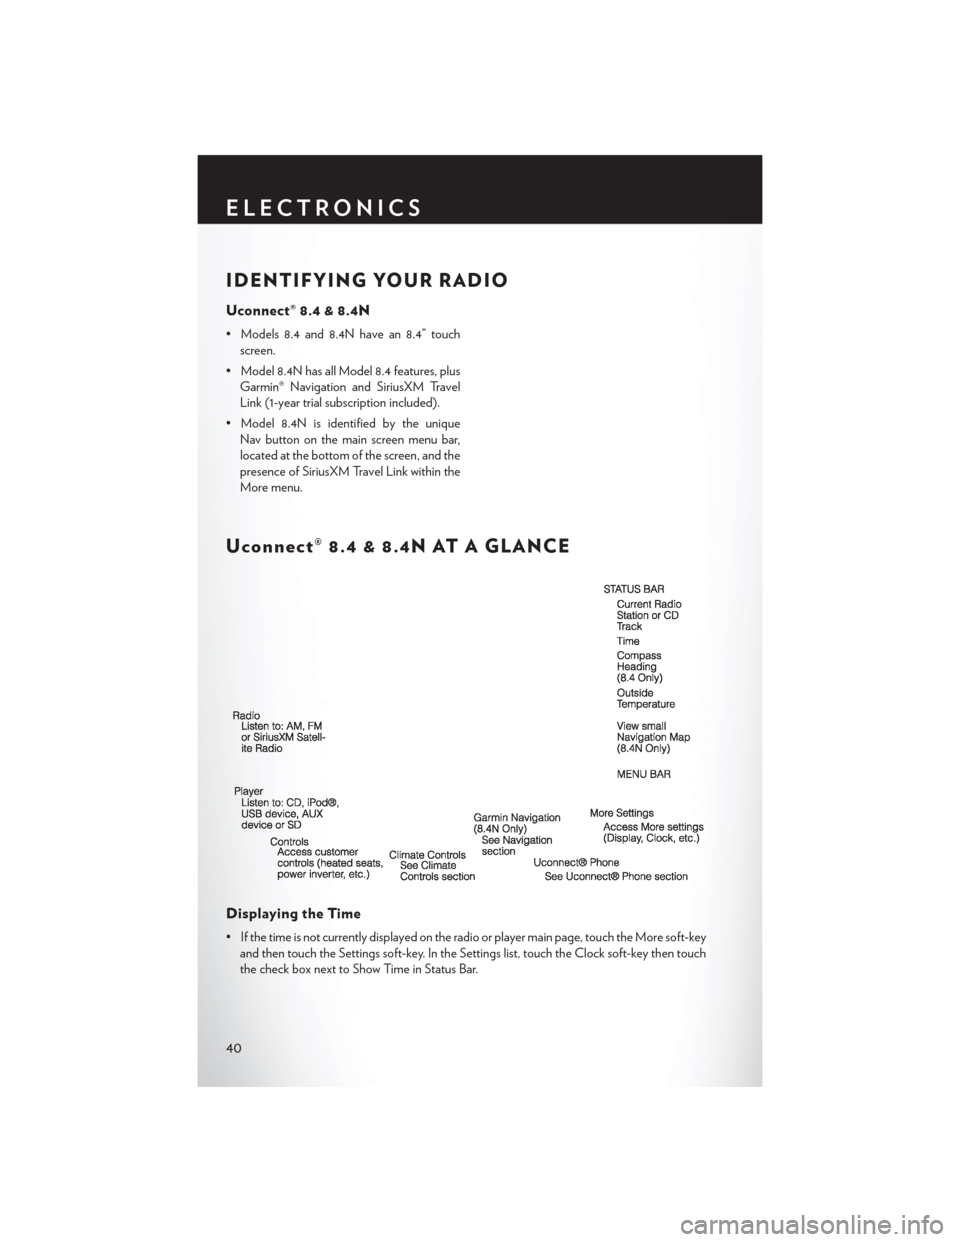
• Models 8.4 and 8.4N have an 8.4” touchscreen.
• Model 8.4N has all Model 8.4 features, plus Garmin® Navigation and SiriusXM Travel
Link (1-year trial subscription included).
• Model 8.4N is identified by the unique Nav button on the main screen menu bar,
located at the bottom of the screen, and the
presence of SiriusXM Travel Link within the
More menu.
Uconnect® 8.4 & 8.4N AT A GLANCE
Displaying the Time
• If the time is not currently displayed on the radio or player main page, touch the More soft-keyand then touch the Settings soft-key. In the Settings list, touch the Clock soft-key then touch
the check box next to Show Time in Status Bar.
ELECTRONICS
40
Page 43 of 132
Setting the Time
•
Model 8.4N synchronizes time automatically via GPS, so should not require any time adjustment.
If you do need to set the time manually, follow the instructions below for Model 8.4.
• For Model 8.4, turn the unit on, then touch the time display at the top of the screen. Touch the Yes soft-key.
• If the time is not displayed at the top of the screen, touch the More soft-key and then touch the Settings soft-key. In the Settings screen, touch the Clock soft-key, then check or uncheck this
option.
• Touch + or – next to Set Time Hours and Set Time Minutes to adjust the time.
• If these features are not available, uncheck the Sync with GPS box.
• Touch the X soft-key to save your settings and exit out of the Clock Setting screen.
Audio Settings
Touch of the Audio soft-key to activate the Audio settings screen to adjust Balance\Fade, Equalizer,
and Speed Adjusted Volume.
You can return to the Radio screen by touching the X soft-key located at the top right.
Balance/Fade
Touch the Balance/Fade soft-key to Balance audio between the front speakers or fade the audio
between the rear and front speakers.
Touching the Front, Rear, Left, or Right soft-keys or touch and drag the blue Speaker Icon to adjust the
Balance/Fade.
Equalizer
Touch the Equalizer soft-key to activate the Equalizer screen.
Touch the + or - soft-keys, or by touching and dragging over the level bar for each of the equalizer
bands. The level value, which spans between plus or minus 9, is displayed at the bottom of each of the
Bands.
Speed Adjusted Volume
Touch the Speed Adjusted Volume soft-key to activate the Speed Adjusted Volume screen. The Speed
Adjusted Volume is adjusted by touching the + and - buttons or by touching and dragging over the level
bar. This alters the automatic adjustment of the audio volume with variation to vehicle speed.
ELECTRONICS
41
Page 45 of 132
SiriusXM SATELLITE RADIO
• SiriusXM Satellite Radio gives you over 130 channels, including 100% commercial-free musicfrom nearly every genre, plus all your favorite sports, news, talk and entertainment channels –
all with crystal clear, coast-to-coast coverage, all in one place and all at your fingertips.
• To access SiriusXM Satellite Radio, touch the SAT soft-key on the main Radio screen.
• The following describes features that are available when in SiriusXM Satellite Radio mode.
Selecting SiriusXM Satellite Channels
Seek Up/Seek Down
• Touch the Seek arrow soft-keys for less than two seconds to seek through channels in SAT mode.
• Touch and hold either arrow soft-key for more than two seconds to bypass channels without stopping. The radio will stop at the next listenable channel once the arrow soft-key is released.
Direct Tune
• Tune directly to a SAT channel by pressing the Tune soft-key on the screen, and entering the desired station number.
Jump
• Automatically tells you when Traffic & Weather for a favorite city is available, and gives you the option to switch to that channel. Touch Jump to activate the feature. After listening to Traffic
and Weather, touch Jump again to return to the previous channel.
Fav
• Activates the favorites menu. You can add up to 50 favorite artists or songs. Just touch Add Fav Artist or Add Fav Song while the song is playing. You will then be alerted any time one of
these songs, or works by these artists, is playing on other SiriusXM channels.
SiriusXM Parental Controls
• You can skip or hide certain channels from view if you do not want access to them. Touch the More soft-key, then the Settings soft-key, next touch the Sirius Setup soft-key, then select
Channel Skip. Touch the box, check-mark, next to the channel you want skipped. They will not
show up in normal usage.
• SiriusXM also offers the option to permanently block selected channels. Call 1-888-539-7474 and request the Family Package.
ELECTRONICS
43