2013 CHRYSLER 200 CONVERTIBLE key
[x] Cancel search: keyPage 3 of 116

INTRODUCTION/WELCOME
WELCOME FROM CHRYSLER
GROUPLLC ..................2
CONTROLS AT A GLANCE
DRIVER COCKPIT...............4
INSTRUMENT CLUSTER ...........6
GETTING STARTED
KEYFOB.....................8
REMOTE START................9
THEFT ALARM .................9
SUPPLEMENTAL RESTRAINT
SYSTEM (SRS) — AIR BAGS .........10
SEATBELT ...................11
CHILD RESTRAINTS .............11
FRONTSEATS ................15
HEATEDSEATS ................17
TILT/TELESCOPING STEERING
COLUMN ...................18
OPERATING YOUR VEHICLE
ENGINE BREAK-IN
RECOMMENDATIONS ............19
TURN SIGNAL/LIGHTS LEVER .......19
WIPER/WASHER LEVER ...........21
SPEED CONTROL ..............22
MANUAL CLIMATE CONTROLS ......23
AUTOMATIC TEMPERATURE
CONTROLS (ATC) ..............24
POWER CONVERTIBLE TOP
OPERATION .................25
WIND BUFFETING . . ............27
ELECTRONICS
YOUR VEHICLE'S SOUND SYSTEM ....28
Uconnect® 130 .................30
Uconnect® 130 WITH SiriusXM SATELLITE
RADIO .....................32
Uconnect® 430/430N ..............35
Uconnect® 730N . . ..............45
SiriusXM SATELLITE RADIO/TRAVEL
LINK .......................57
STEERING WHEEL AUDIO CONTROLS..61
iPod®/USB/MP3 CONTROL .........61
Uconnect® Phone ................62
Uconnect® VOICE COMMAND .......66
Bluetooth® STREAMING AUDIO ......68
ELECTRONIC VEHICLE INFORMATION
CENTER (EVIC) ................69
PROGRAMMABLE FEATURES .......69UNIVERSAL GARAGE DOOR OPENER
(HomeLink®)
..................71
POWER OUTLETS ..............73
UTILITY
TRAILER TOWING WEIGHTS (MAXIMUM
TRAILER WEIGHT RATINGS) ........74
RECREATIONAL TOWING
(BEHIND MOTORHOME, ETC.) ......75
WHAT TO DO IN EMERGENCIES
ROADSIDE ASSISTANCE..........76
INSTRUMENT CLUSTER WARNING
LIGHTS .....................76
IF YOUR ENGINE OVERHEATS ......80
JACKING AND TIRE CHANGING . . . . . 81
BATTERY LOCATION ............86
JUMP-STARTING ...............86
SHIFT LEVER OVERRIDE ..........88
TOWING A DISABLED VEHICLE .....89
FREEING A STUCK VEHICLE .......90
EVENT DATA RECORDER (EDR) . . ....91
MAINTAINING YOUR VEHICLE
OPENING THE HOOD . . .........92
ENGINE COMPARTMENT .........93
FLUIDSANDCAPACITIES .........95
MAINTENANCE SCHEDULE ........97
MAINTENANCE RECORD . ........100
FUSES .....................101
TIRE PRESSURES ...............103
WHEEL AND WHEEL TRIM CARE ....104
EXTERIOR BULBS ..............104
CUSTOMER ASSISTANCE
CHRYSLER GROUP LLC CUSTOMER
CENTER...................105
CHRYSLER CANADA INC. CUSTOMER
CENTER ...................105
ASSISTANCE FOR THE HEARING
IMPAIRED ..................105
PUBLICATIONS ORDERING ........105
REPORTING SAFETY DEFECTS IN
THE 50 UNITED STATES AND
WASHINGTON, D.C. ............106
MOPAR ACCESSORIES
AUTHENTIC ACCESSORIES BY
MOPAR® ...................107
INDEX................... 108
FAQ(HowTo?)
FREQUENTLY ASKED QUESTIONS ....111
TABLE OF CONTENTS
Page 5 of 116

VEHICLES SOLD IN CANADA
With respect to any vehicles sold in Canada, the name Chrysler Group LLC shall be deemed to
be deleted and the name Chrysler Canada Inc. used in substitution.
WARNING!
• Pedals that cannot move freely can cause loss of vehicle control and increase the risk ofserious personal injury.
• Always make sure that objects cannot fall into the driver foot well while the vehicle is
moving. Objects can become trapped under the brake pedal and accelerator pedal
causing a loss of vehicle control.
• Failure to properly follow floor mat installation or mounting can cause interference with
the brake pedal and accelerator pedal operation causing loss of control of the vehicle.
• Never use the ‘PARK’ position as a substitute for the parking brake. Always apply the parking brake fully when parked to guard against vehicle movement and possible injury or
damage.
• Refer to your Owner's Manual on the DVD for further details.
USE OF AFTERMARKET PRODUCTS (ELECTRONICS)
The use of aftermarket devices including cell phones, MP3 players, GPS systems, or chargers
may affect the performance of on-board wireless features including Keyless Enter-N-Go™ and
Remote Start range. If you are experiencing difficulties with any of your wireless features, try
disconnecting your aftermarket devices to see if the situation improves. If your symptoms persist,
please see an authorized dealer.
CHRYSLER, DODGE, JEEP, RAM TRUCK, SRT, ATF+4, MOPAR and Uconnect are regis-
tered trademarks of Chrysler Group LLC.
COPYRIGHT ©2012 CHRYSLER GROUP LLC
INTRODUCTION/WELCOME
3
Page 9 of 116

Indicators
- Turn Signal Indicators
- High Beam Indicator
- Front Fog Light Indicator
- Vehicle Security Indicator*
- Cruise Indicator
- Electronic StabilityControl (ESC) Off
Indicator
- Park/Headlight ONIndicator
Odometer Messages dECK - Trunk Ajar LoW tirE* - Low Tire Pressure
HOTOIL* - Engine oil is over temperature TOP nOT SECUrE - Convertible Top Not Secure
CHANgE OIL* - Change Engine Oil gASCAP - Fuel Cap Fault
* If equipped
** Bulb Check with Key On
CONTROLS AT A GLANCE
7
Page 10 of 116

KEY FOB
Locking And Unlocking The Doors
• Press and release the UNLOCK button onthe RKE transmitter once to unlock the driv-
er’s door (EVIC can be setup for driver door
first, otherwise this will unlock all doors), or
press the unlock button twice within five sec-
onds to unlock all doors. The turn signal
lights will flash to acknowledge the unlock
signal. The illuminated entry system will also
turn on.
• All doors can be programmed to unlock on the first press of the UNLOCK button. Refer to Programmable Features in this guide.
Opening The Trunk
• Press the TRUNK button on the transmitter two times within five seconds to open the trunk.
Lowering The Convertible Top
NOTE:
The following steps must be performed within five seconds.
• Press and release the UNLOCK button.
• Press and release the POWER TOP button.
• Press and hold the POWER TOP button until all of the windows are lowered and the power top lowering sequence is complete.
Panic Alarm
• Press the PANIC button once to turn the panic alarm on.
•
Wait approximately three seconds and press the button a second time to turn the panic alarm off.
CAUTION!
Do not place objects on the cargo shield. Objects placed on the cargo shield will interfere with
the top during lowering and cause extensive damage.
WARNING!
Never leave children alone in a vehicle, or with access to an unlocked vehicle. Allowing children to
be in a vehicle unattended is dangerous for a number of reasons. A child or others could be
severely injured or killed. Children should be warned not to touch the parking brake, brake pedal,
or the shift lever. Do not leave the Key Fob in the vehicle, or in a location accessible to children.
A child could operate power windows, other controls, or move the vehicle.
GETTING STARTED
8
Page 11 of 116

WARNING!
• Do not start or run an engine in a closed garage or confined area. Exhaust gas containsCarbon Monoxide (CO) which is odorless and colorless. Carbon Monoxide is poisonous
and can cause serious injury or death when inhaled.
• Keep Key Fob transmitters away from children. Operation of the Remote Start System,
windows, door locks or other controls could cause serious injury or death.
REMOTE START
• Press the REMOTE START buttonx2on the Key Fob twice within five seconds. Pressing
the REMOTE START button a third time shuts the engine off.
• To drive the vehicle, press the UNLOCK button, insert the key in the ignition and turn to the ON/RUN position.
• With remote start, the engine will only run for 15 minutes (timeout) unless the ignition key is placed in the ON/RUN position.
• The vehicle must be started with the key after two consecutive timeouts.
WARNING!
• Do not start or run an engine in a closed garage or confined area. Exhaust gas contains Carbon Monoxide (CO) which is odorless and colorless. Carbon Monoxide is poisonous
and can cause you or others to be severely injured or killed when inhaled.
• Keep Key Fob transmitters away from children. Operation of the Remote Start System,
windows, door locks or other controls could cause you and others to be severely injured or
killed.
THEFT ALARM
To Arm:
• Press the Key Fob LOCK button or the power door lock switch while the door is open.
To Disarm:
• Press the Key Fob UNLOCK button or turn the ignition to the ON/RUN position.
GETTING STARTED
9
Page 35 of 116

Equalizer, Balance And Fade
• Press the “TUNE/SCROLL” control knob and BASS, MID, TREBLE, BALANCE and FADEwill display. Rotate the “TUNE/SCROLL” control knob to select the desired setting.
Radio Operation
Seek Up/Down Buttons
• Press to seek through radio stations in AM, FM, or SAT bands.
• Hold either button to bypass stations without stopping.
Store Radio Presets
• Press the “SET/RND” button once and SET 1 will show in the display. Then select button (1–6).
• A second station may be added to each push button. Press the “SET/RND” button twice and SET 2 will show in the display. Then select button (1–6).
Music Type
• Press the “MUSIC TYPE” button to activate this mode. Press the “MUSIC TYPE” button again or turn the “TUNE/SCROLL” control knob to select the desired music type (Adult Hits,
Country, Jazz, Oldies, Rock, etc.).
• Once a music type is chosen and the icon is displayed, press either “SEEK” button and the radio will only search for stations with the selected music type.
NOTE:
The Music Type function only operates when in FM mode.
SETUP Button
• Pressing the “SETUP” button allows you to select between items that are available in that particular mode.
• Turn the “TUNE/SCROLL” control knob to scroll through the entries. Push the “AUDIO/ SELECT” button to select an entry and make changes.
SiriusXM Satellite Radio
• SiriusXM Satellite Radio gives you over 130 channels, including 100% commercial-free music from nearly every genre, plus all your favorite sports, news, talk and entertainment channels–all
with crystal clear, coast-to-coast coverage, all in one place and all at your fingertips.
• To access SiriusXM Satellite Radio, press the “SAT” hard-key.
ELECTRONICS
33
Page 37 of 116

Uconnect® 430/430N
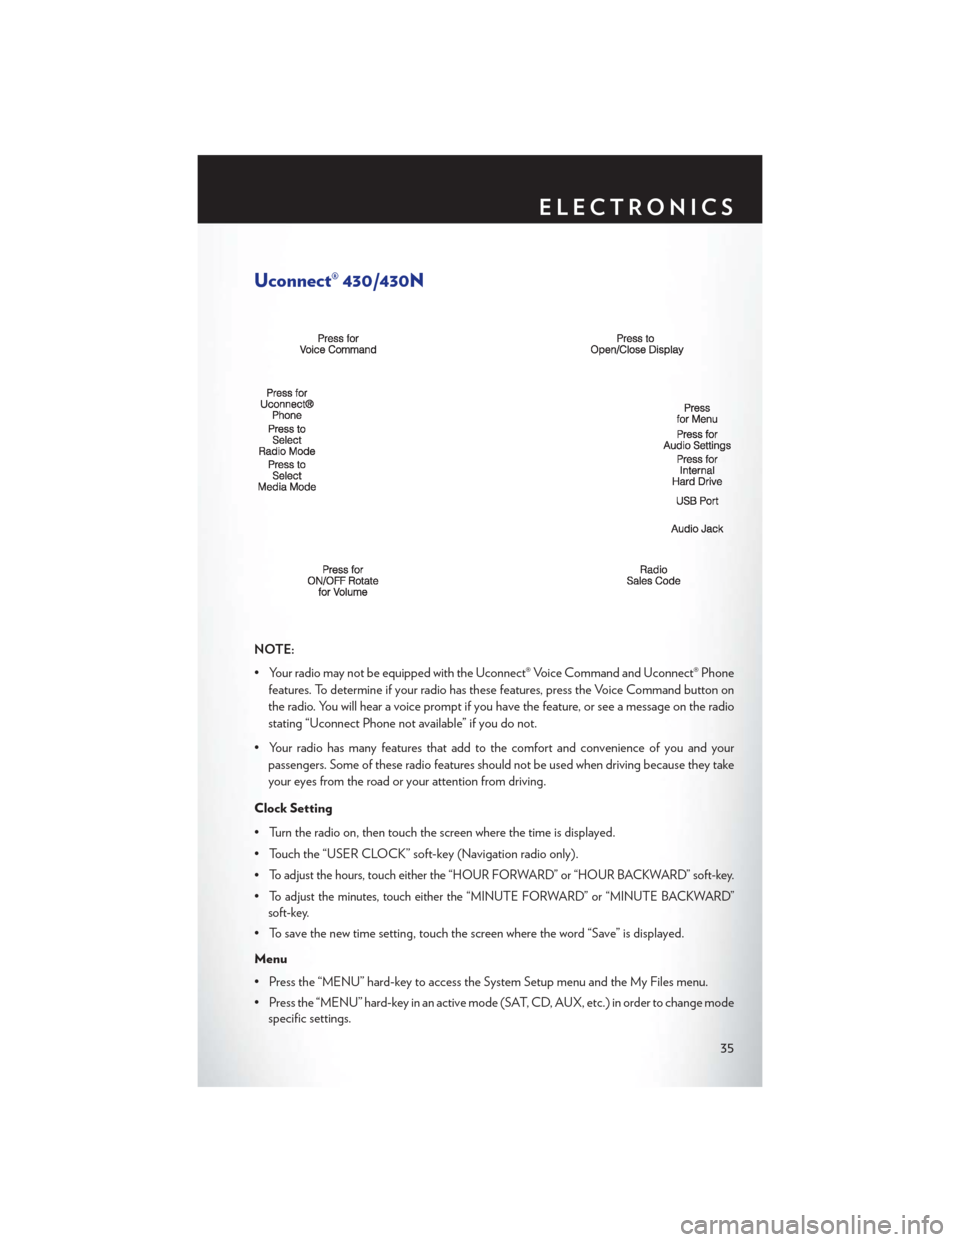
NOTE:
• Your radio may not be equipped with the Uconnect® Voice Command and Uconnect® Phonefeatures. To determine if your radio has these features, press the Voice Command button on
the radio. You will hear a voice prompt if you have the feature, or see a message on the radio
stating “Uconnect Phone not available” if you do not.
• Your radio has many features that add to the comfort and convenience of you and your passengers. Some of these radio features should not be used when driving because they take
your eyes from the road or your attention from driving.
Clock Setting
• Turn the radio on, then touch the screen where the time is displayed.
• Touch the “USER CLOCK” soft-key (Navigation radio only).
•
To adjust the hours, touch either the “HOUR FORWARD” or “HOUR BACKWARD” soft-key.
•To adjust the minutes, touch either the “MINUTE FORWARD” or “MINUTE BACKWARD”
soft-key.
• To save the new time setting, touch the screen where the word “Save” is displayed.
Menu
• Press the “MENU” hard-key to access the System Setup menu and the My Files menu.
• Press the “MENU” hard-key in an active mode (SAT, CD, AUX, etc.) in order to change mode specific settings.
ELECTRONICS
35
Page 38 of 116

Equalizer, Balance And Fade
Audio Control Menu
• Press the “AUDIO” hard-key on the rightside of the radio.
• Use either the arrow soft-keys or the cross- hair on the screen to change Balance and
Fade. The “CENTER” soft-key resets the
settings.
•
Touch the “Equalizer” soft-key and use either
the arrow soft-keys or the sliders on the screen
to adjust BASS, MID, and/or TREBLE.
Display Settings
• Press the “MENU” hard-key and touch the “Display Settings” soft-key to access the
Display Settings menu.
• Select the “Daytime Colors” soft-key to switch to manual daytime mode and to ad-
just the brightness of the display using day-
time colors.
• Select the “Nighttime Colors” soft-key to switch to manual nighttime mode and to
adjust the brightness of the display using nighttime colors.
• Select the “Auto Color Mode” soft-key to switch to automatic daytime/nighttime mode and to control the brightness of the display using the dimmer switch of the vehicle.
• Touch the “EXIT” soft-key to save your settings.
ELECTRONICS
36