2013 CHEVROLET SILVERADO steering
[x] Cancel search: steeringPage 313 of 542
Black plate (45,1)Chevrolet Silverado Owner Manual - 2013 - crc2 - 8/13/12
Driving and Operating 9-45
2. Place the transmission intoN (Neutral).
Shift the transfer case in one
continuous motion into or out of the
N (Neutral) position.
Electronic Transfer Case
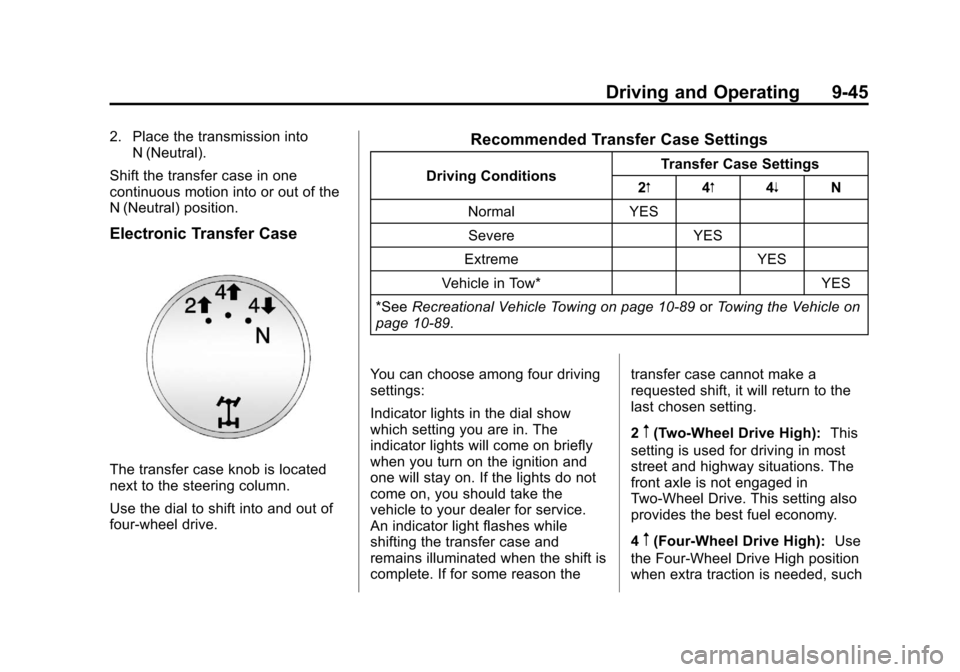
The transfer case knob is located
next to the steering column.
Use the dial to shift into and out of
four-wheel drive.
Recommended Transfer Case Settings
Driving Conditions Transfer Case Settings
2m 4m4n N
Normal YES Severe YES
Extreme YES
Vehicle in Tow* YES
*See Recreational Vehicle Towing on page 10‑89 orTowing the Vehicle on
page 10‑89.
You can choose among four driving
settings:
Indicator lights in the dial show
which setting you are in. The
indicator lights will come on briefly
when you turn on the ignition and
one will stay on. If the lights do not
come on, you should take the
vehicle to your dealer for service.
An indicator light flashes while
shifting the transfer case and
remains illuminated when the shift is
complete. If for some reason the transfer case cannot make a
requested shift, it will return to the
last chosen setting.
2
m(Two-Wheel Drive High):
This
setting is used for driving in most
street and highway situations. The
front axle is not engaged in
Two-Wheel Drive. This setting also
provides the best fuel economy.
4
m(Four-Wheel Drive High): Use
the Four-Wheel Drive High position
when extra traction is needed, such
Page 317 of 542

Black plate (49,1)Chevrolet Silverado Owner Manual - 2013 - crc2 - 8/13/12
Driving and Operating 9-49
one shift per 10 seconds. The
transfer case may stay in this mode
for up to three minutes.
Automatic Transfer Case
The transfer case knob is located
next to the steering column.
Use the dial to shift into and out of
Four-Wheel Drive.
You can choose among five driving
settings:
Indicator lights in the dial show
which setting you are in. The
indicator lights will come on brieflywhen you turn on the ignition and
one will stay on. If the lights do not
come on, you should take the
vehicle to your dealer for service.
An indicator light will flash while
shifting the transfer case. It will
remain illuminated when the shift is
complete. If for some reason the
transfer case cannot make a
requested shift, it will return to the
last chosen setting.
2
m(Two-Wheel Drive High):
This
setting is used for driving in most
street and highway situations. The
front axle is not engaged in
Two-Wheel Drive. This setting also
provides the best fuel economy.
AUTO (Automatic Four-Wheel
Drive): This setting is ideal for use
when road surface traction
conditions are variable. When
driving the vehicle in AUTO, the
front axle is engaged, but the
vehicle's power is sent only to the
front and rear wheels automatically
based on driving conditions. Driving in this mode results in slightly lower
fuel economy than Two-Wheel
Drive High.
4
m(Four-Wheel Drive High):
Use
the Four-Wheel Drive High position
when extra traction is needed, such
as on snowy or icy roads or in most
off-road situations. This setting also
engages the front axle to help drive
the vehicle. This is the best setting
to use when plowing snow.
4
n(Four-Wheel Drive Low): This
setting also engages the front axle
and delivers extra torque. You may
never need this setting. It sends
maximum power to all four wheels.
You might choose Four-Wheel Drive
Low if you are driving off-road in
deep sand, deep mud, deep snow,
and while climbing or descending
steep hills.
If the vehicle has StabiliTrak
®,
shifting into Four-Wheel Drive Low
will turn Traction Control and
StabiliTrak off. See StabiliTrak
®
System on page 9‑56.
Page 322 of 542
Black plate (54,1)Chevrolet Silverado Owner Manual - 2013 - crc2 - 8/13/12
9-54 Driving and Operating
and hold it down, might be the
wrong thing to do. The wheels can
stop rolling. Once they do, the
vehicle cannot respond to the
driver's steering. Momentum will
carry it in whatever direction it was
headed when the wheels stopped
rolling. That could be off the road,
into the very thing the driver was
trying to avoid, or into traffic.
If the vehicle does not have ABS,
use a squeeze braking technique.
This gives maximum braking while
maintaining steering control. Do this
by pushing on the brake pedal with
steadily increasing pressure.
In an emergency, you will probably
want to squeeze the brakes hard
without locking the wheels. If you
hear or feel the wheels sliding, ease
off the brake pedal. This helps
retain steering control. With ABS, it
is different.
In many emergencies, steering can
help more than even the very best
braking.Parking Brake
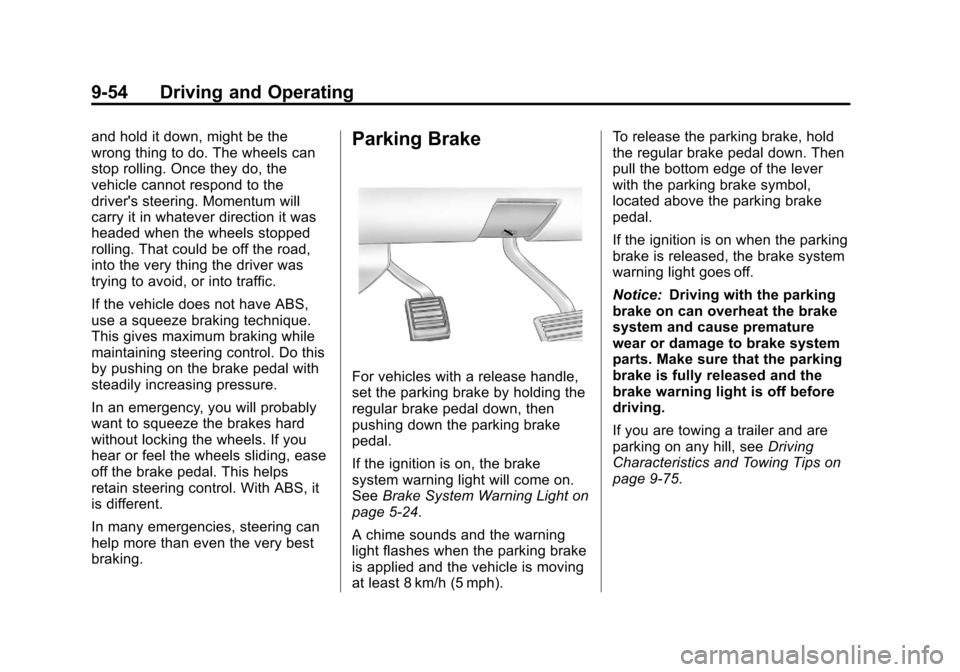
For vehicles with a release handle,
set the parking brake by holding the
regular brake pedal down, then
pushing down the parking brake
pedal.
If the ignition is on, the brake
system warning light will come on.
SeeBrake System Warning Light on
page 5‑24.
A chime sounds and the warning
light flashes when the parking brake
is applied and the vehicle is moving
at least 8 km/h (5 mph). To release the parking brake, hold
the regular brake pedal down. Then
pull the bottom edge of the lever
with the parking brake symbol,
located above the parking brake
pedal.
If the ignition is on when the parking
brake is released, the brake system
warning light goes off.
Notice:
Driving with the parking
brake on can overheat the brake
system and cause premature
wear or damage to brake system
parts. Make sure that the parking
brake is fully released and the
brake warning light is off before
driving.
If you are towing a trailer and are
parking on any hill, see Driving
Characteristics and Towing Tips on
page 9‑75.
Page 328 of 542
Black plate (60,1)Chevrolet Silverado Owner Manual - 2013 - crc2 - 8/13/12
9-60 Driving and Operating
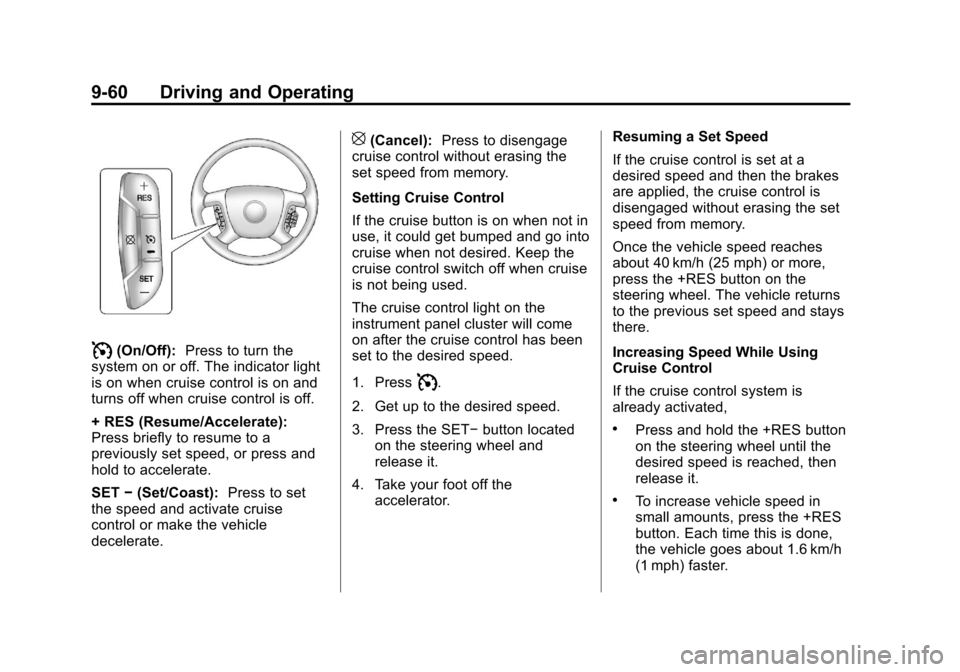
I(On/Off):Press to turn the
system on or off. The indicator light
is on when cruise control is on and
turns off when cruise control is off.
+ RES (Resume/Accelerate):
Press briefly to resume to a
previously set speed, or press and
hold to accelerate.
SET −(Set/Coast): Press to set
the speed and activate cruise
control or make the vehicle
decelerate.
[(Cancel): Press to disengage
cruise control without erasing the
set speed from memory.
Setting Cruise Control
If the cruise button is on when not in
use, it could get bumped and go into
cruise when not desired. Keep the
cruise control switch off when cruise
is not being used.
The cruise control light on the
instrument panel cluster will come
on after the cruise control has been
set to the desired speed.
1. Press
I.
2. Get up to the desired speed.
3. Press the SET− button located
on the steering wheel and
release it.
4. Take your foot off the accelerator. Resuming a Set Speed
If the cruise control is set at a
desired speed and then the brakes
are applied, the cruise control is
disengaged without erasing the set
speed from memory.
Once the vehicle speed reaches
about 40 km/h (25 mph) or more,
press the +RES button on the
steering wheel. The vehicle returns
to the previous set speed and stays
there.
Increasing Speed While Using
Cruise Control
If the cruise control system is
already activated,
.Press and hold the +RES button
on the steering wheel until the
desired speed is reached, then
release it.
.To increase vehicle speed in
small amounts, press the +RES
button. Each time this is done,
the vehicle goes about 1.6 km/h
(1 mph) faster.
Page 329 of 542

Black plate (61,1)Chevrolet Silverado Owner Manual - 2013 - crc2 - 8/13/12
Driving and Operating 9-61
Reducing Speed While Using
Cruise Control
If the cruise control system is
already activated,
.Press and hold the SET–button
on the steering wheel until the
desired lower speed is reached,
then release it.
.To slow down in small amounts,
press the SET– button on the
steering wheel briefly. Each time
this is done, the vehicle goes
about 1.6 km/h (1 mph) slower.
Passing Another Vehicle While
Using Cruise Control
Use the accelerator pedal to
increase the vehicle speed. When
you take your foot off the pedal, the
vehicle will slow down to the
previous set cruise speed.
Using Cruise Control on Hills
How well the cruise control works
on hills depends on the vehicle
speed, the load, and the steepness
of the hills. When going up steep hills, pressing the accelerator pedal
may be necessary to maintain
vehicle speed.
While going downhill:
.Vehicles with a four speed
automatic transmission may
need to have the brakes applied
or the transmission shifted to a
lower gear to maintain driver
selected speed.
.Vehicles with a six speed
automatic transmission and a
gasoline engine have Cruise
Grade Braking to help maintain
driver selected speed.
Cruise Grade Braking is enabled
when the vehicle is started and
Cruise Control is active. It is not
enabled in Range Selection
Mode. It assists in maintaining
driver selected speed when
driving on downhill grades by
using the engine and
transmission to slow the vehicle.
To disable and enable Cruise
Grade Braking for the current
ignition key cycle, press and
hold the Tow/Haul button for
three seconds. A DIC message
displays. See
Transmission
Messages on page 5‑44.
.Vehicles with a diesel engine
have Cruise Grade Braking
enabled when Tow/Haul Mode is
on, the exhaust brake is on,
or both are on.
For other forms of Grade Braking,
see Automatic Transmission on
page 9‑33 andTow/Haul Mode on
page 9‑38.
Page 330 of 542

Black plate (62,1)Chevrolet Silverado Owner Manual - 2013 - crc2 - 8/13/12
9-62 Driving and Operating
Ending Cruise Control
There are three ways to end cruise
control:
.To disengage cruise control;
step lightly on the brake pedal.
.Press[on the steering wheel.
.To turn off the cruise control,
press
Ion the steering wheel.
Erasing Speed Memory
The cruise control set speed is
erased from memory by pressing
Ior if the ignition is turned off.
Object Detection
Systems
Ultrasonic Parking Assist
If available, the Ultrasonic Rear
Parking Assist (URPA) system
assists the driver with parking and
avoiding objects while in
R (Reverse). URPA operates at
speeds less than 8 km/h (5 mph).
The sensors on the rear bumper
detect objects up to 2.5 m (8 ft)
behind the vehicle, and at least
25 cm (10 in) off the ground.
{WARNING
The URPA system does not
detect children, pedestrians,
bicyclists, animals, or objects
below the bumper or that are too
close or too far from the vehicle.
It is not available at speeds
greater than 8 km/h (5 mph). To
prevent injury, death, or vehicle (Continued)
WARNING (Continued)
damage, even with URPA, always
check the area around the vehicle
and check all mirrors before
backing.
How the System Works
URPA comes on automatically when
the shift lever is moved into
R (Reverse). A single tone sounds
to indicate the system is working.
URPA operates only at speeds less
than 8 km/h (5 mph).
An obstacle is indicated by audible
beeps. The interval between the
beeps becomes shorter as the
vehicle gets closer to the obstacle.
When the distance is less than
30 cm (12 in) the beeping is a
continuous tone for five seconds.
To be detected, objects must be at
least 25 cm (10 in) off the ground
and below tailgate level. Objects
must also be within 2.5 m (8 ft) from
Page 344 of 542
Black plate (76,1)Chevrolet Silverado Owner Manual - 2013 - crc2 - 8/13/12
9-76 Driving and Operating
Passing
More passing distance is needed
when towing a trailer. The
combination will not accelerate as
quickly and is longer so it is
necessary to go much farther
beyond the passed vehicle before
returning to the lane.
Backing Up
Hold the bottom of the steering
wheel with one hand. To move the
trailer to the left, move that hand to
the left. To move the trailer to the
right, move your hand to the right.
Always back up slowly and,
if possible, have someone
guide you.
Making Turns
Notice:Making very sharp turns
while trailering could cause the
trailer to come in contact with the
vehicle. The vehicle could be
damaged. Avoid making very
sharp turns while trailering. When turning with a trailer, make
wider turns than normal. Do this so
the trailer will not strike soft
shoulders, curbs, road signs, trees,
or other objects. Avoid jerky or
sudden maneuvers. Signal well in
advance.
If the trailer turn signal bulbs burn
out, the arrows on the instrument
cluster will still flash for turns. It is
important to check occasionally to
be sure the trailer bulbs are still
working.
Driving on Grades
Reduce speed and shift to a lower
gear
before starting down a long or
steep downgrade. If the
transmission is not shifted down, the
brakes might get hot and no longer
work well.
Vehicles can tow in D (Drive). Shift
the transmission to a lower gear if
the transmission shifts too often
under heavy loads and/or hilly
conditions. The Tow/Haul Mode may be used if
the transmission shifts too often.
See
Tow/Haul Mode on page 9‑38.
When towing at high altitude on
steep uphill grades, consider the
following: Engine coolant will boil at
a lower temperature than at normal
altitudes. If the engine is turned off
immediately after towing at high
altitude on steep uphill grades, the
vehicle may show signs similar to
engine overheating. To avoid this,
let the engine run while parked,
preferably on level ground, with the
automatic transmission in P (Park)
for a few minutes before turning the
engine off. If the overheat warning
comes on, see Engine Overheating
on page 10‑21.
Parking on Hills
{WARNING
Parking the vehicle on a hill with
the trailer attached can be
dangerous. If something goes
(Continued)
Page 365 of 542
Black plate (97,1)Chevrolet Silverado Owner Manual - 2013 - crc2 - 8/13/12
Driving and Operating 9-97
headlamps as a second way to
boost the vehicle system and
charge the battery.
Camper/Fifth-Wheel Trailer Wiring
Package
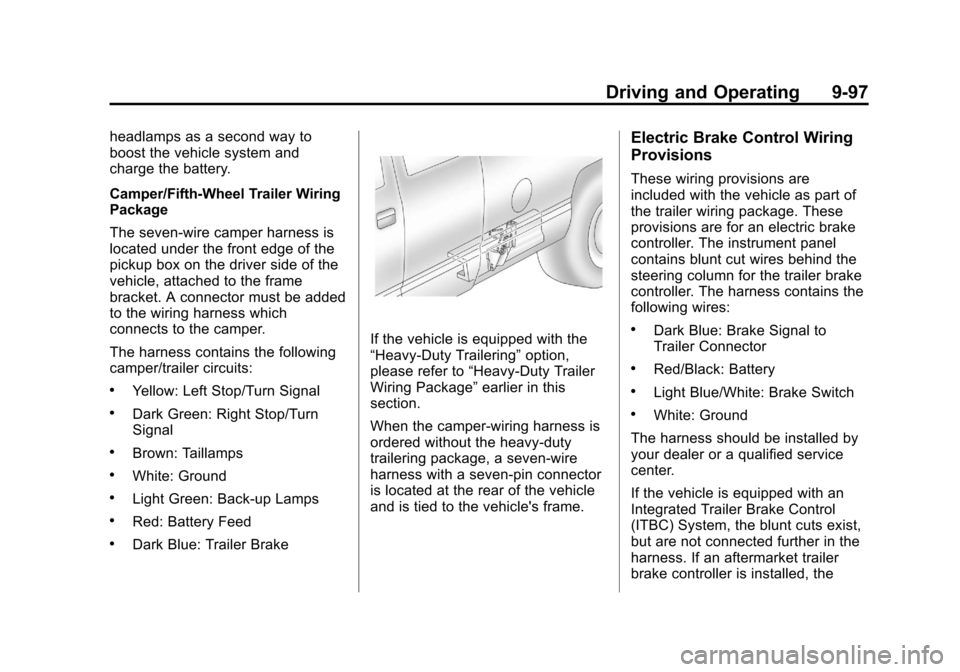
The seven-wire camper harness is
located under the front edge of the
pickup box on the driver side of the
vehicle, attached to the frame
bracket. A connector must be added
to the wiring harness which
connects to the camper.
The harness contains the following
camper/trailer circuits:
.Yellow: Left Stop/Turn Signal
.Dark Green: Right Stop/Turn
Signal
.Brown: Taillamps
.White: Ground
.Light Green: Back-up Lamps
.Red: Battery Feed
.Dark Blue: Trailer Brake
If the vehicle is equipped with the
“Heavy-Duty Trailering”option,
please refer to “Heavy-Duty Trailer
Wiring Package” earlier in this
section.
When the camper-wiring harness is
ordered without the heavy-duty
trailering package, a seven-wire
harness with a seven-pin connector
is located at the rear of the vehicle
and is tied to the vehicle's frame.
Electric Brake Control Wiring
Provisions
These wiring provisions are
included with the vehicle as part of
the trailer wiring package. These
provisions are for an electric brake
controller. The instrument panel
contains blunt cut wires behind the
steering column for the trailer brake
controller. The harness contains the
following wires:
.Dark Blue: Brake Signal to
Trailer Connector
.Red/Black: Battery
.Light Blue/White: Brake Switch
.White: Ground
The harness should be installed by
your dealer or a qualified service
center.
If the vehicle is equipped with an
Integrated Trailer Brake Control
(ITBC) System, the blunt cuts exist,
but are not connected further in the
harness. If an aftermarket trailer
brake controller is installed, the