2013 CHEVROLET SILVERADO tow
[x] Cancel search: towPage 375 of 542
Black plate (107,1)Chevrolet Silverado Owner Manual - 2013 - crc2 - 8/13/12
Driving and Operating 9-107
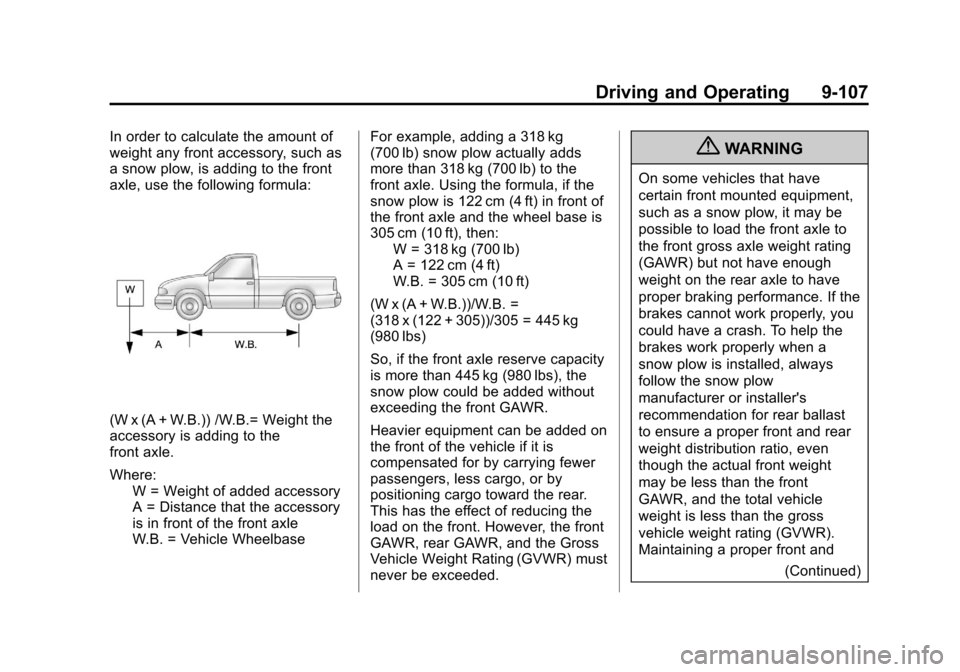
In order to calculate the amount of
weight any front accessory, such as
a snow plow, is adding to the front
axle, use the following formula:
(W x (A + W.B.)) /W.B.= Weight the
accessory is adding to the
front axle.
Where:W = Weight of added accessory
A = Distance that the accessory
is in front of the front axle
W.B. = Vehicle Wheelbase For example, adding a 318 kg
(700 lb) snow plow actually adds
more than 318 kg (700 lb) to the
front axle. Using the formula, if the
snow plow is 122 cm (4 ft) in front of
the front axle and the wheel base is
305 cm (10 ft), then:
W = 318 kg (700 lb)
A = 122 cm (4 ft)
W.B. = 305 cm (10 ft)
(W x (A + W.B.))/W.B. =
(318 x (122 + 305))/305 = 445 kg
(980 lbs)
So, if the front axle reserve capacity
is more than 445 kg (980 lbs), the
snow plow could be added without
exceeding the front GAWR.
Heavier equipment can be added on
the front of the vehicle if it is
compensated for by carrying fewer
passengers, less cargo, or by
positioning cargo toward the rear.
This has the effect of reducing the
load on the front. However, the front
GAWR, rear GAWR, and the Gross
Vehicle Weight Rating (GVWR) must
never be exceeded.
{WARNING
On some vehicles that have
certain front mounted equipment,
such as a snow plow, it may be
possible to load the front axle to
the front gross axle weight rating
(GAWR) but not have enough
weight on the rear axle to have
proper braking performance. If the
brakes cannot work properly, you
could have a crash. To help the
brakes work properly when a
snow plow is installed, always
follow the snow plow
manufacturer or installer's
recommendation for rear ballast
to ensure a proper front and rear
weight distribution ratio, even
though the actual front weight
may be less than the front
GAWR, and the total vehicle
weight is less than the gross
vehicle weight rating (GVWR).
Maintaining a proper front and (Continued)
Page 378 of 542

Black plate (2,1)Chevrolet Silverado Owner Manual - 2013 - crc2 - 8/13/12
10-2 Vehicle Care
Electrical System
Electrical SystemOverload . . . . . . . . . . . . . . . . . . 10-40
Fuses and Circuit Breakers . . . . . . . . . . . . . . . . . . 10-40
Engine Compartment Fuse
Block . . . . . . . . . . . . . . . . . . . . . 10-41
Instrument Panel Fuse Block . . . . . . . . . . . . . . . . . . . . . 10-45
Wheels and Tires
Tires . . . . . . . . . . . . . . . . . . . . . . . . 10-47
All-Season Tires . . . . . . . . . . . . 10-49
Winter Tires . . . . . . . . . . . . . . . . 10-49
Summer Tires . . . . . . . . . . . . . . 10-50
Tire Sidewall Labeling . . . . . . 10-50
Tire Designations . . . . . . . . . . . 10-52
Tire Terminology andDefinitions . . . . . . . . . . . . . . . . 10-54
Tire Pressure . . . . . . . . . . . . . . . 10-56
Tire Pressure for High-Speed Operation . . . . . . . . . . . . . . . . . 10-58
Tire Pressure Monitor System . . . . . . . . . . . . . . . . . . . 10-58
Tire Pressure Monitor Operation . . . . . . . . . . . . . . . . . 10-59
Tire Inspection . . . . . . . . . . . . . . 10-62
Tire Rotation . . . . . . . . . . . . . . . 10-63
Dual Tire Rotation . . . . . . . . . . 10-65 When It Is Time for New
Tires . . . . . . . . . . . . . . . . . . . . . . 10-65
Buying New Tires . . . . . . . . . . . 10-66
Different Size Tires and Wheels . . . . . . . . . . . . . . . . . . . 10-68
Uniform Tire Quality Grading . . . . . . . . . . . . . . . . . . . 10-68
Wheel Alignment and Tire Balance . . . . . . . . . . . . . . . . . . . 10-70
Wheel Replacement . . . . . . . . 10-70
Tire Chains . . . . . . . . . . . . . . . . . 10-71
If a Tire Goes Flat . . . . . . . . . . 10-72
Tire Changing . . . . . . . . . . . . . . 10-73
Full-Size Spare Tire . . . . . . . . 10-84
Jump Starting
Jump Starting . . . . . . . . . . . . . . 10-84
Towing
Towing the Vehicle . . . . . . . . . 10-89
Recreational Vehicle Towing . . . . . . . . . . . . . . . . . . . . 10-89
Appearance Care
Exterior Care . . . . . . . . . . . . . . . 10-93
Interior Care . . . . . . . . . . . . . . . . 10-96
Floor Mats . . . . . . . . . . . . . . . . . . 10-99
General Information
For service and parts needs, visit
your dealer. You will receive
genuine GM parts and GM-trained
and supported service people.
Genuine GM parts have one of
these marks:
California Proposition
65 Warning
Most motor vehicles, including this
one, contain and/or emit chemicals
known to the State of California to
Page 383 of 542
Black plate (7,1)Chevrolet Silverado Owner Manual - 2013 - crc2 - 8/13/12
Vehicle Care 10-7
Checking Engine Oil
It is a good idea to check the engine
oil level at each fuel fill. In order to
get an accurate reading, the vehicle
must be on level ground. The
engine oil dipstick handle is a loop.
SeeEngine Compartment Overview
on page 10‑5 for the location of the
engine oil dipstick.
Obtaining an accurate oil level
reading is essential:
1. If the engine has been running recently, turn off the engine and
allow several minutes for the oil
to drain back into the oil pan.
Checking the oil level too soon
after engine shutoff will not
provide an accurate oil level
reading.
{WARNING
The engine oil dipstick handle
may be hot; it could burn you.
Use a towel or glove to touch the
dipstick handle. 2. Pull out the dipstick and clean it
with a paper towel or cloth, then
push it back in all the way.
Remove it again, keeping the tip
down, and check the level.
When to Add Engine Oil
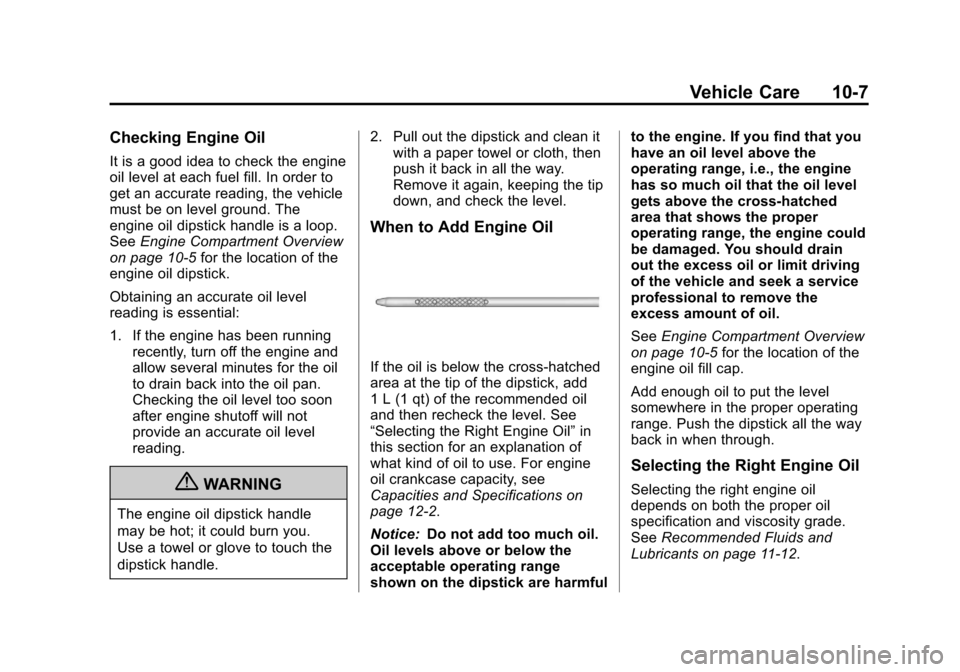
If the oil is below the cross-hatched
area at the tip of the dipstick, add
1 L (1 qt) of the recommended oil
and then recheck the level. See
“Selecting the Right Engine Oil” in
this section for an explanation of
what kind of oil to use. For engine
oil crankcase capacity, see
Capacities and Specifications on
page 12‑2.
Notice: Do not add too much oil.
Oil levels above or below the
acceptable operating range
shown on the dipstick are harmful to the engine. If you find that you
have an oil level above the
operating range, i.e., the engine
has so much oil that the oil level
gets above the cross-hatched
area that shows the proper
operating range, the engine could
be damaged. You should drain
out the excess oil or limit driving
of the vehicle and seek a service
professional to remove the
excess amount of oil.
See
Engine Compartment Overview
on page 10‑5 for the location of the
engine oil fill cap.
Add enough oil to put the level
somewhere in the proper operating
range. Push the dipstick all the way
back in when through.
Selecting the Right Engine Oil
Selecting the right engine oil
depends on both the proper oil
specification and viscosity grade.
See Recommended Fluids and
Lubricants on page 11‑12.
Page 387 of 542
Black plate (11,1)Chevrolet Silverado Owner Manual - 2013 - crc2 - 8/13/12
Vehicle Care 10-11
Get the vehicle warmed up by
driving about 24 km (15 miles) when
outside temperatures are above
10°C (50°F). If it is colder than 10°C
(50°F), drive the vehicle in 3 (Third)
until the engine temperature gauge
moves and then remains steady for
10 minutes.
A cold fluid check can be made
after the vehicle has been sitting for
eight hours or more with the engine
off, but this is used only as a
reference. Let the engine run at idle
for five minutes if outside
temperatures are 10°C (50°F) or
more. If it is colder than 10°C
(50°F), the engine may have to idle
longer. Should the fluid level be low
during this cold check, the fluid must
be checked when hot before adding
fluid. Checking the fluid hot will give
you a more accurate reading of the
fluid level.
Checking the Fluid Level
Prepare the vehicle as follows:
1. Park the vehicle on a levelplace. Keep the engine running. 2. With the parking brake applied,
place the shift lever in P (Park).
3. With your foot on the brake pedal, move the shift lever
through each gear range,
pausing for about three seconds
in each range. Then, position the
shift lever in P (Park).
4. Let the engine run at idle for three minutes or more.
Then, without shutting off the
engine, follow these steps:
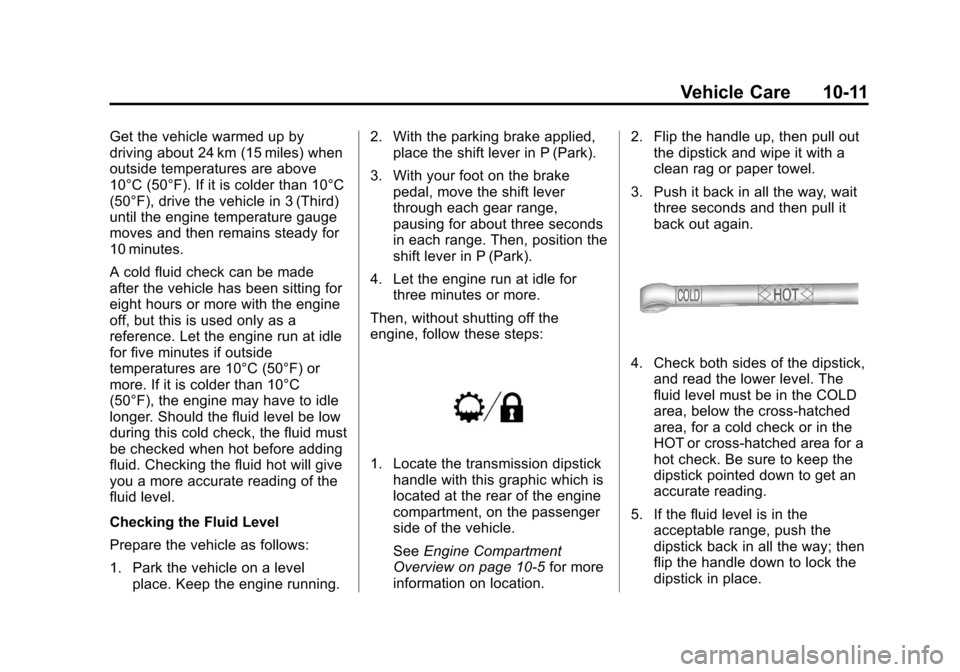
1. Locate the transmission dipstick handle with this graphic which is
located at the rear of the engine
compartment, on the passenger
side of the vehicle.
See Engine Compartment
Overview on page 10‑5 for more
information on location. 2. Flip the handle up, then pull out
the dipstick and wipe it with a
clean rag or paper towel.
3. Push it back in all the way, wait three seconds and then pull it
back out again.
4. Check both sides of the dipstick,and read the lower level. The
fluid level must be in the COLD
area, below the cross-hatched
area, for a cold check or in the
HOT or cross-hatched area for a
hot check. Be sure to keep the
dipstick pointed down to get an
accurate reading.
5. If the fluid level is in the acceptable range, push the
dipstick back in all the way; then
flip the handle down to lock the
dipstick in place.
Page 388 of 542

Black plate (12,1)Chevrolet Silverado Owner Manual - 2013 - crc2 - 8/13/12
10-12 Vehicle Care
Consistency of Readings
Always check the fluid level at least
twice using the procedure described
previously. Consistency (repeatable
readings) is important to maintaining
proper fluid level. If readings are still
inconsistent, contact the dealer.
How to Add Automatic
Transmission Fluid
Refer toRecommended Fluids and
Lubricants on page 11‑12 to
determine what kind of transmission
fluid to use.
Using a funnel, add fluid down the
transmission dipstick tube only after
checking the transmission fluid
while it is hot. A cold check is used
only as a reference. If the fluid level
is low, add only enough of the
proper fluid to bring the level up to
the HOT area for a hot check.
It does not take much fluid,
generally less than 0.5 Liter (1 Pint).
Do not overfill. Notice:
Use of the incorrect
automatic transmission fluid may
damage the vehicle, and the
damages may not be covered by
the vehicle warranty. Always use
the automatic transmission fluid
listed in Recommended Fluids
and Lubricants on page 11‑12.
.After adding fluid, recheck the
fluid level as described under
“How to Check Automatic
Transmission Fluid,” earlier in
this section.
.When the correct fluid level is
obtained, push the dipstick back
in all the way; then flip the
handle down to lock the dipstick
in place.
Automatic Transmission
Fluid (6-Speed
Transmission)
When to Check and Change
Automatic Transmission Fluid
It is usually not necessary to check
the transmission fluid level. The only
reason for fluid loss is a
transmission leak or overheated
transmission. If a small leak is
suspected, then use the following
checking procedures to check the
fluid level. However, if there is a
large leak, then it may be necessary
to have the vehicle towed to a
dealer service department and have
it repaired before driving the vehicle
further.
Notice: Use of the incorrect
automatic transmission fluid may
damage the vehicle, and the
damages may not be covered by
the vehicle warranty. Always use
the automatic transmission fluid
listed in Recommended Fluids
and Lubricants on page 11‑12.
Page 390 of 542
Black plate (14,1)Chevrolet Silverado Owner Manual - 2013 - crc2 - 8/13/12
10-14 Vehicle Care
1. Locate the transmission dipstickat the rear of the engine
compartment, on the passenger
side of the vehicle.
See Engine Compartment
Overview on page 10‑5 for more
information.
2. Flip the handle up, then pull out the dipstick and wipe it with a
clean rag or paper towel.
3. Install the dipstick by pushing it back in all the way; wait
three seconds, and then pull it
back out again.
4. Check both sides of the dipstick and read the lower level. Repeat
the check procedure to verify the
reading.5. If the fluid level is below theCOLD check band, add only
enough fluid as necessary to
bring the level into the COLD
band. It does not take much
fluid, generally less than 0.5 Liter
(1 Pint). Do not overfill.
6. Perform a hot check at the first opportunity after the
transmission reaches a normal
operating temperature between
71°C to 93°C (160°F to 200°F).
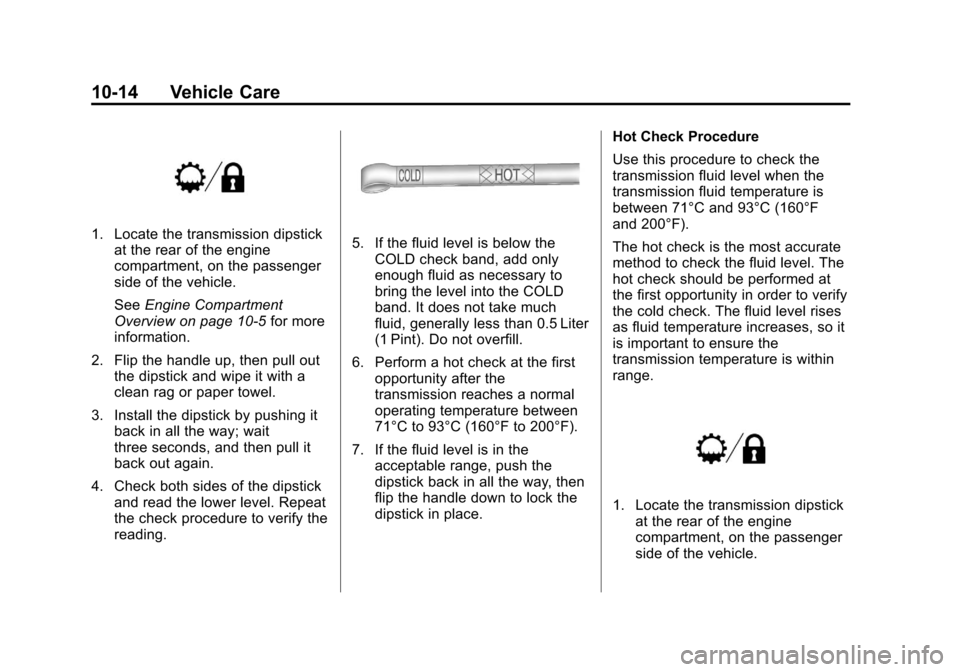
7. If the fluid level is in the acceptable range, push the
dipstick back in all the way, then
flip the handle down to lock the
dipstick in place. Hot Check Procedure
Use this procedure to check the
transmission fluid level when the
transmission fluid temperature is
between 71°C and 93°C (160°F
and 200°F).
The hot check is the most accurate
method to check the fluid level. The
hot check should be performed at
the first opportunity in order to verify
the cold check. The fluid level rises
as fluid temperature increases, so it
is important to ensure the
transmission temperature is within
range.
1. Locate the transmission dipstick
at the rear of the engine
compartment, on the passenger
side of the vehicle.
Page 391 of 542
Black plate (15,1)Chevrolet Silverado Owner Manual - 2013 - crc2 - 8/13/12
Vehicle Care 10-15
SeeEngine Compartment
Overview on page 10‑5 for more
information.
2. Flip the handle up, then pull out the dipstick and wipe it with a
clean rag or paper towel.
3. Install the dipstick by pushing it back in all the way; wait
three seconds, and then pull it
back out again.
4. Check both sides of the dipstick and read the lower level. Repeat
the check procedure to verify the
reading.
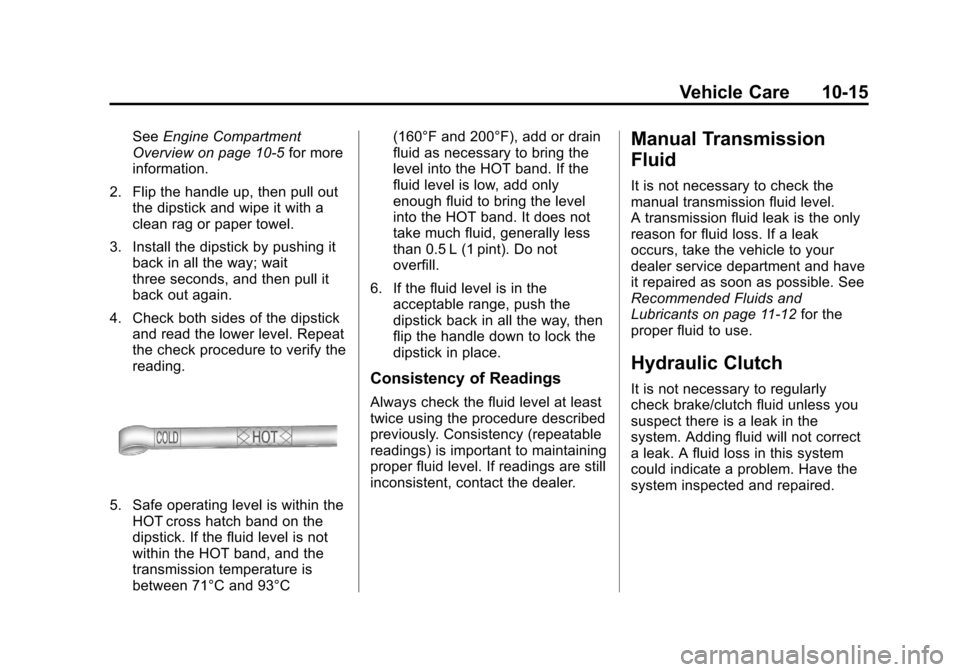
5. Safe operating level is within theHOT cross hatch band on the
dipstick. If the fluid level is not
within the HOT band, and the
transmission temperature is
between 71°C and 93°C (160°F and 200°F), add or drain
fluid as necessary to bring the
level into the HOT band. If the
fluid level is low, add only
enough fluid to bring the level
into the HOT band. It does not
take much fluid, generally less
than 0.5 L (1 pint). Do not
overfill.
6. If the fluid level is in the acceptable range, push the
dipstick back in all the way, then
flip the handle down to lock the
dipstick in place.
Consistency of Readings
Always check the fluid level at least
twice using the procedure described
previously. Consistency (repeatable
readings) is important to maintaining
proper fluid level. If readings are still
inconsistent, contact the dealer.
Manual Transmission
Fluid
It is not necessary to check the
manual transmission fluid level.
A transmission fluid leak is the only
reason for fluid loss. If a leak
occurs, take the vehicle to your
dealer service department and have
it repaired as soon as possible. See
Recommended Fluids and
Lubricants on page 11‑12 for the
proper fluid to use.
Hydraulic Clutch
It is not necessary to regularly
check brake/clutch fluid unless you
suspect there is a leak in the
system. Adding fluid will not correct
a leak. A fluid loss in this system
could indicate a problem. Have the
system inspected and repaired.
Page 398 of 542

Black plate (22,1)Chevrolet Silverado Owner Manual - 2013 - crc2 - 8/13/12
10-22 Vehicle Care
Notice:Running the engine
without coolant may cause
damage or a fire. Vehicle damage
would not be covered by the
warranty. See Overheated Engine
Protection Operating Mode on
page 10‑23 for information on
driving to a safe place in an
emergency.
If Steam is Coming from the
Engine Compartment
{WARNING
Steam from an overheated engine
can burn you badly, even if you
just open the hood. Stay away
from the engine if you see or hear
steam coming from it. Turn it off
and get everyone away from the
vehicle until it cools down. Wait
until there is no sign of steam or
coolant before you open
the hood.
(Continued)
WARNING (Continued)
If you keep driving when the
vehicles engine is overheated,
the liquids in it can catch fire. You
or others could be badly burned.
Stop the engine if it overheats,
and get out of the vehicle until the
engine is cool.
SeeOverheated Engine
Protection Operating Mode on
page 10‑23 for information on
driving to a safe place in an
emergency.
If No Steam is Coming from
the Engine Compartment
The ENGINE OVERHEATED STOP
ENGINE or the ENGINE
OVERHEATED IDLE ENGINE
message, along with a low coolant
condition, can indicate a serious
problem. If there is an engine overheat
warning, but no steam is seen or
heard, the problem may not be too
serious. Sometimes the engine can
get a little too hot when the vehicle:
.Climbs a long hill on a hot day
.Stops after high-speed driving
.Idles for long periods in traffic
.Tows a trailer; see
Trailer Towing
on page 9‑77.
If the ENGINE OVERHEATED
STOP ENGINE or the ENGINE
OVERHEATED IDLE ENGINE
message appears with no sign of
steam, try this for a minute or so:
1. Turn the air conditioning off.
2. Turn the heater on to the highest temperature and to the highest
fan speed. Open the windows as
necessary.