2013 CHEVROLET SILVERADO 1500 ECU
[x] Cancel search: ECUPage 128 of 542
Black plate (66,1)Chevrolet Silverado Owner Manual - 2013 - crc2 - 8/13/12
3-66 Seats and Restraints
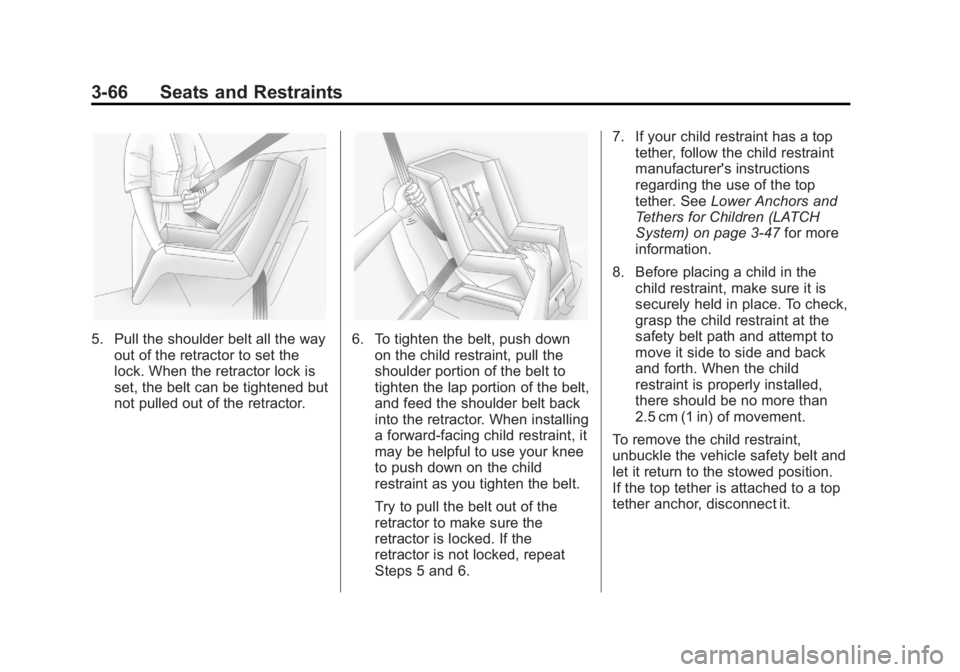
5. Pull the shoulder belt all the wayout of the retractor to set the
lock. When the retractor lock is
set, the belt can be tightened but
not pulled out of the retractor.6. To tighten the belt, push downon the child restraint, pull the
shoulder portion of the belt to
tighten the lap portion of the belt,
and feed the shoulder belt back
into the retractor. When installing
a forward-facing child restraint, it
may be helpful to use your knee
to push down on the child
restraint as you tighten the belt.
Try to pull the belt out of the
retractor to make sure the
retractor is locked. If the
retractor is not locked, repeat
Steps 5 and 6. 7. If your child restraint has a top
tether, follow the child restraint
manufacturer's instructions
regarding the use of the top
tether. See Lower Anchors and
Tethers for Children (LATCH
System) on page 3‑47 for more
information.
8. Before placing a child in the child restraint, make sure it is
securely held in place. To check,
grasp the child restraint at the
safety belt path and attempt to
move it side to side and back
and forth. When the child
restraint is properly installed,
there should be no more than
2.5 cm (1 in) of movement.
To remove the child restraint,
unbuckle the vehicle safety belt and
let it return to the stowed position.
If the top tether is attached to a top
tether anchor, disconnect it.
Page 131 of 542
Black plate (1,1)Chevrolet Silverado Owner Manual - 2013 - crc2 - 8/13/12
Instruments and Controls 5-1
Instruments and
Controls
Controls
Steering Wheel Adjustment . . . 5-2
Steering Wheel Controls . . . . . . 5-2
Horn . . . . . . . . . . . . . . . . . . . . . . . . . . 5-4
Windshield Wiper/Washer . . . . . 5-4
Compass . . . . . . . . . . . . . . . . . . . . . 5-5
Clock . . . . . . . . . . . . . . . . . . . . . . . . . 5-7
Power Outlets . . . . . . . . . . . . . . . . . 5-9
Cigarette Lighter . . . . . . . . . . . . . . 5-9
Ashtrays . . . . . . . . . . . . . . . . . . . . . 5-10
Warning Lights, Gauges, and
Indicators
Warning Lights, Gauges, andIndicators . . . . . . . . . . . . . . . . . . 5-10
Instrument Cluster . . . . . . . . . . . 5-11
Speedometer . . . . . . . . . . . . . . . . 5-12
Odometer . . . . . . . . . . . . . . . . . . . . 5-12
Trip Odometer . . . . . . . . . . . . . . . 5-12
Tachometer . . . . . . . . . . . . . . . . . . 5-12
Fuel Gauge . . . . . . . . . . . . . . . . . . 5-13
Engine Oil Pressure Gauge . . . . . . . . . . . . . . . . . . . . . . 5-14 Engine Coolant Temperature
Gauge . . . . . . . . . . . . . . . . . . . . . . 5-15
Voltmeter Gauge . . . . . . . . . . . . . 5-16
Safety Belt Reminders . . . . . . . 5-16
Airbag Readiness Light . . . . . . 5-17
Airbag On-Off Light . . . . . . . . . . 5-18
Passenger Airbag Status Indicator . . . . . . . . . . . . . . . . . . . . 5-20
Charging System Light . . . . . . 5-21
Malfunction Indicator Lamp . . . . . . . . . . . . . 5-21
Brake System Warning Light . . . . . . . . . . . . . . . . . . . . . . . 5-24
Antilock Brake System (ABS) Warning Light . . . . . . . . . . . . . . 5-24
Four-Wheel-Drive Light . . . . . . 5-25
Tow/Haul Mode Light . . . . . . . . 5-25
StabiliTrak
®OFF Light . . . . . . . 5-25
Traction Control System (TCS)/StabiliTrak
®Light . . . . 5-26
Tire Pressure Light . . . . . . . . . . 5-26
Engine Oil Pressure Light . . . . 5-27
Low Fuel Warning Light . . . . . . 5-27
Security Light . . . . . . . . . . . . . . . . 5-28
High-Beam On Light . . . . . . . . . 5-28
Front Fog Lamp Light . . . . . . . . 5-28
Cruise Control Light . . . . . . . . . 5-28
Information Displays
Driver Information Center (DIC) . . . . . . . . . . . . . . . 5-29
Vehicle Messages
Vehicle Messages . . . . . . . . . . . 5-37
Battery Voltage and ChargingMessages . . . . . . . . . . . . . . . . . . 5-38
Brake System Messages . . . . 5-38
Door Ajar Messages . . . . . . . . . 5-39
Engine Cooling System Messages . . . . . . . . . . . . . . . . . . 5-39
Engine Oil Messages . . . . . . . . 5-40
Engine Power Messages . . . . 5-41
Fuel System Messages . . . . . . 5-41
Key and Lock Messages . . . . . 5-41
Lamp Messages . . . . . . . . . . . . . 5-41
Object Detection System Messages . . . . . . . . . . . . . . . . . . 5-42
Ride Control System Messages . . . . . . . . . . . . . . . . . . 5-42
Airbag System Messages . . . . 5-43
Security Messages . . . . . . . . . . 5-43
Starting the Vehicle Messages . . . . . . . . . . . . . . . . . . 5-43
Tire Messages . . . . . . . . . . . . . . . 5-44
Page 158 of 542
Black plate (28,1)Chevrolet Silverado Owner Manual - 2013 - crc2 - 8/13/12
5-28 Instruments and Controls
Security Light
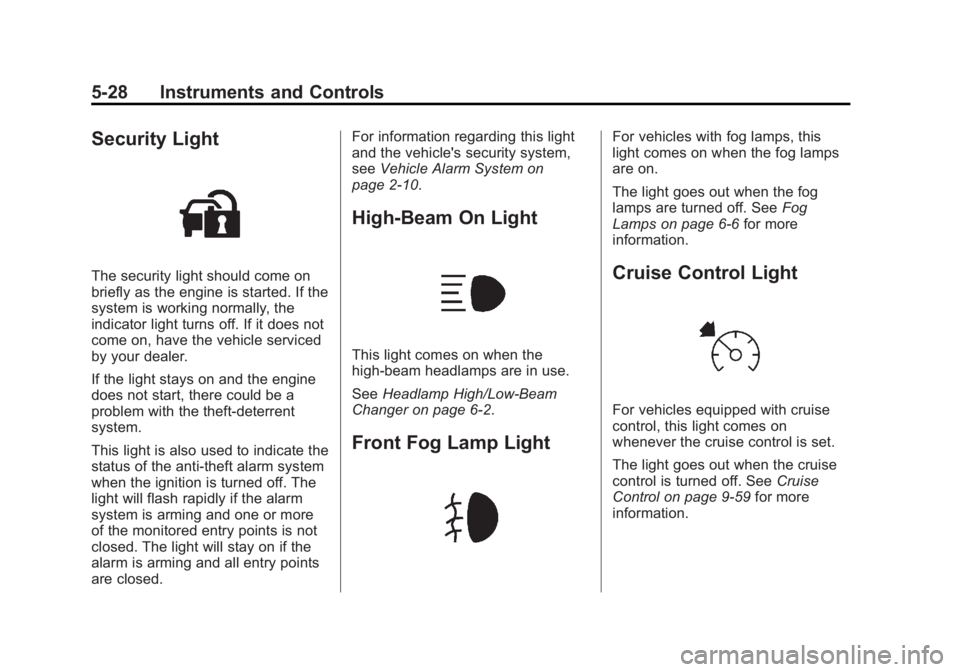
The security light should come on
briefly as the engine is started. If the
system is working normally, the
indicator light turns off. If it does not
come on, have the vehicle serviced
by your dealer.
If the light stays on and the engine
does not start, there could be a
problem with the theft-deterrent
system.
This light is also used to indicate the
status of the anti-theft alarm system
when the ignition is turned off. The
light will flash rapidly if the alarm
system is arming and one or more
of the monitored entry points is not
closed. The light will stay on if the
alarm is arming and all entry points
are closed.For information regarding this light
and the vehicle's security system,
see
Vehicle Alarm System on
page 2‑10.
High-Beam On Light
This light comes on when the
high-beam headlamps are in use.
See Headlamp High/Low-Beam
Changer on page 6‑2.
Front Fog Lamp Light
For vehicles with fog lamps, this
light comes on when the fog lamps
are on.
The light goes out when the fog
lamps are turned off. See Fog
Lamps on page 6‑6 for more
information.
Cruise Control Light
For vehicles equipped with cruise
control, this light comes on
whenever the cruise control is set.
The light goes out when the cruise
control is turned off. See Cruise
Control on page 9‑59 for more
information.
Page 173 of 542
Black plate (43,1)Chevrolet Silverado Owner Manual - 2013 - crc2 - 8/13/12
Instruments and Controls 5-43
limit wheel spin and realize the full
benefits of the stability
enhancement system, you should
normally leave StabiliTrak on.
However, you should turn
StabiliTrak off if the vehicle gets
stuck in sand, mud, ice, or snow
and you want to rock the vehicle to
attempt to free it, or if you are
driving in extreme off-road
conditions and require more wheel
spin. SeeIf the Vehicle Is Stuck on
page 9‑14. To turn the StabiliTrak
system on or off, see StabiliTrak
®
System on page 9‑56.
STABILITRAK OFF may also
display when the stability control
has been automatically disabled.
There are several conditions that
can cause this message to appear.
.One condition is overheating,
which could occur if StabiliTrak
activates continuously for an
extended period of time.
.The message also displays if the
brake system warning light is on.
SeeBrake System Warning
Light on page 5‑24.
.The message could display if the
stability system takes longer
than usual to complete its
diagnostic checks due to driving
conditions.
.The message displays if an
engine or vehicle related
problem has been detected and
the vehicle needs service. See
your dealer.
The message turns off as soon as
the conditions that caused the
message to be displayed are no
longer present.
Airbag System Messages
SERVICE AIR BAG
This message displays if there is a
problem with the airbag system.
Have your dealer inspect the
system for problems. See
Airbag Readiness Light on
page 5‑17 andAirbag System on
page 3‑22 for more information.
Security Messages
SERVICE THEFT DETERRENT
SYSTEM
This message displays when there
is a problem with the theft-deterrent
system. The vehicle may or may not
restart so you may want to take the
vehicle to your dealer before turning
off the engine. See Immobilizer
Operation on page 2‑12 for more
information.
Starting the Vehicle
Messages
FAST IDLE ON
If your vehicle has this feature, this
message displays when the fast idle
feature is on. See Fast Idle System
on page 9‑28 for more information.
Page 184 of 542
Black plate (54,1)Chevrolet Silverado Owner Manual - 2013 - crc2 - 8/13/12
5-54 Instruments and Controls
If you do not exit, pressing the
customization button again will
return you to the beginning of the
feature settings menu.
Exiting the Feature
Settings Menu
The feature settings menu will be
exited when any of the following
occurs:
.The vehicle is no longer in
ON/RUN.
.The trip/fuel or vehicle
information DIC buttons are
pressed.
.The end of the feature settings
menu is reached and exited.
.A 40-second time period has
elapsed with no selection made.
Universal Remote
System
SeeRadio Frequency Statement on
page 13‑20 for information
regarding Part 15 of the Federal
Communications Commission (FCC)
rules and Industry Canada
Standards RSS-GEN/210/220/310.
Universal Remote System
Programming
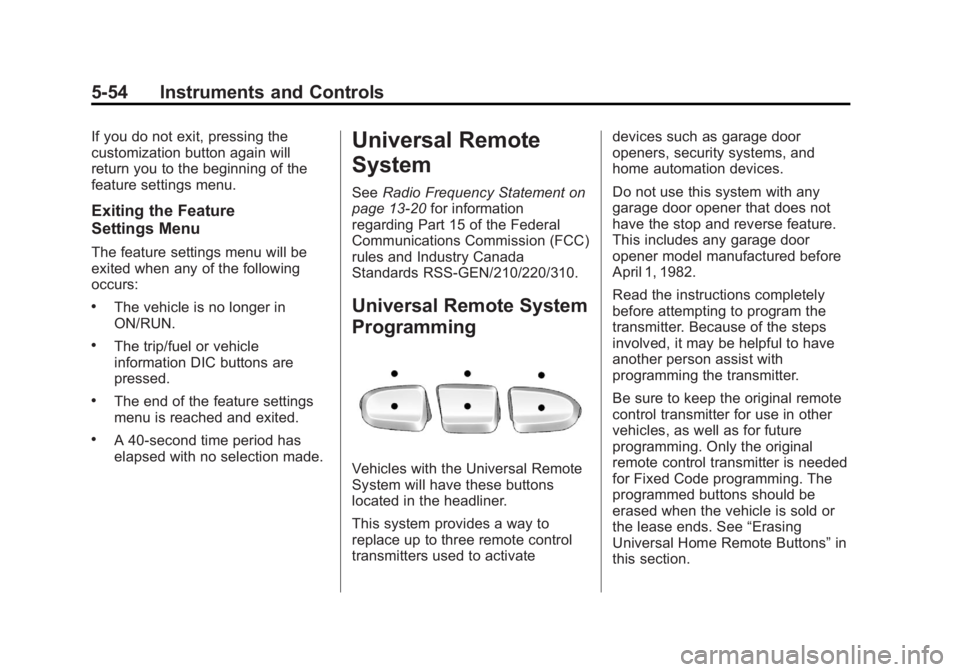
Vehicles with the Universal Remote
System will have these buttons
located in the headliner.
This system provides a way to
replace up to three remote control
transmitters used to activate devices such as garage door
openers, security systems, and
home automation devices.
Do not use this system with any
garage door opener that does not
have the stop and reverse feature.
This includes any garage door
opener model manufactured before
April 1, 1982.
Read the instructions completely
before attempting to program the
transmitter. Because of the steps
involved, it may be helpful to have
another person assist with
programming the transmitter.
Be sure to keep the original remote
control transmitter for use in other
vehicles, as well as for future
programming. Only the original
remote control transmitter is needed
for Fixed Code programming. The
programmed buttons should be
erased when the vehicle is sold or
the lease ends. See
“Erasing
Universal Home Remote Buttons” in
this section.
Page 185 of 542
Black plate (55,1)Chevrolet Silverado Owner Manual - 2013 - crc2 - 8/13/12
Instruments and Controls 5-55
Park the vehicle outside of the
garage when programming a garage
door. Be sure that people and
objects are clear of the garage door
or gate that is being programmed.
Programming Universal Home
Remote—Rolling Code
For questions or help programming
the Universal Home Remote
System, call 1-866-572-2728 or go
to www.learcar2u.com.
Most garage door openers sold
after 1996 are Rolling Code units.
Programming a garage door opener
involves time-sensitive actions, so
read the entire procedure before
starting. Otherwise, the device will
time out and the procedure will have
to be repeated.
To program up to three devices:
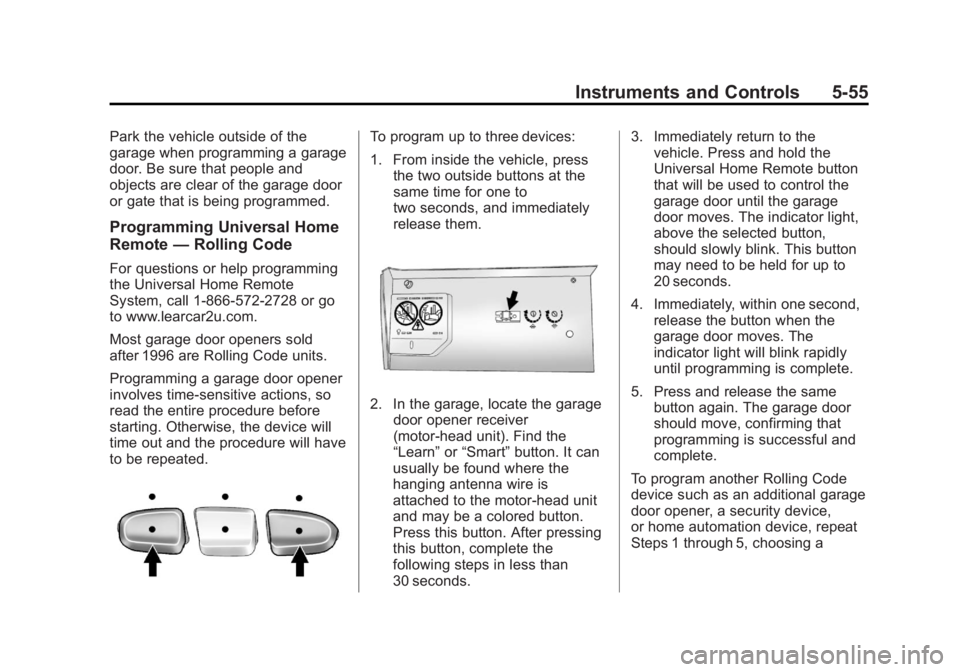
1. From inside the vehicle, press
the two outside buttons at the
same time for one to
two seconds, and immediately
release them.
2. In the garage, locate the garagedoor opener receiver
(motor-head unit). Find the
“Learn” or“Smart” button. It can
usually be found where the
hanging antenna wire is
attached to the motor-head unit
and may be a colored button.
Press this button. After pressing
this button, complete the
following steps in less than
30 seconds. 3. Immediately return to the
vehicle. Press and hold the
Universal Home Remote button
that will be used to control the
garage door until the garage
door moves. The indicator light,
above the selected button,
should slowly blink. This button
may need to be held for up to
20 seconds.
4. Immediately, within one second, release the button when the
garage door moves. The
indicator light will blink rapidly
until programming is complete.
5. Press and release the same button again. The garage door
should move, confirming that
programming is successful and
complete.
To program another Rolling Code
device such as an additional garage
door opener, a security device,
or home automation device, repeat
Steps 1 through 5, choosing a
Page 188 of 542
Black plate (58,1)Chevrolet Silverado Owner Manual - 2013 - crc2 - 8/13/12
5-58 Instruments and Controls
C. Right Button (Down,−,
or Off)
4. The indicator lights will blink slowly. Enter each switch setting
from Step 2 into your vehicle's
Universal Home Remote. You
will have two and one-half
minutes to complete Step 4. Now
press one button on the
Universal Home Remote for
each switch setting as follows:
.If you wrote “Left,”press
the left button (A) in the
vehicle.
.If you wrote “Right,”press
the right button (C) in the
vehicle.
.If you wrote “Middle,”press
the middle button (B) in the
vehicle.
5. After entering all of the switch positions, once again firmly
press and release all three
buttons at the same time. The
indicator lights will turn on. 6. Press and hold the button that
will be used to control the
garage door until the garage
door moves. The indicator light
above the selected button
should slowly blink. This button
may need to be held for up to
55 seconds.
7. Immediately release the button when the garage door moves.
The indicator light will blink
rapidly until programming is
complete.
8. Press and release the same button again. The garage door
should move, confirming that
programming is successful and
complete.
To program another Fixed Code
device such as an additional garage
door opener, a security device,
or home automation device, repeat
Steps 1-8, choosing a different
button in Step 6 than what was used
for the garage door opener.
Universal Remote System
Operation
Press and hold the appropriate
button for at least half of a second.
The indicator light will come on
while the signal is being transmitted.
Reprogramming Universal
Home Remote Buttons
Any of the three buttons can be
reprogrammed by repeating the
instructions.
Erasing Universal Home
Remote Buttons
The programmed buttons should be
erased when the vehicle is sold or
the lease ends.
Page 215 of 542
Black plate (15,1)Chevrolet Silverado Owner Manual - 2013 - crc2 - 8/13/12
Infotainment System 7-15
Channel Unauth:This channel is
blocked or cannot be received with
your SiriusXM subscription package.
Channel Unavail: This previously
assigned channel is no longer
assigned. Tune to another station.
If this station was one of the
presets, choose another station for
that preset button.
No Artist Info: No artist
information is available at this time
on this channel. The system is
working properly.
No Title Info: No song title
information is available at this time
on this channel. The system is
working properly.
No CAT Info: No category
information is available at this time
on this channel. The system is
working properly.
No Information: No text or
informational messages are
available at this time on this
channel. The system is working
properly. No Subscription Please Renew:
The SiriusXM subscription needs to
be reactivated. Contact SiriusXM at
www.siriusxm.com or call
1-866-635-2349 (U.S) and
www.xmradio.ca or call
1-877-209-0079 (Canada).
CAT Not Found:
There are no
channels available for the selected
category. The system is working
properly.
XM Theftlocked: The SiriusXM
receiver in the vehicle could have
previously been in another vehicle.
For security purposes, SiriusXM
receivers cannot be swapped
between vehicles. If this message is
received after having the vehicle
serviced, check with your dealer.
XM Radio ID: If tuned to channel 0,
this message alternates with the
SiriusXM Radio eight-digit radio ID
label. This label is needed to
activate the service. Unknown:
If this message is
received when tuned to channel 0,
there could be a receiver fault.
Consult with your dealer.
Check Antenna: If this message
does not clear within a short period
of time, the receiver or antenna
could have a fault. Consult with your
dealer.
Check XM Receiver: If this
message does not clear within a
short period of time, the receiver
could have a fault. Consult with your
dealer.
XM Not Available: If this message
does not clear within a short period
of time, the receiver could have a
fault. Consult with your dealer.