2013 CHEVROLET MALIBU display
[x] Cancel search: displayPage 42 of 436
Black plate (10,1)Chevrolet Malibu Owner Manual - 2013 - CRC - 6/6/12
2-10 Keys, Doors, and Windows
Automatic Door Locks
The vehicle is programmed to lock
all doors automatically when the
following are met:
.All doors are closed.
.The ignition is on.
.The vehicle is shifted out of
P (Park).
This feature cannot be disabled.
All doors will unlock when the
vehicle is shifted into P (Park).
The power door unlock function can
be programmed through prompts
displayed on the Driver Information
Center (DIC). See Vehicle
Personalization on page 5‑35.
Lockout Protection
If the power door lock switch is
pressed when the key is in the
ignition and any door is open, all
doors will lock and then the driver
door will unlock. Be sure to remove
the key from the ignition when
locking the vehicle. If the Remote Keyless Entry (RKE)
transmitter is used to lock the doors
while the key is in the ignition, a
chime will sound three times. All
doors will then lock.
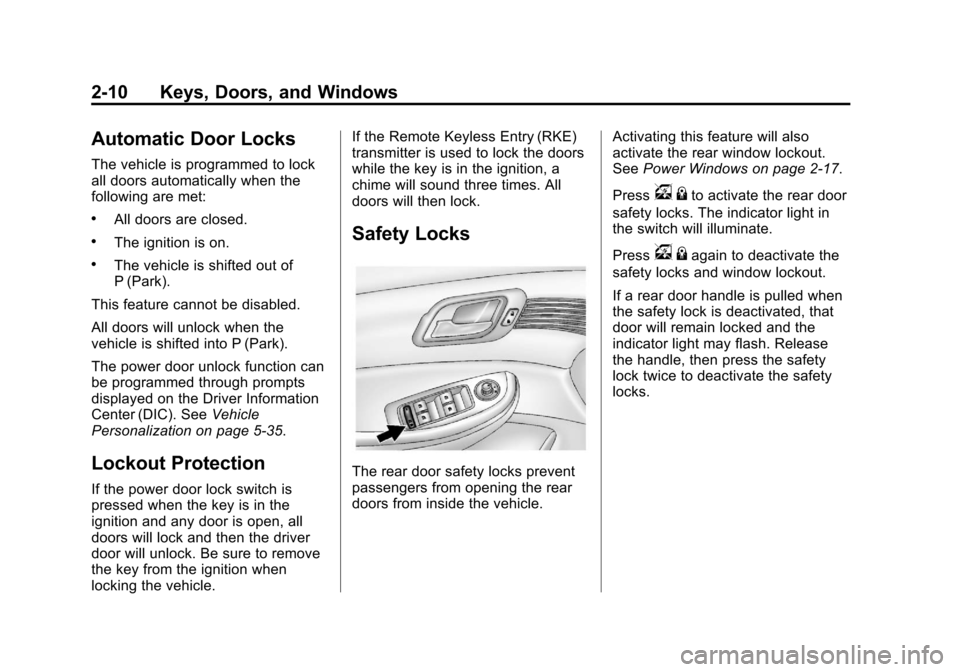
Safety Locks
The rear door safety locks prevent
passengers from opening the rear
doors from inside the vehicle.
Activating this feature will also
activate the rear window lockout.
See
Power Windows on page 2‑17.
Press
v {to activate the rear door
safety locks. The indicator light in
the switch will illuminate.
Press
v {again to deactivate the
safety locks and window lockout.
If a rear door handle is pulled when
the safety lock is deactivated, that
door will remain locked and the
indicator light may flash. Release
the handle, then press the safety
lock twice to deactivate the safety
locks.
Page 84 of 436
Black plate (32,1)Chevrolet Malibu Owner Manual - 2013 - CRC - 6/6/12
3-32 Seats and Restraints
If the airbag readiness light stays on
after the vehicle is started or comes
on when you are driving, the airbag
system may not work properly. Have
the vehicle serviced right away. See
Airbag Readiness Light on
page 5‑12for more information.
Vehicles with eAssist have a high
voltage battery and a standard 12‐
volt battery. If an airbag inflates or
the vehicle has been in a crash, the
vehicle's sensing system may shut
down the high voltage system.
When this occurs, the high voltage
battery is disconnected and the
vehicle is not charging the 12‐volt
battery or the electrical system. The
vehicle may start but it shuts down
once the 12‐volt battery is depleted.
When the 12‐volt battery is
depleted, the vehicle will not start
and the on‐board jump start feature
is disabled. The airbag readiness
light and/or the 12‐volt battery
warning light are displayed. Before
the vehicle can be operated again, it
must be serviced at your dealer.Child Restraints
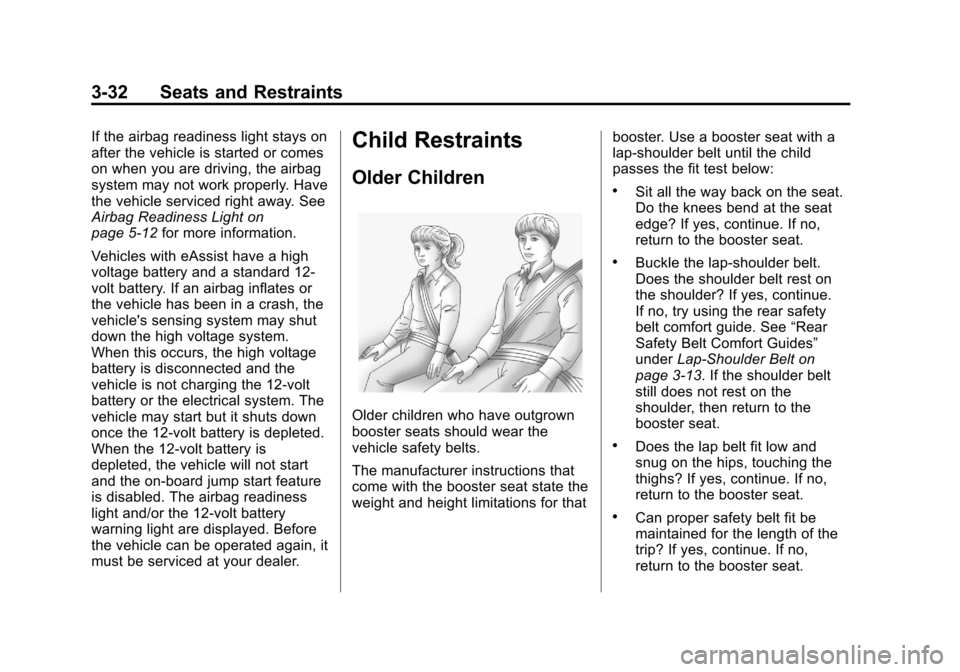
Older Children
Older children who have outgrown
booster seats should wear the
vehicle safety belts.
The manufacturer instructions that
come with the booster seat state the
weight and height limitations for that booster. Use a booster seat with a
lap-shoulder belt until the child
passes the fit test below:
.Sit all the way back on the seat.
Do the knees bend at the seat
edge? If yes, continue. If no,
return to the booster seat.
.Buckle the lap-shoulder belt.
Does the shoulder belt rest on
the shoulder? If yes, continue.
If no, try using the rear safety
belt comfort guide. See
“Rear
Safety Belt Comfort Guides”
under Lap-Shoulder Belt on
page 3‑13. If the shoulder belt
still does not rest on the
shoulder, then return to the
booster seat.
.Does the lap belt fit low and
snug on the hips, touching the
thighs? If yes, continue. If no,
return to the booster seat.
.Can proper safety belt fit be
maintained for the length of the
trip? If yes, continue. If no,
return to the booster seat.
Page 105 of 436
Black plate (1,1)Chevrolet Malibu Owner Manual - 2013 - CRC - 6/6/12
Storage 4-1
Storage
Storage Compartments
Instrument Panel Storage . . . . . 4-1
Glove Box . . . . . . . . . . . . . . . . . . . . 4-1
Cupholders . . . . . . . . . . . . . . . . . . . 4-2
Sunglasses Storage . . . . . . . . . . 4-2
Center Console Storage . . . . . . 4-3
Additional Storage Features
Cargo Tie-Downs . . . . . . . . . . . . . 4-3
Convenience Net . . . . . . . . . . . . . 4-3
Storage
Compartments
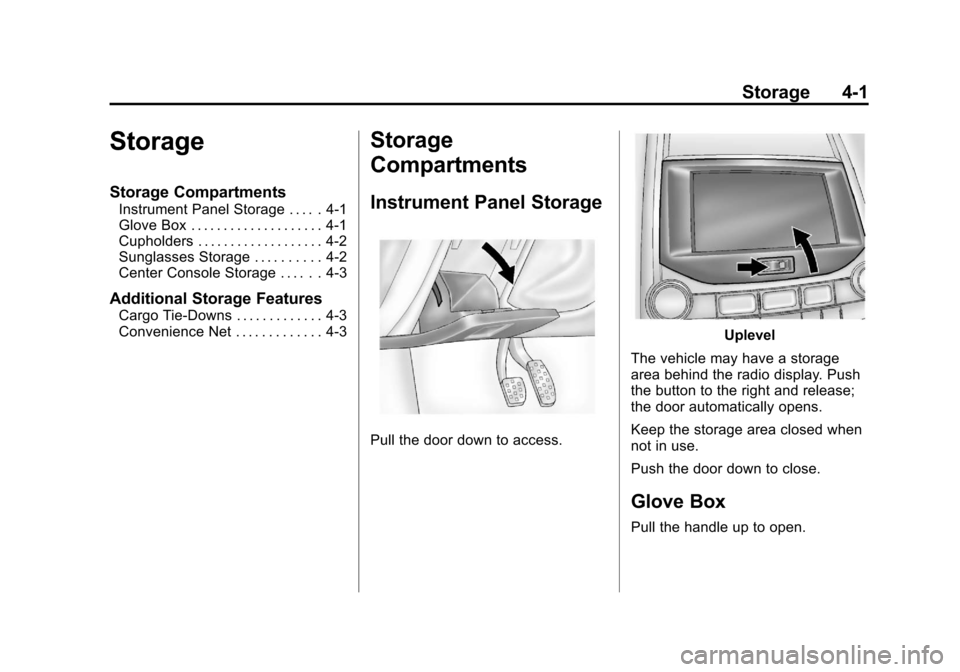
Instrument Panel Storage
Pull the door down to access.
Uplevel
The vehicle may have a storage
area behind the radio display. Push
the button to the right and release;
the door automatically opens.
Keep the storage area closed when
not in use.
Push the door down to close.
Glove Box
Pull the handle up to open.
Page 109 of 436
Black plate (1,1)Chevrolet Malibu Owner Manual - 2013 - CRC - 6/6/12
Instruments and Controls 5-1
Instruments and
Controls
Controls
Steering Wheel Adjustment . . . 5-2
Steering Wheel Controls . . . . . . 5-2
Horn . . . . . . . . . . . . . . . . . . . . . . . . . . 5-3
Windshield Wiper/Washer . . . . . 5-3
Compass . . . . . . . . . . . . . . . . . . . . . 5-4
Clock . . . . . . . . . . . . . . . . . . . . . . . . . 5-5
Power Outlets . . . . . . . . . . . . . . . . . 5-5
Warning Lights, Gauges, and
Indicators
Warning Lights, Gauges, andIndicators . . . . . . . . . . . . . . . . . . . . 5-7
Instrument Cluster . . . . . . . . . . . . 5-8
Speedometer . . . . . . . . . . . . . . . . 5-10
Odometer . . . . . . . . . . . . . . . . . . . . 5-10
Trip Odometer . . . . . . . . . . . . . . . 5-10
Tachometer . . . . . . . . . . . . . . . . . . 5-10
Fuel Gauge . . . . . . . . . . . . . . . . . . 5-10
Driver Efficiency Gauge . . . . . . 5-11
Engine Coolant Temperature Gauge . . . . . . . . . . . . . . . . . . . . . . 5-11
Safety Belt Reminders . . . . . . . 5-12
Airbag Readiness Light . . . . . . 5-12 Passenger Airbag Status
Indicator . . . . . . . . . . . . . . . . . . . . 5-13
Charging System Light . . . . . . 5-14
Malfunction Indicator Lamp . . . . . . . . . . . . . 5-14
Brake System Warning Light . . . . . . . . . . . . . . . . . . . . . . . 5-17
Electric Parking Brake Light . . . . . . . . . . . . . . . . . . . . . . . 5-17
Service Electric Parking Brake Light . . . . . . . . . . . . . . . . . . . . . . . 5-17
Antilock Brake System (ABS) Warning Light . . . . . . . . . . . . . . 5-18
Lane Departure Warning (LDW) Light . . . . . . . . . . . . . . . . 5-18
Forward Collision Alert (FCA) Warning Light . . . . . . . . . . . . . . 5-19
Traction Off Light . . . . . . . . . . . . 5-19
StabiliTrak
®OFF Light . . . . . . . 5-19
Traction Control System (TCS)/StabiliTrak
®Light . . . . 5-20
Engine Coolant Temperature Warning Light . . . . . . . . . . . . . . 5-20
Tire Pressure Light . . . . . . . . . . 5-21
Engine Oil Pressure Light . . . . 5-22
Low Fuel Warning Light . . . . . . 5-22
Security Light . . . . . . . . . . . . . . . . 5-22
High-Beam On Light . . . . . . . . . 5-23
Front Fog Lamp Light . . . . . . . . 5-23 Lamps On Reminder . . . . . . . . . 5-23
Cruise Control Light . . . . . . . . . 5-23
Door Ajar Light . . . . . . . . . . . . . . 5-24
Information Displays
Center Stack Display . . . . . . . . 5-24
Driver Information
Center (DIC) . . . . . . . . . . . . . . . 5-24
Vehicle Messages
Vehicle Messages . . . . . . . . . . . 5-28
Battery Voltage and ChargingMessages . . . . . . . . . . . . . . . . . . 5-28
Brake System Messages . . . . 5-28
Compass Messages . . . . . . . . . 5-29
Cruise Control Messages . . . . 5-29
Door Ajar Messages . . . . . . . . . 5-29
Engine Cooling System Messages . . . . . . . . . . . . . . . . . . 5-29
Engine Oil Messages . . . . . . . . 5-30
Engine Power Messages . . . . 5-30
Fuel System Messages . . . . . . 5-31
Key and Lock Messages . . . . . 5-31
Lamp Messages . . . . . . . . . . . . . 5-31
Object Detection System Messages . . . . . . . . . . . . . . . . . . 5-31
Ride Control System Messages . . . . . . . . . . . . . . . . . . 5-32
Security Messages . . . . . . . . . . 5-32
Page 112 of 436
Black plate (4,1)Chevrolet Malibu Owner Manual - 2013 - CRC - 6/6/12
5-4 Instruments and Controls
Heavy snow or ice can overload the
wipers. A circuit breaker stops them
until the motor cools.
Wipe Parking
If the ignition is turned to LOCK/
OFF while the wipers are on 1, 2,
or
3, they will immediately stop.
If the windshield wiper lever is then
moved to
9before the driver door
is opened, or within 10 minutes, the
wipers will restart and move to the
base of the windshield.
If the ignition is turned to LOCK/
OFF during a windshield wash, the
wipers will stop when they reach the
base of the windshield.
Windshield Washer
Pull the windshield wiper lever
toward you to spray windshield
washer fluid and activate the wipers.
The washer and wipers will continue
until the lever is released or the
maximum wash time is reached. When the windshield wiper lever is
released, additional wipes may
occur depending on how long the
windshield washer had been
activated.
If the washer fluid is low a message
may display on the Driver
Information Center (DIC), see
Washer Fluid Messages on
page 5‑34. For information on
filling the windshield washer fluid
reservoir, seeWasher Fluid on
page 10‑22.
{WARNING
In freezing weather, do not use
the washer until the windshield is
warmed. Otherwise the washer
fluid can form ice on the
windshield, blocking your vision.
Compass
There is a compass display in the
Driver Information Center (DIC). The
compass receives its heading and
other information from the GlobalPositioning System (GPS) antenna,
StabiliTrak, and vehicle speed
information.
Avoid covering the GPS antenna for
long periods of time with objects
that may interfere with the antenna's
ability to receive a satellite signal.
See
Backglass Antenna on
page 7‑21 andSatellite Radio
Antenna on page 7‑21 for the
location of the vehicle's antennas.
The compass system is designed to
operate for a certain number of
miles or degrees of turn before
needing a signal from the GPS
satellites. When the compass
display shows CAL, drive the
vehicle for a short distance in an
open area where it can receive a
GPS signal. The compass system
will automatically determine when
the GPS signal is restored and
provide a heading again. See
Compass Messages on page 5‑29
for more information on the
messages that may be displayed for
the compass.
Page 113 of 436
Black plate (5,1)Chevrolet Malibu Owner Manual - 2013 - CRC - 6/6/12
Instruments and Controls 5-5
Clock
The infotainment system controls
are used to access the time and
date settings through the menu
system. The clock menu can only
be used with the radio on while in
ON/RUN or ACC/ACCESSORY.
SeeOverview (Radio with CD and
Touchscreen) on page 7‑5 or
Overview (Radio with CD) on
page 7‑2 for information about how
to use the menu system. For
vehicles with a navigation system,
see the separate navigation manual.
Setting the Clock (Radio
with CD)
To set the time:
1. Press the CONFIG button and select Time Settings.
2. Select Set Time.
3. Turn the TUNE/MENU knob to adjust the highlighted number.
4. Press the TUNE/MENU knob to select the next number. 5. To save the time and return to
the Time Settings menu, press
the BACK
/button at any time
or press the TUNE/MENU knob
after adjusting the minutes.
Setting the 12/24 Hour Format
1. Press the CONFIG button and select Time Settings.
2. Highlight 12/24 Hour Format.
3. Press the TUNE/MENU knob to select the 12 hour or 24 hour
display format.
Setting the Clock (Radio with
CD and Touchscreen)
To set the time:
1. Press the CONFIG button toenter the menu options. Turn the
TUNE/MENU knob to scroll
through the available setup
features. Press the TUNE/MENU
knob or press the Time screen
button to display other options
within that feature. 2. Press + or
−to increase or
decrease the Hours and Minutes
displayed on the clock.
12/24 HR Format: Press the 12 HR
screen button for standard time;
press the 24 HR screen button for
military time.
Day + or Day −:Press the Day +
or Day −display buttons to increase
or decrease the day.
Display: Press Display to turn the
display of the time on the screen on
or off.
Power Outlets
The accessory power outlets can be
used to plug in electrical equipment,
such as a cell phone or MP3 player.
There are two accessory power
outlets: one on the center stack
below the climate control system,
and one under the armrest inside
the center console storage.
Page 118 of 436
Black plate (10,1)Chevrolet Malibu Owner Manual - 2013 - CRC - 6/6/12
5-10 Instruments and Controls
Speedometer
The speedometer shows the
vehicle's speed in either kilometers
per hour (km/h) or miles per
hour (mph).
Odometer
The odometer shows how far the
vehicle has been driven, in either
kilometers or miles.
This vehicle has a tamper‐resistant
odometer. The digital odometer will
read 999,999 if it is turned back.
If the vehicle needs a new odometer
installed, it must be set to the
mileage total of the old odometer.
If that is not possible, then it must
be set at zero and a label must be
put on the driver door to show the
old mileage reading when the new
odometer was installed.
Trip Odometer
The trip odometer can show how far
the vehicle has been driven since
the trip odometer was last reset.
The trip odometer is accessed and
reset through the Driver Information
Center (DIC). SeeDriver
Information Center (DIC) on
page 5‑24.
Tachometer
The tachometer displays the
engine speed in revolutions per
minute (rpm).
For eAssist vehicles, when the
ignition is in ON/RUN, the
tachometer indicates the vehicle
status. When pointing to AUTO
STOP, the engine is off but the
vehicle is on and can move. The
engine could auto start at any time.
When the indicator points to OFF,
the vehicle is off.
When the engine is on, the
tachometer will indicate the engine’s
revolutions per minute (rpm). The tachometer may vary by several
hundred rpm’s, during auto stop
mode, when the engine is shutting
off and restarting.
A slight bump may be felt when the
transmission is determining the
most fuel efficient operating range.
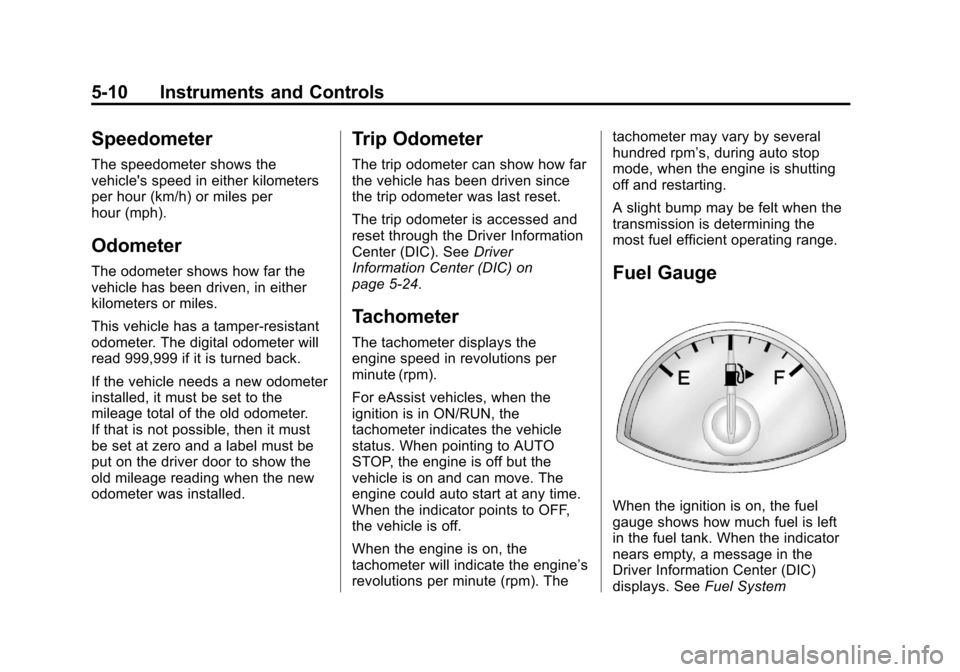
Fuel Gauge
When the ignition is on, the fuel
gauge shows how much fuel is left
in the fuel tank. When the indicator
nears empty, a message in the
Driver Information Center (DIC)
displays. See
Fuel System
Page 125 of 436
Black plate (17,1)Chevrolet Malibu Owner Manual - 2013 - CRC - 6/6/12
Instruments and Controls 5-17
Brake System Warning
Light
The vehicle brake system consists
of two hydraulic circuits. If one
circuit is not working, the remaining
circuit can still work to stop the
vehicle. For normal braking
performance, both circuits need to
be working.
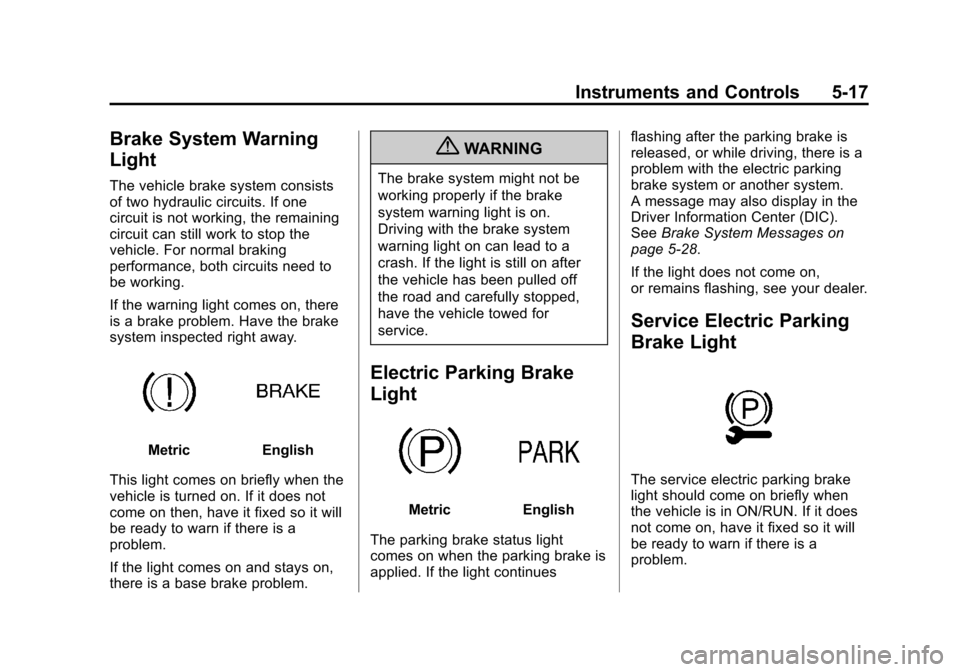
If the warning light comes on, there
is a brake problem. Have the brake
system inspected right away.
MetricEnglish
This light comes on briefly when the
vehicle is turned on. If it does not
come on then, have it fixed so it will
be ready to warn if there is a
problem.
If the light comes on and stays on,
there is a base brake problem.
{WARNING
The brake system might not be
working properly if the brake
system warning light is on.
Driving with the brake system
warning light on can lead to a
crash. If the light is still on after
the vehicle has been pulled off
the road and carefully stopped,
have the vehicle towed for
service.
Electric Parking Brake
Light
MetricEnglish
The parking brake status light
comes on when the parking brake is
applied. If the light continues flashing after the parking brake is
released, or while driving, there is a
problem with the electric parking
brake system or another system.
A message may also display in the
Driver Information Center (DIC).
See
Brake System Messages on
page 5‑28.
If the light does not come on,
or remains flashing, see your dealer.
Service Electric Parking
Brake Light
The service electric parking brake
light should come on briefly when
the vehicle is in ON/RUN. If it does
not come on, have it fixed so it will
be ready to warn if there is a
problem.