2013 CHEVROLET MALIBU run flat
[x] Cancel search: run flatPage 31 of 436
Black plate (25,1)Chevrolet Malibu Owner Manual - 2013 - CRC - 6/6/12
In Brief 1-25
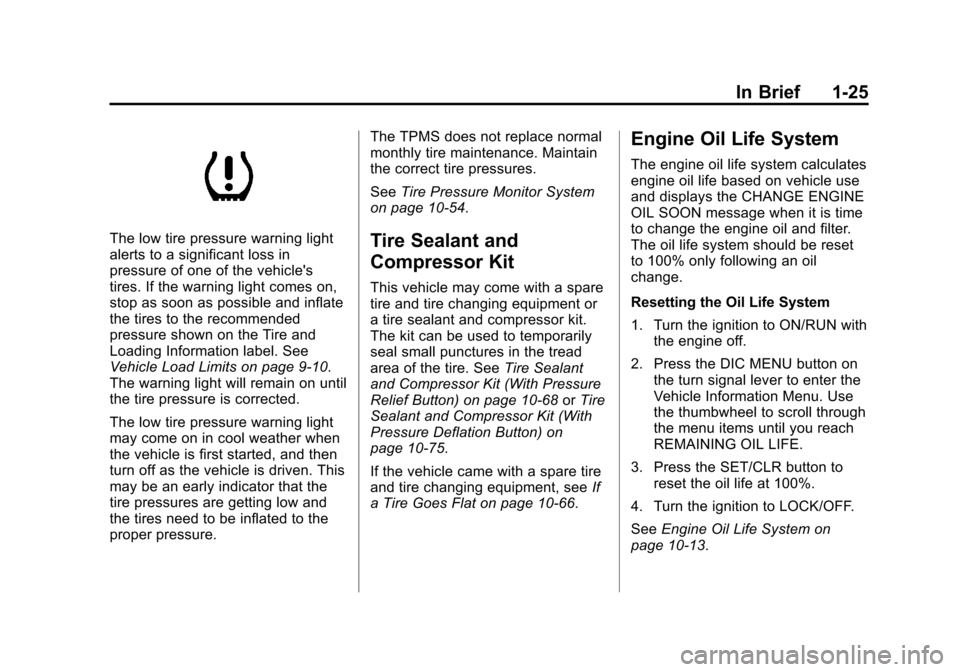
The low tire pressure warning light
alerts to a significant loss in
pressure of one of the vehicle's
tires. If the warning light comes on,
stop as soon as possible and inflate
the tires to the recommended
pressure shown on the Tire and
Loading Information label. See
Vehicle Load Limits on page 9‑10.
The warning light will remain on until
the tire pressure is corrected.
The low tire pressure warning light
may come on in cool weather when
the vehicle is first started, and then
turn off as the vehicle is driven. This
may be an early indicator that the
tire pressures are getting low and
the tires need to be inflated to the
proper pressure.The TPMS does not replace normal
monthly tire maintenance. Maintain
the correct tire pressures.
See
Tire Pressure Monitor System
on page 10‑54.Tire Sealant and
Compressor Kit
This vehicle may come with a spare
tire and tire changing equipment or
a tire sealant and compressor kit.
The kit can be used to temporarily
seal small punctures in the tread
area of the tire. See Tire Sealant
and Compressor Kit (With Pressure
Relief Button) on page 10‑68 orTire
Sealant and Compressor Kit (With
Pressure Deflation Button) on
page 10‑75.
If the vehicle came with a spare tire
and tire changing equipment, see If
a Tire Goes Flat on page 10‑66.
Engine Oil Life System
The engine oil life system calculates
engine oil life based on vehicle use
and displays the CHANGE ENGINE
OIL SOON message when it is time
to change the engine oil and filter.
The oil life system should be reset
to 100% only following an oil
change.
Resetting the Oil Life System
1. Turn the ignition to ON/RUN with the engine off.
2. Press the DIC MENU button on the turn signal lever to enter the
Vehicle Information Menu. Use
the thumbwheel to scroll through
the menu items until you reach
REMAINING OIL LIFE.
3. Press the SET/CLR button to reset the oil life at 100%.
4. Turn the ignition to LOCK/OFF.
See Engine Oil Life System on
page 10‑13.
Page 223 of 436
Black plate (7,1)Chevrolet Malibu Owner Manual - 2013 - CRC - 6/6/12
Driving and Operating 9-7
Hill and Mountain Roads
Driving on steep hills or through
mountains is different than driving
on flat or rolling terrain. Tips for
driving in these conditions include:
.Keep the vehicle serviced and in
good shape.
.Check all fluid levels and brakes,
tires, cooling system, and
transmission.
.Shift to a lower gear when going
down steep or long hills.
{WARNING
If you do not shift down, the
brakes could get so hot that they
would not work well. You would
then have poor braking or even
none going down a hill. You could
crash. Shift down to let the engine
assist the brakes on a steep
downhill slope.
{WARNING
Coasting downhill in N (Neutral)
or with the ignition off is
dangerous. The brakes will have
to do all the work of slowing down
and they could get so hot that
they would not work well. You
would then have poor braking or
even none going down a hill. You
could crash. Always have the
engine running and the vehicle in
gear when going downhill.
.Stay in your own lane. Do not
swing wide or cut across the
center of the road. Drive at
speeds that let you stay in your
own lane.
.Be alert on top of hills;
something could be in your lane
(stalled car, accident).
.Pay attention to special road
signs (falling rocks area, winding
roads, long grades, passing or
no-passing zones) and take
appropriate action.
Winter Driving
Driving on Snow or Ice
Drive carefully when there is snow
or ice between the tires and the
road, creating less traction or grip.
Wet ice can occur at about 0°C
(32°F) when freezing rain begins to
fall, resulting in even less traction.
Avoid driving on wet ice or in
freezing rain until roads can be
treated with salt or sand.
Drive with caution, whatever the
condition. Accelerate gently so
traction is not lost. Accelerating too
quickly causes the wheels to spin
and makes the surface under the
tires slick, so there is even less
traction.
Page 310 of 436
Black plate (44,1)Chevrolet Malibu Owner Manual - 2013 - CRC - 6/6/12
10-44 Vehicle Care
FusesUsage
25 110V AC
26 Spare
Relays Usage
K1 Trunk Release
K2 Not Used
K3 Power Outlet RelayWheels and Tires
Tires
Every new GM vehicle has
high-quality tires made by a
leading tire manufacturer. See
the warranty manual for
information regarding the tire
warranty and where to get
service. For additional
information refer to the tire
manufacturer.
{WARNING
.Poorly maintained and
improperly used tires are
dangerous.
.Overloading the tires can
cause overheating as a result
of too much flexing. There
could be a blowout and a
serious crash. See Vehicle
Load Limits on page 9‑10.
(Continued)
WARNING (CONTINUED)
.Underinflated tires pose the
same danger as overloaded
tires. The resulting crash
could cause serious injury.
Check all tires frequently to
maintain the recommended
pressure. Tire pressure
should be checked when the
tires are cold.
.Overinflated tires are more
likely to be cut, punctured,
or broken by a sudden
impact—such as when
hitting a pothole. Keep tires at
the recommended pressure.
.Worn or old tires can cause a
crash. If the tread is badly
worn, replace them.
.Replace any tires that have
been damaged by impacts
with potholes, curbs, etc.
(Continued)
Page 335 of 436
Black plate (69,1)Chevrolet Malibu Owner Manual - 2013 - CRC - 6/6/12
Vehicle Care 10-69
WARNING (CONTINUED)
which cannot be seen or smelled.
It can cause unconsciousness
and even death. Never run the
engine in an enclosed area that
has no fresh air ventilation. For
more information, seeEngine
Exhaust on page 9‑25.
{WARNING
Overinflating a tire could cause
the tire to rupture and you or
others could be injured. Be sure
to read and follow the tire sealant
and compressor kit instructions
and inflate the tire to its
recommended pressure. Do not
exceed the recommended
pressure.
{WARNING
Storing the tire sealant and
compressor kit or other
equipment in the passenger
compartment of the vehicle could
cause injury. In a sudden stop or
collision, loose equipment could
strike someone. Store the tire
sealant and compressor kit in its
original location.
If this vehicle has a tire sealant and
compressor kit, there may not be a
spare tire and tire changing
equipment, and on some vehicles
there may not be a place to store
a tire. The tire sealant and compressor
can be used to temporarily seal
punctures up to 6 mm (0.25 in) in
the tread area of the tire. It can
also be used to inflate an
underinflated tire.
If the tire has been separated from
the wheel, has damaged sidewalls,
or has a large puncture, the tire is
too severely damaged for the tire
sealant and compressor kit to be
effective. See
Roadside Assistance
Program (Mexico) on page 13‑7 or
Roadside Assistance Program (U.S.
and Canada) on page 13‑11.
Read and follow all of the tire
sealant and compressor kit
instructions.
Page 337 of 436
Black plate (71,1)Chevrolet Malibu Owner Manual - 2013 - CRC - 6/6/12
Vehicle Care 10-71
If a tire goes flat, avoid further tire
and wheel damage by driving slowly
to a level place. Turn on the hazard
warning flashers. SeeHazard
Warning Flashers on page 6‑4.
See If a Tire Goes Flat on
page 10‑66 for other important
safety warnings.
Do not remove any objects that
have penetrated the tire.
1. Remove the tire sealant and compressor kit from its storage
location. See Storing the Tire
Sealant and Compressor Kit on
page 10‑83.
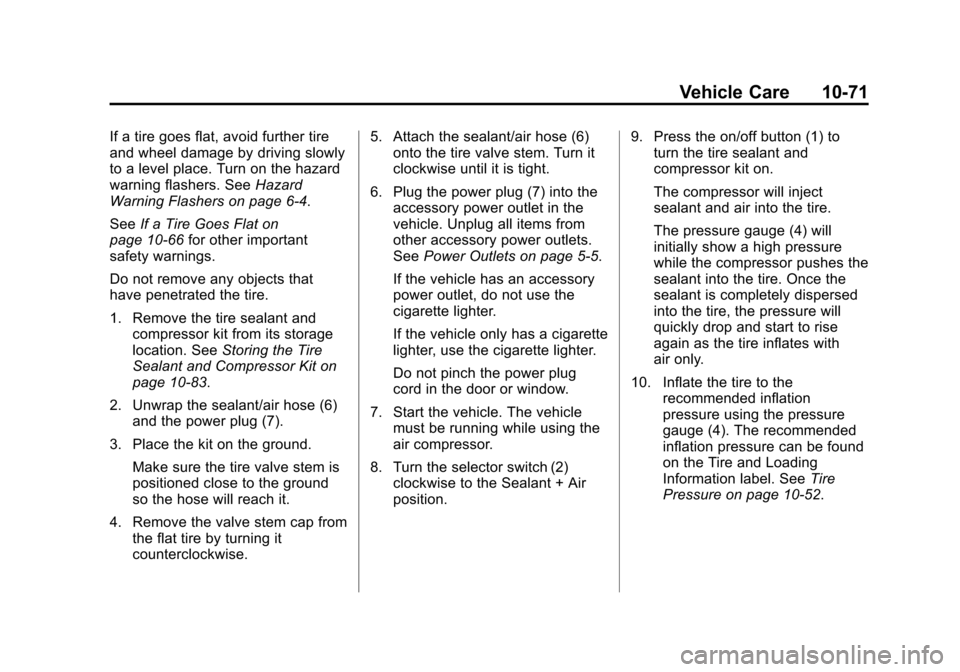
2. Unwrap the sealant/air hose (6) and the power plug (7).
3. Place the kit on the ground. Make sure the tire valve stem is
positioned close to the ground
so the hose will reach it.
4. Remove the valve stem cap from the flat tire by turning it
counterclockwise. 5. Attach the sealant/air hose (6)
onto the tire valve stem. Turn it
clockwise until it is tight.
6. Plug the power plug (7) into the accessory power outlet in the
vehicle. Unplug all items from
other accessory power outlets.
See Power Outlets on page 5‑5.
If the vehicle has an accessory
power outlet, do not use the
cigarette lighter.
If the vehicle only has a cigarette
lighter, use the cigarette lighter.
Do not pinch the power plug
cord in the door or window.
7. Start the vehicle. The vehicle must be running while using the
air compressor.
8. Turn the selector switch (2) clockwise to the Sealant + Air
position. 9. Press the on/off button (1) to
turn the tire sealant and
compressor kit on.
The compressor will inject
sealant and air into the tire.
The pressure gauge (4) will
initially show a high pressure
while the compressor pushes the
sealant into the tire. Once the
sealant is completely dispersed
into the tire, the pressure will
quickly drop and start to rise
again as the tire inflates with
air only.
10. Inflate the tire to the recommended inflation
pressure using the pressure
gauge (4). The recommended
inflation pressure can be found
on the Tire and Loading
Information label. See Tire
Pressure on page 10‑52.
Page 340 of 436

Black plate (74,1)Chevrolet Malibu Owner Manual - 2013 - CRC - 6/6/12
10-74 Vehicle Care
SeeIf a Tire Goes Flat on
page 10‑66 for other important
safety warnings.
1. Remove the tire sealant and compressor kit from its storage
location. See Storing the Tire
Sealant and Compressor Kit on
page 10‑83.
2. Unwrap the air only hose (5) and the power plug (7).
3. Place the kit on the ground. Make sure the tire valve stem is
positioned close to the ground
so the hose will reach it.
4. Remove the tire valve stem cap from the flat tire by turning it
counterclockwise.
5. Attach the air only hose (5) onto the tire valve stem by turning it
clockwise until it is tight. 6. Plug the power plug (7) into the
accessory power outlet in the
vehicle. Unplug all items from
other accessory power outlets.
See Power Outlets on page 5‑5.
If the vehicle has an accessory
power outlet, do not use the
cigarette lighter.
If the vehicle only has a cigarette
lighter, use the cigarette lighter.
Do not pinch the power plug
cord in the door or window.
7. Start the vehicle. The vehicle must be running while using the
air compressor.
8. Turn the selector switch (2) counterclockwise to the Air Only
position.
9. Press the on/off button (1) to turn the compressor on.
The compressor will inflate the
tire with air only. 10. Inflate the tire to the
recommended inflation
pressure using the pressure
gauge (4). The recommended
inflation pressure can be found
on the Tire and Loading
Information label. See Tire
Pressure on page 10‑52.
The pressure gauge (4) may
read higher than the actual tire
pressure while the compressor
is on. Turn the compressor off
to get an accurate reading. The
compressor may be turned on/
off until the correct pressure is
reached. If the tire is inflated
higher than the recommended
pressure, press the pressure
relief button (3), if equipped,
until the proper pressure
reading is reached. This option
is only functional when using
the air only hose (5).
Page 342 of 436
Black plate (76,1)Chevrolet Malibu Owner Manual - 2013 - CRC - 6/6/12
10-76 Vehicle Care
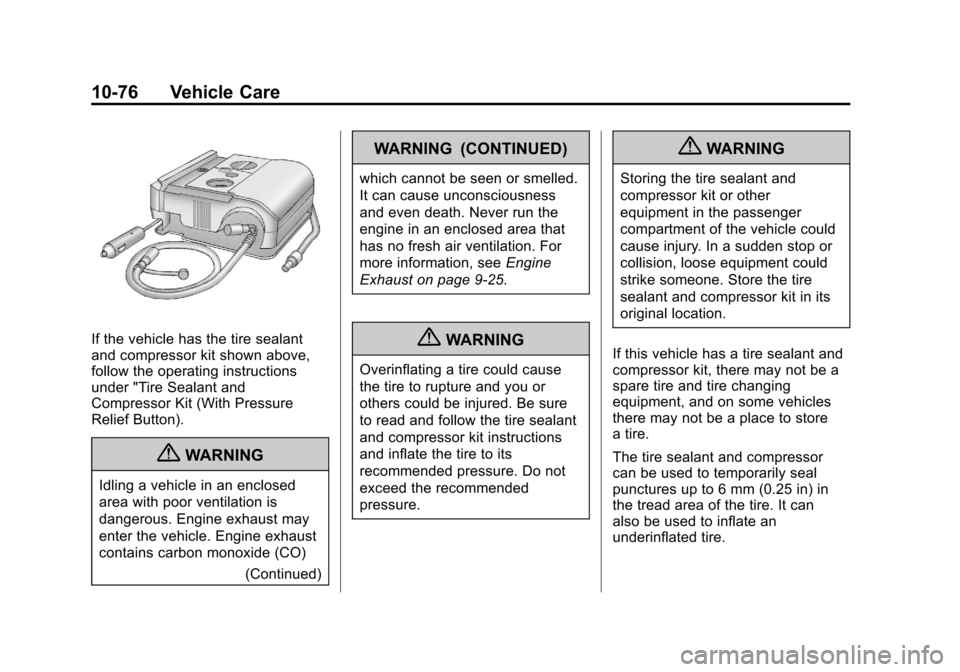
If the vehicle has the tire sealant
and compressor kit shown above,
follow the operating instructions
under "Tire Sealant and
Compressor Kit (With Pressure
Relief Button).
{WARNING
Idling a vehicle in an enclosed
area with poor ventilation is
dangerous. Engine exhaust may
enter the vehicle. Engine exhaust
contains carbon monoxide (CO)(Continued)
WARNING (CONTINUED)
which cannot be seen or smelled.
It can cause unconsciousness
and even death. Never run the
engine in an enclosed area that
has no fresh air ventilation. For
more information, seeEngine
Exhaust on page 9‑25.
{WARNING
Overinflating a tire could cause
the tire to rupture and you or
others could be injured. Be sure
to read and follow the tire sealant
and compressor kit instructions
and inflate the tire to its
recommended pressure. Do not
exceed the recommended
pressure.
{WARNING
Storing the tire sealant and
compressor kit or other
equipment in the passenger
compartment of the vehicle could
cause injury. In a sudden stop or
collision, loose equipment could
strike someone. Store the tire
sealant and compressor kit in its
original location.
If this vehicle has a tire sealant and
compressor kit, there may not be a
spare tire and tire changing
equipment, and on some vehicles
there may not be a place to store
a tire.
The tire sealant and compressor
can be used to temporarily seal
punctures up to 6 mm (0.25 in) in
the tread area of the tire. It can
also be used to inflate an
underinflated tire.
Page 345 of 436
Black plate (79,1)Chevrolet Malibu Owner Manual - 2013 - CRC - 6/6/12
Vehicle Care 10-79
4. Remove the valve stem cap fromthe flat tire by turning it
counterclockwise.
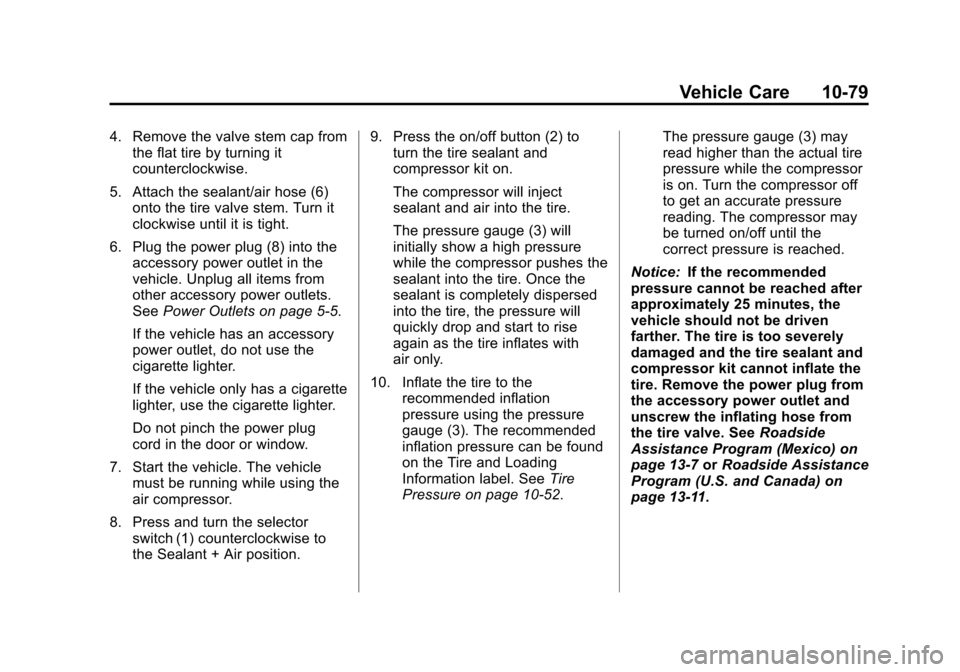
5. Attach the sealant/air hose (6) onto the tire valve stem. Turn it
clockwise until it is tight.
6. Plug the power plug (8) into the accessory power outlet in the
vehicle. Unplug all items from
other accessory power outlets.
See Power Outlets on page 5‑5.
If the vehicle has an accessory
power outlet, do not use the
cigarette lighter.
If the vehicle only has a cigarette
lighter, use the cigarette lighter.
Do not pinch the power plug
cord in the door or window.
7. Start the vehicle. The vehicle must be running while using the
air compressor.
8. Press and turn the selector switch (1) counterclockwise to
the Sealant + Air position. 9. Press the on/off button (2) to
turn the tire sealant and
compressor kit on.
The compressor will inject
sealant and air into the tire.
The pressure gauge (3) will
initially show a high pressure
while the compressor pushes the
sealant into the tire. Once the
sealant is completely dispersed
into the tire, the pressure will
quickly drop and start to rise
again as the tire inflates with
air only.
10. Inflate the tire to the recommended inflation
pressure using the pressure
gauge (3). The recommended
inflation pressure can be found
on the Tire and Loading
Information label. See Tire
Pressure on page 10‑52. The pressure gauge (3) may
read higher than the actual tire
pressure while the compressor
is on. Turn the compressor off
to get an accurate pressure
reading. The compressor may
be turned on/off until the
correct pressure is reached.
Notice: If the recommended
pressure cannot be reached after
approximately 25 minutes, the
vehicle should not be driven
farther. The tire is too severely
damaged and the tire sealant and
compressor kit cannot inflate the
tire. Remove the power plug from
the accessory power outlet and
unscrew the inflating hose from
the tire valve. See Roadside
Assistance Program (Mexico) on
page 13‑7 orRoadside Assistance
Program (U.S. and Canada) on
page 13‑11.