2013 CHEVROLET CRUZE maintenance
[x] Cancel search: maintenancePage 243 of 394
Black plate (53,1)Chevrolet Cruze Owner Manual - 2013 - crc - 10/16/12
Driving and Operating 9-53
When towing at high altitude on
steep uphill grades, engine coolant
boils at a lower temperature than at
normal altitudes. If the engine is
turned off immediately after towing
at high altitude on steep uphill
grades, the vehicle could show
signs similar to engine overheating.
To avoid this, let the engine run
while parked, preferably on level
ground, with the transmission in
P (Park) for a few minutes before
turning the engine off. If the
overheat warning comes on, see
Engine Overheating on page 10‑19.
Parking on Hills
{WARNING
Parking the vehicle on a hill with
the trailer attached can be
dangerous. If something goes
wrong, the rig could start to move.
People can be injured, and both
the vehicle and the trailer can be
damaged. When possible, always
park the rig on a flat surface.If parking the rig on a hill:
1. Press the brake pedal, but do
not shift into P (Park) yet. Turn
the wheels into the curb if facing
downhill or into traffic if facing
uphill.
2. Have someone place chocks under the trailer wheels.
3. When the wheel chocks are in place, release the brake pedal
until the chocks absorb the load.
4. Reapply the brake pedal. Then apply the parking brake and shift
into P (Park) for vehicles with an
automatic transmission or into
gear for vehicles with a manual
transmission.
5. Release the brake pedal.
Leaving After Parking on a Hill
1. Apply and hold the brake pedal while you:
.Start the engine.
.Shift into a gear.
.Release the parking brake. 2. Let up on the brake pedal.
3. Drive slowly until the trailer is
clear of the chocks.
4. Stop and have someone pick up and store the chocks.
Maintenance When Trailer
Towing
The vehicle needs service more
often when pulling a trailer. See the
Maintenance Schedule on
page 11‑2. Things that are
especially important in trailer
operation are automatic
transmission fluid, engine oil, axle
lubricant, belts, cooling system and
brake system. Inspect these before
and during the trip.
Check periodically to see that all
hitch nuts and bolts are tight.
Page 250 of 394
Black plate (4,1)Chevrolet Cruze Owner Manual - 2013 - crc - 10/16/12
10-4 Vehicle Care
This vehicle has an airbag system.
Before attempting to do your own
service work, seeServicing the
Airbag-Equipped Vehicle on
page 3‑28.
Keep a record with all parts receipts
and list the mileage and the date of
any service work performed. See
Maintenance Records on
page 11‑15.
Notice: Even small amounts of
contamination can cause damage
to vehicle systems. Do not allow
contaminants to contact the
fluids, reservoir caps,
or dipsticks.Hood
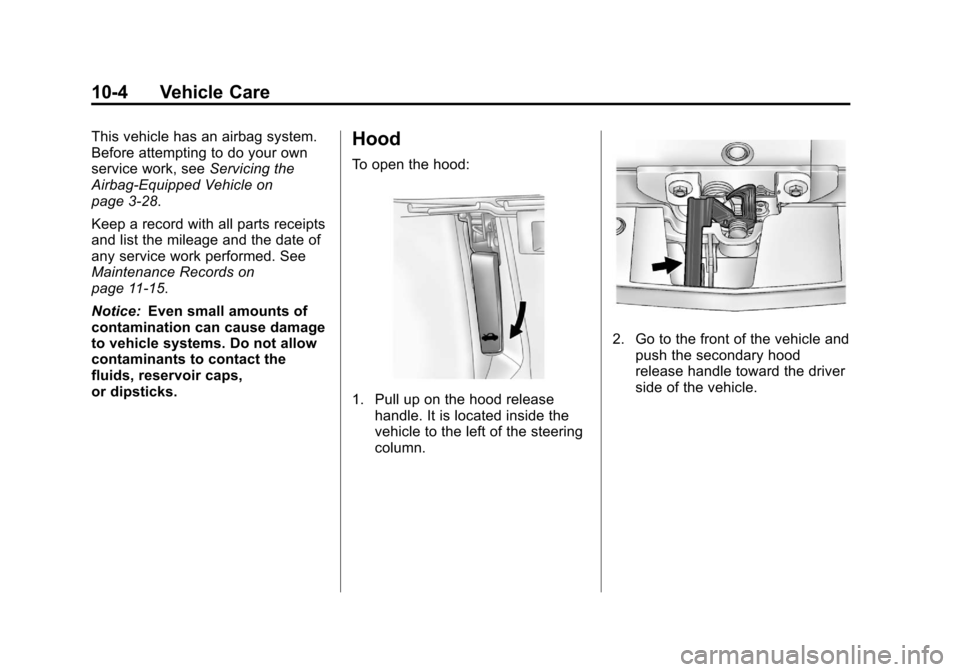
To open the hood:
1. Pull up on the hood release handle. It is located inside the
vehicle to the left of the steering
column.
2. Go to the front of the vehicle andpush the secondary hood
release handle toward the driver
side of the vehicle.
Page 259 of 394
Black plate (13,1)Chevrolet Cruze Owner Manual - 2013 - crc - 10/16/12
Vehicle Care 10-13
Change the fluid and filter at the
intervals listed inMaintenance
Schedule on page 11‑2, and be sure
to use the fluid listed in
Recommended Fluids and
Lubricants on page 11‑12.
Manual Transmission
Fluid
How to Check Manual
Transmission Fluid
It is not necessary to check the
manual transmission fluid level.
A transmission fluid leak is the only
reason for fluid loss. If a leak
occurs, take the vehicle to your
dealer and have it repaired as soon
as possible. See Recommended
Fluids and Lubricants on page 11‑12
for the proper fluid to use.
Hydraulic Clutch
For vehicles with a manual
transmission, it is not necessary to
regularly check brake/clutch fluid
unless there is a leak suspected. Adding fluid will not correct a leak.
A fluid loss in this system could
indicate a problem. Have the
system inspected and repaired.
When to Check and What
to Use
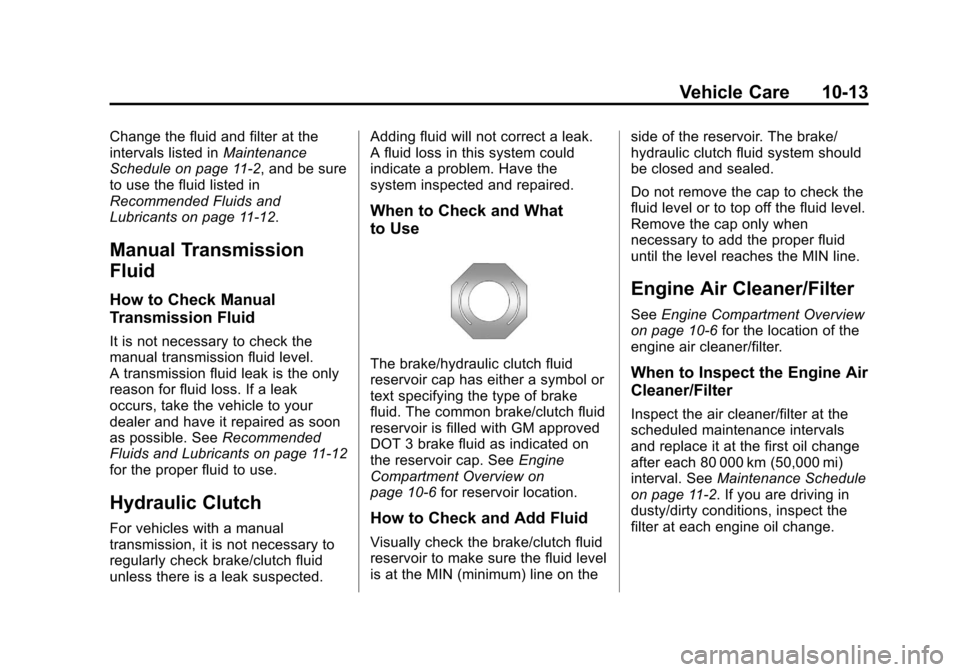
The brake/hydraulic clutch fluid
reservoir cap has either a symbol or
text specifying the type of brake
fluid. The common brake/clutch fluid
reservoir is filled with GM approved
DOT 3 brake fluid as indicated on
the reservoir cap. See
Engine
Compartment Overview on
page 10‑6 for reservoir location.
How to Check and Add Fluid
Visually check the brake/clutch fluid
reservoir to make sure the fluid level
is at the MIN (minimum) line on the side of the reservoir. The brake/
hydraulic clutch fluid system should
be closed and sealed.
Do not remove the cap to check the
fluid level or to top off the fluid level.
Remove the cap only when
necessary to add the proper fluid
until the level reaches the MIN line.
Engine Air Cleaner/Filter
See
Engine Compartment Overview
on page 10‑6 for the location of the
engine air cleaner/filter.
When to Inspect the Engine Air
Cleaner/Filter
Inspect the air cleaner/filter at the
scheduled maintenance intervals
and replace it at the first oil change
after each 80 000 km (50,000 mi)
interval. See Maintenance Schedule
on page 11‑2. If you are driving in
dusty/dirty conditions, inspect the
filter at each engine oil change.
Page 267 of 394
Black plate (21,1)Chevrolet Cruze Owner Manual - 2013 - crc - 10/16/12
Vehicle Care 10-21
Notice
.When using concentrated
washer fluid, follow the
manufacturer instructions for
adding water.
.Do not mix water with
ready-to-use washer fluid.
Water can cause the solution
to freeze and damage the
washer fluid tank and other
parts of the washer system.
.Fill the washer fluid tank only
three-quarters full when it is
very cold. This allows for
fluid expansion if freezing
occurs, which could damage
the tank if it is
completely full.
.Do not use engine coolant
(antifreeze) in the windshield
washer. It can damage the
windshield washer system
and paint.
Brakes
This vehicle has front disc brakes
and could have rear drum brakes or
rear disc brakes.
Disc brake pads have built-in wear
indicators that make a high-pitched
warning sound when the brake pads
are worn and new pads are needed.
The sound can come and go or be
heard all the time the vehicle is
moving, except when applying the
brake pedal firmly.
{WARNING
The brake wear warning sound
means that soon the brakes will
not work well. That could lead to
a crash. When the brake wear
warning sound is heard, have the
vehicle serviced.
Notice: Continuing to drive with
worn-out brake pads could result
in costly brake repair. Some driving conditions or climates
can cause a brake squeal when the
brakes are first applied or lightly
applied. This does not mean
something is wrong with the brakes.
Properly torqued wheel nuts are
necessary to help prevent brake
pulsation. When tires are rotated,
inspect brake pads for wear and
evenly tighten wheel nuts in the
proper sequence to torque
specifications in
Capacities and
Specifications on page 12‑2.
If the vehicle has rear drum brakes,
they do not have wear indicators,
but if a rear brake rubbing noise is
heard, have the rear brake linings
inspected immediately. Rear brake
drums should be removed and
inspected each time the tires are
removed for rotation or changing.
Drum brakes have an inspection
hole to inspect lining wear during
scheduled maintenance. When the
front brake pads are replaced, have
the rear brakes inspected, too.
Page 272 of 394
Black plate (26,1)Chevrolet Cruze Owner Manual - 2013 - crc - 10/16/12
10-26 Vehicle Care
.To check the P (Park)
mechanism's holding ability:
With the engine running, shift to
P (Park). Then release the
parking brake followed by the
regular brake.
Contact your dealer if service is
required.
Wiper Blade Replacement
Windshield wiper blades should be
inspected for wear and cracking.
See Maintenance Schedule on
page 11‑2.
Replacement blades come in
different types and are removed in
different ways. For proper type and
length, see Maintenance
Replacement Parts on page 11‑13. Notice:
Allowing the wiper arm to
touch the windshield when no
wiper blade is installed could
damage the windshield. Any
damage that occurs would not be
covered by your warranty. Do not
allow the wiper arm to touch the
windshield.
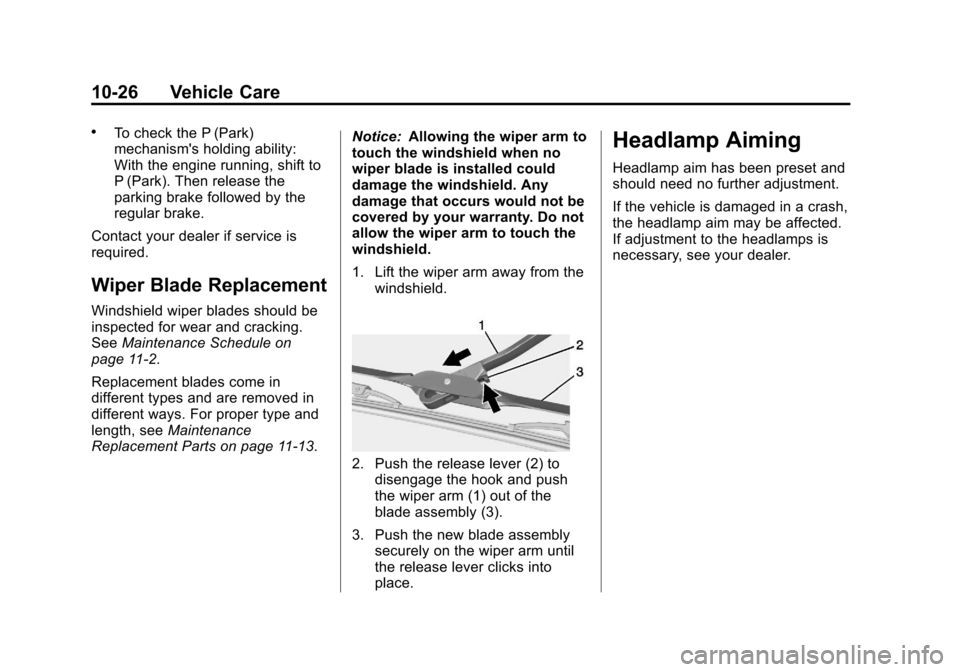
1. Lift the wiper arm away from the
windshield.
2. Push the release lever (2) todisengage the hook and push
the wiper arm (1) out of the
blade assembly (3).
3. Push the new blade assembly securely on the wiper arm until
the release lever clicks into
place.
Headlamp Aiming
Headlamp aim has been preset and
should need no further adjustment.
If the vehicle is damaged in a crash,
the headlamp aim may be affected.
If adjustment to the headlamps is
necessary, see your dealer.
Page 294 of 394

Black plate (48,1)Chevrolet Cruze Owner Manual - 2013 - crc - 10/16/12
10-48 Vehicle Care
inflation pressure is high, press
on the metal stem in the center
of the tire valve to release air.
Recheck the tire pressure with
the tire gauge.
Return the valve caps on the
valve stems to prevent leaks
and keep out dirt and moisture.
Tire Pressure Monitor
System
The Tire Pressure Monitor System
(TPMS) uses radio and sensor
technology to check tire pressure
levels. The TPMS sensors monitor
the air pressure in your tires and
transmit tire pressure readings to a
receiver located in the vehicle.
Each tire, including the spare (if
provided), should be checked
monthly when cold and inflated to
the inflation pressure recommended
by the vehicle manufacturer on the
vehicle placard or tire inflation
pressure label. (If your vehicle has
tires of a different size than the sizeindicated on the vehicle placard or
tire inflation pressure label, you
should determine the proper tire
inflation pressure for those tires.)
As an added safety feature, your
vehicle has been equipped with a
tire pressure monitoring system
(TPMS) that illuminates a low tire
pressure telltale when one or more
of your tires is significantly
under-inflated.
Accordingly, when the low tire
pressure telltale illuminates, you
should stop and check your tires as
soon as possible, and inflate them
to the proper pressure. Driving on a
significantly under-inflated tire
causes the tire to overheat and can
lead to tire failure. Under-inflation
also reduces fuel efficiency and tire
tread life, and may affect the
vehicle's handling and stopping
ability.
Please note that the TPMS is not a
substitute for proper tire
maintenance, and it is the driver's
responsibility to maintain correct tire
pressure, even if under-inflation has
not reached the level to trigger
illumination of the TPMS low tire
pressure telltale.
Your vehicle has also been
equipped with a TPMS malfunction
indicator to indicate when the
system is not operating properly.
The TPMS malfunction indicator is
combined with the low tire pressure
telltale. When the system detects a
malfunction, the telltale will flash for
approximately one minute and then
remain continuously illuminated.
This sequence will continue upon
subsequent vehicle start-ups as
long as the malfunction exists.
When the malfunction indicator is
illuminated, the system may not be
able to detect or signal low tire
pressure as intended. TPMS
malfunctions may occur for a variety
of reasons, including the installation
of replacement or alternate tires or
wheels on the vehicle that prevent
the TPMS from functioning properly.
Always check the TPMS malfunction
telltale after replacing one or more
Page 296 of 394

Black plate (50,1)Chevrolet Cruze Owner Manual - 2013 - crc - 10/16/12
10-50 Vehicle Care
The TPMS can warn about a low
tire pressure condition but it does
not replace normal tire
maintenance. SeeTire Inspection
on page 10‑52, Tire Rotation on
page 10‑52 andTires on
page 10‑38.
Notice: Tire sealant materials are
not all the same. A non-approved
tire sealant could damage the
TPMS sensors. TPMS sensor
damage caused by using an
incorrect tire sealant is not
covered by the vehicle warranty.
Always use only the
GM-approved tire sealant
available through your dealer or
included in the vehicle.
Factory-installed Tire Inflator Kits
use a GM-approved liquid tire
sealant. Using non-approved tire
sealants could damage the TPMS
sensors. See Tire Sealant and
Compressor Kit on page 10‑61 for
information regarding the inflator kit
materials and instructions.TPMS Malfunction Light and
Message
The TPMS will not function properly
if one or more of the TPMS sensors
are missing or inoperable. When the
system detects a malfunction, the
low tire warning light flashes for
about one minute and then stays on
for the remainder of the ignition
cycle. A DIC warning message also
displays. The malfunction light and
DIC warning message come on at
each ignition cycle until the problem
is corrected. Some of the conditions
that can cause these to come
on are:
.One of the road tires has been
replaced with the spare tire. The
spare tire does not have a
TPMS sensor. The malfunction
light and DIC message should
go off after the road tire is
replaced and the sensor
matching process is performed
successfully. See "TPMS Sensor
Matching Process" later in this
section.
.The TPMS sensor matching
process was not done or not
completed successfully after
rotating the tires. The
malfunction light and the DIC
message should go off after
successfully completing the
sensor matching process. See
"TPMS Sensor Matching
Process" later in this section.
.One or more TPMS sensors are
missing or damaged. The DIC
message and the malfunction
light should go off when the
TPMS sensors are installed and
the sensor matching process is
performed successfully. See
your dealer for service.
.Replacement tires or wheels do
not match the original equipment
tires or wheels. Tires and wheels
other than those recommended
could prevent the TPMS from
functioning properly. See Buying
New Tires on page 10‑54.
Page 298 of 394

Black plate (52,1)Chevrolet Cruze Owner Manual - 2013 - crc - 10/16/12
10-52 Vehicle Care
10. Proceed to the passenger siderear tire, and repeat the
procedure in Step 8.
11. Proceed to the driver side rear tire, and repeat the procedure
in Step 8. The horn sounds two
times to indicate the sensor
identification code has been
matched to the driver side rear
tire, and the TPMS sensor
matching process is no longer
active. The TIRE LEARNING
ACTIVE message on the DIC
display screen goes off.
12. Turn the ignition to LOCK/OFF.
13. Set all four tires to the recommended air pressure
level as indicated on the Tire
and Loading Information label.Tire Inspection
We recommend that the tires,
including the spare tire, if the
vehicle has one, be inspected
for signs of wear or damage at
least once a month.
Replace the tire if:
.The indicators at three or
more places around the tire
can be seen.
.There is cord or fabric
showing through the tire's
rubber.
.The tread or sidewall is
cracked, cut, or snagged
deep enough to show cord or
fabric.
.The tire has a bump, bulge,
or split.
.The tire has a puncture, cut,
or other damage that cannot
be repaired well because of
the size or location of the
damage.
Tire Rotation
Tires should be rotated every
12 000 km (7,500 mi). See
Maintenance Schedule on
page 11‑2.
Tires are rotated to achieve a
uniform wear for all tires. The
first rotation is the most
important.
Anytime unusual wear is
noticed, rotate the tires as soon
as possible, check for proper tire
inflation pressure, and check for
damaged tires or wheels. If the
unusual wear continues after the
rotation, check the wheel
alignment.