2013 CHEVROLET CORVETTE ignition
[x] Cancel search: ignitionPage 245 of 414
Black plate (33,1)Chevrolet Corvette Owner Manual - 2013 - crc2 - 11/8/12
Driving and Operating 9-33
Remember: ABS does not change
the time needed to get a foot up to
the brake pedal or always decrease
stopping distance. If you get too
close to the vehicle in front of you,
there will not be enough time to
apply the brakes if that vehicle
suddenly slows or stops. Always
leave enough room up ahead to
stop, even with ABS.
Using ABS
Do not pump the brakes. Just hold
the brake pedal down firmly and let
ABS work. You might hear the ABS
pump or motor operating and feel
the brake pedal pulsate, but this is
normal.
Braking in Emergencies
ABS allows you to steer and brake
at the same time. In many
emergencies, steering can help
more than even the very best
braking.
Parking Brake
The parking brake lever is located to
the right of the center console.
To set the parking brake, hold the
brake pedal down. Pull the parking
brake lever up. If the ignition is on,
the brake system warning light will
come on.
To release the parking brake, hold
the brake pedal down. Then push
the release button in as you move
the parking brake lever all the
way down.
Notice:Driving with the parking
brake on can overheat the brake
system and cause premature
wear or damage to brake system
parts. Make sure that the parking
brake is fully released and the
brake warning light is off before
driving.
Brake Assist
This vehicle has a brake assist
feature designed to assist the driver
in stopping or decreasing vehicle
speed in emergency driving
conditions. This feature uses the
stability system hydraulic brake
control module to supplement the
power brake system under
conditions where the driver has
quickly and forcefully applied the
brake pedal in an attempt to quickly
stop or slow down the vehicle. The
stability system hydraulic brake
control module increases brake
pressure at each corner of the
vehicle until the ABS activates.
Minor brake pedal pulsation or
pedal movement during this time is
normal and the driver should
continue to apply the brake pedal as
the driving situation dictates. The
brake assist feature will
automatically disengage when the
brake pedal is released or brake
pedal pressure is quickly
decreased.
Page 256 of 414
Black plate (44,1)Chevrolet Corvette Owner Manual - 2013 - crc2 - 11/8/12
9-44 Driving and Operating
Cruise Control in Sport and
Manual Paddle Shift Gear
Selection
When the vehicle is in S (Sport) and
the manual paddle shift controls are
not being used, cruise control
operates in the same manner as
D (Drive).
When the vehicle is in S (Sport) and
the manual paddle shift controls are
being used, cruise control operates
as follows:
.If cruise control is active and a
gear is selected with the manual
paddle shift controls, the vehicle
speed is maintained in the driver
selected gear and will not
automatically up-shift or
down-shift the transmission
while the driver’s gear selection
is active.
.If driving in hilly terrain, cruise
control may not be able to
maintain vehicle speed if an
up-shift or down-shift is not
selected by the driver. While
driving on hilly terrain and cruise
control is active with a manual
paddle shift gear selection, the
driver must select the proper
gear for the terrain or select
D (Drive) on the gear range
selector for full automatic
transmission operation.
Ending Cruise Control
.To disengage cruise control,
step lightly on the brake pedal.
If the vehicle has a manual
transmission, lightly tap the
clutch to end the cruise control
session.
.To turn off the cruise control
system, move the cruise control
switch to
9. When cruise control is disengaged,
the CRUISE DISENGAGED
message displays on the Driver
Information Center (DIC). See
Cruise Control Messages on
page 5‑37.
Erasing Speed Memory
The cruise control set speed is
erased from memory by moving the
switch to
9or if the ignition is
turned off.
Page 293 of 414

Black plate (31,1)Chevrolet Corvette Owner Manual - 2013 - crc2 - 11/8/12
Vehicle Care 10-31
Notice:After driving in the
overheated engine protection
operating mode, to avoid engine
damage, allow the engine to cool
before attempting any repair. The
engine oil will be severely
degraded. Repair the cause of
coolant loss, change the oil and
reset the oil life system. See
Engine Oil on page 10‑13.
Power Steering Fluid
See Engine Compartment Overview
on page 10‑8 for reservoir location.
When to Check Power Steering
Fluid
It is not necessary to regularly
check power steering fluid unless
there is a leak suspected in the
system or an unusual noise is heard. A fluid loss in this system
could indicate a problem. Have the
system inspected and repaired.
How to Check Power Steering
Fluid
To check the power steering fluid:
1. Turn the ignition off and let the
engine compartment cool down.
2. Wipe the cap and the top of the reservoir clean.
3. Unscrew the cap and wipe the dipstick with a clean rag.
4. Replace the cap and completely tighten it.
5. Remove the cap again and look at the fluid level on the dipstick.
There are markings on both
sides of the dipstick.
The level should be at the FULL
COLD mark. If necessary, add only
enough fluid to bring the level up to
the mark.
When the engine compartment is
hot, the level should be at the HOT
mark. When the engine
compartment is cool, the level
should be at the FULL COLD mark.
Page 301 of 414
Black plate (39,1)Chevrolet Corvette Owner Manual - 2013 - crc2 - 11/8/12
Vehicle Care 10-39
2. Firmly apply both the parkingbrake and the regular brake.
See Parking Brake on
page 9‑33.
Do not use the accelerator
pedal, and be ready to turn off
the engine immediately if it
starts.
3. For automatic transmission vehicles, try to start the engine
in each gear. The vehicle should
start only in P (Park) or
N (Neutral). If the vehicle starts
in any other position, contact
your dealer for service.
For manual transmission
vehicles, put the shift lever in
Neutral, push the clutch pedal
down halfway, and try to start
the engine. The vehicle should
start only when the clutch pedal
is pushed down all the way to
the floor. If the vehicle starts
when the clutch pedal is not
pushed all the way down,
contact your dealer for service.Automatic Transmission
Shift Lock Control
Function Check
{WARNING
When you are doing this
inspection, the vehicle could
move suddenly. If the vehicle
moves, you or others could be
injured.
1. Before starting this check, be sure there is enough room
around the vehicle. It should be
parked on a level surface.
2. Firmly apply the parking brake. See Parking Brake on
page 9‑33.
Be ready to apply the regular
brake immediately if the vehicle
begins to move. 3. With the engine off, turn the
ignition on, but do not start the
engine. Without applying the
regular brake, try to move the
shift lever out of P (Park) with
normal effort. If the shift lever
moves out of P (Park), contact
your dealer for service.
Park Brake and P (Park)
Mechanism Check
{WARNING
When you are doing this check,
the vehicle could begin to move.
You or others could be injured
and property could be damaged.
Make sure there is room in front
of the vehicle in case it begins to
roll. Be ready to apply the regular
brake at once should the vehicle
begin to move.
Page 310 of 414

Black plate (48,1)Chevrolet Corvette Owner Manual - 2013 - crc2 - 11/8/12
10-48 Vehicle Care
Mini-Relays Usage40 Rear Defog
41 Windshield Wiper High/Low
42 Windshield Wiper Run/Accessory
43 Crank
44 Powertrain Ignition 1
45 Windshield Wiper On/Off
47 Low-Beam Headlamp Spare Fuses Usage
48 Spare
49 Spare
50 Spare
51 Spare
52 Spare
53 Spare
54 Fuse Puller
Diodes Usage § Diode 1
§ Wiper
§ Diode 2Instrument Panel Fuse
Block
The instrument panel fuse block is
located on the passenger side of the
vehicle, under the instrument panel
and under the toe-board.
Remove the carpet and toe-board
covering to access the fuse block by
pulling at the top of each corner of
the panel. Open the fuse block
cover to access the fuses.
You can remove fuses using the
fuse puller.
Page 312 of 414

Black plate (50,1)Chevrolet Corvette Owner Manual - 2013 - crc2 - 11/8/12
10-50 Vehicle Care
FusesUsage
EXH MDL Exhaust Module (Z06 &
ZR1),
Spare (Coupe and
Convertible)
FUSE PLR Fuse Puller
GM LAN
RUN/CRNK GM LAN Devices
HTD SEAT/
WPR RLY Heated Seat,
Wiper Relays
HVAC/
PWR SND Heating Ventilation/
Air Conditioning,
Power Sounder
IGN SWTCH/
INTR SNSR Ignition Switch,
Intrusion Sensor Fuses
Usage
ISRVM/HVAC Electric Inside Rearview Mirror,
Heating,
Ventilation, Air
Conditioning
ONSTAR OnStar (if equipped)
RDO/
S-BAND Radio, S-Band
REAR FOG/
ALDL/TOP
SWTCH Rear Fog Lamp,
Assembly Line
Diagnostic Link
Connector,
Convertible Top
Switch
REVERSE
LAMPS Reverse Lamps
RUN CRNK Run/Crank Relay Fuses
Usage
SDM/AOS
SWTCH
AIRBAG Sensing and
Diagnostic Module,
Automatic
Occupant Sensing
Module, Airbag
SPARE Spare
SPARE Spare
SPARE Spare
SPARE Spare
STOP LAMP Stop Lamp
SWC DM Steering Wheel Dimming
TELE
SWTCH/
MSM Telescope Switch,
Memory Seat
Module
TONNEAU
RELSE Tonneau Release
TPA Tonneau Pulldown Actuator
Page 326 of 414
Black plate (64,1)Chevrolet Corvette Owner Manual - 2013 - crc2 - 11/8/12
10-64 Vehicle Care
Tire Pressure Monitor
Operation
This vehicle may have a Tire
Pressure Monitor System (TPMS).
The TPMS is designed to warn the
driver when a low tire pressure
condition exists. TPMS sensors are
mounted onto each tire and wheel
assembly on your vehicle. The
TPMS sensors monitor the air
pressure in the tires and transmits
the tire pressure readings to a
receiver located in the vehicle.
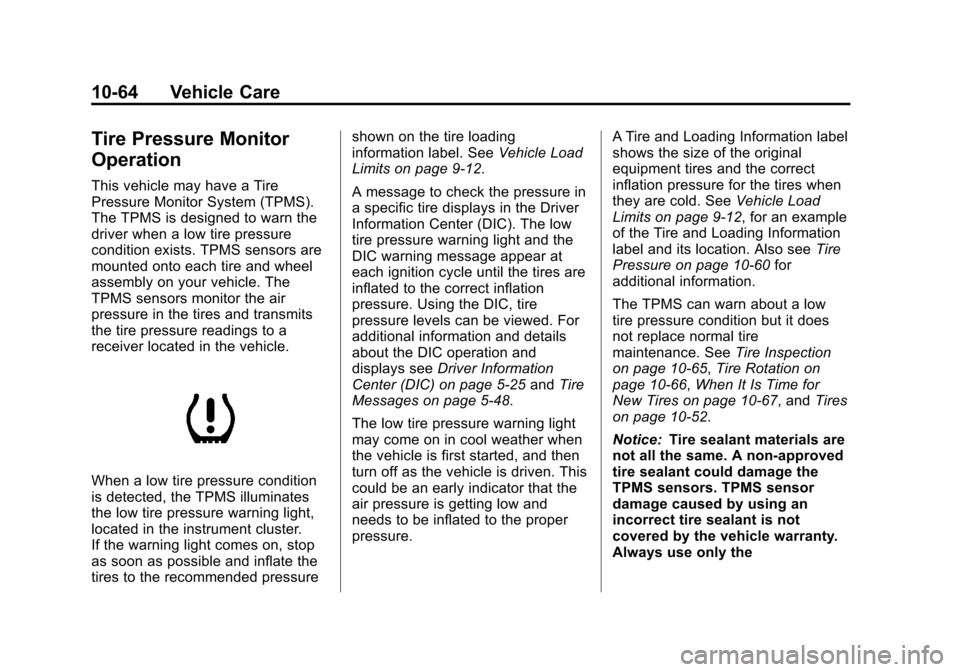
When a low tire pressure condition
is detected, the TPMS illuminates
the low tire pressure warning light,
located in the instrument cluster.
If the warning light comes on, stop
as soon as possible and inflate the
tires to the recommended pressureshown on the tire loading
information label. See
Vehicle Load
Limits on page 9‑12.
A message to check the pressure in
a specific tire displays in the Driver
Information Center (DIC). The low
tire pressure warning light and the
DIC warning message appear at
each ignition cycle until the tires are
inflated to the correct inflation
pressure. Using the DIC, tire
pressure levels can be viewed. For
additional information and details
about the DIC operation and
displays see Driver Information
Center (DIC) on page 5‑25 andTire
Messages on page 5‑48.
The low tire pressure warning light
may come on in cool weather when
the vehicle is first started, and then
turn off as the vehicle is driven. This
could be an early indicator that the
air pressure is getting low and
needs to be inflated to the proper
pressure. A Tire and Loading Information label
shows the size of the original
equipment tires and the correct
inflation pressure for the tires when
they are cold. See
Vehicle Load
Limits on page 9‑12, for an example
of the Tire and Loading Information
label and its location. Also see Tire
Pressure on page 10‑60 for
additional information.
The TPMS can warn about a low
tire pressure condition but it does
not replace normal tire
maintenance. See Tire Inspection
on page 10‑65, Tire Rotation on
page 10‑66, When It Is Time for
New Tires on page 10‑67, and Tires
on page 10‑52.
Notice: Tire sealant materials are
not all the same. A non-approved
tire sealant could damage the
TPMS sensors. TPMS sensor
damage caused by using an
incorrect tire sealant is not
covered by the vehicle warranty.
Always use only the
Page 327 of 414
Black plate (65,1)Chevrolet Corvette Owner Manual - 2013 - crc2 - 11/8/12
Vehicle Care 10-65
GM-approved tire sealant
available through your dealer or
included in the vehicle.
TPMS Malfunction Light and
Message
The TPMS will not function properly
if one or more of the TPMS sensors
are missing or inoperable. When the
system detects a malfunction, the
low tire warning light flashes for
about one minute and then stays on
for the remainder of the ignition
cycle. A DIC warning message also
displays. The malfunction light and
DIC warning message come on at
each ignition cycle until the problem
is corrected. Some of the conditions
that can cause these to come
on are:
.The TPMS sensor matching
process was not done or not
completed successfully. The
malfunction light and the DIC
message should go off after
successfully completing the
sensor matching process.
.One or more TPMS sensors are
missing or damaged. The
malfunction light and the DIC
message should go off when the
TPMS sensors are installed and
the sensor matching process is
performed successfully. See
your dealer for service.
.Replacement tires or wheels do
not match the original equipment
tires or wheels. Tires and wheels
other than those recommended
could prevent the TPMS from
functioning properly. SeeBuying
New Tires on page 10‑68.
.Operating electronic devices or
being near facilities using radio
wave frequencies similar to the
TPMS could cause the TPMS
sensors to malfunction.
If the TPMS is not functioning
properly, it cannot detect or signal a
low tire condition. See your dealer
for service if the TPMS malfunction
light and DIC message come on
and stays on.
TPMS Sensor Matching
Process
Each TPMS sensor has a unique
identification code. The identification
code needs to be matched to a new
tire/wheel position after replacing
one or more of the TPMS sensors.
The malfunction light and the DIC
message should go off at the next
ignition cycle. The sensors are
matched to the tire/wheel positions,
using a TPMS relearn tool, in the
following order: driver side front tire,
passenger side front tire, passenger
side rear tire, and driver side rear.
See your dealer for service.
Tire Inspection
We recommend that the tires,
including the spare tire, if the
vehicle has one, be inspected
for signs of wear or damage at
least once a month.