2013 CHEVROLET CORVETTE tow
[x] Cancel search: towPage 276 of 414
Black plate (14,1)Chevrolet Corvette Owner Manual - 2013 - crc2 - 11/8/12
10-14 Vehicle Care
Checking Engine Oil (Except
Z06, ZR1, manual transmission
Grand Sport Coupe, and 427
Convertible)
If the CHECK OIL LEVEL message
displays on the Driver Information
Center (DIC), check the engine oil
level right away. For more
information, seeEngine Oil
Messages on page 5‑39. Check the
engine oil level regularly; this is an
added reminder.
It is a good idea to check the engine
oil level at each fuel fill. In order to
get an accurate reading, the vehicle
must be on level ground. The
engine oil dipstick handle is a loop.
See Engine Compartment Overview
on page 10‑8 for the location of the
engine oil dipstick. Obtaining an accurate oil level
reading is essential:
1. If the engine has been running
recently, turn off the engine and
allow several minutes for the oil
to drain back into the oil pan.
Checking the oil level too soon
after engine shutoff will not
provide an accurate oil level
reading.
{WARNING
The engine oil dipstick handle
may be hot; it could burn you.
Use a towel or glove to touch the
dipstick handle.
2. Pull the dipstick and clean it with a paper towel or cloth, then push
it back in all the way. Remove it
again, keeping the tip down, and
check the level.
When to Add Engine Oil
(Except Z06, ZR1, manual
transmission Grand Sport
Coupe, and 427 Convertible)
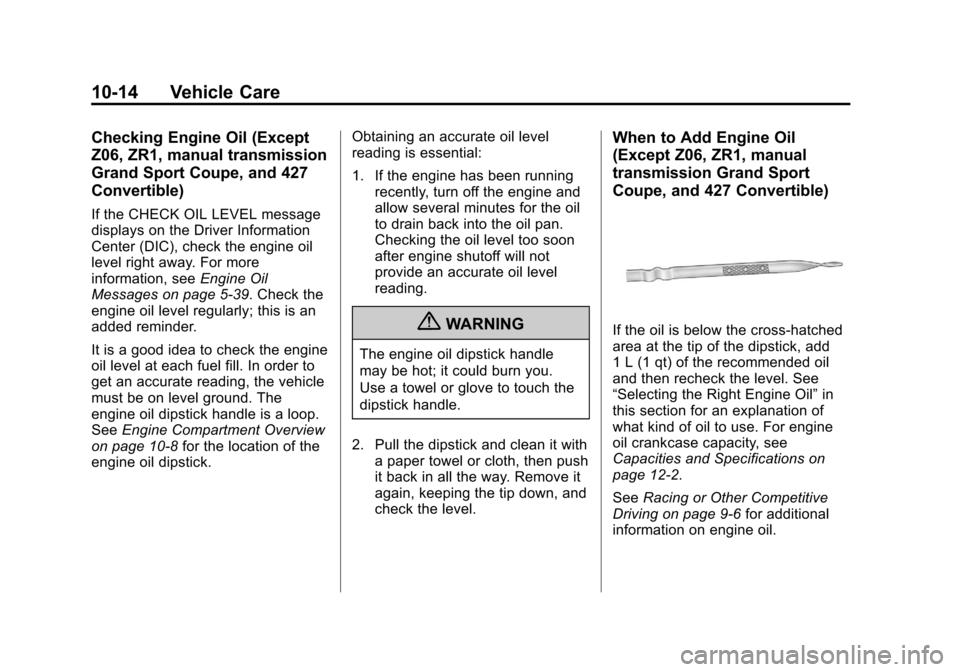
If the oil is below the cross-hatched
area at the tip of the dipstick, add
1 L (1 qt) of the recommended oil
and then recheck the level. See
“Selecting the Right Engine Oil” in
this section for an explanation of
what kind of oil to use. For engine
oil crankcase capacity, see
Capacities and Specifications on
page 12‑2.
See Racing or Other Competitive
Driving on page 9‑6 for additional
information on engine oil.
Page 278 of 414
Black plate (16,1)Chevrolet Corvette Owner Manual - 2013 - crc2 - 11/8/12
10-16 Vehicle Care
tank and there could be no engine
oil at all showing on the dipstick.
This is normal since the dipstick is
designed to read engine oil level
only after the engine has run long
enough to reach normal operating
temperature. Do not add engine oil
based on cold engine dipstick
readings. The engine oil level on the
dipstick will also be inaccurate if
checked while the engine is running.
1. To obtain an accurate engine oillevel reading, warm up the
engine to at least 80°C (175°F).
Cold oil will not give a correct oil
level reading.
2. Once the engine is warm, turn off the engine. Checking the oil
while the engine is running will
result in an incorrect oil level
reading.
3. Wait at least five minutes (but not more than 20 minutes) to
allow oil to drain and settle in the
engine.{WARNING
The engine oil dipstick handle
may be hot; it could burn you.
Use a towel or glove to touch the
dipstick handle.
4. Remove the dipstick from the external engine oil tank and
clean it with a lint-free paper
towel or a cloth. Re-insert the
dipstick into the external oil tank,
pushing it all the way in until it
stops.
5. Remove the dipstick from the oil tank and read the level on the
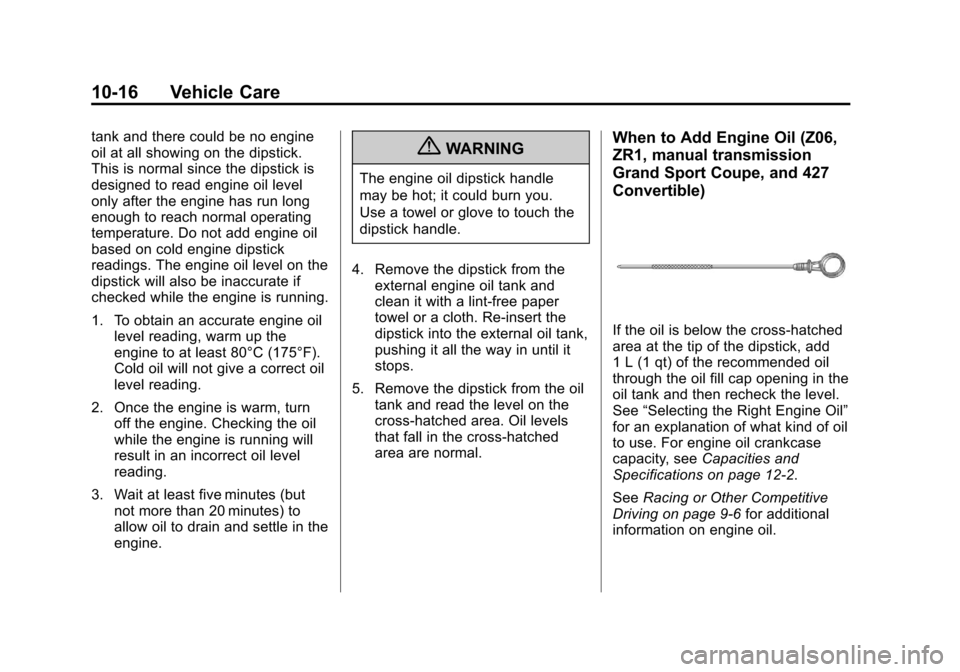
cross-hatched area. Oil levels
that fall in the cross-hatched
area are normal.
When to Add Engine Oil (Z06,
ZR1, manual transmission
Grand Sport Coupe, and 427
Convertible)
If the oil is below the cross-hatched
area at the tip of the dipstick, add
1 L (1 qt) of the recommended oil
through the oil fill cap opening in the
oil tank and then recheck the level.
See “Selecting the Right Engine Oil”
for an explanation of what kind of oil
to use. For engine oil crankcase
capacity, see Capacities and
Specifications on page 12‑2.
See Racing or Other Competitive
Driving on page 9‑6 for additional
information on engine oil.
Page 289 of 414
Black plate (27,1)Chevrolet Corvette Owner Manual - 2013 - crc2 - 11/8/12
Vehicle Care 10-27
coolant for the cooling system.
SeeRecommended Fluids and
Lubricants on page 11‑12.
Never dispose of engine coolant by
putting it in the trash, pouring it on
the ground, or into sewers, streams,
or bodies of water. Have the coolant
changed by an authorized service
center, familiar with legal
requirements regarding used
coolant disposal. This will help
protect the environment and your
health.
Checking Coolant
The vehicle must be on a level
surface when checking the coolant
level.
Check to see if coolant is visible in
the coolant surge tank. If the coolant
inside the coolant surge tank is
boiling, do not do anything else until
it cools down. If coolant is visible
but the coolant level is not at or
above the FULL COLD mark, add a
50/50 mixture of clean, drinkable
water and DEX-COOL coolant at the
coolant recovery tank, but be sure the cooling system is cool before
this is done. See
Cooling System
(Engine) on page 10‑24 orCooling
System (Intercooler) on page 10‑25.
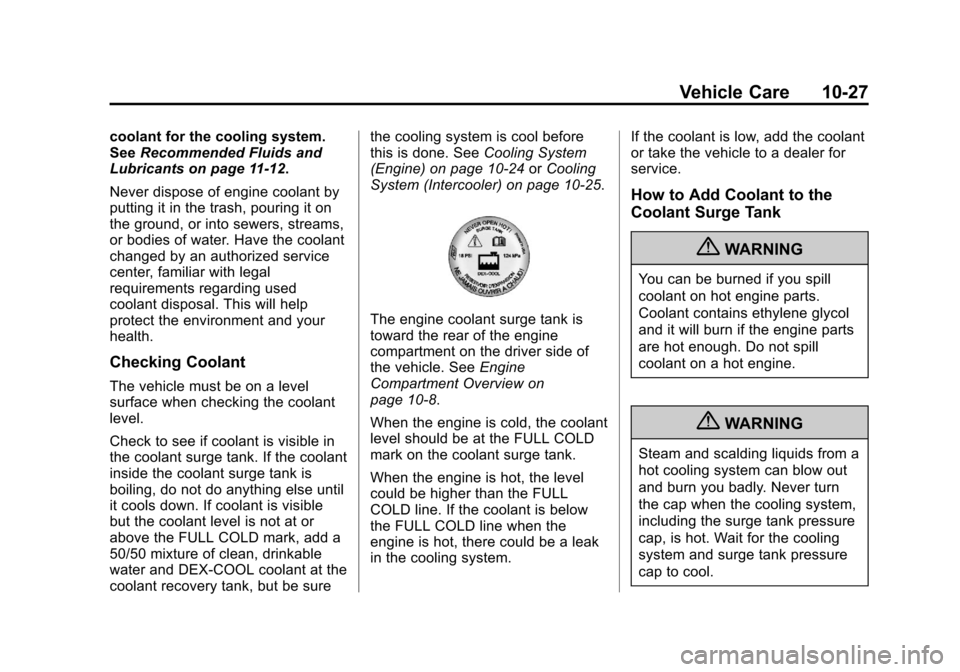
The engine coolant surge tank is
toward the rear of the engine
compartment on the driver side of
the vehicle. See Engine
Compartment Overview on
page 10‑8.
When the engine is cold, the coolant
level should be at the FULL COLD
mark on the coolant surge tank.
When the engine is hot, the level
could be higher than the FULL
COLD line. If the coolant is below
the FULL COLD line when the
engine is hot, there could be a leak
in the cooling system. If the coolant is low, add the coolant
or take the vehicle to a dealer for
service.
How to Add Coolant to the
Coolant Surge Tank
{WARNING
You can be burned if you spill
coolant on hot engine parts.
Coolant contains ethylene glycol
and it will burn if the engine parts
are hot enough. Do not spill
coolant on a hot engine.
{WARNING
Steam and scalding liquids from a
hot cooling system can blow out
and burn you badly. Never turn
the cap when the cooling system,
including the surge tank pressure
cap, is hot. Wait for the cooling
system and surge tank pressure
cap to cool.
Page 302 of 414
Black plate (40,1)Chevrolet Corvette Owner Manual - 2013 - crc2 - 11/8/12
10-40 Vehicle Care
Park on a fairly steep hill, with the
vehicle facing downhill. Keeping
your foot on the regular brake, set
the parking brake.
.To check the parking brake's
holding ability: With the engine
running and the transmission in
N (Neutral), slowly remove foot
pressure from the regular brake
pedal. Do this until the vehicle is
held by the parking brake only.
.To check the P (Park)
mechanism's holding ability:
With the engine running, shift to
P (Park). Then release the
parking brake followed by the
regular brake.
Contact your dealer if service is
required.
Wiper Blade Replacement
Windshield wiper blades should be
inspected for wear or cracking. See
Maintenance Schedule on
page 11‑3 for more information.
Replacement blades come in
different types and are removed in
different ways. For proper
windshield wiper blade length and
type, see Maintenance
Replacement Parts on page 11‑14.
Notice: Allowing the wiper arm to
touch the windshield when no
wiper blade is installed could
damage the windshield. Any
damage that occurs would not be
covered by your warranty. Do not
allow the wiper arm to touch the
windshield. To replace the windshield wiper
blade:
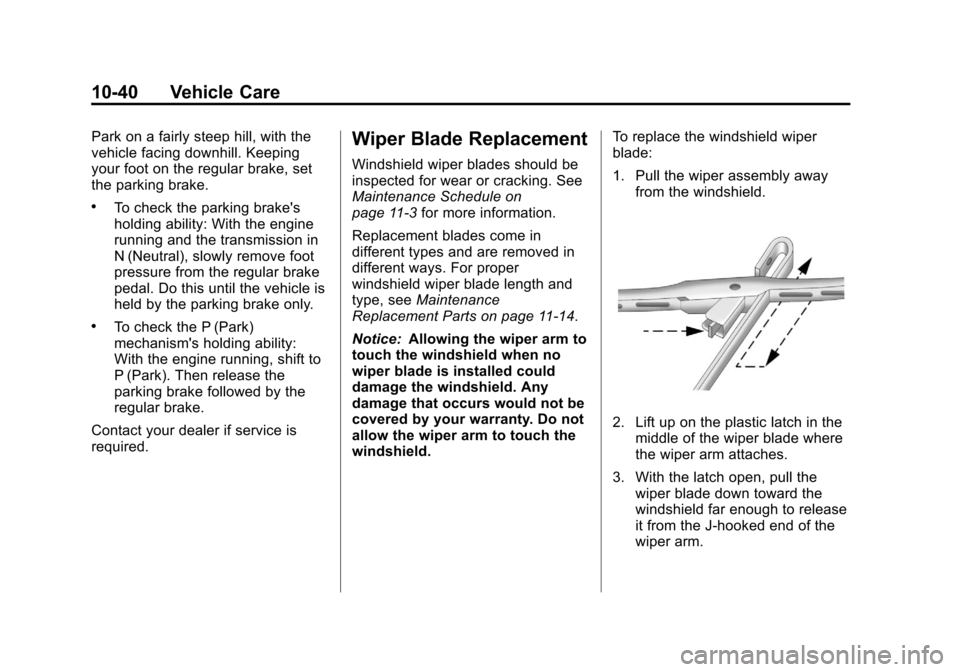
1. Pull the wiper assembly away
from the windshield.
2. Lift up on the plastic latch in themiddle of the wiper blade where
the wiper arm attaches.
3. With the latch open, pull the wiper blade down toward the
windshield far enough to release
it from the J-hooked end of the
wiper arm.
Page 305 of 414
Black plate (43,1)Chevrolet Corvette Owner Manual - 2013 - crc2 - 11/8/12
Vehicle Care 10-43
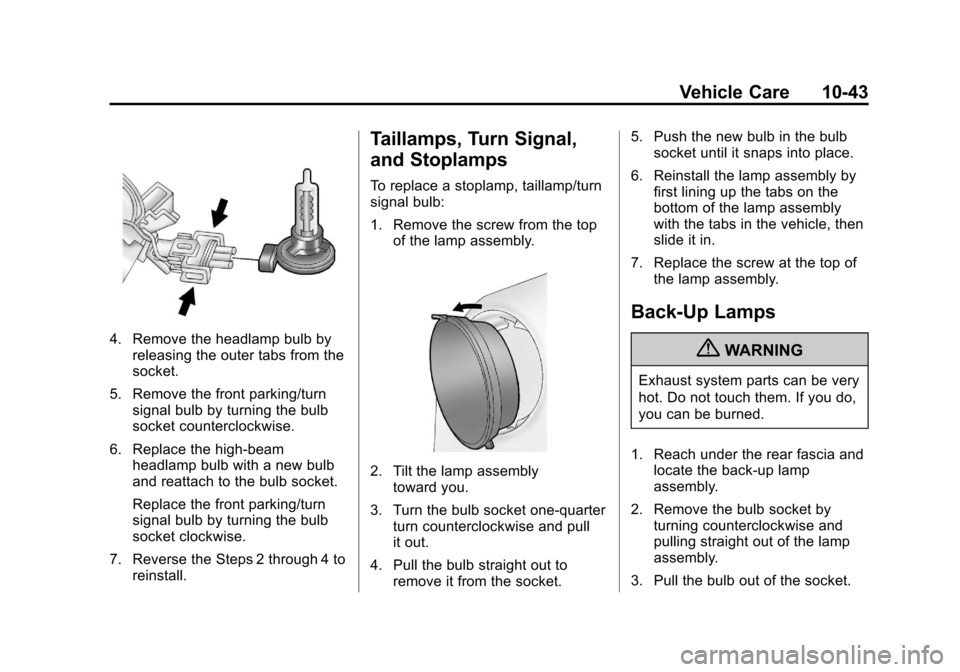
4. Remove the headlamp bulb byreleasing the outer tabs from the
socket.
5. Remove the front parking/turn signal bulb by turning the bulb
socket counterclockwise.
6. Replace the high-beam headlamp bulb with a new bulb
and reattach to the bulb socket.
Replace the front parking/turn
signal bulb by turning the bulb
socket clockwise.
7. Reverse the Steps 2 through 4 to reinstall.
Taillamps, Turn Signal,
and Stoplamps
To replace a stoplamp, taillamp/turn
signal bulb:
1. Remove the screw from the top
of the lamp assembly.
2. Tilt the lamp assemblytoward you.
3. Turn the bulb socket one-quarter turn counterclockwise and pull
it out.
4. Pull the bulb straight out to remove it from the socket. 5. Push the new bulb in the bulb
socket until it snaps into place.
6. Reinstall the lamp assembly by first lining up the tabs on the
bottom of the lamp assembly
with the tabs in the vehicle, then
slide it in.
7. Replace the screw at the top of the lamp assembly.
Back-Up Lamps
{WARNING
Exhaust system parts can be very
hot. Do not touch them. If you do,
you can be burned.
1. Reach under the rear fascia and locate the back-up lamp
assembly.
2. Remove the bulb socket by turning counterclockwise and
pulling straight out of the lamp
assembly.
3. Pull the bulb out of the socket.
Page 329 of 414
Black plate (67,1)Chevrolet Corvette Owner Manual - 2013 - crc2 - 11/8/12
Vehicle Care 10-67
Adjust the front and rear tires to
the recommended inflation
pressure on the Tire and
Loading Information label after
the tires have been rotated. See
Tire Pressure on page 10‑60
andVehicle Load Limits on
page 9‑12.
Reset the Tire Pressure Monitor
System. See Tire Pressure
Monitor Operation on
page 10‑64.
Check that all wheel nuts are
properly tightened. See “Wheel
Nut Torque” underCapacities
and Specifications on
page 12‑2.
{WARNING
Rust or dirt on a wheel, or on the
parts to which it is fastened, can
make wheel nuts become loose
after time. The wheel could come
(Continued)
WARNING (Continued)
off and cause an accident. When
changing a wheel, remove any
rust or dirt from places where the
wheel attaches to the vehicle. In
an emergency, a cloth or a paper
towel can be used; however, use
a scraper or wire brush later to
remove all rust or dirt.
Lightly coat the center of the
wheel hub with wheel bearing
grease after a wheel change or
tire rotation to prevent corrosion
or rust build-up. Do not get
grease on the flat wheel
mounting surface or on the
wheel nuts or bolts.
When It Is Time for New
Tires
Factors such as maintenance,
temperatures, driving speeds,
vehicle loading, and road conditions
affect the wear rate of the tires.
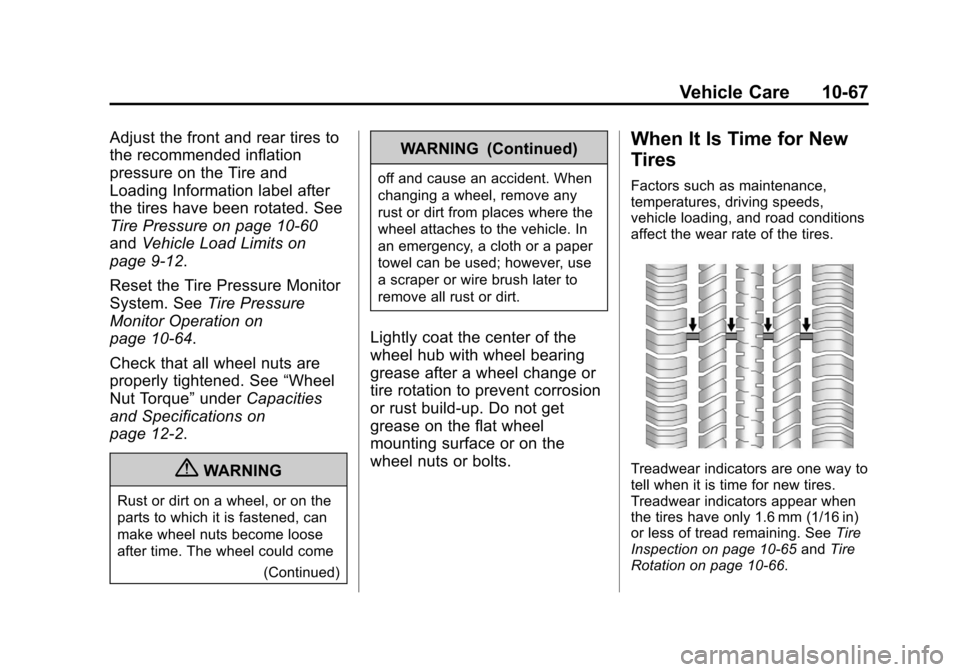
Treadwear indicators are one way to
tell when it is time for new tires.
Treadwear indicators appear when
the tires have only 1.6 mm (1/16 in)
or less of tread remaining. See Tire
Inspection on page 10‑65 andTire
Rotation on page 10‑66.
Page 335 of 414
Black plate (73,1)Chevrolet Corvette Owner Manual - 2013 - crc2 - 11/8/12
Vehicle Care 10-73
Notice:The wrong wheel can
also cause problems with bearing
life, brake cooling, speedometer
or odometer calibration,
headlamp aim, bumper height,
vehicle ground clearance, and tire
clearance to the body and
chassis.
{WARNING
Rust or dirt on a wheel, or on
the parts to which it is
fastened, can make wheel
nuts become loose after a
time. The wheel could come
off and cause a crash. When
changing a wheel, remove any
rust or dirt from places where
the wheel attaches to the
vehicle. In an emergency, a
cloth or a paper towel can be
used, however, use a scraper
or wire brush to remove all
rust or dirt.
Tightening Wheel Lug Nuts
{WARNING
Never use oil or grease on studs
or the threads of the wheel nuts.
The wheel nuts might come loose
and the wheel could fall off,
causing a crash.
{WARNING
Incorrect wheel nuts or improperly
tightened wheel nuts can cause
the wheel to become loose and
even come off. This could lead to
a crash. Be sure to use the
correct wheel nuts. If you have to
replace them, be sure to get new
GM original equipment
wheel nuts. Notice:
Improperly tightened
wheel nuts can lead to brake
pulsation and rotor damage. To
avoid expensive brake repairs,
evenly tighten the wheel nuts in
the proper sequence and to the
proper torque specification.
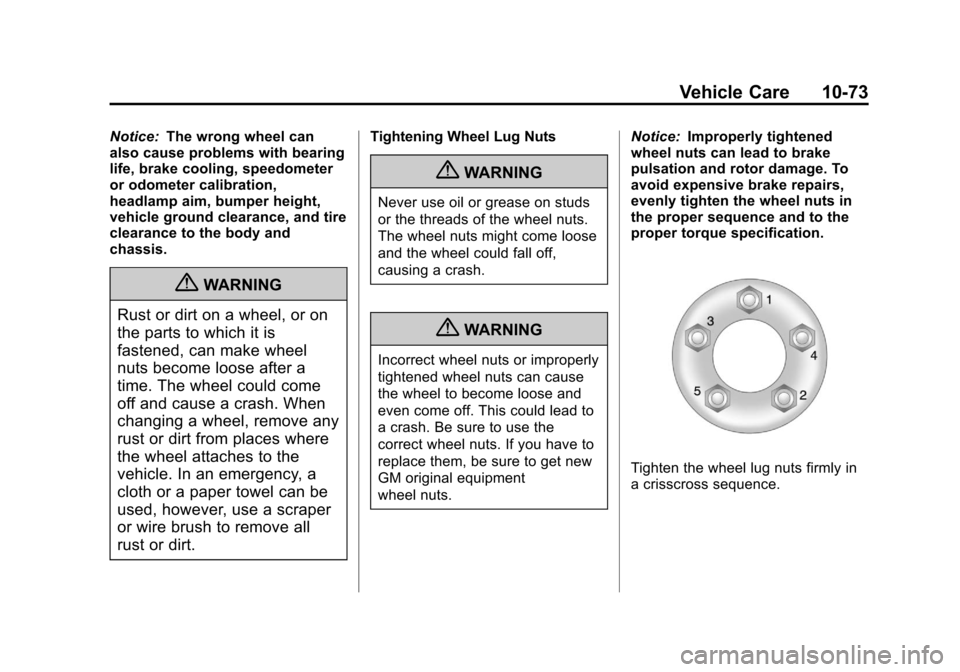
Tighten the wheel lug nuts firmly in
a crisscross sequence.
Page 336 of 414
Black plate (74,1)Chevrolet Corvette Owner Manual - 2013 - crc2 - 11/8/12
10-74 Vehicle Care
Tire Chains
{WARNING
Do not use tire chains. There is
not enough clearance. Tire chains
used on a vehicle without the
proper amount of clearance can
cause damage to the brakes,
suspension, or other vehicle
parts. The area damaged by the
tire chains could cause loss of
control and a crash. Use another
type of traction device only if its
manufacturer recommends it for
the vehicle's tire size combination
and road conditions. Follow that
manufacturer's instructions. To
avoid vehicle damage, drive
slowly and readjust or remove the
traction device if it contacts the
vehicle. Do not spin the wheels.
If traction devices are used, install
them on the rear tires.
If a Tire Goes Flat
It is unusual for a tire to blowout
while driving, especially if the tires
are maintained properly. If air goes
out of a tire, it is much more likely to
leak out slowly. SeeTires on
page 10‑52 for additional
information. But if there ever is a
blowout, here are a few tips about
what to expect and what to do:
If a front tire fails, the flat tire
creates a drag that pulls the vehicle
toward that side. Take your foot off
the accelerator pedal and grip the
steering wheel firmly. Steer to
maintain lane position, and then
gently brake to a stop, well off the
road, if possible.
A rear blowout, particularly on a
curve, acts much like a skid and
may require the same correction as
used in a skid. Stop pressing the
accelerator pedal and steer to
straighten the vehicle. It may be
very bumpy and noisy. Gently brake
to a stop, well off the road,
if possible. The vehicle has no spare tire, no
tire changing equipment, and no
place to store a tire.
If the vehicle has run-flat tires, there
is no need to stop on the side of the
road to change a flat tire. See
Run-Flat Tires on page 10‑53.
{WARNING
Special tools and procedures are
required to service a run-flat tire.
If these special tools and
procedures are not used, injury or
vehicle damage may occur.
Always be sure the proper tools
and procedures, as described in
the service manual, are used.
To order a service manual, see
Service Publications Ordering
Information on page 13‑16.