2013 CHEVROLET CORVETTE battery
[x] Cancel search: batteryPage 210 of 414
Black plate (6,1)Chevrolet Corvette Owner Manual - 2013 - crc2 - 11/8/12
8-6 Climate Controls
Air Vents
Use the tab located on the air
outlets to change the direction of the
airflow.
Operation Tips
.Clear away any ice, snow,
or leaves from the air inlets at
the base of the windshield that
may block the flow of air into the
vehicle.
.Use of non-GM approved hood
deflectors may adversely affect
the performance of the system.
.Keep the area around the base
of the instrument panel console
and air path under the seats
clear of objects to help circulate
the air inside of the vehicle more
effectively.
Maintenance
Passenger Compartment
Air Filter
The passenger compartment air
filter removes certain particles from
the air including pollen and dust
particles. Reductions in airflow,
which may occur more often in
dusty areas, indicate that the filter
may need to be replaced. See
Maintenance Schedule on
page 11‑3.
Notice:Driving without a
passenger compartment air filter
in place can cause water and
small particles, like paper and
leaves, to be pulled into your
climate control system which may
cause damage to it. Make sure
you always replace the old filter
with a new one. The passenger compartment air
filter is located on the passenger
side of the engine compartment
near the battery. See
Engine
Compartment Overview on
page 10‑8.
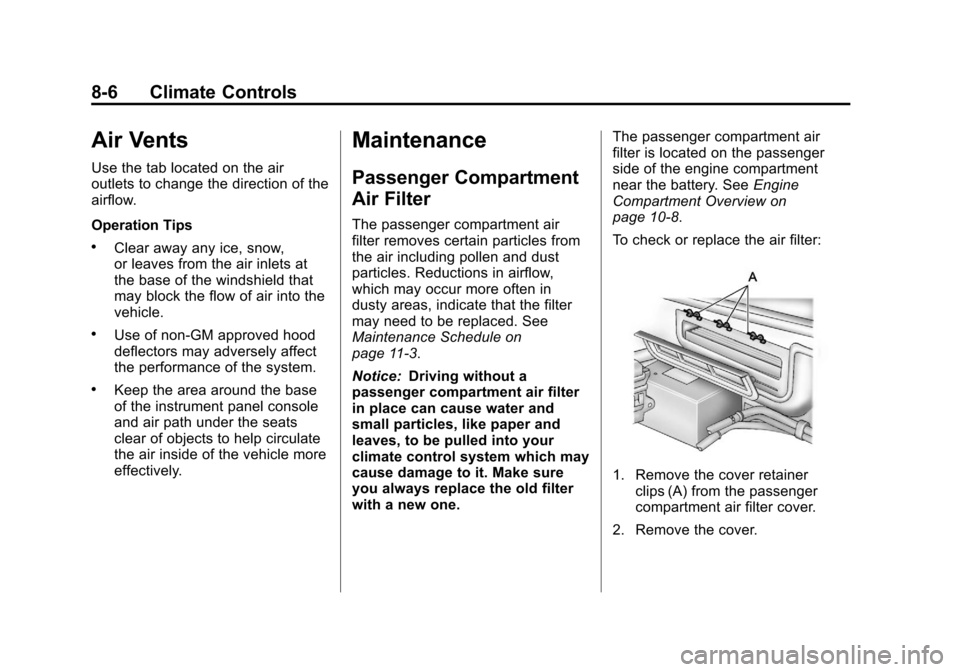
To check or replace the air filter:
1. Remove the cover retainer clips (A) from the passenger
compartment air filter cover.
2. Remove the cover.
Page 224 of 414
Black plate (12,1)Chevrolet Corvette Owner Manual - 2013 - crc2 - 11/8/12
9-12 Driving and Operating
If it takes some time for help to
arrive, now and then when you run
the engine, push the accelerator
pedal slightly so the engine runs
faster than the idle speed. This
keeps the battery charged to restart
the vehicle and to signal for help
with the headlamps. Do this as little
as possible to save fuel.
If the Vehicle Is Stuck
Slowly and cautiously spin the
wheels to free the vehicle when
stuck in sand, mud, ice, or snow.
If stuck too severely for the traction
system to free the vehicle, turn the
traction system off and use the
rocking method. SeeTraction
Control System (TCS) on
page 9‑34.
{WARNING
If the vehicle's tires spin at high
speed, they can explode, and you
or others could be injured. The
vehicle can overheat, causing an
engine compartment fire or other
damage. Spin the wheels as little
as possible and avoid going
above 56 km/h (35 mph).
Rocking the Vehicle to Get
it Out
Turn the steering wheel left and
right to clear the area around the
front wheels. Turn off any traction
system. Shift back and forth
between R (Reverse) and a low
forward gear, spinning the wheels
as little as possible. To prevent
transmission wear, wait until the
wheels stop spinning before shifting
gears. Release the accelerator
pedal while shifting, and press
lightly on the accelerator pedal
when the transmission is in gear. Slowly spinning the wheels in the
forward and reverse directions
causes a rocking motion that could
free the vehicle. If that does not get
the vehicle out after a few tries, it
might need to be towed out. If the
vehicle does need to be towed out,
see
Towing the Vehicle on
page 10‑79.
Vehicle Load Limits
It is very important to know how
much weight your vehicle can
carry. This weight is called the
vehicle capacity weight and
includes the weight of all
occupants, cargo and all
nonfactory-installed options.
Two labels on your vehicle show
how much weight it may
properly carry, the Tire and
Loading Information label and
the Certification label.
Page 232 of 414
Black plate (20,1)Chevrolet Corvette Owner Manual - 2013 - crc2 - 11/8/12
9-20 Driving and Operating
Starting the Engine
Move the shift lever to P (Park) or
N (Neutral) for an automatic
transmission. For a manual
transmission the vehicle can be
started in Neutral or any other gear
as long as the clutch pedal is
pressed. To restart a vehicle with a
manual transmission when you are
already moving, use the Neutral
position only. To restart a vehicle
with an automatic transmission
when you are already moving, use
N (Neutral).
Notice:Do not try to shift to
P (Park) if the vehicle is moving.
If you do, you could damage the
transmission. Shift to P (Park)
only when the vehicle is stopped.
The RKE transmitter must be inside
the vehicle for the ignition to work.
Cell phone chargers can interfere
with the operation of the Keyless
Access System. Battery chargers
should not be plugged in when
starting or turning off the engine. To start the vehicle, do the following:
1. For vehicles with an automatic
transmission, with your foot on
the brake pedal, press the
START button located on the
instrument panel. For vehicles
with a manual transmission, you
must also press in the clutch
pedal while pressing the START
button.
If there is not an RKE transmitter
in the vehicle or if there is
something causing interference
with it, the DIC will display
NO FOBS DETECTED. See Key
and Lock Messages on
page 5‑40 for more information.
2. When the engine begins cranking, let go of the button and
the engine cranks automatically
until it starts. If the battery in the
RKE transmitter is weak, the
DIC displays FOB BATTERY
LOW. You can still drive the
vehicle. See
“Battery Replacement”
under Remote Keyless Entry
(RKE) System Operation on
page 2‑3 for more information.
If the fob battery is dead, you
need to insert the fob into the
fob slot to enable engine
starting. See “NO FOBS
DETECTED” underKey and
Lock Messages on page 5‑40.
3. Do not race the engine immediately after starting it.
Operate the engine and
transmission gently until the oil
warms up and lubricates all
moving parts.
4. If the engine does not start and no DIC message is displayed,
wait 15 seconds before trying
again to let the cranking motor
cool down.
If the engine does not start after
five to 10 seconds, especially in
very cold weather (below −18°C
or 0°F), it could be flooded with
too much gasoline. Try pushing
the accelerator pedal all the way
Page 233 of 414
Black plate (21,1)Chevrolet Corvette Owner Manual - 2013 - crc2 - 11/8/12
Driving and Operating 9-21
to the floor while cranking for up
to 15 seconds maximum. Wait at
least 15 seconds between each
try, to allow the cranking motor
to cool down. When the engine
starts, let go of the accelerator.
If the vehicle starts briefly but
then stops again, repeat these
steps. This clears the extra
gasoline from the engine.
Notice: Cranking the engine for
long periods of time, by pressing
the START button immediately
after cranking has ended, can
overheat and damage the
cranking motor, and drain the
battery. Wait at least 15 seconds
between each try, to allow the
cranking motor to cool down.
The vehicle has a
Computer-Controlled Cranking
System. This feature assists in
starting the engine and protects
components. Once cranking has
been initiated, the engine continues
cranking for a few seconds or until
the vehicle starts. If the engine does
not start, cranking automatically stops after 15 seconds to prevent
cranking motor damage. To prevent
gear damage, this system also
prevents cranking if the engine is
already running.
Notice:
If you add electrical parts
or accessories, you could change
the way the engine operates. Any
resulting damage would not be
covered by the vehicle warranty.
See Add-On Electrical Equipment
on page 9‑50.
Stopping the Engine
If the vehicle has an automatic
transmission, move the shift lever to
P (Park) and press and hold the
Acc. (Off/Accessory) button, located
on the instrument panel, until the
engine shuts off. If the shift lever is
not in P (Park), the engine shuts off
and the vehicle goes into the
accessory mode. The DIC displays
SHIFT TO PARK. Once the shifter is
moved to P (Park), the vehicle turns
off. If the vehicle has a manual
transmission, it is recommended
that you move the shift lever to R (Reverse) and set the parking
brake after you turn off the engine
by pressing and holding the Acc.
(Off/Accessory) button.
If the RKE transmitter is not
detected inside the vehicle when it
is turned to off, the DIC displays
NO FOB
–OFF OR RUN?.
See Key and Lock Messages on
page 5‑40 for more information.
Retained Accessory
Power (RAP)
These vehicle accessories can be
used for up to 10 minutes after the
engine is turned off:
.Audio System
.Power Windows
These features continue to work up
to 10 minutes after the engine is
turned off or until either door is
opened. If a door is opened, the
power windows and audio system
will shut off.
Page 235 of 414
Black plate (23,1)Chevrolet Corvette Owner Manual - 2013 - crc2 - 11/8/12
Driving and Operating 9-23
the driver seat. To find out how, see
“Shifting Into P (Park)”previously in
this section.
When you are ready to drive, move
the shift lever out of P (Park) before
you release the parking brake.
If torque lock does occur, you may
need to have another vehicle push
yours a little uphill to take some of
the pressure from the transmission
parking pawl, so you can pull the
shift lever out of P (Park).
Shifting out of Park
Shift lock release prevents shifting
out of P (Park) unless the vehicle is
running or in accessory mode and
the brake pedal is applied.
The shift lock release is always
functional except in the case of an
uncharged or low voltage (less than
9‐volt) battery. See Jump Starting
on page 10‑75 for more information. To shift out of P (Park) use the
following:
1. Apply the brake pedal.
2. Release the parking brake. See
Parking Brake on page 9‑33.
3. Press the shift lever button.
4. Move the shift lever to the desired position.
If you still are unable to shift out of
P (Park):
1. Fully release the shift lever button.
2. While holding down the brake pedal, press the shift lever
button again.
3. Move the shift lever to the desired position.
If you still cannot move the shift
lever from P (Park), consult your
dealer or a professional towing
service.
Parking (Manual
Transmission)
Before you get out of the vehicle,
move the shift lever into R (Reverse)
and firmly apply the parking brake.
Once the shift lever has been
placed into R (Reverse) with the
clutch pedal pressed in, you can
turn the ignition off and release the
clutch.
Parking over Things
That Burn
{WARNING
Things that can burn could touch
hot exhaust parts under the
vehicle and ignite. Do not park
over papers, leaves, dry grass,
or other things that can burn.
Page 262 of 414
Black plate (50,1)Chevrolet Corvette Owner Manual - 2013 - crc2 - 11/8/12
9-50 Driving and Operating
Towing
General Towing
Information
The vehicle is neither designed nor
intended to tow a trailer.
Conversions and
Add-Ons
Add-On Electrical
Equipment
Notice:Some electrical
equipment can damage the
vehicle or cause components to
not work and would not be
covered by the warranty. Always
check with your dealer before
adding electrical equipment.
Add-on equipment can drain the
vehicle's 12-volt battery, even if the
vehicle is not operating.
The vehicle has an airbag system.
Before attempting to add anything
electrical to the vehicle, see
Servicing the Airbag-Equipped
Vehicle on page 3‑24 andAdding
Equipment to the Airbag-Equipped
Vehicle on page 3‑25.
Page 263 of 414

Black plate (1,1)Chevrolet Corvette Owner Manual - 2013 - crc2 - 11/8/12
Vehicle Care 10-1
Vehicle Care
General Information
General Information . . . . . . . . . . 10-2
California Proposition65 Warning . . . . . . . . . . . . . . . . . 10-2
California Perchlorate Materials Requirements . . . . 10-3
Accessories and Modifications . . . . . . . . . . . . . . . 10-3
Lifting the Vehicle . . . . . . . . . . . . 10-3
Vehicle Checks
Doing Your Own Service Work . . . . . . . . . . . . . . . 10-6
Hood . . . . . . . . . . . . . . . . . . . . . . . . 10-7
Engine Compartment Overview . . . . . . . . . . . . . . . . . . . 10-8
Engine Oil . . . . . . . . . . . . . . . . . . 10-13
Engine Oil Life System . . . . . 10-19
Automatic Transmission Fluid . . . . . . . . . . . . . . . . . . . . . . 10-20
Manual Transmission Fluid . . . . . . . . . . . . . . . . . . . . . . 10-21
Hydraulic Clutch . . . . . . . . . . . . 10-21
Engine Air Cleaner/Filter . . . . 10-21
Cooling System (Engine) . . . 10-24 Cooling System
(Intercooler) . . . . . . . . . . . . . . . 10-25
Engine Coolant . . . . . . . . . . . . . 10-26
Engine Overheating . . . . . . . . 10-29
Overheated Engine Protection
Operating Mode . . . . . . . . . . . 10-30
Power Steering Fluid . . . . . . . 10-31
Washer Fluid . . . . . . . . . . . . . . . 10-32
Brakes . . . . . . . . . . . . . . . . . . . . . 10-32
Brake Fluid . . . . . . . . . . . . . . . . . 10-36
Battery . . . . . . . . . . . . . . . . . . . . . 10-37
Rear Axle . . . . . . . . . . . . . . . . . . 10-38
Starter Switch Check . . . . . . . 10-38
Automatic Transmission Shift Lock Control Function
Check . . . . . . . . . . . . . . . . . . . . . 10-39
Park Brake and P (Park) Mechanism Check . . . . . . . . 10-39
Wiper Blade Replacement . . . . . . . . . . . . . . 10-40
Windshield Replacement . . . 10-41
Headlamp Aiming
Headlamp Aiming . . . . . . . . . . 10-41
Bulb Replacement
Bulb Replacement . . . . . . . . . . 10-41
Halogen Bulbs . . . . . . . . . . . . . . 10-41 High Intensity Discharge
(HID) Lighting . . . . . . . . . . . . . 10-42
Headlamps, Front Turn Signal and Parking
Lamps . . . . . . . . . . . . . . . . . . . . 10-42
Taillamps, Turn Signal, and Stoplamps . . . . . . . . . . . . . . . . 10-43
Back-Up Lamps . . . . . . . . . . . . 10-43
License Plate Lamp . . . . . . . . 10-44
Replacement Bulbs . . . . . . . . . 10-44
Electrical System
Electrical System Overload . . . . . . . . . . . . . . . . . . 10-44
Fuses and Circuit Breakers . . . . . . . . . . . . . . . . . . 10-45
Engine Compartment Fuse
Block . . . . . . . . . . . . . . . . . . . . . 10-45
Instrument Panel Fuse Block . . . . . . . . . . . . . . . . . . . . . 10-48
Wheels and Tires
Tires . . . . . . . . . . . . . . . . . . . . . . . . 10-52
Winter Tires . . . . . . . . . . . . . . . . 10-53
Run-Flat Tires . . . . . . . . . . . . . . 10-53
Low-Profile Tires . . . . . . . . . . . 10-54
Sport Cup Tires . . . . . . . . . . . . 10-55
Summer Tires . . . . . . . . . . . . . . 10-55
Tire Sidewall Labeling . . . . . . 10-55
Page 271 of 414

Black plate (9,1)Chevrolet Corvette Owner Manual - 2013 - crc2 - 11/8/12
Vehicle Care 10-9
A. Clutch Master CylinderReservoir (If Equipped). See
Hydraulic Clutch on page 10‑21.
B. Windshield Washer Fluid Reservoir. See “Adding Washer
Fluid” under Washer Fluid on
page 10‑32.
C. Brake Fluid Reservoir. See “Brake Fluid” underBrakes on
page 10‑32.
D. Coolant Surge Tank and Pressure Cap. See Engine
Coolant on page 10‑26.
E. Engine Air Cleaner/Filter on
page 10‑21.
F. Power Steering Fluid Reservoir. See Power Steering Fluid on
page 10‑31.
G. Engine Oil Fill Cap. See “When
to Add Engine Oil” underBrake
Fluid on page 10‑36.
H. Engine Oil Dipstick. See “Checking Engine Oil” under
Engine Oil on page 10‑13. I.
Engine Compartment Fuse
Block on page 10‑45.
J. Passenger Compartment Air Filter (Out of View). See
Passenger Compartment Air
Filter on page 8‑6.
K. Battery on page 10‑37.
If the vehicle has the 6.2L LS3
V8 engine (without the dry sump
engine oil tank) and you are facing
the front of the vehicle.